Twilight Town: Difference between revisions
ShardofTruth (talk | contribs) |
(→Characters: To match his latest appearance in KHIII.) Tag: Mobile edit |
||
| (105 intermediate revisions by 39 users not shown) | |||
| Line 1: | Line 1: | ||
{{Game|COM|REC|KH2|FM2|358|BBS|FMB}} | {{Game|COM|REC|KH2|FM2|358|BBS|FMB|DDD|DHD|KH3|3RM|MOM}} | ||
{{suite}} | {{suite}} | ||
{{Youmay|the real Twilight Town|[[ | {{Youmay|the real Twilight Town|[[The Other Twilight Town]] or [[Chapter 1: Twilight Town|the chapter in the ''Kingdom Hearts II'' manga]]}} | ||
{{World | {{World | ||
|name=Twilight Town | |name=Twilight Town | ||
| Line 10: | Line 10: | ||
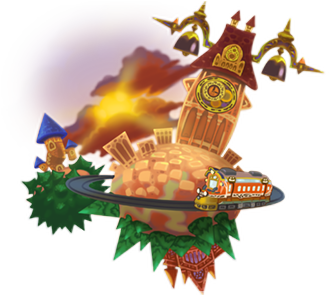
|COMimage=[[File:Twilight Town KHCOM.png]] | |COMimage=[[File:Twilight Town KHCOM.png]] | ||
|COMlogo=[[File:Twilight Town Logo KHCOM.png|325px]] | |COMlogo=[[File:Twilight Town Logo KHCOM.png|325px]] | ||
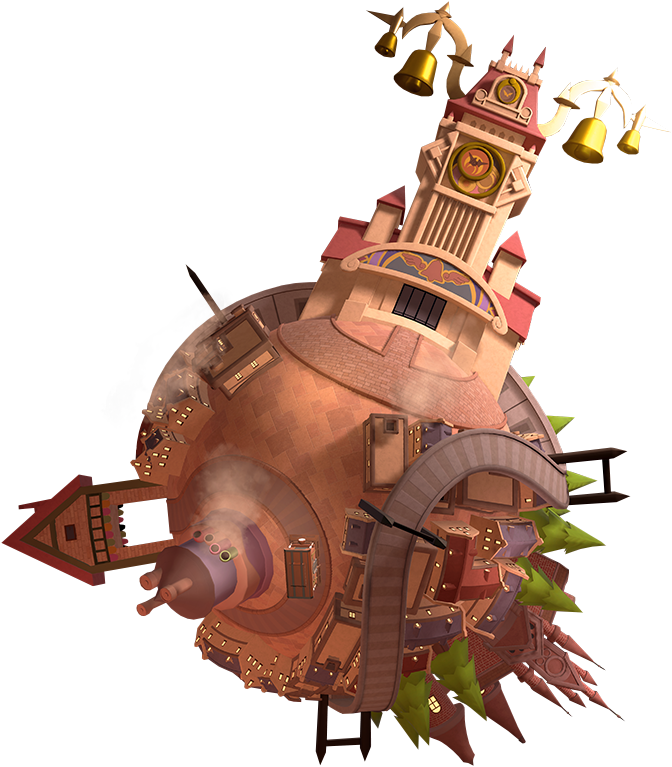
|KH3image=[[File:Twilight Town KHIII.png]] | |||
|KH3logo=[[File:Twilight Town Logo KHIII.png|325px]] | |||
|assist=[[Mickey Mouse|King Mickey]], [[Axel]] | |assist=[[Mickey Mouse|King Mickey]], [[Axel]] | ||
|game1=Kingdom Hearts | |game1=Kingdom Hearts Chain of Memories | ||
|game2=Kingdom Hearts 358/2 Days | |game2=Kingdom Hearts 358/2 Days | ||
|game3=Kingdom Hearts II | |game3=Kingdom Hearts II | ||
|game4=Kingdom Hearts III | |||
|game5=Kingdom Hearts Melody of Memory | |||
|COMnormalname=Lazy Afternoons | |COMnormalname=Lazy Afternoons | ||
|COMnormalfile=Lazy Afternoons KHRECOM.ogg | |COMnormalfile=Lazy Afternoons KHRECOM.ogg | ||
| Line 26: | Line 30: | ||
|358battlename=Sinister Sundown | |358battlename=Sinister Sundown | ||
|358battlefile=Sinister Sundown KHD.ogg | |358battlefile=Sinister Sundown KHD.ogg | ||
|KH3normalname=The Afternoon Streets | |||
|KH3normalfile=The Afternoon Streets -KINGDOM HEARTS III Version- KHIII.ogg | |||
|KH3battlename=Working Together | |||
|KH3battlefile=Working Together -KINGDOM HEARTS III Version- KHIII.ogg | |||
}} | }} | ||
'''Twilight Town''' is a world that appears in ''[[Kingdom Hearts Chain of Memories]]'', ''[[Kingdom Hearts II]]'', | '''Twilight Town''' is a world that appears in ''[[Kingdom Hearts Chain of Memories]]'', ''[[Kingdom Hearts II]]'', ''[[Kingdom Hearts 358/2 Days]]'' and ''[[Kingdom Hearts III]]''. It is the "birthplace" of [[Roxas]], and one of the only two real worlds that appears in ''Kingdom Hearts Chain of Memories''. It has recently been infested with [[Nobodies]]; however, [[Heartless]] were known to have been in the city during Roxas's time in [[Organization XIII]]. | ||
Despite its subtle atmosphere, Twilight Town is one of the largest worlds known. It is located in | Despite its subtle atmosphere, Twilight Town is one of the largest worlds known. It is located in the [[Realm Between]], similar to [[Castle Oblivion]] and [[The World That Never Was]]. As its name implies, Twilight Town is stuck in endless sunset, with its sun always in the same position in the sky, never rising nor setting. Much like [[Traverse Town]] in the previous game, it is divided into several distinct districts, Market Street, Sunset Terrace, and Yen Sid's Tower. [[Mysterious Tower|The Tower]] is not truly part of the town; it is merely reached by a train from this world. | ||
==Settings and Areas== | ==Settings and Areas== | ||
Twilight Town is | ===''Kingdom Hearts Chain of Memories''=== | ||
Twilight Town is first introduced in ''Kingdom Hearts Chain of Memories'', but unlike all the other worlds, it's not based on [[Sora]]'s memories, but rather [[Roxas]]'. The world is explored through boxed-in areas heavily inspired by the real town. In cutscenes, areas such as '''{{a|Tram Common}}''', the '''{{a|Pod Room}}''', and '''{{a|The Old Mansion}}''' are visited. The last area also serving as boss arena for both [[Vexen]], and [[Riku Replica]]. | |||
During the game's credit Roxas is briefly seen on top of the Clock Tower at the '''{{a|Station Plaza}}'''. | |||
=== | ===''Kingdom Hearts II''=== | ||
[[File:Market Street (Art).png|thumb| | ====Twilight Town==== | ||
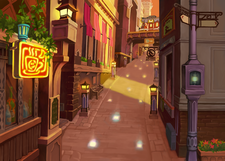
{{nihongo|'''{{a|Market Street}}'''|商店街|Shōten Machi}} | [[File:Market Street (Art).png|thumb|left|225px|Concept art of Market Street.]] | ||
Twilight Town is among one of the largest worlds in ''Kingdom Hearts II'', with many major set pieces. One of the town's bigger locations is the {{nihongo|'''{{a|Market Street}}'''|商店街|Shōten Machi}}, a long, winding, steeply-sloped road that leads from the lower areas of town to the top, stretching across multiple areas. The upper portion of the street is known as {{nihongo|'''{{a|Station Heights}}'''|駅前通り|Ekimaedōri|lit. "Station Road"}}, where a few shops are located such as [[Wallace]]'s weapon shop and an item shop run by [[Wantz]], as well as a noticeboard for various jobs, which can be experience through [[mini-games]]. The lower portion of Market Street is the {{nihongo|'''{{a|Tram Common}}'''|トラム広場|Toramu Hiroba|lit. "Tram Square"}}, an open-market area with a free tram circling around. Many shops are found here, including [[Jessie]]'s accessory shop, [[Biggs]]' armor shop, and a [[Moogle Shop]]. In [[The Other Twilight Town]], the Moogle Shop is a candy shop instead. Another noticeboard mini-game jobs is found down here. Both parts of Market Street connect to the {{nihongo|'''{{a|Sandlot}}'''|空き地|Akichi|lit. "Vacant Lot"}}, an open area where the infamous [[Struggle]] battles take place. Both Station Heights and the Sandlot lead to the {{nihongo|'''{{a|Back Alley}}'''|路地裏|Rojiura}}, where [[Hayner]]'s gang's hideout, {{nihongo|'''{{a|The Usual Spot}}'''|いつもの場所|Itsumo no Basho}} is located. In The Other Twilight Town, {{nihongo|'''{{a|Roxas' Room}}'''|ロワサスの部屋|Rokusasu no Heya}} can be briefly seen in various cutscenes. It's several stories above ground, and has a nice view of the town. | |||
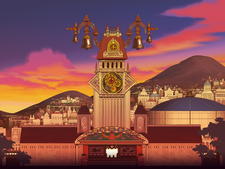
[[File:Train Station (Art).png|thumb|right|225px|The famous Clock Tower above Station Plaza.]] | |||
Traveling up through the Station Heights leads to the {{nihongo|'''{{a|Station Plaza}}'''|駅前広場|Ekimae Hiroba}}, a large and open terrace, with a great view of the entire town. The plaza is presided over by the town's distinctive and famous Clock Tower, which, though a twelve-hour clock, has "I" at the top instead of "XII". At Station Plaza is also where the {{nihongo|'''{{a|Central Station}}'''|セントラルステーション|Sentoraru Sutēshon}} is found, which is a large train station, with trains that travel all over the world, including other districts of the town, as well as an unseen beach. There's also a magic train here that travels to the [[Mysterious Tower]]. | |||
{{nihongo|'''{{a|Central Station}}'''| | Another district of the town, {{nihongo|'''{{a|Sunset Terrace}}'''|サンセット住宅街|Sansetto Jūtakugai|lit. "Sunset Residential Area"}}, can be reached by taking the train at Central Station to {{nihongo|'''{{a|Sunset Station}}'''|サンセットステーション|Sansetto Sutēshon}}. Sunset Terrace lies at the outskirts of Twilight Town and boarders to huge fields of grass, with a great view of the mountains in the distance. Another free train travels back and forth the area. Connecting to Sunset Terrace is {{nihongo|'''{{a|Sunset Hill}}'''|サンセットヒル|Sansetto Hiru}}, a tranquil, tiny area, with a small sculpture mimicking the Clock Tower, which can also be seen from here. Underneath the town is a vast {{nihongo|'''{{a|Underground Concourse}}'''|地下連絡通路|Chika Renraku Tsūro}}, which has several entrances across town, located at the Back Alley, the Station Plaza, and the Tram Commons. One exit leads to the {{nihongo|'''{{a|Tunnelway}}'''|トンネル|Tonneru|lit. "Tunnel"}}, which in turn leads back to Sunset Terrace. | ||
The | To the far right of town are {{nihongo|'''{{a|The Woods}}'''|町はずれの森|Machihazure no Mori|lit. "Forest on the Outskirts of Town"}}, a large forest only accessible through a crack in the walls of Tram Common. Passing through The Woods leads to a gate and a courtyard belonging to {{nihongo|'''{{a|The Old Mansion}}'''|屋敷前|Yashikimae|lit. "Mansion Anterior"}}. Upon entering the {{nihongo|'''{{a|Foyer}}'''|ロビー|Robī|lit. "Lobby"}}, the Mansion splits off in three different directions. On the left side of the Foyer is the {{nihongo|'''{{a|Dining Room}}'''|ダイニング|Dainingu|lit. "Dining"}}; up the left set of stairs and through the door is {{nihongo|'''{{a|The White Room}}'''|白い部屋|Shiroi Heya}}, where [[Naminé]] spends a lot of her time; while up the stairs to the right lies the {{nihongo|'''{{a|Library}}'''|書庫|Shoko|lit. "Archive"}}. At the Library, there is a false floor that hides a staircase which goes down and leads to the {{nihongo|'''{{a|Computer Room}}'''|コンピュータールーム|Konpyūtā Rūmu}}, where [[DiZ]] monitors The Other Twilight Town. There's also a machine which allows transport into the simulation. The doorway to the left of the computer leads to the {{nihongo|'''{{a|Basement Hall}}'''|地下広間|Chika Hōru}}, where [[Roxas]] fights [[Axel]] in the simulated counterpart. The Basement Hall then leads to the {{nihongo|'''{{a|Basement Corridor}}'''|地下廊下|Chika Rōka}}, which houses a few pods, and finally to the {{nihongo|'''{{a|Pod Room}}'''|ポッドルーム|Poddo Rūmu}}, where [[Sora]] slept while Naminé fixed his memories. Towards the end of the game Sora and party can access the simulation via DiZ's machine, but are limited access to only the Computer Room, and the Basement Hall. A [[Corridor of Darkness]] can by found in the latter area, which allows travel across the emptiness of {{nihongo|'''{{a|Betwixt and Between}}'''|狭間の空間|Hazama no Kūkan|lit. "In-between Space"}} to enter the [[Dark City]] and begin their assault on the Organization's stronghold. | ||
{{nihongo|'''{{a|The Empty Realm}}'''|虚無の世界}} is an ominous white room where Naminé temporarily brings Roxas after his visit to [[Dive to the Heart]]. It's filled with oddly shaped boxes with varying lengths and sizes, most of them having their top portions resembling a crown. The room also seem to have no end and just goes on forever. Two other areas featured exclusively in cutscenes are {{nihongo|'''{{a|On The Train}}'''|電車:車内}} and {{nihongo|'''{{a|The Mysterial Train}}'''|不思議な電車:車内}}; featured as Roxas head to Sunset Staion and Sora traveling to Mysterious Tower respectively. | |||
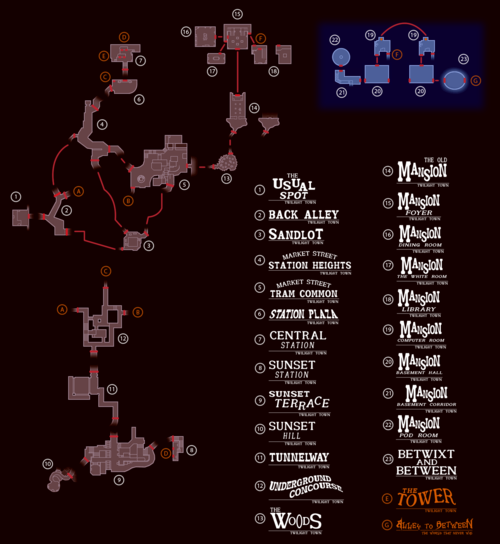
{|class="wikitable collapsible collapsed" | {|class="wikitable mw-collapsible mw-collapsed" | ||
!Area Map in ''Kingdom Hearts II'' | !Area Map of Twilight Town in ''Kingdom Hearts II'' | ||
|- | |- | ||
| | | | ||
| Line 54: | Line 66: | ||
|} | |} | ||
{|class="wikitable collapsible collapsed" | ====Mysterious Tower==== | ||
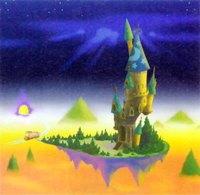
[[File:Mysterious Tower (Art).png|thumb|200px|left|Artwork of the Mysterious Tower.]] | |||
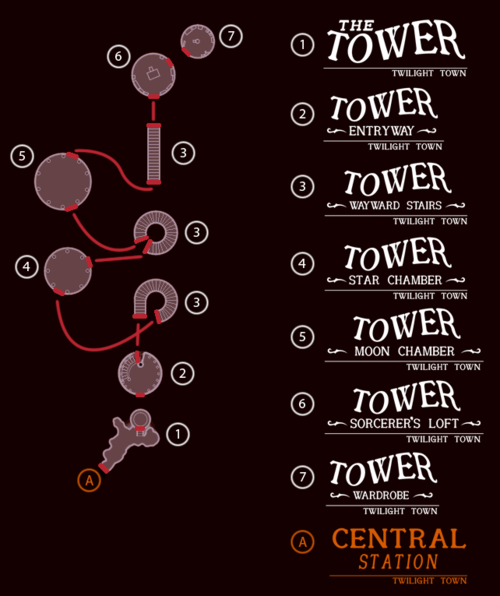
As mentioned, [[Mysterious Tower]] is part of Twilight Town in ''Kingdom Hearts II'', and is accessed by the magic train. {{nihongo|'''{{a|The Tower}}'''|不思議な塔}} itself is a surrealistic, crooked, golden-brown tower, loosely based on the setting of ''{{w|Fantasia (1940 film)|Fantasia's}}'' ''The Sorcerer's Apprentice''. The Tower is topped with blue cone-shaped turret roofs, decorated with moons and stars, similar to [[Yen Sid]]'s hat. It rests on a floating island that contains a courtyard with plenty of trees. Inside the main door is the {{nihongo|'''{{a|Entryway}}'''|塔:エントランス}} , surrounded by an upward-spiraling staircase that leads to a strange portal. Through the portal, Sora and party are transported to the {{nihongo|'''{{a|Wayward Stairs}}'''|塔:階段の間}} , a transitioning room where stairways connect the various rooms of the tower via portals. Other than the entrance, stairs, and upper floor, there are two known rooms in the middle of the Tower. One is the {{nihongo|'''{{a|Moon Chamber}}'''|塔:月の部屋}} , and the other is the {{nihongo|'''{{a|Star Chamber}}'''|塔:星の部屋}} . Both are perfectly round rooms, each with two doors leading either up or down the Tower, and are decorated with moons and stars, respectively. The final stairway is steep and straight, and leads to Yen Sid's study, the {{nihongo|'''{{a|Sorcerer's Loft}}'''|塔:魔法使いの部屋}} . The study is the largest room in the building, with several bookshelves, as well as three large star-shaped windows and a crescent one. A door to the right leads to the {{nihongo|'''{{a|Wardrobe}}'''|塔:ドレスルーム}} , where the Three Good Fairies, [[Flora, Fauna, and Merryweather]], resides. Several covered mirrors are located there, each representing one of Sora's [[Drive Form]]s. | |||
{{-|left}} | |||
{|class="wikitable mw-collapsible mw-collapsed" | |||
!Area Map of Mysterious Tower in ''Kingdom Hearts II'' | |||
|- | |||
| | |||
[[File:Minimap (Mysterious Tower) KHII.png|500px]] | |||
|} | |||
{{-}} | |||
===''Kingdom Hearts 358/2 Days''=== | |||
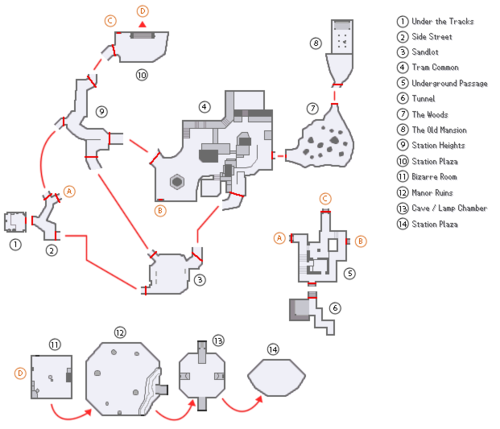
In ''Kingdom Hearts 358/2 Days'', Twilight Town is smaller than it was in ''Kingdom Hearts II''. The town's largest area is the {{nihongo|'''{{a|Tram Common}}'''|トラム広場}}, loaded with buildings and streets, and tram tacks around the area. Heading down south of the area leads to the {{nihongo|'''{{a|Sandlot}}'''|空き地}}, location to several boss encounter. The bottom west point of the area takes Roxas up to the {{nihongo|'''{{a|Side Street}}'''|路地裏}}, where Hayner, [[Pence]], and [[Olette]]'s hangout is located, called {{nihongo|'''{{a|Under the Tracks}}'''|高架下}}. Continuing up from Side Street leads to the {{nihongo|'''{{a|Station Heights}}'''|駅前通り}}, a long street on an incline, with paths leading back down to both the Tram Common and the Sandlot. At top of Station Heights is the {{nihongo|'''{{a|Station Plaza}}'''|駅前広場}}, home to the town's famous Clock Tower, where Roxas, Axel, and [[Xion]] often eat [[Sea-salt ice cream]] after missions. One of the entrances the town's tunnels, called {{nihongo|'''{{a|Underground Passage}}'''|地下連絡通路}}, is located here. The underground connects to several areas from town, such as the Tram Common and the Side Street. At bottom of the area is passage leading a smaller location simply called {{nihongo|'''{{a|Tunnel}}'''|トンネル}}. | |||
To the east of the Tram Common is a massive wall with a hole in it, from which {{nihongo|'''{{a|The Woods}}'''|町はずれの森}} can be accessed. Traversing through the forest takes Roxas up to a courtyard belonging to {{nihongo|'''{{a|The Old Mansion}}'''|屋敷前}}, headquarters to DiZ, Naminé, and [[Riku]]. | |||
In cutscenes, areas such as '''{{a|Pod Room}}''', the '''{{a|Computer Room}}''', and '''{{a|The White Room}}''' are scene. Also, during the fight against Xion, she'll drag Roxas across locations from other worlds, such as the | |||
[[Bizarre Room#Kingdom Hearts 358/2 Days|Bizarre Room]], [[Manor Ruins#Kingdom Hearts 358/2 Days|Manor Ruins]], and [[Lamp Chamber#Kingdom Hearts 358/2 Days|Lamp Chamber]], before they end back up in the air above Station Plaza. | |||
{|class="wikitable mw-collapsible mw-collapsed" | |||
!Area Map in ''Kingdom Hearts 358/2 Days'' | !Area Map in ''Kingdom Hearts 358/2 Days'' | ||
|- | |- | ||
| Line 60: | Line 93: | ||
[[File:Minimap (Twilight Town) KHD.png|500px]] | [[File:Minimap (Twilight Town) KHD.png|500px]] | ||
|} | |} | ||
===''Kingdom Hearts III''=== | |||
[[File:Le Grand Bistrot KHIII.png|thumb|225px|right|The Tram Common area with Le Grand Bistrot in the distance.]] | |||
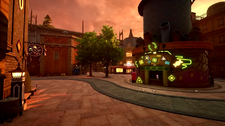
In ''Kingdom Hearts III'' the world is a lot smaller than it's previously been, and the areas available for traversal are collectively referred to as {{nihongo|'''{{a|The Neighborhood}}'''|街の一角|Machi no Ikkaku|lit. "Corner of Town"}}. Sora arrives at the {{nihongo|'''{{a|Tram Common}}'''|トラム広場}}, which has undergone several changes. The place is heavily populated with people, filled with plants, and other signs of habitation. The Sandlot entryway is closed off by a large door, while the entrance to Station Heights serves as an exit from the world, making these parts of the world inaccessible. The armor shop has been replaced by [[Le Grand Bistrot]], where [[Merlin]] can be found dining in the terrace out front, allowing access to the [[100 Acre Wood]], while the tram lot's been repurposed into an outdoor movie theater. The [[Synthesis]] [[Moogle Shop]] is still where it was in ''Kingdom Hearts II'', with a tiny mailbox beside it where Sora can mail the [[Prize Postcard]]s he finds. | |||
The hole in the wall has been sealed, and to access {{nihongo|'''{{a|The Woods}}'''|街外れの森}}, Sora has to traverse through a new passageway near the former Sandlot entrance, called the {{nihongo|'''{{a|Underground Conduit}}'''|地下水道|Chika Suidō|lit. "Underground Waterway"}}. The area is quite linear, with a lot of sewage across the floors. At the end of the waterway Sora can exit to The Woods through a cellar door. The Woods are noticeably different with a lot of fallen trees around the area. Passing by the woods and running up the path leads to the {{nihongo|'''{{a|The Old Mansion}}'''|屋敷前}}, which is briefly entered only in cutscenes where only the '''Computer Room''' is shown. | |||
The top of the Clock Tower also appears in various cutscenes, though the '''Station Plaza''' below is inaccessible. | |||
{{-}} | |||
==Story== | ==Story== | ||
===''Kingdom Hearts 358/2 Days''=== | ===''Kingdom Hearts 358/2 Days''=== | ||
Roxas is first "born" in Twilight Town in front of the Old Mansion and is given his name by [[Xemnas]]. Roxas at first turned down Xemnas's offer to join [[Organization XIII]] and wandered the city streets. After seeing a trio of friends (Hayner, [[Pence]], and [[Olette]]), [[Axel]] sees Roxas's apparent sadness over not having friends here, appears, and gives him [[sea-salt ice cream]], convincing him to join atop the Clock Tower. | |||
Throughout Roxas's life as a Nobody, he, Axel, and [[Xion]] used the Clock Tower as a meeting place after their missions, where they would sit and talk about their missions, or discuss whatever came to mind. It is also here that Roxas and Xion have their final battle and where he absorbs her | Throughout Roxas's life as a Nobody, he, Axel, and [[Xion]] used the Clock Tower as a meeting place after their missions, where they would sit and talk about their missions, or discuss whatever came to mind. It is also here that Roxas and Xion have their final battle and where he absorbs her afterward. | ||
{{Sec-stub}} | |||
===''Kingdom Hearts | ===''Kingdom Hearts Chain of Memories''=== | ||
[[File: | [[File:Riku's Choice 01 KHRECOM.png|thumb|225px|left|Riku and Naminé talk in front of the memory pod in which Sora sleeps.]] | ||
During [[Sora]]'s journey in [[Castle Oblivion]], [[Vexen]] creates a memory-based version of Twilight Town using Roxas's recollections of the world. Sora explores it and winds up in front of the Old Mansion, where he battles and defeats Vexen. The Nobody tells Sora he is naught but a puppet with false memories; Vexen is assassinated by Axel to protect Roxas's identity and obtain proof of [[Marluxia]]'s plan to overthrow the Organization as Sora looks on. | |||
Sometime later, [[Riku]] accesses the memory-based Twilight Town with help from [[King Mickey]]. He battles and defeats the [[Riku Replica]] in front of the Old Mansion, and within the mansion itself, Riku meets [[Naminé]], who offers to put him to sleep in order to seal away the darkness in his heart. Riku declines the offer, choosing to confront Ansem to dispel the darkness inside his heart by himself. | |||
{{-}} | |||
===''Kingdom Hearts II''=== | ===''Kingdom Hearts II''=== | ||
DiZ | [[DiZ]] chooses the Old Mansion as his base of operations after he successfully infiltrates Castle Oblivion in pursuit of revenge against the members of [[Organization XIII]]. He sets up a large computer system in the mansion's basement, and he also constructs the Pod Room to host the memory [[pod]]s containing the sleeping Sora, Donald, and Goofy, as well as the White Room, where he allows Naminé to reside. It is from within the Old Mansion that DiZ, Naminé, and Riku work to restore Sora's memories; DiZ also creates a simulated version of Twilight Town from here in which he places Roxas after Riku captures him. | ||
After Sora and Roxas become one in [[The Other Twilight Town]], Sora awakens in the real one along with Donald and Goofy. DiZ, Naminé, and Riku have left the Old Mansion at this point; Sora and his friends begin their second journey together from here alone. The trio have clue as to how long they were asleep, or how they got to Twilight Town, but Sora says that the surroundings are rather familiar, and the group ponders if they've been here before. They wander the streets, looking for answers, and ultimately meet Hayner, Pence, Olette, Seifer, and the other residents of Twilight Town. Eventually, they encounter King Mickey, when he saves them from a group of attacking Nobodies and tells them to board a magic train to the [[Mysterious Tower]]. | |||
Sora and the party return to Twilight Town twice during their adventures. The first time, he learns that [[Kairi]] and [[Pluto]] fled [[Destiny Islands]] and was kidnapped by Axel. As he leaves town, he is stopped by [[Saïx]], who taunts him into defeating more Heartless for Organization XIII. | |||
The second time, seeking Organization XIII's world, Sora, Donald, and Goofy eventually return to Twilight Town and head to the Old Mansion. There, they find Hayner, Pence, and Olette, who have gone to the mansion because they believe it to be the gateway to an alternate Twilight Town, from which Sora's [[Munny Pouch]] and crystal must have come. The trio also assumes that [[Kairi]], whom they have befriended, has ended up in this second Twilight Town following her capture at Axel's hands, for they have no knowledge of other worlds. In the Old Mansion's basement, Pence activates DiZ's computer, and is able to send Sora, Donald, Goofy, and King Mickey to The Other Twilight Town, from which they are able to enter the Betwixt and Between and access [[The World That Never Was]]. | |||
===''Kingdom Hearts III''=== | |||
While Riku and King Mickey search for [[Aqua]], Sora decides to visit Twilight Town with Donald and Goofy to follow Roxas's [[heart]]. After arriving and being forced to fend off a group of Nobodies and a [[Demon Tide]], Sora meets up with Hayner, Pence, and Olette. Sora shows the [[picture]] to explain who Roxas is, and though the gang doesn't recognize Roxas they agree to help Sora in reviving him. | |||
After saving [[Little Chef]] from the Heartless, the group meets up at the Old Mansion. Though they fail to access the transporter to The Other Twilight Town, Sora is contacted by [[Ienzo]] who decides to use the computer to speed up the process of deciphering [[Ansem's Code]]. Outside the mansion, Ansem and Xemnas appear to Sora, Donald, and Goofy to claim that the only way to bring Roxas back is for Sora to surrender to the darkness. | |||
Sora and company return to town and are introduced to Little Chef and [[Le Grand Bistrot]] by Scrooge McDuck. When Sora leaves Twilight Town, Xigbar meets with Ansem and Xemnas and learns that they intend to destroy Sora if he strays from his path, as well as that the Organization has a backup plan if Sora does not become a vessel. | |||
Later on, Ansem, Seeker of Darkness, returns to Twilight Town with Ansem the Wise, intending on questioning him about [[Subject X]]'s whereabouts. Hayner, Pence, and Olette spy on the two and realize their link to Roxas. While Hayner distracts Xehanort's Heartless, Olette frees Ansem the Wise with the help of a group of Dusks. As the four retreat into the sewers, they meet Vexen, who had sent the Dusks and intends to atone. | |||
The day before the Keyblade War, Lea sits at the clock tower with three sticks of ice cream. Saïx arrives and reminisces with Lea over why they joined the Organization, with Lea promising to bring Isa back. | |||
Following Master Xehanort's defeat, Roxas, Lea, Xion, Isa, Hayner, Pence, and Olette meet up at the clock tower to eat ice cream, with Sora and Kairi watching from above. Riku arrives in the [[Gummi Ship]] to pick the group up. Later, Scrooge arrives at the kitchen of Le Grand Bistrot to see Little Chef cooking his next meal. | |||
One year later, Riku explains that Hayner, Pence, and Olette are observing Roxas and Xion's memories to find a clue to Sora's whereabouts. | |||
==Other appearances== | ==Other appearances== | ||
===''Blank Points''=== | ===''Blank Points''=== | ||
In one scene, Naminé is shown drawing in the White Room | In one scene, Naminé is shown drawing in the White Room and saying Sora's name. In the next, Roxas, Axel and Xion are shown sitting atop the clock tower eating sea salt ice cream as they did during their Organization days. The trio looks out towards the setting sun and Roxas and Xion say Sora's name in unison. | ||
===''A fragmentary passage''=== | ===''A fragmentary passage''=== | ||
Twilight Town is seen at several points during the ending montage. First, Kairi, Hayner, Pence and Olette are shown looking up at the Old Mansion, followed by a scene of DiZ watching over a sleeping Sora in the basement, and finally Roxas and Xion walking through Tram Common as a cloaked and blindfolded Riku watches from above a nearby shop. | Twilight Town is seen at several points during the ending montage. First, Kairi, Hayner, Pence, and Olette are shown looking up at the Old Mansion, followed by a scene of DiZ watching over a sleeping Sora in the basement, and finally Roxas and Xion walking through Tram Common as a cloaked and blindfolded Riku watches from above atop of a nearby shop. | ||
{{-}} | {{-}} | ||
==Characters== | ==Characters== | ||
<gallery> | <gallery> | ||
File:Roxas | File:Roxas KHIII.png|[[Roxas]]<br>{{KHD}} {{KHII}} {{KHIII}} | ||
File:Hayner KHIII.png|[[Hayner]]<br>{{KHD}} {{KHII}} {{KHIII}} | |||
File:Hayner | File:Pence KHIII.png|[[Pence]]<br>{{KHD}} {{KHII}} {{KHIII}} | ||
File:Pence | File:Olette KHIII.png|[[Olette]]<br>{{KHD}} {{KHII}} {{KHIII}} | ||
File:Olette | |||
File:Seifer KHII.png|[[Seifer]]<br>{{KHII}} | File:Seifer KHII.png|[[Seifer]]<br>{{KHII}} | ||
File:Rai KHII.png|[[Rai]]<br>{{KHII}} | File:Rai KHII.png|[[Rai]]<br>{{KHII}} | ||
| Line 103: | Line 161: | ||
File:Setzer KHII.png|[[Setzer]]<br>{{KHII}} | File:Setzer KHII.png|[[Setzer]]<br>{{KHII}} | ||
File:Moogle KH.png|[[Elmina]]<br>{{KHII}} | File:Moogle KH.png|[[Elmina]]<br>{{KHII}} | ||
File:Sponsor KHII.png|The Struggle tournament sponsor<br>{{KHII}} | File:Sponsor KHII.png|[[The Struggle tournament sponsor]]<br>{{KHII}} | ||
File:Wantz KHII.png|[[Wantz]]<br>{{KHII}} | File:Wantz KHII.png|[[Wantz]]<br>{{KHII}} | ||
File:Wallace KHII.png|[[Wallace]]<br>{{KHII}} | File:Wallace KHII.png|[[Wallace]]<br>{{KHII}} | ||
| Line 109: | Line 167: | ||
File:Biggs KHII.png|[[Biggs]]<br>{{KHII}} | File:Biggs KHII.png|[[Biggs]]<br>{{KHII}} | ||
File:Chiro KHII.png|[[Chiro]]<br>{{KHII}} | File:Chiro KHII.png|[[Chiro]]<br>{{KHII}} | ||
File:DiZ KHII.png|[[DiZ]]<br>{{KHCoM}}{{KHD}}{{KHII}} | |||
File:Naminé KHII.png|[[Naminé]]<br>{{KHCoM}}{{KHD}}{{KHII}} | |||
File:Riku (Blindfolded) KHII.png|[[Riku]]<br>{{KHCoM}}{{KHD}} | |||
File:Riku-Ansem KHII.png|[[Riku-Ansem]]<br>{{KHD}}{{KHII}} | |||
File:Scrooge McDuck KHIII.png|[[Scrooge McDuck]]<br>{{KHIII}} | |||
File:Little Chef KHIII.png|[[Little Chef]]<br>{{KHIII}} | |||
File:Huey KHIII.png|[[Huey, Dewey, and Louie|Huey]]<br>{{KHIII}} | |||
File:Dewey KHIII.png|[[Huey, Dewey, and Louie|Dewey]]<br>{{KHIII}} | |||
File:Louie KHIII.png|[[Huey, Dewey, and Louie|Louie]]<br>{{KHIII}} | |||
File:Merlin KHIII.png|[[Merlin]]<br>{{KHIII}} | |||
File:Xion KHIII.png|[[Xion]]<br>{{KHD}}{{KHIII}} | |||
File:Axel KHD.png|[[Axel]]<br>{{KHD}}{{KHII}} | |||
File:Lea KHIII.png|[[Lea]]<br>{{KHIII}} | |||
File:Isa KHIII.png|[[Isa]]<br>{{KHIII}} | |||
File:Saïx KHIII.png|[[Saïx]]<br>{{KHII}}{{KHIII}} | |||
File:Mickey Mouse KHII.png|[[Mickey Mouse]]<br>{{KHII}} | |||
File:Ansem, Seeker of Darkness KHIII.png|[[Ansem, Seeker of Darkness]]<br>{{KHIII}} | |||
File:Xemnas KHIII.png|[[Xemnas]]<br>{{KHD}} {{KHII}} {{KHIII}} | |||
File:Xigbar KHIII.png|[[Xigbar]]<br>{{KHIII}} | |||
File:Maleficent KHIII.png|[[Maleficent]]<br>{{KHIII}} | |||
File:Pete KHIII.png|[[Pete]]<br>{{KHIII}} | |||
</gallery> | |||
*'''{{w|Ludwig Von Drake}}''' is mentioned on a poster for [[Giantland]] as the creator of the cartoons that Scrooge is airing in town, but does not make a physical appearance. | |||
==NPCs== | |||
<gallery> | |||
File:Traverse Town NPC 3 KHREC.png|Man at Station Heights<br>{{KHII}} | |||
File:Traverse Town NPC 1 KHREC.png|Boy at Station Heights<br>{{KHII}} | |||
File:Twilight Town NPC 1 KHII.png|Woman at Station Heights<br>{{KHII}} | |||
File:Twilight Town NPC 2 KHII.png|Girl at Station Heights<br>{{KHII}} | |||
File:Twilight Town NPC 10 KHII.png|Elder man at Tram Common<br>{{KHII}} | |||
File:Twilight Town NPC 3 KHII.png|Man at Tram Common<br>{{KHII}} | |||
File:Traverse Town NPC 2 KHREC.png|Woman at Tram Common<br>{{KHII}} | |||
File:Twilight Town NPC 4 KHII.png|Elder woman at Sunset Station<br>{{KHII}} | |||
File:Twilight Town NPC 5 KHII.png|Woman at Sunset Terrace<br>{{KHII}} | |||
File:Twilight Town NPC 6 KHII.png|Young man at Sunset Terrace<br>{{KHII}} | |||
File:Twilight Town NPC 9 KHII.png|Man at Sunset Terrace<br>{{KHII}} | |||
File:Twilight Town NPC 8 KHII.png|Boy at Sunset Hill<br>{{KHII}} | |||
File:Twilight Town NPC 7 KHII.png|Girl at Sunset Hill<br>{{KHII}} | |||
</gallery> | </gallery> | ||
==Enemies== | ==Enemies== | ||
===Heartless=== | ===Heartless=== | ||
{|class="wikitable collapsible collapsed" | {|class="wikitable mw-collapsible mw-collapsed" | ||
! | ! | ||
|- | |- | ||
| | | | ||
<gallery> | <gallery> | ||
File:Shadow | File:Shadow KHIII.png|[[Shadow]]<br>{{KHCoM}}{{KHD}}{{KHII}}{{KHIII}} | ||
File:Gigas Shadow KHFM.png|[[Gigas Shadow]] | File:Gigas Shadow KHFM.png|[[Gigas Shadow]]<br>{{KHD}} | ||
File:Mega-Shadow KHD.png|[[Mega-Shadow]] | File:Mega-Shadow KHD.png|[[Mega-Shadow]]<br>{{KHD}} | ||
File:Soldier KHII.png|[[Soldier]] | File:Neoshadow KHIII.png|[[Neoshadow]]<br>{{KHD}}{{KHIII}} | ||
File:Deserter KHD.png|[[Deserter]] | File:Soldier KHII.png|[[Soldier]]<br>{{KHCoM}}{{KHII}} | ||
File:Air Soldier KH.png|[[Air Soldier]] | File:Deserter KHD.png|[[Deserter]]<br>{{KHD}} | ||
File:Yellow Opera KH.png|[[Yellow Opera]] | File:Air Soldier KH.png|[[Air Soldier]]<br>{{KHCoM}} | ||
File:Scarlet Tango KHD.png|[[Scarlet Tango]] | File:Large Body KHIII.png|[[Large Body]]<br>{{KHIII}} | ||
File:Barrel Spider KH.png|[[Barrel Spider]] | File:Yellow Opera KH.png|[[Yellow Opera]]<br>{{KHD}} | ||
File:Tailbunker KHD.png|[[Tailbunker]] | File:Scarlet Tango KHD.png|[[Scarlet Tango]]<br>{{KHD}} | ||
File:Avalanche KHD.png|[[Avalanche]] | File:Vermilion Samba KHIII.png|[[Vermilion Samba]]<br>{{KHIII}} | ||
File:Dustflier KHD.png|[[Dustflier]] | File:Powerwild KHIII.png|[[Powerwild]]<br>{{KHIII}} | ||
File:Invisible | File:Barrel Spider KH.png|[[Barrel Spider]]<br>{{KHCoM}} | ||
File:Orcus KHD.png|[[Orcus]] | File:White Mushroom KH.png|[[White Mushroom]]<br>{{KHCoM}} | ||
File:Black Fungus KH.png|[[Black Fungus]]<br>{{KHCoM}} | |||
File:Dire Plant KHD.png|[[Dire Plant]] | File:Tailbunker KHD.png|[[Tailbunker]]<br>{{KHD}} | ||
File:Poison Plant KHD.png|[[Poison Plant]] | File:Avalanche KHD.png|[[Avalanche]]<br>{{KHD}} | ||
File:Barrier Master KHD.png|[[Barrier Master]] | File:Dustflier KHD.png|[[Dustflier]]<br>{{KHD}} | ||
File:Minute Bomb KHII.png|[[Minute Bomb]] | File:Invisible KHD.png|[[Invisible]]<br>{{KHD}} | ||
File:Storm Bomb KHD.png|[[Storm Bomb]] | File:Orcus KHD.png|[[Orcus]]<br>{{KHD}} | ||
File:Detonator KHD.png|[[Detonator]] | File:Dire Plant KHD.png|[[Dire Plant]]<br>{{KHD}} | ||
File:Bulky Vendor KHII.png|[[Bulky Vendor]] | File:Poison Plant KHD.png|[[Poison Plant]]<br>{{KHD}} | ||
File:Rare Vendor KHD.png|[[Rare Vendor]] | File:Barrier Master KHD.png|[[Barrier Master]]<br>{{KHD}} | ||
File:Surveillance Robot KHII.png|[[Watcher]] | File:Minute Bomb KHII.png|[[Minute Bomb]]<br>{{KHD}} | ||
File:Guardian KHD.png|[[Guardian]] | File:Storm Bomb KHD.png|[[Storm Bomb]]<br>{{KHD}} | ||
File:Destroyer KHD.png|[[Destroyer]] | File:Detonator KHD.png|[[Detonator]]<br>{{KHD}} | ||
File:Possessor KHD.png|[[Possessor]] | File:Bulky Vendor KHII.png|[[Bulky Vendor]]<br>{{KHD}}{{KHII}} | ||
File:Cymbal Monkey KHD.png|[[Cymbal Monkey]] | File:Rare Vendor KHD.png|[[Rare Vendor]]<br>{{KHD}} | ||
File:Tricky Monkey KHD.png|[[Tricky Monkey]] | File:Surveillance Robot KHII.png|[[Watcher]]<br>{{KHD}} | ||
File:Zip Slasher KHD.png|[[Zip Slasher]] | File:Guardian KHD.png|[[Guardian]]<br>{{KHD}} | ||
File:Heat Saber KHD.png|[[Heat Saber]] | File:Destroyer KHD.png|[[Destroyer]]<br>{{KHD}} | ||
File:Stalwart Blade KHD.png|[[Stalwart Blade]] | File:Possessor KHD.png|[[Possessor]]<br>{{KHD}} | ||
File:Shadow Glob KHD.png|[[Shadow Glob]] | File:Cymbal Monkey KHD.png|[[Cymbal Monkey]]<br>{{KHD}} | ||
File:Darkside KHD.png|'''[[Darkside]]''' | File:Tricky Monkey KHD.png|[[Tricky Monkey]]<br>{{KHD}} | ||
File:Powered Armor KHD.png|'''[[Powered Armor]]''' | File:Zip Slasher KHD.png|[[Zip Slasher]]<br>{{KHD}} | ||
File:Veil Lizard KHD.png|'''[[Veil Lizard]]''' | File:Heat Saber KHD.png|[[Heat Saber]]<br>{{KHD}} | ||
File:Mushroom XIII No. 7 KHIIFM.png|'''[[Mushroom XIII No. 7]]''' | File:Stalwart Blade KHD.png|[[Stalwart Blade]]<br>{{KHD}} | ||
File:Mushroom XIII No. | File:Shadow Glob KHD.png|[[Shadow Glob]]<br>{{KHD}} | ||
File: | File:Munny Popcat KHIII.png|[[Munny Popcat]]<br>{{KHIII}} | ||
File:Bizarre Archer KHIII.png|[[Bizarre Archer]]<br>{{KHIII}} | |||
File:Darkside KHD.png|'''[[Darkside]]'''<br>{{KHD}} | |||
File:Powered Armor KHD.png|'''[[Powered Armor]]'''<br>{{KHD}} | |||
File:Veil Lizard KHD.png|'''[[Veil Lizard]]'''<br>{{KHD}} | |||
File:Mushroom XIII No. 7 KHIIFM.png|'''[[Mushroom XIII No. 7]]'''<br>{{FMII}} | |||
File:Mushroom XIII No. 12 KHIIFM.png|'''[[Mushroom XIII No. 12]]'''<br>{{FMII}} | |||
File:Demon Tide KH0.2.png|'''[[Demon Tide]]'''<br>{{KHIII}} | |||
</gallery> | </gallery> | ||
|} | |} | ||
===Nobodies=== | ===Nobodies=== | ||
{|class="wikitable collapsible collapsed" | {|class="wikitable mw-collapsible mw-collapsed" | ||
! | ! | ||
|- | |- | ||
| | | | ||
<gallery> | <gallery> | ||
File:Dusk | File:Dusk KHIII.png|[[Dusk]]<br>{{KHII}}{{KHIII}} | ||
File:Creeper KHII.png|[[Creeper]] | File:Creeper KHII.png|[[Creeper]]<br>{{KHII}} | ||
File:Sniper | File:Sniper KHIII.png|[[Sniper]]<br>{{KHII}}{{KHIII}} | ||
File:Dragoon KHII.png|[[Dragoon]] | File:Dragoon KHII.png|[[Dragoon]]<br>{{KHII}} | ||
File:Berserker KHII.png|[[Berserker]] | File:Berserker KHII.png|[[Berserker]]<br>{{KHII}} | ||
File:Assassin KHII.png|[[Assassin]] | File:Assassin KHII.png|[[Assassin]]<br>{{KHII}} | ||
File:Dancer KHII.png|[[Dancer]] | File:Dancer KHII.png|[[Dancer]]<br>{{KHII}} | ||
File:Gambler KHII.png|[[Gambler]] | File:Gambler KHII.png|[[Gambler]]<br>{{KHII}} | ||
File:Samurai KHII.png|[[Samurai]] | File:Samurai KHII.png|[[Samurai]]<br>{{KHII}} | ||
File:Vivi KHII.png|'''[[Fake Vivi]]''' | File:Sorcerer KHII.png|[[Sorcerer]]<br>{{KHII}} | ||
File:Twilight Thorn KHII.png|'''[[Twilight Thorn]]''' | File:Vivi KHII.png|'''[[Fake Vivi]]'''<br>{{KHII}} | ||
File:Riku (Dark Mode) KH.png|'''{{ns|game|Riku Replica}}''' | File:Twilight Thorn KHII.png|'''[[Twilight Thorn]]'''<br>{{KHII}} | ||
File:Vexen | File:Riku (Dark Mode) KH.png|'''{{ns|game|Riku Replica}}'''<br>{{KHCoM}} | ||
File:Vexen's Absent Silhouette KHIIFM.png|'''[[Game:Vexen|Vexen's Absent Silhouette]]''' | File:Vexen KHCOM.png|'''{{ns|game|Vexen}}'''<br>{{KHCoM}} | ||
File:Lexaeus's Absent Silhouette KHIIFM.png|'''[[Game:Lexaeus|Lexaeus's Absent Silhouette]]''' | File:Vexen's Absent Silhouette KHIIFM.png|'''[[Game:Vexen|Vexen's Absent Silhouette]]'''<br>{{FMII}} | ||
File:Lexaeus's Absent Silhouette KHIIFM.png|'''[[Game:Lexaeus|Lexaeus's Absent Silhouette]]'''<br>{{FMII}} | |||
File: | File:Axel KHD.png|'''{{ns|game|Axel}}'''<br>{{KHII}} | ||
</gallery> | </gallery> | ||
|} | |} | ||
===Other=== | ===Other=== | ||
{|class="wikitable collapsible collapsed" | {|class="wikitable mw-collapsible mw-collapsed" | ||
! | ! | ||
|- | |- | ||
| | | | ||
<gallery> | <gallery> | ||
File:Honey Bee KHII.png|[[Honey Bee]] | File:Honey Bee KHII.png|[[Honey Bee]]<br>{{KHII}} | ||
File: | File:Shadow Roxas KHII.png|'''[[Shadow Roxas]]'''<br>{{KHII}} | ||
File: | File:Hayner KHII.png|'''[[Game:Hayner|Hayner]]'''<br>{{KHII}} | ||
File: | File:Seifer KHII.png|'''[[Game:Seifer|Seifer]]'''<br>{{KHII}} | ||
File: | File:Setzer KHII.png|'''[[Game:Setzer|Setzer]]'''<br>{{KHII}} | ||
File: | File:Unknown (Riku) KHD.png|'''[[Game:Riku|???]]'''<br>{{KHD}} | ||
File:Unknown (Xion) KHD.png|'''{{ns|game|Xion|???}}'''<br>{{KHD}} | |||
File:Xion Final Form KHMOM.png|'''{{ns|game|Xion|Xion (Final Form)}}'''<br>{{KHD}} | |||
</gallery> | </gallery> | ||
|} | |} | ||
==Trivia== | ==Trivia== | ||
* | *The Old Mansion is notable for having four different command menu icons (The White Room/Pod Room, Betwixt and Between, the Computer Room, and the remaining rooms). | ||
*If one goes into the White Room (or the Pod Room) in ''Kingdom Hearts II'', the command menu icons will be styled after the cards from ''Kingdom Hearts Chain of Memories'', while the menu itself is based on Castle Oblivion. | |||
*In ''Kingdom Hearts II'', the Basement Corridor leading towards the Pod Room has a track containing seven other pods. The third and fourth pods were previously occupied by Donald and Goofy, respectively. However, examining the one farthest from the Pod Room states, "There's evidence this was used before." | |||
*If the player equips either Kingdom Key, Oathkeeper, or Oblivion and enters Betwixt and Between, the animations for the summoning of those Keyblades will not be shown and the Keyblade will appear out of nowhere, just like they did in the first game. | *If the player equips either Kingdom Key, Oathkeeper, or Oblivion and enters Betwixt and Between, the animations for the summoning of those Keyblades will not be shown and the Keyblade will appear out of nowhere, just like they did in the first game. | ||
{{COM}} | {{COM}} | ||
{{KH2}} | {{KH2}} | ||
{{358}} | {{358}} | ||
{{KH3}} | {{KH3}} | ||
[[Category:Realm Between]][[Category:Kingdom Hearts III worlds]] | {{MOM}} | ||
[[Category:Realm Between]] | |||
[[Category:Kingdom Hearts III worlds]] | |||
Latest revision as of 10:55, 12 December 2023
| This article is about the real Twilight Town. You may be looking for The Other Twilight Town or the chapter in the Kingdom Hearts II manga. |
Twilight Town is a world that appears in Kingdom Hearts Chain of Memories, Kingdom Hearts II, Kingdom Hearts 358/2 Days and Kingdom Hearts III. It is the "birthplace" of Roxas, and one of the only two real worlds that appears in Kingdom Hearts Chain of Memories. It has recently been infested with Nobodies; however, Heartless were known to have been in the city during Roxas's time in Organization XIII.
Despite its subtle atmosphere, Twilight Town is one of the largest worlds known. It is located in the Realm Between, similar to Castle Oblivion and The World That Never Was. As its name implies, Twilight Town is stuck in endless sunset, with its sun always in the same position in the sky, never rising nor setting. Much like Traverse Town in the previous game, it is divided into several distinct districts, Market Street, Sunset Terrace, and Yen Sid's Tower. The Tower is not truly part of the town; it is merely reached by a train from this world.
Settings and Areas[edit]
Kingdom Hearts Chain of Memories[edit]
Twilight Town is first introduced in Kingdom Hearts Chain of Memories, but unlike all the other worlds, it's not based on Sora's memories, but rather Roxas'. The world is explored through boxed-in areas heavily inspired by the real town. In cutscenes, areas such as Tram Common, the Pod Room, and The Old Mansion are visited. The last area also serving as boss arena for both Vexen, and Riku Replica.
During the game's credit Roxas is briefly seen on top of the Clock Tower at the Station Plaza.
Kingdom Hearts II[edit]
Twilight Town[edit]
Twilight Town is among one of the largest worlds in Kingdom Hearts II, with many major set pieces. One of the town's bigger locations is the Market Street (商店街 Shōten Machi), a long, winding, steeply-sloped road that leads from the lower areas of town to the top, stretching across multiple areas. The upper portion of the street is known as Station Heights (駅前通り Ekimaedōri, lit. "Station Road"), where a few shops are located such as Wallace's weapon shop and an item shop run by Wantz, as well as a noticeboard for various jobs, which can be experience through mini-games. The lower portion of Market Street is the Tram Common (トラム広場 Toramu Hiroba, lit. "Tram Square"), an open-market area with a free tram circling around. Many shops are found here, including Jessie's accessory shop, Biggs' armor shop, and a Moogle Shop. In The Other Twilight Town, the Moogle Shop is a candy shop instead. Another noticeboard mini-game jobs is found down here. Both parts of Market Street connect to the Sandlot (空き地 Akichi, lit. "Vacant Lot"), an open area where the infamous Struggle battles take place. Both Station Heights and the Sandlot lead to the Back Alley (路地裏 Rojiura), where Hayner's gang's hideout, The Usual Spot (いつもの場所 Itsumo no Basho) is located. In The Other Twilight Town, Roxas' Room (ロワサスの部屋 Rokusasu no Heya) can be briefly seen in various cutscenes. It's several stories above ground, and has a nice view of the town.
Traveling up through the Station Heights leads to the Station Plaza (駅前広場 Ekimae Hiroba), a large and open terrace, with a great view of the entire town. The plaza is presided over by the town's distinctive and famous Clock Tower, which, though a twelve-hour clock, has "I" at the top instead of "XII". At Station Plaza is also where the Central Station (セントラルステーション Sentoraru Sutēshon) is found, which is a large train station, with trains that travel all over the world, including other districts of the town, as well as an unseen beach. There's also a magic train here that travels to the Mysterious Tower.
Another district of the town, Sunset Terrace (サンセット住宅街 Sansetto Jūtakugai, lit. "Sunset Residential Area"), can be reached by taking the train at Central Station to Sunset Station (サンセットステーション Sansetto Sutēshon). Sunset Terrace lies at the outskirts of Twilight Town and boarders to huge fields of grass, with a great view of the mountains in the distance. Another free train travels back and forth the area. Connecting to Sunset Terrace is Sunset Hill (サンセットヒル Sansetto Hiru), a tranquil, tiny area, with a small sculpture mimicking the Clock Tower, which can also be seen from here. Underneath the town is a vast Underground Concourse (地下連絡通路 Chika Renraku Tsūro), which has several entrances across town, located at the Back Alley, the Station Plaza, and the Tram Commons. One exit leads to the Tunnelway (トンネル Tonneru, lit. "Tunnel"), which in turn leads back to Sunset Terrace.
To the far right of town are The Woods (町はずれの森 Machihazure no Mori, lit. "Forest on the Outskirts of Town"), a large forest only accessible through a crack in the walls of Tram Common. Passing through The Woods leads to a gate and a courtyard belonging to The Old Mansion (屋敷前 Yashikimae, lit. "Mansion Anterior"). Upon entering the Foyer (ロビー Robī, lit. "Lobby"), the Mansion splits off in three different directions. On the left side of the Foyer is the Dining Room (ダイニング Dainingu, lit. "Dining"); up the left set of stairs and through the door is The White Room (白い部屋 Shiroi Heya), where Naminé spends a lot of her time; while up the stairs to the right lies the Library (書庫 Shoko, lit. "Archive"). At the Library, there is a false floor that hides a staircase which goes down and leads to the Computer Room (コンピュータールーム Konpyūtā Rūmu), where DiZ monitors The Other Twilight Town. There's also a machine which allows transport into the simulation. The doorway to the left of the computer leads to the Basement Hall (地下広間 Chika Hōru), where Roxas fights Axel in the simulated counterpart. The Basement Hall then leads to the Basement Corridor (地下廊下 Chika Rōka), which houses a few pods, and finally to the Pod Room (ポッドルーム Poddo Rūmu), where Sora slept while Naminé fixed his memories. Towards the end of the game Sora and party can access the simulation via DiZ's machine, but are limited access to only the Computer Room, and the Basement Hall. A Corridor of Darkness can by found in the latter area, which allows travel across the emptiness of Betwixt and Between (狭間の空間 Hazama no Kūkan, lit. "In-between Space") to enter the Dark City and begin their assault on the Organization's stronghold.
The Empty Realm (虚無の世界) is an ominous white room where Naminé temporarily brings Roxas after his visit to Dive to the Heart. It's filled with oddly shaped boxes with varying lengths and sizes, most of them having their top portions resembling a crown. The room also seem to have no end and just goes on forever. Two other areas featured exclusively in cutscenes are On The Train (電車:車内) and The Mysterial Train (不思議な電車:車内); featured as Roxas head to Sunset Staion and Sora traveling to Mysterious Tower respectively.
| Area Map of Twilight Town in Kingdom Hearts II |
|---|
Mysterious Tower[edit]
As mentioned, Mysterious Tower is part of Twilight Town in Kingdom Hearts II, and is accessed by the magic train. The Tower (不思議な塔) itself is a surrealistic, crooked, golden-brown tower, loosely based on the setting of Fantasia's The Sorcerer's Apprentice. The Tower is topped with blue cone-shaped turret roofs, decorated with moons and stars, similar to Yen Sid's hat. It rests on a floating island that contains a courtyard with plenty of trees. Inside the main door is the Entryway (塔:エントランス) , surrounded by an upward-spiraling staircase that leads to a strange portal. Through the portal, Sora and party are transported to the Wayward Stairs (塔:階段の間) , a transitioning room where stairways connect the various rooms of the tower via portals. Other than the entrance, stairs, and upper floor, there are two known rooms in the middle of the Tower. One is the Moon Chamber (塔:月の部屋) , and the other is the Star Chamber (塔:星の部屋) . Both are perfectly round rooms, each with two doors leading either up or down the Tower, and are decorated with moons and stars, respectively. The final stairway is steep and straight, and leads to Yen Sid's study, the Sorcerer's Loft (塔:魔法使いの部屋) . The study is the largest room in the building, with several bookshelves, as well as three large star-shaped windows and a crescent one. A door to the right leads to the Wardrobe (塔:ドレスルーム) , where the Three Good Fairies, Flora, Fauna, and Merryweather, resides. Several covered mirrors are located there, each representing one of Sora's Drive Forms.
| Area Map of Mysterious Tower in Kingdom Hearts II |
|---|
Kingdom Hearts 358/2 Days[edit]
In Kingdom Hearts 358/2 Days, Twilight Town is smaller than it was in Kingdom Hearts II. The town's largest area is the Tram Common (トラム広場), loaded with buildings and streets, and tram tacks around the area. Heading down south of the area leads to the Sandlot (空き地), location to several boss encounter. The bottom west point of the area takes Roxas up to the Side Street (路地裏), where Hayner, Pence, and Olette's hangout is located, called Under the Tracks (高架下). Continuing up from Side Street leads to the Station Heights (駅前通り), a long street on an incline, with paths leading back down to both the Tram Common and the Sandlot. At top of Station Heights is the Station Plaza (駅前広場), home to the town's famous Clock Tower, where Roxas, Axel, and Xion often eat Sea-salt ice cream after missions. One of the entrances the town's tunnels, called Underground Passage (地下連絡通路), is located here. The underground connects to several areas from town, such as the Tram Common and the Side Street. At bottom of the area is passage leading a smaller location simply called Tunnel (トンネル).
To the east of the Tram Common is a massive wall with a hole in it, from which The Woods (町はずれの森) can be accessed. Traversing through the forest takes Roxas up to a courtyard belonging to The Old Mansion (屋敷前), headquarters to DiZ, Naminé, and Riku.
In cutscenes, areas such as Pod Room, the Computer Room, and The White Room are scene. Also, during the fight against Xion, she'll drag Roxas across locations from other worlds, such as the Bizarre Room, Manor Ruins, and Lamp Chamber, before they end back up in the air above Station Plaza.
| Area Map in Kingdom Hearts 358/2 Days |
|---|
Kingdom Hearts III[edit]
In Kingdom Hearts III the world is a lot smaller than it's previously been, and the areas available for traversal are collectively referred to as The Neighborhood (街の一角 Machi no Ikkaku, lit. "Corner of Town"). Sora arrives at the Tram Common (トラム広場), which has undergone several changes. The place is heavily populated with people, filled with plants, and other signs of habitation. The Sandlot entryway is closed off by a large door, while the entrance to Station Heights serves as an exit from the world, making these parts of the world inaccessible. The armor shop has been replaced by Le Grand Bistrot, where Merlin can be found dining in the terrace out front, allowing access to the 100 Acre Wood, while the tram lot's been repurposed into an outdoor movie theater. The Synthesis Moogle Shop is still where it was in Kingdom Hearts II, with a tiny mailbox beside it where Sora can mail the Prize Postcards he finds.
The hole in the wall has been sealed, and to access The Woods (街外れの森), Sora has to traverse through a new passageway near the former Sandlot entrance, called the Underground Conduit (地下水道 Chika Suidō, lit. "Underground Waterway"). The area is quite linear, with a lot of sewage across the floors. At the end of the waterway Sora can exit to The Woods through a cellar door. The Woods are noticeably different with a lot of fallen trees around the area. Passing by the woods and running up the path leads to the The Old Mansion (屋敷前), which is briefly entered only in cutscenes where only the Computer Room is shown.
The top of the Clock Tower also appears in various cutscenes, though the Station Plaza below is inaccessible.
Story[edit]
Kingdom Hearts 358/2 Days[edit]
Roxas is first "born" in Twilight Town in front of the Old Mansion and is given his name by Xemnas. Roxas at first turned down Xemnas's offer to join Organization XIII and wandered the city streets. After seeing a trio of friends (Hayner, Pence, and Olette), Axel sees Roxas's apparent sadness over not having friends here, appears, and gives him sea-salt ice cream, convincing him to join atop the Clock Tower.
Throughout Roxas's life as a Nobody, he, Axel, and Xion used the Clock Tower as a meeting place after their missions, where they would sit and talk about their missions, or discuss whatever came to mind. It is also here that Roxas and Xion have their final battle and where he absorbs her afterward.
Kingdom Hearts Chain of Memories[edit]
During Sora's journey in Castle Oblivion, Vexen creates a memory-based version of Twilight Town using Roxas's recollections of the world. Sora explores it and winds up in front of the Old Mansion, where he battles and defeats Vexen. The Nobody tells Sora he is naught but a puppet with false memories; Vexen is assassinated by Axel to protect Roxas's identity and obtain proof of Marluxia's plan to overthrow the Organization as Sora looks on.
Sometime later, Riku accesses the memory-based Twilight Town with help from King Mickey. He battles and defeats the Riku Replica in front of the Old Mansion, and within the mansion itself, Riku meets Naminé, who offers to put him to sleep in order to seal away the darkness in his heart. Riku declines the offer, choosing to confront Ansem to dispel the darkness inside his heart by himself.
Kingdom Hearts II[edit]
DiZ chooses the Old Mansion as his base of operations after he successfully infiltrates Castle Oblivion in pursuit of revenge against the members of Organization XIII. He sets up a large computer system in the mansion's basement, and he also constructs the Pod Room to host the memory pods containing the sleeping Sora, Donald, and Goofy, as well as the White Room, where he allows Naminé to reside. It is from within the Old Mansion that DiZ, Naminé, and Riku work to restore Sora's memories; DiZ also creates a simulated version of Twilight Town from here in which he places Roxas after Riku captures him.
After Sora and Roxas become one in The Other Twilight Town, Sora awakens in the real one along with Donald and Goofy. DiZ, Naminé, and Riku have left the Old Mansion at this point; Sora and his friends begin their second journey together from here alone. The trio have clue as to how long they were asleep, or how they got to Twilight Town, but Sora says that the surroundings are rather familiar, and the group ponders if they've been here before. They wander the streets, looking for answers, and ultimately meet Hayner, Pence, Olette, Seifer, and the other residents of Twilight Town. Eventually, they encounter King Mickey, when he saves them from a group of attacking Nobodies and tells them to board a magic train to the Mysterious Tower.
Sora and the party return to Twilight Town twice during their adventures. The first time, he learns that Kairi and Pluto fled Destiny Islands and was kidnapped by Axel. As he leaves town, he is stopped by Saïx, who taunts him into defeating more Heartless for Organization XIII.
The second time, seeking Organization XIII's world, Sora, Donald, and Goofy eventually return to Twilight Town and head to the Old Mansion. There, they find Hayner, Pence, and Olette, who have gone to the mansion because they believe it to be the gateway to an alternate Twilight Town, from which Sora's Munny Pouch and crystal must have come. The trio also assumes that Kairi, whom they have befriended, has ended up in this second Twilight Town following her capture at Axel's hands, for they have no knowledge of other worlds. In the Old Mansion's basement, Pence activates DiZ's computer, and is able to send Sora, Donald, Goofy, and King Mickey to The Other Twilight Town, from which they are able to enter the Betwixt and Between and access The World That Never Was.
Kingdom Hearts III[edit]
While Riku and King Mickey search for Aqua, Sora decides to visit Twilight Town with Donald and Goofy to follow Roxas's heart. After arriving and being forced to fend off a group of Nobodies and a Demon Tide, Sora meets up with Hayner, Pence, and Olette. Sora shows the picture to explain who Roxas is, and though the gang doesn't recognize Roxas they agree to help Sora in reviving him.
After saving Little Chef from the Heartless, the group meets up at the Old Mansion. Though they fail to access the transporter to The Other Twilight Town, Sora is contacted by Ienzo who decides to use the computer to speed up the process of deciphering Ansem's Code. Outside the mansion, Ansem and Xemnas appear to Sora, Donald, and Goofy to claim that the only way to bring Roxas back is for Sora to surrender to the darkness.
Sora and company return to town and are introduced to Little Chef and Le Grand Bistrot by Scrooge McDuck. When Sora leaves Twilight Town, Xigbar meets with Ansem and Xemnas and learns that they intend to destroy Sora if he strays from his path, as well as that the Organization has a backup plan if Sora does not become a vessel.
Later on, Ansem, Seeker of Darkness, returns to Twilight Town with Ansem the Wise, intending on questioning him about Subject X's whereabouts. Hayner, Pence, and Olette spy on the two and realize their link to Roxas. While Hayner distracts Xehanort's Heartless, Olette frees Ansem the Wise with the help of a group of Dusks. As the four retreat into the sewers, they meet Vexen, who had sent the Dusks and intends to atone.
The day before the Keyblade War, Lea sits at the clock tower with three sticks of ice cream. Saïx arrives and reminisces with Lea over why they joined the Organization, with Lea promising to bring Isa back.
Following Master Xehanort's defeat, Roxas, Lea, Xion, Isa, Hayner, Pence, and Olette meet up at the clock tower to eat ice cream, with Sora and Kairi watching from above. Riku arrives in the Gummi Ship to pick the group up. Later, Scrooge arrives at the kitchen of Le Grand Bistrot to see Little Chef cooking his next meal.
One year later, Riku explains that Hayner, Pence, and Olette are observing Roxas and Xion's memories to find a clue to Sora's whereabouts.
Other appearances[edit]
Blank Points[edit]
In one scene, Naminé is shown drawing in the White Room and saying Sora's name. In the next, Roxas, Axel and Xion are shown sitting atop the clock tower eating sea salt ice cream as they did during their Organization days. The trio looks out towards the setting sun and Roxas and Xion say Sora's name in unison.
A fragmentary passage[edit]
Twilight Town is seen at several points during the ending montage. First, Kairi, Hayner, Pence, and Olette are shown looking up at the Old Mansion, followed by a scene of DiZ watching over a sleeping Sora in the basement, and finally Roxas and Xion walking through Tram Common as a cloaked and blindfolded Riku watches from above atop of a nearby shop.
Characters[edit]
- Ludwig Von Drake is mentioned on a poster for Giantland as the creator of the cartoons that Scrooge is airing in town, but does not make a physical appearance.
NPCs[edit]
Man at Station Heights
[KH II]Boy at Station Heights
[KH II]Woman at Station Heights
[KH II]Girl at Station Heights
[KH II]Elder man at Tram Common
[KH II]Man at Tram Common
[KH II]Woman at Tram Common
[KH II]Elder woman at Sunset Station
[KH II]Woman at Sunset Terrace
[KH II]Young man at Sunset Terrace
[KH II]Man at Sunset Terrace
[KH II]Boy at Sunset Hill
[KH II]Girl at Sunset Hill
[KH II]
Enemies[edit]
Heartless[edit]
|
|
Nobodies[edit]
|
|
Other[edit]
|
|
Trivia[edit]
- The Old Mansion is notable for having four different command menu icons (The White Room/Pod Room, Betwixt and Between, the Computer Room, and the remaining rooms).
- If one goes into the White Room (or the Pod Room) in Kingdom Hearts II, the command menu icons will be styled after the cards from Kingdom Hearts Chain of Memories, while the menu itself is based on Castle Oblivion.
- In Kingdom Hearts II, the Basement Corridor leading towards the Pod Room has a track containing seven other pods. The third and fourth pods were previously occupied by Donald and Goofy, respectively. However, examining the one farthest from the Pod Room states, "There's evidence this was used before."
- If the player equips either Kingdom Key, Oathkeeper, or Oblivion and enters Betwixt and Between, the animations for the summoning of those Keyblades will not be shown and the Keyblade will appear out of nowhere, just like they did in the first game.
| Kingdom Hearts Chain of Memories |
|---|
| Characters |
| Party members |
| Sora - Riku - Donald Duck - Goofy - Mickey Mouse Aladdin - Ariel - Jack Skellington - Peter Pan - Beast |
| Summons |
| Simba - Genie - Cloud - Dumbo - Bambi - Tinker Bell - Mushu |
| Antagonists |
| Ansem Organization XIII Marluxia - Lexaeus - Larxene - Vexen - Zexion - Axel - Riku Replica Villains Hades - Jafar - Ursula - Oogie Boogie - Captain Hook - Maleficent |
| Non-playable characters |
| Aerith - Alice - Ansem the Wise - Belle - Card Soldiers - Cave of Wonders Guardian - Cheshire Cat - Cid - Dark Figure - Dr. Finkelstein - Eeyore - Flounder - Geppetto - Hercules - Iago - Jasmine - Jiminy Cricket - Kairi - Moogles - Naminé - Owl - Philoctetes - Piglet - Pinocchio - Pluto - Queen of Hearts - Rabbit - Roo - Sally - Sebastian - Selphie - Squall Leonhart - Tidus - Tigger - Wakka - Wendy - White Rabbit - Winnie the Pooh - Yuffie |
| Locations |
| Worlds |
| Traverse Town - Agrabah - Olympus Coliseum - Wonderland - Monstro - Halloween Town - Atlantica - Neverland - 100 Acre Wood - Hollow Bastion - Twilight Town - Destiny Islands - Castle Oblivion |
| Terms |
| Attack Card - Card break - Cards - Enemy Card - Friend Card - Gimmick Card - Item Card - Keyblade - Wayfinder - Magic Card - Map Card - Memory - Pod - Premium Cards - Reload Card - Replica - Sleight - Special Card - Summon Card - World Cards - The End |
| Music |
| Kingdom Hearts Original Soundtrack Complete - Simple and Clean |
| Archives |
| Artwork - Bosses - Enemies - Keyblades - Removed content |
| Kingdom Hearts II |
|---|
| Characters |
| Party members |
| Roxas - Sora - Donald Duck - Goofy Fa Mulan - Beast - Auron - Jack Sparrow - Aladdin - Jack Skellington - Simba - Tron - Riku |
| Summons |
| Chicken Little - Genie - Stitch - Peter Pan |
| Antagonists |
| Organization XIII Xemnas - Xigbar - Xaldin - Saïx - Axel - Demyx - Luxord Villains Maleficent - Pete - Hades - Ursula - Hector Barbossa - Jafar - Oogie Boogie - Scar Shan-Yu - Master Control Program - Sark |
| Non-playable characters |
| Abu - Aerith - Ansem the Wise - Ariel - Ariel's Sisters - Auron - Bathtub - Belle - Biggs - Captain Pete - Carpet - Cave of Wonders Guardian - Cerberus - Chien Po, Ling, and Yao - Chip - Chip and Dale - Christmas Elves - Cid - Clara Cluck - Clarabelle Cow - Cloud - Cogsworth - Daisy Duck - Dark Figure - Dr. Finkelstein - Eeyore - Elizabeth Swann - Enchanted Brooms - Flora, Fauna, and Merryweather - Flotsam and Jetsam - Flounder - Fuu - Gopher - Gullwings - Hayabusa - Hayner - Hercules - Horace Horsecollar - Hostile Program - Huey, Dewey, and Louie - Hydra - Iago - Jasmine - Jessie - Jiminy Cricket - Kairi - Kanga - King Triton - Li Shang - Lock, Shock, and Barrel - Lumière - Maleficent's Raven - Megara - Merlin - Mickey Mouse - Minnie Mouse - Moogles - Mrs. Potts - Mufasa - Mushu - Nala - Naminé - Olette - Owl - Pain and Panic - Pegasus - Pence - Philoctetes - Piglet - Pluto - Prince Eric - Pumbaa - Rabbit - Rafiki - Rai - Reindeer - Rock Titan - Roo - Sally - Santa Claus - Scrooge McDuck - Sebastian - Seifer - Selphie - Sephiroth - Setzer - Shenzi, Banzai, and Ed - Simba and Nala's cub - Squall Leonhart - Terra-Xehanort - The Emperor - The Experiment - The Ghost of Scar - The Mayor - The Peddler - Tifa - Tigger - Timon - Tinker Bell - Undead Pirates - Vivi - Wallace - Wantz - Wardrobe - William Turner - Winnie the Pooh - Wedge - Yen Sid - Yuffie - Zero |
| Locations |
| Worlds |
| Twilight Town - Destiny Islands - Hollow Bastion/Radiant Garden - The Land of Dragons - Beast's Castle - 100 Acre Wood - Olympus Coliseum - Disney Castle - Timeless River - Atlantica - Port Royal - Agrabah - Halloween Town - Pride Lands - Space Paranoids - The World That Never Was - End of Sea |
| Places |
| The Other Twilight Town - Dive to the Heart - Mysterious Tower - Kingdom Hearts |
| Terms |
| Cornerstone of Light - Drive Form - Gate - Hollow Bastion Restoration Committee - Kairi's Letter - Keyblade - Kingdom Hearts Encoder - Organization XIII - Princesses of Heart - Reaction Command - Secret Ansem Report - Sidecar Glider - Skateboard - The End - Twilight Town Disciplinary Committee |
| Music |
| Kingdom Hearts II Original Soundtrack - Kingdom Hearts Original Soundtrack Complete - Sanctuary |
| Archives |
| Accessories - Artwork - Bosses - Enemies - Items - Keyblades - Other Weapons - Songs - Removed content |
| Kingdom Hearts 358/2 Days |
|---|
| Characters |
| Party members |
| Roxas - Axel - Demyx - Larxene - Lexaeus - Luxord - Marluxia - Saïx - Vexen - Xaldin - Xemnas - Xigbar - Xion - Zexion |
| Secret characters |
| Donald Duck - Goofy - King Mickey - Riku - Sora |
| Non-playable characters |
| Abu - Aladdin - Ansem the Wise - Beast - Belle - Captain Hook - Card Soldiers - Carpet - Cave of Wonders Guardian - Cheshire Cat - Cogsworth - Dark Figure - Doorknob - Dr. Finkelstein - Genie - Hayner - Hercules - Jack Skellington - Jasmine - Kairi - Lock, Shock, and Barrel - Lumière - Moogle - Mr. Smee - Naminé - Olette - Pence - Pete - Philoctetes - Queen of Hearts - Tinker Bell - White Rabbit - Zero |
| Locations |
| Worlds |
| Agrabah - Beast's Castle - Castle Oblivion - Destiny Islands - Halloween Town - Neverland - Olympus Coliseum - The World That Never Was - Twilight Town - Wonderland |
| Places |
| The Other Twilight Town |
| Terms |
| Heart - Heartless - Keyblade - Kingdom Hearts - Mission Mode - Nobody - Organization XIII - Organization XIII Device - Replica - Replica Program - Roxas's Diary - Sea-salt ice cream - The End |
| Music |
| Kingdom Hearts Birth by Sleep & 358/2 Days Original Soundtrack - Sanctuary |
| Archives |
| Rings - Artwork - Bosses - Enemies - Keyblades - Other Weapons - Removed content |
| Kingdom Hearts III |
|---|
| Characters |
| Party members |
| Sora - Donald Duck - Goofy - Riku - Aqua Hercules - Woody - Buzz Lightyear - Rapunzel - Eugene Fitzherbert - James P. Sullivan - Mike Wazowski - Marshmallow - Jack Sparrow - Baymax Mickey Mouse - Kairi - Ventus - Lea - Roxas - Xion |
| Link system |
| Meow Wow - Wreck-It Ralph - Simba - Ariel - Stitch |
| Antagonists |
| Real Organization XIII (Seekers of Darkness) Master Xehanort - Young Xehanort - Terra-Xehanort - Ansem, Seeker of Darkness - Xemnas - Vanitas - Xigbar - Saïx - Luxord - Marluxia - Larxene - Dark Riku - Xion Vexen - Demyx - Replica Xehanort Villains Maleficent - Pete - Hades - Rock Titan - Ice Titan - Lava Titan - Tornado Titan Mother Gothel - Randall Boggs - Hans - Davy Jones - Kraken - Cutler Beckett - Dark Baymax Other Anti-Aqua |
| Non-playable characters |
| Seven Guardians of Light - New Seven Hearts Aced - Aeleus - Air Droids - Angelic Amber - Anna - Ansem the Wise - Apollo - Athena - Beasts & Bugs - Boo - Bouncy Pets - CDA Agent - Chip and Dale - Chirithy - Daisy Duck - Dark Figure - Dilan - Elizabeth Swann - Elsa - Ephemer - Eraqus - Even - Fred - Gigas - Go Go Tomago - Gopher - Green Army Men - Gula - Hamm - Hayner - Hector Barbossa - Hermes - Hiro Hamada - Honey Lemon - Huey, Dewey, and Louie - Ienzo - Invi - Ira - Isa - Jiminy Cricket - Joshamee Gibbs - Kristoff - Lingering Will - Little Green Men - Lumpy - Luxu - The Master of Masters - Maximus - Megara - Merlin - Minnie Mouse - Moogle - Nameless Star - Naminé - Olaf - Olette - Pascal - Patchwork Animals - Pegasus - Pence - Piglet - Philoctetes - Pluto - Rabbit - Remy - Rex - Riku Replica - Roo - Sarge - Scrooge McDuck - Supreme Smasher - Sven - Terra - Tia Dalma - Tigger - Wasabi - William Turner - Winnie the Pooh - Yen Sid - Yozora - Zeus |
| Locations |
| Worlds |
| Olympus - Dark World - Mysterious Tower - Disney Castle - Radiant Garden - Twilight Town - Toy Box - Kingdom of Corona - Monstropolis - Arendelle - The Caribbean - San Fransokyo - 100 Acre Wood - Destiny Islands - Castle Oblivion / Land of Departure - Keyblade Graveyard - The Final World - Scala ad Caelum - Quadratum |
| Terms |
| Alba & Ater - Ansem's Code - Black Box - Datascape - Dream Eater - Heartless - Keyblade - Keyblade Master - Keyblade War - Kingdom Hearts - New Seven Hearts - Nobody - Port Royal - Secret Reports - Subject X - Unversed - Verum Rex - Yozora |
| Gameplay terms |
| Attractions - Battlegate - Black Pearl - Classic Kingdom - Flowmotion - Formchange - Gigas - Glossary - Gummiphone - Gummi Ship - Keyblade Forge - Leviathan - Lucky Emblems - Make Your Mark - Memory Archive - Moogle Shop - Link - Shotlock - Situation Command - Tech Points - χ3 |
| Music |
| Don't Think Twice - Face My Fears - Kingdom Hearts - III, II.8, Unchained χ & Union χ [Cross] - Original Soundtrack - Unnamed tracks |
| Archives |
| Accessories - Armor - Artwork - DLC - Enemies - Items - Keyblades - Weapons - Removed content |
| Kingdom Hearts Melody of Memory |
|---|
| Characters |
| Party members |
| Kairi - Sora - Roxas - Aqua - Riku Donald Duck - Goofy - Axel - Xion - Terra - Ventus - Meow Wow - Komory Bat - Mickey Mouse Hercules - Aladdin - Ariel - Peter Pan - Beast - Fa Mulan - Simba - Stitch |
| Antagonists |
| Xehanort - Ansem, Seeker of Darkness - Xemnas - Maleficent |
| Non-playable characters |
| Aeleus - Ansem the Wise - Even - Fairy Godmother - Ienzo - Nameless Star - Terra-Xehanort - Yen Sid |
| Locations |
| Worlds |
| Mysterious Tower - Radiant Garden - The Final World |
| Terms |
| An Oath to Return - Another Key - Key Art - Keyblade - Museum - Music Stage - Rhythm Points - Story Scene - The End - VS Battle - World Tour |
| Music |
| Kingdom Hearts Melody of Memory - Special Disc - Unnamed tracks |
| Archives |
| Artwork - Bosses - Enemies - Items - Trophy - Songs |
![Roxas [KH Days] [KH II] [KH III]](https://kh.wiki.gallery/images/thumb/9/9d/Roxas_KHIII.png/120px-Roxas_KHIII.png)
![Hayner [KH Days] [KH II] [KH III]](https://kh.wiki.gallery/images/thumb/e/e2/Hayner_KHIII.png/53px-Hayner_KHIII.png)
![Pence [KH Days] [KH II] [KH III]](https://kh.wiki.gallery/images/thumb/7/79/Pence_KHIII.png/57px-Pence_KHIII.png)
![Seifer [KH II]](https://kh.wiki.gallery/images/thumb/0/01/Seifer_KHII.png/79px-Seifer_KHII.png)
![Rai [KH II]](https://kh.wiki.gallery/images/thumb/e/e4/Rai_KHII.png/54px-Rai_KHII.png)
![Vivi [KH II]](https://kh.wiki.gallery/images/thumb/1/1e/Vivi_KHII.png/111px-Vivi_KHII.png)
![Setzer [KH II]](https://kh.wiki.gallery/images/thumb/e/ee/Setzer_KHII.png/69px-Setzer_KHII.png)
![Elmina [KH II]](https://kh.wiki.gallery/images/thumb/e/eb/Moogle_KH.png/54px-Moogle_KH.png)
![The Struggle tournament sponsor [KH II]](https://kh.wiki.gallery/images/thumb/e/ed/Sponsor_KHII.png/59px-Sponsor_KHII.png)
![Wallace [KH II]](https://kh.wiki.gallery/images/thumb/d/db/Wallace_KHII.png/58px-Wallace_KHII.png)
![Chiro [KH II]](https://kh.wiki.gallery/images/thumb/1/15/Chiro_KHII.png/82px-Chiro_KHII.png)
![DiZ [KH CoM][KH Days][KH II]](https://kh.wiki.gallery/images/thumb/9/91/DiZ_KHII.png/83px-DiZ_KHII.png)
![Riku [KH CoM][KH Days]](https://kh.wiki.gallery/images/thumb/6/67/Riku_%28Blindfolded%29_KHII.png/57px-Riku_%28Blindfolded%29_KHII.png)
![Scrooge McDuck [KH III]](https://kh.wiki.gallery/images/thumb/a/a7/Scrooge_McDuck_KHIII.png/86px-Scrooge_McDuck_KHIII.png)
![Little Chef [KH III]](https://kh.wiki.gallery/images/thumb/7/77/Little_Chef_KHIII.png/87px-Little_Chef_KHIII.png)
![Huey [KH III]](https://kh.wiki.gallery/images/thumb/0/09/Huey_KHIII.png/62px-Huey_KHIII.png)
![Dewey [KH III]](https://kh.wiki.gallery/images/thumb/5/5b/Dewey_KHIII.png/67px-Dewey_KHIII.png)
![Louie [KH III]](https://kh.wiki.gallery/images/thumb/9/9a/Louie_KHIII.png/61px-Louie_KHIII.png)
![Merlin [KH III]](https://kh.wiki.gallery/images/thumb/8/8a/Merlin_KHIII.png/71px-Merlin_KHIII.png)
![Xion [KH Days][KH III]](https://kh.wiki.gallery/images/thumb/4/4f/Xion_KHIII.png/63px-Xion_KHIII.png)
![Axel [KH Days][KH II]](https://kh.wiki.gallery/images/thumb/2/28/Axel_KHD.png/67px-Axel_KHD.png)
![Lea [KH III]](https://kh.wiki.gallery/images/thumb/e/e5/Lea_KHIII.png/77px-Lea_KHIII.png)
![Saïx [KH II][KH III]](https://kh.wiki.gallery/images/thumb/b/b1/Sa%C3%AFx_KHIII.png/83px-Sa%C3%AFx_KHIII.png)
![Mickey Mouse [KH II]](https://kh.wiki.gallery/images/thumb/b/b7/Mickey_Mouse_KHII.png/71px-Mickey_Mouse_KHII.png)
![Ansem, Seeker of Darkness [KH III]](https://kh.wiki.gallery/images/thumb/7/75/Ansem%2C_Seeker_of_Darkness_KHIII.png/53px-Ansem%2C_Seeker_of_Darkness_KHIII.png)
![Xemnas [KH Days] [KH II] [KH III]](https://kh.wiki.gallery/images/thumb/0/01/Xemnas_KHIII.png/69px-Xemnas_KHIII.png)
![Xigbar [KH III]](https://kh.wiki.gallery/images/thumb/4/49/Xigbar_KHIII.png/56px-Xigbar_KHIII.png)
![Maleficent [KH III]](https://kh.wiki.gallery/images/thumb/2/27/Maleficent_KHIII.png/103px-Maleficent_KHIII.png)
![Pete [KH III]](https://kh.wiki.gallery/images/thumb/4/4a/Pete_KHIII.png/118px-Pete_KHIII.png)
![Elder man at Tram Common [KH II]](https://kh.wiki.gallery/images/thumb/6/6d/Twilight_Town_NPC_10_KHII.png/52px-Twilight_Town_NPC_10_KHII.png)
![Man at Tram Common [KH II]](https://kh.wiki.gallery/images/thumb/a/a6/Twilight_Town_NPC_3_KHII.png/52px-Twilight_Town_NPC_3_KHII.png)
![Elder woman at Sunset Station [KH II]](https://kh.wiki.gallery/images/thumb/3/37/Twilight_Town_NPC_4_KHII.png/68px-Twilight_Town_NPC_4_KHII.png)
![Man at Sunset Terrace [KH II]](https://kh.wiki.gallery/images/thumb/7/7a/Twilight_Town_NPC_9_KHII.png/66px-Twilight_Town_NPC_9_KHII.png)
![Shadow [KH CoM][KH Days][KH II][KH III]](https://kh.wiki.gallery/images/thumb/e/ea/Shadow_KHIII.png/120px-Shadow_KHIII.png)
![Gigas Shadow [KH Days]](https://kh.wiki.gallery/images/thumb/4/42/Gigas_Shadow_KHFM.png/101px-Gigas_Shadow_KHFM.png)
![Mega-Shadow [KH Days]](https://kh.wiki.gallery/images/thumb/2/2a/Mega-Shadow_KHD.png/114px-Mega-Shadow_KHD.png)
![Neoshadow [KH Days][KH III]](https://kh.wiki.gallery/images/thumb/4/4d/Neoshadow_KHIII.png/108px-Neoshadow_KHIII.png)
![Soldier [KH CoM][KH II]](https://kh.wiki.gallery/images/thumb/e/ee/Soldier_KHII.png/94px-Soldier_KHII.png)
![Deserter [KH Days]](https://kh.wiki.gallery/images/thumb/4/4f/Deserter_KHD.png/98px-Deserter_KHD.png)
![Air Soldier [KH CoM]](https://kh.wiki.gallery/images/thumb/d/d2/Air_Soldier_KH.png/120px-Air_Soldier_KH.png)
![Large Body [KH III]](https://kh.wiki.gallery/images/thumb/c/c2/Large_Body_KHIII.png/120px-Large_Body_KHIII.png)
![Yellow Opera [KH Days]](https://kh.wiki.gallery/images/thumb/0/04/Yellow_Opera_KH.png/67px-Yellow_Opera_KH.png)
![Scarlet Tango [KH Days]](https://kh.wiki.gallery/images/thumb/1/1b/Scarlet_Tango_KHD.png/54px-Scarlet_Tango_KHD.png)
![Vermilion Samba [KH III]](https://kh.wiki.gallery/images/thumb/f/f1/Vermilion_Samba_KHIII.png/111px-Vermilion_Samba_KHIII.png)
![Powerwild [KH III]](https://kh.wiki.gallery/images/thumb/5/59/Powerwild_KHIII.png/120px-Powerwild_KHIII.png)
![Barrel Spider [KH CoM]](https://kh.wiki.gallery/images/thumb/7/73/Barrel_Spider_KH.png/120px-Barrel_Spider_KH.png)
![White Mushroom [KH CoM]](https://kh.wiki.gallery/images/thumb/4/4a/White_Mushroom_KH.png/67px-White_Mushroom_KH.png)
![Black Fungus [KH CoM]](https://kh.wiki.gallery/images/thumb/5/50/Black_Fungus_KH.png/76px-Black_Fungus_KH.png)
![Tailbunker [KH Days]](https://kh.wiki.gallery/images/thumb/8/8f/Tailbunker_KHD.png/120px-Tailbunker_KHD.png)
![Avalanche [KH Days]](https://kh.wiki.gallery/images/thumb/4/46/Avalanche_KHD.png/120px-Avalanche_KHD.png)
![Dustflier [KH Days]](https://kh.wiki.gallery/images/thumb/b/be/Dustflier_KHD.png/120px-Dustflier_KHD.png)
![Invisible [KH Days]](https://kh.wiki.gallery/images/thumb/9/9a/Invisible_KHD.png/85px-Invisible_KHD.png)
![Orcus [KH Days]](https://kh.wiki.gallery/images/thumb/a/ab/Orcus_KHD.png/119px-Orcus_KHD.png)
![Dire Plant [KH Days]](https://kh.wiki.gallery/images/thumb/b/bb/Dire_Plant_KHD.png/78px-Dire_Plant_KHD.png)
![Poison Plant [KH Days]](https://kh.wiki.gallery/images/thumb/1/1d/Poison_Plant_KHD.png/91px-Poison_Plant_KHD.png)
![Barrier Master [KH Days]](https://kh.wiki.gallery/images/thumb/a/af/Barrier_Master_KHD.png/120px-Barrier_Master_KHD.png)
![Minute Bomb [KH Days]](https://kh.wiki.gallery/images/thumb/2/2a/Minute_Bomb_KHII.png/60px-Minute_Bomb_KHII.png)
![Storm Bomb [KH Days]](https://kh.wiki.gallery/images/thumb/1/1a/Storm_Bomb_KHD.png/52px-Storm_Bomb_KHD.png)
![Detonator [KH Days]](https://kh.wiki.gallery/images/thumb/f/f8/Detonator_KHD.png/59px-Detonator_KHD.png)
![Bulky Vendor [KH Days][KH II]](https://kh.wiki.gallery/images/thumb/4/4a/Bulky_Vendor_KHII.png/88px-Bulky_Vendor_KHII.png)
![Rare Vendor [KH Days]](https://kh.wiki.gallery/images/thumb/b/bb/Rare_Vendor_KHD.png/64px-Rare_Vendor_KHD.png)
![Watcher [KH Days]](https://kh.wiki.gallery/images/thumb/7/70/Surveillance_Robot_KHII.png/95px-Surveillance_Robot_KHII.png)
![Guardian [KH Days]](https://kh.wiki.gallery/images/thumb/e/ed/Guardian_KHD.png/91px-Guardian_KHD.png)
![Destroyer [KH Days]](https://kh.wiki.gallery/images/thumb/6/63/Destroyer_KHD.png/100px-Destroyer_KHD.png)
![Possessor [KH Days]](https://kh.wiki.gallery/images/thumb/9/95/Possessor_KHD.png/113px-Possessor_KHD.png)
![Cymbal Monkey [KH Days]](https://kh.wiki.gallery/images/thumb/3/3d/Cymbal_Monkey_KHD.png/120px-Cymbal_Monkey_KHD.png)
![Tricky Monkey [KH Days]](https://kh.wiki.gallery/images/thumb/b/b6/Tricky_Monkey_KHD.png/120px-Tricky_Monkey_KHD.png)
![Zip Slasher [KH Days]](https://kh.wiki.gallery/images/thumb/c/c4/Zip_Slasher_KHD.png/120px-Zip_Slasher_KHD.png)
![Heat Saber [KH Days]](https://kh.wiki.gallery/images/thumb/8/82/Heat_Saber_KHD.png/120px-Heat_Saber_KHD.png)
![Stalwart Blade [KH Days]](https://kh.wiki.gallery/images/thumb/a/a9/Stalwart_Blade_KHD.png/120px-Stalwart_Blade_KHD.png)
![Shadow Glob [KH Days]](https://kh.wiki.gallery/images/thumb/c/c6/Shadow_Glob_KHD.png/120px-Shadow_Glob_KHD.png)
![Munny Popcat [KH III]](https://kh.wiki.gallery/images/thumb/2/20/Munny_Popcat_KHIII.png/107px-Munny_Popcat_KHIII.png)
![Bizarre Archer [KH III]](https://kh.wiki.gallery/images/thumb/6/63/Bizarre_Archer_KHIII.png/108px-Bizarre_Archer_KHIII.png)
![Darkside [KH Days]](https://kh.wiki.gallery/images/thumb/5/58/Darkside_KHD.png/120px-Darkside_KHD.png)
![Powered Armor [KH Days]](https://kh.wiki.gallery/images/thumb/2/2c/Powered_Armor_KHD.png/114px-Powered_Armor_KHD.png)
![Veil Lizard [KH Days]](https://kh.wiki.gallery/images/thumb/4/4f/Veil_Lizard_KHD.png/120px-Veil_Lizard_KHD.png)
![Mushroom XIII No. 7 [KH II FM]](https://kh.wiki.gallery/images/thumb/c/cd/Mushroom_XIII_No._7_KHIIFM.png/74px-Mushroom_XIII_No._7_KHIIFM.png)
![Mushroom XIII No. 12 [KH II FM]](https://kh.wiki.gallery/images/thumb/d/da/Mushroom_XIII_No._12_KHIIFM.png/69px-Mushroom_XIII_No._12_KHIIFM.png)
![Demon Tide [KH III]](https://kh.wiki.gallery/images/thumb/b/b8/Demon_Tide_KH0.2.png/120px-Demon_Tide_KH0.2.png)
![Dusk [KH II][KH III]](https://kh.wiki.gallery/images/thumb/7/7c/Dusk_KHIII.png/77px-Dusk_KHIII.png)
![Creeper [KH II]](https://kh.wiki.gallery/images/thumb/d/d8/Creeper_KHII.png/102px-Creeper_KHII.png)
![Sniper [KH II][KH III]](https://kh.wiki.gallery/images/thumb/a/a6/Sniper_KHIII.png/77px-Sniper_KHIII.png)
![Dragoon [KH II]](https://kh.wiki.gallery/images/thumb/8/8c/Dragoon_KHII.png/120px-Dragoon_KHII.png)
![Berserker [KH II]](https://kh.wiki.gallery/images/thumb/a/a1/Berserker_KHII.png/120px-Berserker_KHII.png)
![Assassin [KH II]](https://kh.wiki.gallery/images/thumb/d/dc/Assassin_KHII.png/104px-Assassin_KHII.png)
![Dancer [KH II]](https://kh.wiki.gallery/images/thumb/b/bd/Dancer_KHII.png/76px-Dancer_KHII.png)
![Gambler [KH II]](https://kh.wiki.gallery/images/thumb/0/01/Gambler_KHII.png/105px-Gambler_KHII.png)
![Samurai [KH II]](https://kh.wiki.gallery/images/thumb/d/df/Samurai_KHII.png/103px-Samurai_KHII.png)
![Sorcerer [KH II]](https://kh.wiki.gallery/images/thumb/1/14/Sorcerer_KHII.png/71px-Sorcerer_KHII.png)
![Twilight Thorn [KH II]](https://kh.wiki.gallery/images/thumb/b/bb/Twilight_Thorn_KHII.png/120px-Twilight_Thorn_KHII.png)
![Riku Replica [KH CoM]](https://kh.wiki.gallery/images/thumb/c/c4/Riku_%28Dark_Mode%29_KH.png/85px-Riku_%28Dark_Mode%29_KH.png)
![Vexen [KH CoM]](https://kh.wiki.gallery/images/thumb/7/73/Vexen_KHCOM.png/62px-Vexen_KHCOM.png)
![Vexen's Absent Silhouette [KH II FM]](https://kh.wiki.gallery/images/thumb/8/8e/Vexen%27s_Absent_Silhouette_KHIIFM.png/107px-Vexen%27s_Absent_Silhouette_KHIIFM.png)
![Lexaeus's Absent Silhouette [KH II FM]](https://kh.wiki.gallery/images/thumb/c/c2/Lexaeus%27s_Absent_Silhouette_KHIIFM.png/120px-Lexaeus%27s_Absent_Silhouette_KHIIFM.png)
![Honey Bee [KH II]](https://kh.wiki.gallery/images/thumb/e/ee/Honey_Bee_KHII.png/120px-Honey_Bee_KHII.png)
![Shadow Roxas [KH II]](https://kh.wiki.gallery/images/thumb/1/1d/Shadow_Roxas_KHII.png/105px-Shadow_Roxas_KHII.png)
![??? [KH Days]](https://kh.wiki.gallery/images/thumb/e/e5/Unknown_%28Riku%29_KHD.png/66px-Unknown_%28Riku%29_KHD.png)
![Xion (Final Form) [KH Days]](https://kh.wiki.gallery/images/thumb/5/56/Xion_Final_Form_KHMOM.png/113px-Xion_Final_Form_KHMOM.png)