|
|
| (80 intermediate revisions by 52 users not shown) |
| Line 1: |
Line 1: |
| {|style="background: white; border: 3px solid cornflowerblue; -moz-border-radius: 10px; font-size:95%; width: 95%" align="center" | | {{game|KH2|FM2}} |
| |colspan="2" align="center"|<div style="padding:3px; background-color:royalblue; -moz-border-radius: 7px; color:white;"><big>'''I don't mean to be ungrateful, but... was that true, what you said? Are you the thief?'''</big></div> | | {{merge|Hades Cup}} |
| |- | | {{Coliseum |
| |width="60px"|[[Image:Alice2-ChOfMem.png]] | | |name=Hades Paradox Cup |
| |<center><font size=e>'''This article has been partially or completely "stolen" from another website.'''<br>You are welcome to help by <span class="plainlinks">[{{fullurl:{{FULLPAGENAME}}|action=edit}} editing this page]</span>. You may refer to the [[Kingdom Hearts Wiki: Manual of Style|Manual of Style]] for some guidance.</font></center> | | |katakana=裏ハデスカップ |
| |} | | |romaji=Ura Hadesu Kappu |
| The '''Hades Paradox Cup''' is one of the four cups that you enter by asking [[Hades]] directly in ''[[Kingdom Hearts II]]''. The tournament consists of 50 matches. You fight a boss on every tenth match. The final boss is Hades in Berserk Mode. Note: the level that you should be at in order to win this Cup is level 99. All [[drive form]]s and [[summon|summoning]] must be on level 7. To unlock the cup you have to complete [[Space Paranoids]] for the second time.
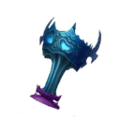
| | |image=[[File:Hades Paradox Cup Trophy KHII.png|200px]] |
| | |rounds=50 |
| | |level=99 |
| | |unlock=Level up all [[Drive Form]]s and [[Summon]]s to level 7 and complete the second visit to [[Space Paranoids]]. |
| | |rules=There are no special rules in this tournament |
| | |missions=Give it a try.<br>Win with a score of 15,000 or more. |
| | |reward=Hades Cup Trophy |
| | |round1=1 |
| | |enem1=Shadow x 3<br>Soldier x 3 |
| | |round2=2 |
| | |enem2=Driller Mole x 4<br>Hook Bats x 2 |
| | |round3=3 |
| | |enem3=Rapid Thruster x 3<br>Surveillance Robot x 2 |
| | |round4=4 |
| | |enem4=Rabid Dogs x 5<br>Creeper Plant x 2 |
| | |round5=5 |
| | |enem5=Volcanic Lord<br>Soldier x 2 |
| | |round6=6 |
| | |enem6=Cannon Gun x 3<br>Silver Rock x 2 |
| | |round7=7 |
| | |enem7=Icy Cubes x 3<br>Shadow x 4<br> Minute Bombs x ? |
| | |round8=8 |
| | |enem8=Soldier x ?<br>Silver Rock x ?<br>Armored Knights x 4<br>Large Body x 1 |
| | |round9=9 |
| | |enem9=Creepers x 4<br>Samurai x 1 |
| | |round10=10 |
| | |enem10=Yuffie <br> Tifa |
| | |round11=11 |
| | |enem11=Rapid Thruster x 5<br>Aeroplane x 3 |
| | |round12=12 |
| | |enem12=Minute Bomb x 4<br>Magnum Loader x 1<br>Air Pirate x 2 |
| | |round13=13 |
| | |enem13=Luna Bandit x 3<br>Driller Mole x 2 |
| | |round14=14 |
| | |enem14=Lance Soldier x 2<br>Armored Knights x 2<br>Tornado Step x 2 |
| | |round15=15 |
| | |enem15=Blizzard Lord |
| | |round16=16 |
| | |enem16=Soldier x 4<br>Wight Knight x 2 |
| | |round17=17 |
| | |enem17=Strafer x 4<br> Neoshadow x 4<br>Aerial Knocker x 4 |
| | |round18=18 |
| | |enem18=Luna Bandit x 2<br>Air Pirate x 2<br>Creeper Plant x 3<br>Wight Knight x 3 |
| | |round19=19 |
| | |enem19=Dusk x 2<br>Assassin x 2<br>Dragoon x 1 |
| | |round20=20 |
| | |enem20=Pete |
| | |round21=21 |
| | |enem21=Gargoyle Knight x 3<br>Armored Knight x 3 |
| | |round22=22 |
| | |enem22=Fortuneteller x 2<br>Aeroplane x 1<br>Trick Ghost x 2 |
| | |round23=23 |
| | |enem23=Soldier x 2<br>Creeper Plant x 2<br>Shaman x 2 |
| | |round24=24 |
| | |enem24=Bulky Vendor x 3 |
| | |round25=25 |
| | |enem25=Cloud<br>Tifa |
| | |round26=26 |
| | |enem26=Bolt Tower x 2<br>Hammer Frame x 2<br>Neoshadow x 1 |
| | |round27=27 |
| | |enem27=Gargoyle Warrior x 2<br> Rabid Dog x 4<br>Nightwalker x 4 |
| | |round28=28 |
| | |enem28=Bookmaster x 2<br>Emerald Blues x 4<br>Shaman x 4<br>Silver Rock x 3 |
| | |round29=29 |
| | |enem29=Sniper x 2<br>Gambler x 2 |
| | |round30=30 |
| | |enem30=Hades |
| | |round31=31 |
| | |enem31=Samurai x 2<br>Berserker x 1<br>Creeper x 2 |
| | |round32=32 |
| | |enem32=Dancer x 3<br>Water Clone x 3 |
| | |round33=33 |
| | |enem33=Samurai x 4 |
| | |round34=34 |
| | |enem34=Sorcerer x 2 |
| | |round35=35 |
| | |enem35=Rapid Thruster x ? |
| | |round36=36 |
| | |enem36=Berserker x 3 |
| | |round37=37 |
| | |enem37=Sniper x 2<br>Assassin x 3<br>Dragoon x 4 |
| | |round38=38 |
| | |enem38=Dusk x 6<br>Samurai x 3<br>Dancer x 3<br>Gambler x 4<br>Sorcerer x 1 |
| | |round39=39 |
| | |enem39=Dragoon x 4 |
| | |round40=40 |
| | |enem40=Leon <br> Cloud |
| | |round41=41 |
| | |enem41=Toy Soldier x 2<br>Graveyard x 2 |
| | |round42=42 |
| | |enem42=Living Bone x 2<br>Fortuneteller x 1 |
| | |round43=43 |
| | |enem43=Morning Star x 2<br>Large Body x 2 |
| | |round44=44 |
| | |enem44=Living Bone x 3 |
| | |round45=45 |
| | |enem45=Armored Knight x ?<br>Surveillance Robot x ? |
| | |round46=46 |
| | |enem46=Hot Rod x 2<br>Devastator x 1 |
| | |round47=47 |
| | |enem47=Bulky Vendor x 1<br>Lance Soldier x 2<br>Living Bone x 1<br>Emerald Blues x 2<br>Assault Rider x 2<br>Morning Star x 3<br>Crescendo x 5 |
| | |round48=48 |
| | |enem48=Cerberus |
| | |round49=49 |
| | |enem49=Leon<br>Cloud<br>Yuffie<br>Tifa |
| | |round50=50 |
| | |enem50=Hades |
| | |style=kh2 |
| | }} |
|
| |
|
| | The {{nihongo|'''Hades Paradox Cup'''|裏ハデスカップ|Ura Hadesu Kappu}} is one of the four cups that can be entered by talking to [[Hades]] in his chamber in ''[[Kingdom Hearts II]]'', and is the longest and hardest in the game. The tournament consists of fifty matches with the cup's rules changing every ten matches. A boss is fought on every tenth match and the final boss is Hades in Berserk mode. Upon winning the cup, the {{nihongo|'''Hades Cup Trophy'''|ハデスカップトロフィー|Hadesu Kappu Torofī}} is received. |
|
| |
|
| ==How to Complete== | | ==Rules== |
| ===ROUNDS 1-10=== | | ===Rounds 1-10=== |
| No restrictions. You are not timed, and you have access to | | *No restrictions. Sora has access to [[Drive Form|Drives]], [[Summon]]s, and his allies. |
| Drives, Summons, and your allies. | | ** Round 6 is fought in the dark. |
| | ** A good strategy is to use [[Peter Pan]]'s [[Journey's End]] to accumulate points. Note this is ineffective on the boss fights on Rounds 5 and 10. |
|
| |
|
| | ===Rounds 11-20=== |
| | *[[Titan Cup]] rules. [[Sora]] fights alone, and cannot use Drives, but Summons are available. There is also the Damage Points restriction with Sora starting out at 500 points. |
| | ** As with the first 10 rounds, a good strategy is to use [[Peter Pan]]'s [[Journey's End]] to accumulate points. Note this is ineffective on the boss fights on Rounds 15 and 20. |
|
| |
|
| '''Round 1''' - Three Shadows and three Soldiers. (This couldn't be easier. Get
| | ===Rounds 21-30=== |
| your score orbs and destroy these Heartless in any way you choose; you shouldn't
| | *[[Pain and Panic Cup]] rules. The [[Drive Gauge]] is locked, but Summons and Allies are available and [[Limit]]s consume less [[MP]] than usual. |
| even get hit, or at least not very much.)
| | ** Liberal use of [[Trinity Limit]] is highly recommended for clearing this section. |
| | ** Round 24 is a group of 3 [[Bulky Vendor]]s. Because prizes are not given during the tournament, there is no need to wait for their health to deplete. Use this time to breathe before the battle with [[Cloud]] & [[Tifa]] next round. |
|
| |
|
| '''Round 2''' - Four Driller Moles and two Hook Bats. (Take out the Bats and be
| | ===Rounds 31-40=== |
| mindful that the Driller Moles don't hit you with their drilling and emerging
| | *[[Cerberus Cup]] rules. Forms are available, and Drive Gauges fill much faster than normal. There is also a ten-minute timer. |
| move. Other than that, this is as easy as they come.)
| | ** Use of [[Final Form]] is recommended to beat the timer. |
| | ** Round 35 is a cloud of [[Rapid Thruster]]s, against which you must survive for one minute. It is recommended to use Magnet and Thunder to clear as many as possible to increase your score. |
| | ** Round 38 is several waves of Nobody enemies. Magnet and Thunder can be used to clear each wave, but beware that the [[Sorcerer]] is immune to elemental magic. |
|
| |
|
| '''Round 3''' - Three Rapid Thrusters and two Surveillance Robots. (For a laugh, try | | ===Rounds 41-50=== |
| for the Snag/Sparkle Ray Reaction Command from the Robots. This is another | | *No Summons, no Drives (with the exception of Limit Form in ''Kingdom Hearts II Final Mix''), and no allies (except in the final round, where you have [[Hercules]] as the only ally); only the Keyblade, magic, and [[Trinity Limit]] are available. |
| round you should be able to do without taking damage.) | | ** Round 44 is a group of [[Living Bone]]s enemies. Be prepared to [[Reflect]] immediately as the round opens to survive their attacks. |
| | ** Round 45 is a repeat of the [[Battle of 1000 Heartless]], and Sora must survive for one minute. Snag [[Surveillance Robot]]s and use Sparkle Ray liberally to clear the field. |
| | ** Round 47 is the final round in which you can increase your score. |
| | *** The round opens with a single Bulky Vendor; once it is defeated, several waves of additional enemies will spawn. A Magnet and Thunder combo can be used to clear the room rapidly for a score bonus. |
|
| |
|
| '''Round 4''' - Five Rabid Dogs and two Creeper Plants. (Creeper Plants are a
| | <!--For any of these that have notable tips, merge into previous section |
| wonderful thing to see in any round. The reason is if you clear out the other
| | ==Rounds== |
| enemies, you can stand on the other side of the arena and not receive any damage.
| | {|border="1" cellspacing="0" cellpadding="5" align="center" |
| Their projectile range is very short and only in front of them.
| | !style="background:#FFFF00;"|Round |
| Take out the Dogs with some quick Keyblade attacks. Go for the Creepers' Reaction
| | !style="background:#FFFF00;"|Opponents |
| Command if you see it because it explodes a good portion of the stage around
| | !style="background:#FFFF00;"|Hints |
| you.)
| | |-style="background:#FFFACD;" |
| | |1 |
| | |x3 [[Shadow]]s, x3 [[Soldier]]s |
| | |Get your score orbs and destroy these Heartless in any way you choose. |
| | |-style="background:#FFE4B5;" |
| | |2 |
| | |x4 [[Driller Mole]]s, x2 [[Hook Bat]]s |
| | |Take out the Bats and be mindful that the Driller Moles don't hit you with their drilling and emerging move. |
| | |-style="background:#FFFACD;" |
| | |3 |
| | |x3 [[Rapid Thruster]]s, x2 [[Surveillance Robot]]s |
| | | |
| | |-style="background:#FFE4B5;" |
| | |4 |
| | |x5 [[Rabid Dog]]s x2 [[Creeper Plant]]s |
| | |Take out the Dogs with some quick Keyblade attacks. Go for the Creeper Plants' Reaction Command because it explodes around you. |
| | |-style="background:#FFFACD;" |
| | |5 |
| | |[[Volcanic Lord]], x2 [[Soldier]]s |
| | | |
| | |-style="background:#FFE4B5;" |
| | |6 |
| | |x3 [[Cannon Gun]]s, x2 [[Silver Rock]]s |
| | |This round is fought in the dark. |
| | |-style="background:#FFFACD;" |
| | |7 |
| | |x3 [[Icy Cube]]s, x4 [[Shadow]]s, x? [[Minute Bomb]]s |
| | |Eight Minute Bombs appear, then more continue to spawn. |
| | |-style="background:#FFE4B5;" |
| | |8 |
| | |x? [[Soldier]]s, x? [[Silver Rock]]s, x4 [[Armored Knight]]s, x1 [[Large Body]] |
| | |Soldiers and Silver Rocks respawn throughout fight. |
| | |-style="background:#FFFACD;" |
| | |9 |
| | |x4 [[Creeper]]s, x1 [[Samurai]] |
| | |Use [[Reaction Command|Duel Stance]] to get rid of more than one enemy. |
| | |-style="background:#FFE4B5;" |
| | |10 |
| | |{{c|Yuffie|Enemy}} and {{c|Tifa|Enemy}} |
| | |Yuffie can interrupt combos and attack Tifa from behind. |
| | |-style="background:#FFFACD;" |
| | | |
| | | |
| | | |
| | |-style="background:#FFE4B5;" |
| | |11 |
| | |x5 [[Rapid Thruster]]s, x3 [[Aeroplane]]s |
| | |Use [[Magnet]] magic to gather enemies together. |
| | |-style="background:#FFFACD;" |
| | |12 |
| | |x4 [[Minute Bomb]]s, x1 [[Magnum Loader]], x2 [[Air Pirate]]s |
| | |Use [[Magnet]] magic to gather enemies together. |
| | |-style="background:#FFE4B5;" |
| | |13 |
| | |x3 [[Luna Bandit]]s, x2 [[Driller Mole]]s |
| | |Fight the Luna Bandits one at a time. |
| | |-style="background:#FFFACD;" |
| | |14 |
| | |x2 [[Lance Soldier]]s, x2 [[Armored Knight]]s, x2 [[Tornado Step]]s |
| | |Use the [[Reaction Command]]s Rising Sun and Lance Tug. |
| | |-style="background:#FFE4B5;" |
| | |15 |
| | |[[Blizzard Lord]] |
| | |Use Fire magic against it. |
| | |-style="background:#FFFACD;" |
| | |16 |
| | |x4 [[Soldier]]s, x2 [[Wight Knight]]s |
| | |Use aerial attacks against the Wight Knights. |
| | |-style="background:#FFE4B5;" |
| | |17 |
| | |x4 [[Strafer]]s, x4 [[Neoshadow]]s, x4 [[Aerial Knocker]]s |
| | |Watch out for Aerial Knocker's punch combos. |
| | |-style="background:#FFFACD;" |
| | |18 |
| | |x2 [[Luna Bandit]]s, x2 [[Air Pirate]]s, x3 [[Creeper Plant]]s, x3 [[Wight Knight]]s |
| | |Use [[Thunder]] and [[Magnet]] magic against the many opponents. |
| | |-style="background:#FFE4B5;" |
| | |19 |
| | |x2 [[Dusk]]s, x2 [[Assassin]]s, x1 [[Dragoon]] |
| | |Watch out for the Assassins. |
| | |-style="background:#FFFACD;" |
| | |20 |
| | |{{c|Pete|Enemy}} |
| | |Use [[Trinity Limit]] and watch out for his bombs. |
| | |-style="background:#FFE4B5;" |
| | | |
| | | |
| | | |
| | |-style="background:#FFFACD;" |
| | |21 |
| | |x3 [[Gargoyle Knight]]s, x3 [[Armored Knight]]s |
| | |Use Rising Sun or the Whirli-Goof Limit. |
| | |-style="background:#FFE4B5;" |
| | |22 |
| | |x2 [[Fortuneteller]]s, x1 [[Aeroplane]], x2 {{c|Trick Ghost|KHII}}s |
| | |Watch out for the Trick Ghost's energy blasts. |
| | |-style="background:#FFFACD;" |
| | |23 |
| | |x2 [[Soldier]]s, x2 [[Creeper Plant]]s, x2 [[Shaman]]s |
| | |Watch out for Shamans and use Whirli-Goof. |
| | |-style="background:#FFE4B5;" |
| | |24 |
| | |x3 [[Bulky Vendor]]s |
| | |Don't wait for their HP to lower, no prizes are given in the Tournament. |
| | |-style="background:#FFFACD;" |
| | |25 |
| | |{{c|Cloud|Enemy}} and {{c|Tifa|Enemy}} |
| | |Use Goofy's Limits and be cautious. |
| | |-style="background:#FFE4B5;" |
| | |26 |
| | |x2 [[Bolt Tower]]s, x2 [[Hammer Frame]]s, x1 [[Neoshadow]] |
| | |Use [[Magnet]] magic and the [[Reaction Command|Bolt Reversal]] Reaction Command to clear this round. |
| | |-style="background:#FFFACD;" |
| | |27 |
| | |x2 [[Gargoyle Warrior]]s, x4 [[Rabid Dog]]s, x4 [[Nightwalker]]s |
| | |Use Magnet magic and aerial attacks. |
| | |-style="background:#FFE4B5;" |
| | |28 |
| | |x2 [[Bookmaster]]s, x4 [[Emerald Blues]], x4 [[Shaman]]s, x3 [[Silver Rock]]s |
| | |Use the Shift Shot [[Reaction Command]] to get rid of enemies. |
| | |-style="background:#FFFACD;" |
| | |29 |
| | |x2 [[Sniper]]s, x2 [[Gambler]]s |
| | |Use Warp Snipe to defeat enemies quickly. |
| | |-style="background:#FFE4B5;" |
| | |30 |
| | |{{c|Hades|Enemy}} |
| | |This round is fought in the dark. |
| | |-style="background:#FFFACD;" |
| | | |
| | | |
| | | |
| | |-style="background:#FFE4B5;" |
| | |31 |
| | |x2 [[Samurai]], x1 [[Berserker]], x2 [[Creeper]]s |
| | |Get rid of the Berserker first. |
| | |-style="background:#FFFACD;" |
| | |32 |
| | |x3 [[Dancer]]s, x3 [[Demyx (Enemy)|Water Clones]] |
| | |Use Wild Dance to injure Dancers. |
| | |-style="background:#FFE4B5;" |
| | |33 |
| | |x4 [[Samurai]] |
| | |Use Magnet magic or [[Final Form]]. |
| | |-style="background:#FFFACD;" |
| | |34 |
| | |x2 [[Sorcerer]]s |
| | |Watch out for their magic attacks and shields. |
| | |-style="background:#FFE4B5;" |
| | |35 |
| | |x? [[Rapid Thruster]]s |
| | |This round is timed. |
| | |-style="background:#FFFACD;" |
| | |36 |
| | |x3 [[Berserker]]s |
| | |Use the [[Reaction Command]] Berserk to finish enemies. |
| | |-style="background:#FFE4B5;" |
| | |37 |
| | |x2 [[Sniper]]s, x3 [[Assassin]]s, x4 [[Dragoon]]s |
| | |Use Learn/Jump and Warp Snipe Reaction Commands. |
| | |-style="background:#FFFACD;" |
| | |38 |
| | |x6 [[Dusk]]s, x3 [[Samurai]], x4 [[Dancer]]s, x4 [[Gambler]]s, x1 [[Sorcerer]] |
| | |Use [[Thunder]] and [[Magnet]] magic against the many opponents. |
| | |-style="background:#FFE4B5;" |
| | |39 |
| | |x4 [[Dragoon]]s |
| | |Watch out for the Assassins. |
| | |-style="background:#FFFACD;" |
| | |40 |
| | |{{c|Leon|Enemy}} and {{c|Cloud|Enemy}} |
| | |Use [[Final Form]] and [[Master Form]] to deal massive amounts of damage. |
| | |-style="background:#FFE4B5;" |
| | | |
| | | |
| | | |
| | |-style="background:#FFFACD;" |
| | |41 |
| | |x2 [[Toy Soldier]]s, x2 [[Graveyard]]s |
| | |Use [[Magnet]] magic and aerial combos, then flee if necessary. |
| | |-style="background:#FFE4B5;" |
| | |42 |
| | |x2 [[Living Bone]]s, x1 [[Fortuneteller]] |
| | |Use Magnet to inflict damage. |
| | |-style="background:#FFFACD;" |
| | |43 |
| | |x2 [[Morning Star (Heartless)|Morning Stars]], x2 [[Large Body]]s |
| | |Use the [[Reaction Command]]s for help. |
| | |-style="background:#FFE4B5;" |
| | |44 |
| | |x3 [[Living Bone]]s |
| | |Use [[Magnet]] magic on these three. |
| | |-style="background:#FFFACD;" |
| | |45 |
| | |x? [[Armored Knight]]s, x? [[Surveillance Robot]]s |
| | |[[Battle of the 1000 Heartless]] repeat. Survive time limit. |
| | |-style="background:#FFE4B5;" |
| | |46 |
| | |x2 [[Hot Rod]]s, x1 [[Devastator]] |
| | |Use Magnet magic and take your time. |
| | |-style="background:#FFFACD;" |
| | |47 |
| | |×1 [[Bulky Vendor]], ×2 [[Lance Soldier]]s, ×1 [[Living Bone]], ×2 [[Emerald Blues]], ×2 [[Assault Rider]]s, x3 [[Morning Star (Heartless)|Morning Stars]], x5 [[Crescendo]]s |
| | |Use every Reaction Command at your disposal, especially Heal Stomp. |
| | |-style="background:#FFE4B5;" |
| | |48 |
| | |[[Cerberus]] |
| | |Attack the center head and jump to avoid shockwaves. |
| | |-style="background:#FFFACD;" |
| | |49 |
| | |[[Game:Leon|Leon]], [[Game:Cloud|Cloud]], [[Game:Yuffie|Yuffie]] and [[Game:Tifa|Tifa]] |
| | |Either you can attack at everyone or choose one to finish off. Another strategy is to target whichever enemy is the most annoying and repeatedly use Trinity Limit on them. It will hit a good amount of them since they walk into it. Remember to break twice. |
| | |-style="background:#FFE4B5;" |
| | |50 |
| | |[[Game:Hades|Hades]] |
| | |You have [[Hercules]] as help because Hades can change into his berserk mode. |
| | |} |
| | --> |
|
| |
|
| '''Round 5''' - Volcanic Lord and two Soldiers. (The Soldiers are immaterial. They
| | ==Enemies== |
| practically don't exist. Donald and Goofy will probably make sure of that
| | ===Heartless=== |
| for you at some point anyway. Just beat him to death with aerial combos. He
| | {|class="wikitable mw-collapsible mw-collapsed" |
| shouldn't cause you too much trouble until he starts his belly bounce tactic
| | ! |
| that leaves the melted spots in its wake. The Reaction Command here is the
| | |- |
| same as when you fought him along with Blizzard Lord in Agrabah, but its only
| | | |
| good use here is to cut short his bouncing tantrum. As I write this, I have
| | <gallery> |
| just finished him off with Final Form, but you don't have to; it will take less
| | File:Shadow KHII.png|[[Shadow]] |
| time, but it's not exactly difficult to beat him up normally and heal if you
| | File:Soldier KHII.png|[[Soldier]] |
| need to. Or Activate Master form instead of Final, it will help in the enemies to come)
| | File:Driller Mole KHII.png|[[Driller Mole]] |
| | File:Hook Bat KHII.png|[[Hook Bat]] |
| | File:Surveillance Robot KHII.png|[[Surveillance Robot]] |
| | File:Rabid Dog KHII.png|[[Rabid Dog]] |
| | File:Creeper Plant KHII.png|[[Creeper Plant]] |
| | File:Volcanic Lord KHII.png|[[Volcanic Lord]] |
| | File:Cannon Gun KHII.png|[[Cannon Gun]] |
| | File:Silver Rock KHII.png|[[Silver Rock]] |
| | File:Armored Knight KHII.png|[[Armored Knight]] |
| | File:Large Body KHII.png|[[Large Body]] |
| | File:Rapid Thruster KHII.png|[[Rapid Thruster]] |
| | File:Aeroplane KHII.png|[[Aeroplane]] |
| | File:Magnum Loader (Red) KHII.png|[[Magnum Loader]] |
| | File:Air Pirate KHII.png|[[Air Pirate]] |
| | File:Luna Bandit KHII.png|[[Luna Bandit]] |
| | File:Lance Soldier KHII.png|[[Lance Soldier]] |
| | File:Tornado Step KHII.png|[[Tornado Step]] |
| | File:Blizzard Lord KHII.png|[[Blizzard Lord]] |
| | File:Wight Knight KHII.png|[[Wight Knight]] |
| | File:Strafer KHII.png|[[Strafer]] |
| | File:Neoshadow KHII.png|[[Neoshadow]] |
| | File:Aerial Knocker KHII.png|[[Aerial Knocker]] |
| | File:Gargoyle Knight KHII.png|[[Gargoyle Knight]] |
| | File:Fortuneteller KHII.png|[[Fortuneteller]] |
| | File:Trick Ghost KHII.png|{{c|Trick Ghost|KHII}} |
| | File:Shaman KHII.png|[[Shaman]] |
| | File:Bulky Vendor KHII.png|[[Bulky Vendor]] |
| | File:Bolt Tower KHII.png|[[Bolt Tower]] |
| | File:Hammer Frame KHII.png|[[Hammer Frame]] |
| | File:Gargoyle Warrior KHII.png|[[Gargoyle Warrior]] |
| | File:Nightwalker KHII.png|[[Nightwalker]] |
| | File:Bookmaster KHII.png|[[Bookmaster]] |
| | File:Emerald Blues KHII.png|[[Emerald Blues]] |
| | File:Toy Soldier KHII.png|[[Toy Soldier]] |
| | File:Graveyard KHII.png|[[Graveyard]] |
| | File:Living Bone KHII.png|[[Living Bone]] |
| | File:Morning Star KHII.png|[[Morning Star]] |
| | File:Hot Rod KHII.png|[[Hot Rod]] |
| | File:Devastator KHII.png|[[Devastator]] |
| | File:Assault Rider KHII.png|[[Assault Rider]] |
| | File:Crescendo KHII.png|[[Crescendo]] |
| | </gallery> |
| | |} |
|
| |
|
| '''Round 6''' - Three Cannon Guns and two Silver Rocks. (Dark Round.) (The Guns are
| | ===Nobody=== |
| barely a threat, and you can dispose of them immediately with a
| | {|class="wikitable mw-collapsible mw-collapsed" |
| couple of good combos. The Silver Rocks can be annoying, but there are only two
| | ! |
| of them here, and they have a Reaction Command to counter their "ball of light"
| | |- |
| trick. I usually kill them before they can make use of it.)
| | | |
| | <gallery> |
| | File:Creeper KHII.png|[[Creeper]] |
| | File:Samurai KHII.png|[[Samurai]] |
| | File:Dusk KHII.png|[[Dusk]] |
| | File:Assassin KHII.png|[[Assassin]] |
| | File:Dragoon KHII.png|[[Dragoon]] |
| | File:Sniper KHII.png|[[Sniper]] |
| | File:Gambler KHII.png|[[Gambler]] |
| | File:Berserker KHII.png|[[Berserker]] |
| | File:Dancer KHII.png|[[Dancer]] |
| | File:Sorcerer KHII.png|[[Sorcerer]] |
| | </gallery> |
| | |} |
|
| |
|
| '''Round 7''' - Three Icy Cubes and four Shadows, followed by eight Minute Bombs.
| | ===Other=== |
| (The Cubes die as easily as in Agrabah. The Bombs actually continue to spawn to a
| | {|class="wikitable mw-collapsible mw-collapsed" |
| certain point, so it is more than eight. However, The first wave is just eight. I
| | ! |
| couldn't tell exactly how many there were in total, but just deal with them
| | |- |
| with a shot of Magnega so you don't have several of them reaching the end of
| | | |
| their countdowns and exploding quite so much.)
| | <gallery> |
| | | File:Tifa KHII.png|'''[[Game:Tifa|Tifa]]''' |
| '''Round 8''' - Three Soldiers and two Silver Rocks, followed by more of the same
| | File:Yuffie KHII.png|'''[[Game:Yuffie|Yuffie]]''' |
| spawning in, followed by four Armored Knights, followed by one Large Body.
| | File:Pete KHII.png|'''[[Game:Pete|Pete]]''' |
| (Another one where it's hard to tell how many enemies spawn after the initial
| | File:Cloud KHII.png|'''[[Game:Cloud|Cloud]] |
| ones. Good thing they're easy enemies this time. They don't spawn very many.
| | File:Hades KHII.png|'''[[Game:Hades|Hades]]''' |
| I just can't be bothered to count them. Deal with them like you did in
| | File:Leon KHII.png|'''[[Game:Leon|Leon]]''' |
| other rounds. The Knights are easy in such small numbers. You can use the
| | File:Cerberus KHII.png|'''[[Cerberus]]''' |
| Rising Sun Reaction Command if you get the chance. The single Large Body can
| | </gallery> |
| be dangerous if you let it, but a good, solid aerial combo to its back can lay
| | |} |
| it out stunned. It tends to give you the Full Swing Reaction Command to do
| | ==Gallery== |
| further damage. Fight wisely and get good at this one, because there will be
| | <gallery> |
| more than one Large Body to deal with at once later on.)
| | File:Hades Cup Trophy KHII.png|The item icon for the Hades Cup trophy. |
| | | </gallery> |
| '''Round 9''' - Four Creepers and one Samurai. (Nobodies already? This is just a
| | {{Minigames}} |
| taste of the horrors to come in the later rounds. The Creepers can be taken
| | [[fr:Coupe Hadès Paradoxe]] |
| out easily with some Keyblade attacks, but watch that Samurai. I highly
| |
| dislike these Nobodies because they hit you three times VERY quickly, and can
| |
| interrupt your combo. Stop this by seeing how a samurai will attack, then throw up a block or reglega. This will put the Samurai into duel stance form, which will help you take him and the other guys out in one shot. Try opening with an aerial combo,
| |
| preferably after Goofy and Donald bear the brunt of the Samurai's attack.)
| |
| | |
| '''Round 10''' - Tifa and Yuffie. (You have the luxury of Final Form here, so use
| |
| it! Yuffie seems to be more annoying here than she is in Round 49, because
| |
| she'll interrupt you when you're trying to fight Tifa. If you activated Master Form before youll probably drop out of it soon after the battle starts. But with 3 drive Left, use up the last of your magic in Knocksmash or Whirli Goof, then go into wisdom form and take out Tifa with some well placed Blizzagas and Reflegas. Try to bait Tifa
| |
| into attacking you, and do whatever you can to get behind her, but do not stay
| |
| out in front. Final Heaven HURTS, and she can use it as a combo finisher
| |
| whenever she wants. Wtch otu for Yuffie though, shes good at interupting combos. Of course, if you enter this round with
| |
| enough Drive Gauge to go into Final Form, then go nuts on the both of them. throwing otu random Reflegas helps.)
| |
| | |
| ===ROUNDS 11-20=== | |
| Titan Cup rules. Sora fights alone, and cannot use Drives (with the exception of [[Limit Form]] in ''Kingdom Hearts II: Final Mix+''), but
| |
| Summons and Trinity Limit are available. This also means you're under the
| |
| Damage Points restriction too, and 500 points just isn't as much as it used to
| |
| be. BE CAREFUL HERE! You can't afford a careless step, because even the less
| |
| dangerous enemies can make you suffer with this rule in play. Use Peter Pans limit to gain huge points.
| |
| CHEAP METHOD: Spam Final Geneie's Limit. Takes care of everything.
| |
| | |
| '''Round 11''' - Five Rapid Thrusters and three Aeroplanes. (The Rapid Thrusters are
| |
| negligible, except when they are a distraction to get you in the air so the
| |
| Aeroplanes can knock you about, something they like to do repeatedly when there
| |
| are several of them. Lift them up where they belong with a Magnega sphere, and
| |
| try to take them out before the relatively harmless Thrusters.)
| |
| | |
| '''Round 12''' - Four Minute Bombs, one Magnum Loader, and two Air Pirates. (Magnega, or even the '''Magnet''' ability, makes this round a right walk in the park. Get up there and swing like you're
| |
| really bad at golf.)
| |
| | |
| '''Round 13''' - Three Luna Bandits and two Armored Moles. (Be cautious here. Luna
| |
| Bandits are agile with their attacks, which include sword swipes and a leaping,
| |
| downward swing, and in a group even this small, can be a pain. Don't get
| |
| caught in the centre of the group, or you're going to be hearing the warning
| |
| siren in short order, and you'll be severely down on Damage Points. Engage
| |
| them one at a time if possible, and glide off to heal when needed. This isn't
| |
| a difficult round if you play it safe, which you're going to need to do more
| |
| and more from this point on.)
| |
| | |
| '''Round 14''' - Two Lance Soldiers, two Tornado Steps, and two Armored Knights. | |
| (Magnega is good again, but try for the Rising Sun Reaction Command from the
| |
| Armored Knights. I've taken out all six enemies with it. It's an easy battle,
| |
| at any rate.)
| |
| | |
| '''Round 15''' - Blizzard Lord. (You'd think they would have just put him with his | |
| brother, aye? He's even more of a pushover than Volcanic Lord, because he
| |
| doesn't do the belly bounce move. He'll blow icy mist all over the place, but
| |
| generally, you can lay massive, repeated combos on him. Use Trinity Limit, then summon Genie in VALOR form and lay waste to him.)
| |
| | |
| '''Round 16''' - Four Soldiers and two Wight Knights. (Again, the Soldiers are
| |
| barely a threat, although possibly a tad bit more than before. It's the Wight
| |
| Knights you need to be wary of, because they can hit multiple times and make
| |
| you lose a lot of Damage Points. Falling on them attacking form the air helps. Put a Magnega sphere out and try to combo the
| |
| Knights as soon as they fall out, or just snare them right back up in the
| |
| Magnega magic again.)
| |
| | |
| '''Round 17''' - Four Strafers and four Neoshadows followed by four Aerial Knockers.
| |
| (As long as you don't get caught off guard by the Strafers' slow-moving magic
| |
| ring projectiles, this one starts off fine, and gets nasty if you stay in the
| |
| air when the Knockers fly around. They will punch you repeatedly with their
| |
| magically enlarging fists, and that's no good for Damage Points. Again, Genie Rules.)
| |
| | |
| '''Round 18''' - Two Luna Bandits and two Air Pirates, followed by three Creeper
| |
| Plants, followed by three Wight Knights after one Plant is dead. (They will continuously
| |
| slash you, and peel off dozens of Damage Points here. Destroy them first, at all costs.
| |
| Magnega, Thundaga, Trinity Limit, whatever you can do to them, just get them
| |
| out of your hair. The Air Pirates have never been a problem for me, but you
| |
| need to be careful with the Creeper Plants. In a later round, when there are
| |
| only two of them, you can safely stand anywhere out of range of their seed
| |
| attacks, but there is only one side of the arena they can't reach in this
| |
| round, so don't assume you're safe until you find it. When you do, it's still
| |
| a good spot to regenerate MP, but only until you kill off one of the plants.
| |
| Then you have the Wight Squad to deal with, and they don't stand still.
| |
| Carefully work through this set, because you've got projectiles mixed with
| |
| physical attacks, and it can be a handful.)
| |
| | |
| '''Round 19''' - Two Dusks, two Assassins, and one Dragoon. (TIME FOR MASSIVE POINTS! Use Peter Pans limit like no tommorow on the Assassins, WHILE they are below ground. They wont take damage but theyll sprout points like a fountain. You can easily get 2000+ points here. The dusks are nothing to worry about , once your done spamming peter the Dragoon should eb long dead, and just take out the assassins the old fashioned way, attacking when they attack to bring themout of the ground.)
| |
| | |
| '''Round 20''' - Pete. (He's about as easy to fight as bosses come, if you play it
| |
| safe. Use '''Trinity Limit''' (or if you're in Limit Form, use '''Sonic Blade''') like it's not going to be there tomorrow. You should be
| |
| able to get three separate combos out of it, and knock at least a full HP bar off of
| |
| Pete. Follow this up with a ground combo, Guard Break, and Explosion finishers, and | |
| then get away from him because he'll retaliate with a punch or his trademark rolling
| |
| bombs. He can also rush you, which he telegraphs by yelling, "get outta my way!" Several
| |
| times during the battle, usually when you're off regenerating MP, he surrounds
| |
| himself in a magic sphere and yells something like, "look out, kids, Pete's
| |
| invincible!" He isn't joking; attacking during the next several seconds will
| |
| only get you beaten into a cocked hat. He also regenerates HP during this
| |
| phase, though thankfully it isn't very much. Certainly, it isn't enough to
| |
| save him from further Trinity attacks. You can attack him without Trinity,
| |
| it's just much, much faster to use it, and it's a very safe method of fighting
| |
| him. I've gotten through this without a scratch doing that.
| |
| CHEAP METHOD: Start off with Trinity Limit, switch to Valor genie and continue using its limit the moment he hits the ground. The only tiem hell be able to attack is when/ if you have to re summon genie.)
| |
| | |
| ===ROUNDS 21-30===
| |
| Pain and Panic Cup rules. Your Drive Gauge is locked, but
| |
| Summons and Allies are available and Limits consume less MP than usual. Goofy's Limits help the most in all of these rounds, especially Whirli- Goof.
| |
| | |
| '''Round 21''' - Three Gargoyle Knights (Sword) and three Armored Knights. (One Whirli- Goof and its over.)
| |
| | |
| '''Round 22''' - Two Fortune Tellers, two Trick Ghosts, and one Aeroplane. (Again,
| |
| the Fortune Tellers can pester you with long-distance ice shots. This is
| |
| compounded by the Ghosts and their plasma balls. The Ghosts, by the way, are
| |
| immune to Magnega, so keep that in mind. You might want to ensnare the other
| |
| three enemies and take the Ghosts out before proceeding, because the aerial
| |
| bombardment can get tricky here. The single Aeroplane is less of a threat than
| |
| when those enemies are in groups, but don't stay out in front of it long enough
| |
| for it to strafe you with gunfire. Get up close and personal with aerial
| |
| combos to cut the bombing runs short.)
| |
| | |
| '''Round 23''' - Two Soldiers, two Creeper Plants, and two Shamans. The Shamans are killer. they can float aroudn invincible and damage you heavily. Activating Whirli- Goof before they can spread out helps alot. Keep an eye on Donalds magic to know whether to heal yourself or let Donald take care of it
| |
| | |
| '''Round 24''' - Three Bulky Vendors. (Use Curaga the moment the battle starts.This is the equivalent of the round in the
| |
| original Hades Cup when you had to face the Blue Fungus enemies. Which is to
| |
| say, enjoy this breath of fresh air and regenerate any HP or MP you want.
| |
| Don't even bother with waiting for their HP to lower, because you receive no
| |
| prizes in the tournament. If you are so inclined, you can simply wait whilst
| |
| the Vendors' HP drains out of them at an astonishing rate of its own accord.)
| |
| | |
| '''Round 25''' - Cloud and Tifa. (Its ridiculous how strong Goofy's Limits are in this round. Switch from Whirli- Goof to Knocksmash as needed, but both will hurt BOTH cloud and Tifa.This feels like a hint of things to come in Round
| |
| 49. Tifa is tenacious, please do not underestimate her because she will badger
| |
| you to no end. Whereas Cloud likes to stab around everywhere, Tifa will track
| |
| you and come to say hello at the worst times. Her finisher, a huge wave of
| |
| blue explosions in front of her, can come after she says, "don't say I didn't
| |
| warn you!" or if you hear her shout, "aaaaah!" I don't think it's Final
| |
| Heaven, because she identifies that move by saying its name, but it hurts
| |
| nonetheless. Bait her and dodge her punches, which is sometimes easier said
| |
| than done, especially with Cloud attacking you as well. As for Cloud, remember
| |
| that he is most vulnerable just after this three-stage sword combo, definitely
| |
| more than following his lunge attacks. I've also found how useful Reflega
| |
| can be in this battle. If you have it on your shortcut and mash the button, it
| |
| can protect you from combos from either opponent, and set you up beautifully
| |
| for a retaliating combo. Reflega will actually hurt the both of them, if you
| |
| spam it throughout one of their combos! This expends a lot of MP, but it seems
| |
| to injure them a lot more than it should while keeping you relatively safe, so
| |
| make use of it if you want to lay on some heavy damage with a followup combo
| |
| whilst they're recovering from their attack stance. Thanks to everyone who
| |
| suggested Reflega; this was a strategy I had not considered previously.
| |
| Barring this, bait and dodge, retaliating with your own combos, either ground
| |
| or air, but remembering that Guard Break and Explosion are lovely for piling on
| |
| the damage and can hit multiple targets in proximity. You will likely need to
| |
| heal during this if you get caught in a couple attacks. )
| |
| | |
| '''Round 26''' - Two Bolt Towers, two Hammer Frames, and one Neoshadow. (It is
| |
| almost surprising what a useful spell Magnega is, and the vast majority of
| |
| enemies on which it works. Even the Bolt Towers will get sucked in by it. Be
| |
| careful of staying on the ground whilst the Hammer Frames are alive, because
| |
| they love making shock waves. You should spend a good amount of this round in
| |
| the air anyway, taking on the Bolt Towers. If you get caught in the lightning
| |
| spheres from these enemies, consider it a blessing and mash Triangle for their
| |
| Reaction Command. The ensuing explosion can kill other monsters. Focus on the
| |
| Towers, not only because they're the largest targets, but because they have
| |
| both a ranged physical attack and a shock wave of their own.)
| |
| | |
| '''Round 27''' - Two Gargoyle Warriors (Axe) and four Rabid Dogs, followed by four
| |
| Nightwalkers. (What is it with this game and enemies rapidly spinning at you?
| |
| The opening move should be your trusty Magnega, followed by lots of blade time
| |
| to start aerial combos. I have never had much trouble with Rabid Dogs, and
| |
| consider them a baby version of Living Bones in that all they can do is bite
| |
| you, which even in this tournament doesn't hurt too much. Take out the
| |
| Gargoyles first if you can, and beware of their spinning attack, which sends
| |
| them like tops over several metres of space. They don't use it a lot, though,
| |
| and are just as easy to dispatch as their sword-wielding brethren. The
| |
| Nightwalkers also love to spin, but they also succumb to faithful Magnega, so
| |
| you can clean them up exactly like the Gargoyles, keeping in mind that they
| |
| will gang up on you more than those.)
| |
| | |
| '''Round 28''' - Two Bookmasters and two Emerald Blues followed by three Shamans,
| |
| followed by at least one Emerald Blues and at least three Silver Rocks.
| |
| (Another difficult round when you get towards the end. Bookmasters are
| |
| powerful spellcasters, but as long as you get up close with aerial combos, you
| |
| can control them with little sweat. The Blues have their trademark tornado
| |
| move, as well as an Aeroga-like spell they use to bash into you repeatedly.
| |
| The Shamans are horrible, I cannot stress how highly I dislike them. They love
| |
| their blue fire spells, but that's all they have, so get up close and shred
| |
| them with the Keyblade. In this particular round, I have only seen them use
| |
| one version of their spell, the one that sends plumes of fire upward from the
| |
| floor. The other iteration will be outlined in a later round. Unfortunately,
| |
| the spacing of the three of them makes Magnega difficult to use to full effect,
| |
| and you might get fried by the remaining Shaman's spells in the meanwhile. I
| |
| always need to cure sometime in this battle, so don't feel ashamed of it. Once
| |
| they're gone, it's back to the swarm of mage-type enemies. I tried to count
| |
| the exact number and type of them, but they zip about like insects and it's
| |
| difficult to ascertain. Make use of the Rock's Reaction Commands, because it
| |
| can rid you of them one at a time from a good distance. Treat the Blues like
| |
| always. To a right solid beating.
| |
| | |
| '''Round 29''' - Two Gamblers and two Snipers. (I. HATE. NOBODIES! Gamblers in
| |
| particular can be loathsome creatures, especially if they linger for a while.
| |
| They have large dice they'll roll after you, card attacks, and if you're really
| |
| unfortunate, you can be turned INTO a die, left to do nothing but bounce around
| |
| and wait for a Drive Gauge to deplete slowly and return you to normal form.
| |
| Take them out as quickly as you possibly can because they make the Snipers seem
| |
| tame by comparison. You also have the Warp Snipe Reaction Command for those,
| |
| which further makes them seem like puppies. Don't forget that Magnega even
| |
| words on Nobodies, so enjoy it yet again.)
| |
| | |
| '''Round 30''' - Hades. (Dark Round.) (Hades seems more annoying here than he does
| |
| 20 rounds from now. He will use Firaga Ball almost exclusively, telegraphed by
| |
| him saying, "feel the heat." This move is trickier than it appears, and can
| |
| hit you at times when you don't think it can. He'll use it repeatedly, and it
| |
| knocks you backward, so don't underestimate it. It can be knocked back at him
| |
| by guarding or attacking, though it won't damage Hades. Reflega can absorb it,
| |
| but I wouldn't waste the MP. If you are in the midst of a Slide Dash attack to
| |
| close distance to him, you will often go right through a Firaga Ball without
| |
| taking damage, so there are numerous ways to counter it, just be sure -to-
| |
| counter it if you can't dodge. Aside from that, Hades has a one-two flaming
| |
| punch attack when he says, "take THAT!" but you won't see it too often, nor is
| |
| it particularly powerful. One nice thing here is that you can catch him with
| |
| extra attacks off of a finished combo; Hades is not quick on his feet when he's
| |
| being beaten up. His only counter is to poof out of the way and rematerialise
| |
| a couple metres away, when he says, "is that all you got?" This will annoy you
| |
| because he does it A LOT, usually just before you get to land that nice
| |
| Explosion finisher. Just keep on him. He's much less dangerous when you stay
| |
| close to him, because Firaga Ball is largely a ranged attack. Trinity Limit
| |
| might be nice here, but I usually just combo him to death.)
| |
| | |
| ===ROUNDS 31-40===
| |
| Cerberus Cup rules. You have Forms available to you, and Drive
| |
| metres fill much faster than normal. You have a ten-minute timer that will
| |
| make you very thankful for those Forms.
| |
| IMPORTANT NOTE: While in a form, cast Magnega, and immediately drop out of the form. Youll find regular Sora will have a full drive gauge. This is because the enemies trapped in a forms magnega take constant damaging = addigng hugely yo the drive gauge.
| |
| | |
| '''Round 31''' - Two Samurai, two Creepers, and one Berserker. (This set of ten | |
| rounds is possibly more difficult, albeit in a steady, unrelenting way, than
| |
| all but one of the 41-50 set. At the very least, it requires more endurance,
| |
| in my opinion. I hate Nobodies. I've said it before and I'll keep saying it.
| |
| The Berserker in this group is thankfully just that, singular. If you can
| |
| manage to make it drop its hammer, and are fortunate enough not to get attacked
| |
| on your way to it, grab that sodding thing and use it to the best of your
| |
| ability. Get rid of that Berserker at any rate, and do it quickly, because I'm
| |
| willing to bet that if you eat an entire combo from one of them complete with
| |
| shock wave finisher, you'll either be dead or clinging to your last hit point.
| |
| The two Samurai are nearly as dangerous. You can only endure a couple of
| |
| four-swipe sword attacks here before going critical, and either one of them can
| |
| perform them consecutively. Don't rely on the Reaction Commands either; Duel
| |
| Stance is an elegant and beautiful way to kill a Samurai, but the penalty for
| |
| making a mistake here is much worse than in a normal setting. I love Magnega
| |
| for these, as well as any of the more dangerous Nobodies. Fire off a sphere
| |
| and catch them when they're falling down with an aerial combo. They aren't
| |
| dangerous if you keep them at a distance, but that leaves you with only the
| |
| option to chip at their HP with magic. You need to get in close, but be
| |
| careful when you do. I've had them interrupt my combos with their own. The
| |
| Creepers are laughable by comparison, so just kill them with combos before they
| |
| have a chance to morph into swords and swipe at you. I would try to hold off
| |
| on Final Form here, just because the earlier you use it, the more chance you
| |
| have to run out at a moment when you really don't want to later. Even though
| |
| the metre charges faster, you still have a few moments between one Form change
| |
| and the next, and Leon and Cloud in the last round will take advantage of
| |
| that.)
| |
| | |
| '''Round 32''' - Three strange musical notes in water form and three Dancers. (Demyx
| |
| isn't around, but you get these water forms just like he uses, only they're in
| |
| the shape of musical notes, and they carry the same Wild Dance Reaction
| |
| Commands. I haven't yet found a threat from these. The real danger is the
| |
| Dancers. Something is a bit wrong with the damage output they programmed for
| |
| these Nobodies in this tournament. If they manage to grab you by the head and
| |
| swing you around, you'll lose 30 percent of your HP. Do anything you can think
| |
| of to prevent this. I've noticed that in groups, they interrupt my combos a
| |
| lot and do that head grab. By itself, a single Dancer is easier to attack, so
| |
| get out your Magnega, strike them until it fades, and single out whichever
| |
| enemy is the farthest away. I personally just go for more Magnega. That head
| |
| grab is lethal, not to mention frustrating, and I'd rather have to regenerate
| |
| MP no matter what round it is. I even had difficulty fighting them in Final
| |
| Form, because getting up close to them prompts more of that awful head grabbing
| |
| and tossing. If you're already in Final Form, get them in a Magnega sphere
| |
| before attacking them unless you have one cornered and no others are around.)
| |
| | |
| '''Round 33''' - Four Samurai. (These bastards are horrible in a ground like this,
| |
| and they stick together and attack in sync, which is even worse. Often, if you
| |
| think you're far enough away, they'll slide forward with their arms spread and
| |
| manage to hit you anyway. If you're not already in Final Form, this is a great
| |
| place to start. I usually get hit once or twice whilst attacking them, but it
| |
| doesn't hurt nearly as much as normal Sora being hit by them. It might be
| |
| helpful to get them with Magnega and then attack, Final Form or not. It can
| |
| save you some pain.
| |
| | |
| '''Round 34''' - Two Sorcerers. (As soon as the round starts, they tend to instantly
| |
| surround you with their floating cubes. Final Form will make very short work
| |
| of these two, but lifting them off the floor with your trusty Magnet magic
| |
| beforehand makes even shorter work of them. A relatively easy round.)
| |
| | |
| '''Round 35''' - Rapid Thrusters. LOTS OF THEM. (This is just like the top of Pride
| |
| Rock, only you're alone and you have that bloody timer to contend with. This
| |
| is the round that takes me the longest, aside from Leon and Cloud, and possibly
| |
| even more at times. The best thing you can do is to immediately shift into
| |
| Final Form, toss a couple Magnega spheres skyward, and mash the X button like
| |
| you're trying to break it. Expend your MP on Magnega and then wait for your
| |
| Drive Gauge to deplete. Now is when that whole "gauges fill faster" caveat is
| |
| truly great. You can go from level 2 to a full level 7 in literally three or
| |
| four seconds if you just keep smacking the enemies about, which isn't difficult
| |
| because there are so many of them. Immediately go back into Final Form, which
| |
| will refill your MP, and start Magnega again. It might not seem to help, but
| |
| every little dent you can make is a good dent. This one will feel like it
| |
| takes forever, and you may start to worry about the timer. Just mash your
| |
| attack button as fast as you can. This round takes me about two and a half
| |
| minutes, making it all the more imperative to use Final Form to the fullest in
| |
| the other rounds. I think the only really good thing about this round is that
| |
| it's nearly impossible to get hurt when Sora is a silver whirling death dealer
| |
| with two weapons. I love Final Form.)
| |
| | |
| '''Round 36''' - Three Berserkers. (Final Form is wonderful here, but even better is | |
| being able to grab one of their hammers and kill two or all three of them
| |
| simultaneously. I've never done more than two, as that last one always seems
| |
| to decide to do its hammer tantrum just then. If you'll notice, they shrink
| |
| when they jump on the hammer. The gangly little sods look silly but are harder
| |
| to hit that way, though you'll probably still hit them in Final Form. Just
| |
| watch that last hit with the shock wave, as it will knock a chunk of HP from
| |
| you. I suggest Magnega, then attacking in Final Form, then grabbing the
| |
| nearest hammer and enjoying that and mopping up the last Berserker with the
| |
| Keyblades. It makes the round go by very quickly.)
| |
| | |
| '''Round 37''' - Three Assassins and two Snipers, followed by four Dragoons. (The
| |
| initial set is easy enough with Final Form, but it seems like a lot of the
| |
| Nobodies don't stay in Magnega spheres for very long at all, popping out almost
| |
| instantly. I don't know if that's just here, or everywhere. The first five
| |
| enemies is, nonetheless, simple to dispatch, just keep on them and use Warp
| |
| Snipe if it becomes available. When the Dragoons teleport in, a few of them
| |
| will do it via their damaging lance dive move, so watch the centre of the
| |
| arena. They are just as susceptible to the sustained pressure of Final Form
| |
| though, so don't waste any time in ending their lives. If you see them curl
| |
| into a ball, take those specific ones out before they can lance dive again.)
| |
| | |
| '''Round 38''' - Six Dusks, followed by three Dancers, followed by three Samurai,
| |
| followed by four Gamblers, followed by one Sorcerer. (Dusks are as easy as they
| |
| come and shouldn't give any trouble, even out of Final Form. Now, the Dancers,
| |
| Samurai, and Gamblers overlap with their spawn times. Once you kill one or two
| |
| of the Dancers, the Samurai will come, and one or two seem to drop into the
| |
| arena as you're fighting, so it might be more than three. One Gambler shows
| |
| up, and three more in short order, and it's all a steady reason for you to get
| |
| those Dancers and Samurai out of there so you can combo without being
| |
| interrupted. Gamblers are easier to combo than Dancers and Samurai, even in a
| |
| group. I guess they move a lot more slowly. The Sorcerer is just like before,
| |
| but easier as there's just one this time, so kill it and move on.)
| |
| | |
| '''Round 39''' - Five Dragoons. (The fifth seems to come in sometime during the
| |
| fight, but I can't be certain. Get ready to love Master Form. Drive into it, start a combo, dash away with Firaga and Dash back, throw out a Thundaga or two, then finish the combo into Disaster and watch as the Dragoons spin and die.
| |
| | |
| '''Round 40''' - Leon and Cloud. ( Master Form once again. Start a combo on Leon, then use Firaga or Reflega, and Firaga again if needed to get back, though usually Master forms attacks will move it towards en enemy. The Firaga is not to hurt Leon, (though it will keep him from interrupting your combos), its to hurt Cloud and Keep him occupied. Reflega will catch a Cloud sneaking up on you, and even before the after shock the spinning Keyblade will hurt Leon. Usign this youll actually be able to let loose some of your Combo finishers, hope to Get 'Master Strike' instead of Disaster, its a flurry of Blows that is much faster than anything else youve seen out of master form, ending with a giant X. When Leon starts his fireball, lock onto Cloud and block/ or use Reflega. It will send he fireball at Cloud for some easy damage. If you want, you can try taking out Cloud this way.
| |
| | |
| ===ROUNDS 41-50=== | |
| No Summons, no Drives (with the exception of '''Limit Form''' in ''Kingdom Hearts II: Final Mix+'', no friends, just your Keyblade, magic, and Trinity Limit. For those of you playing ''Final Mix+'', you have access to a host of limits; use them to your advantage.
| |
| | |
| '''Round 41''' - Two Toy Soldiers and two Graveyards. (This isn't too scary as long
| |
| as you don't engage them at point-blank range for long. Both enemy types have
| |
| attacks that will juggle or immobilise you while you eat damage like yummy
| |
| chocolate. Have a chat with your friend Magnega, and his girlfriend Aerial
| |
| Combo. This round should be pretty easy. Glide away and heal if you must.)
| |
| | |
| '''Round 42''' - Two Fortune Tellers and one Living Bone. (Do not underestimate these
| |
| enemies' range! The Fortune Tellers can cast an ice spell at you even if
| |
| they're off-camera, and the Living Bone is capable of huge leaps with bites at
| |
| the end, not to mention the spinning move. I recommend killing the Fortune
| |
| Tellers first, because their icy attacks from the sky will keep you pinned so
| |
| the Bone can bash your brains out. The Bone itself is much less dangerous when
| |
| it's just you and it; it is a large target, and you can keep an eye on it more
| |
| effectively when you glide off to heal.)
| |
| | |
| '''Round 43''' - Two Morning Stars and two Large Bodies. (One that I've seen a lot of
| |
| people having problems with. I seem to have a lot more success with aerial
| |
| combos on the Morning Stars. If you think you can make it in time, try a ground
| |
| combo and Explosion, but MAKE SURE you have the clearance, because even if you
| |
| think you do, you usually don't. If you land a full combo on a Morningstar, it
| |
| will be stunned for a couple precious seconds, which you can use to best suit
| |
| your situation, be it beating it down some more, or getting away from there,
| |
| usually the latter. And don't forget the very useful Reaction Command when a
| |
| Morning Star leaps over your head. It can deal massive damage to it, and
| |
| possibly any enemies very close by, though I haven't tested this. The Large
| |
| Bodies are easier, in my opinion. They will occasionally pause to think things
| |
| over, and you should have no compunction with scooping out their guts from
| |
| behind to punish them for it. I suggest keeping them at a healthful distance
| |
| to ascertain what they're up to before trying to attack. Doing this keeps you
| |
| safe from both their jumping shockwave and punching moves, and lets you see
| |
| their belly slide coming a mile away. Be sure to jump and glide away from
| |
| this, instead of simply jumping once, because the belly slide doesn't
| |
| necessarily end when the Large Body hits a wall; it will continue for the
| |
| duration of the move, and it's frustrating to get hit in the back after evading
| |
| it. Once you do get away from it, though, they seem to pause for a bit, so get
| |
| them whilst the getting is good. This move also bears a Reaction Command to
| |
| help you evade or guard, but I don't rely on it because if you make a mistake,
| |
| the Large Body will hit you three times with impunity, something you do NOT
| |
| want happening in this tournament. Use your own judgement on this, and do the
| |
| Reaction Command if you feel better with that. It will stun the Large Body and
| |
| leave it on its stomach, though not for very long, and they seem harder to hit
| |
| than when they're standing. Again, aerial combos are what I like to use, but
| |
| with Large Bodies, you seem to have a bit more time to attack before they hit
| |
| you, at least more time than those accursed Morningstars. Explosion is a
| |
| wonderful finisher if you can get it safely, but only if.)
| |
| | |
| '''Round 44''' - Three Living Bones, two of the headless variety with Shaman riders,
| |
| and one normal one. (Again with the spinning maneuver? I recall something
| |
| about Monty Python vikings singing about a canned meat product. Anyway, this
| |
| one is difficult because not only will they all spin over the arena, but they
| |
| like to run after you before doing it, making it much harder to glide away and
| |
| catch your breath. I noticed the ones with the Shaman riders doing this
| |
| annoying tactic a lot more than the normal Living Bone, by the way. Do not
| |
| underestimate this trio of enemies, because they will kill you in five seconds
| |
| if they pin you down. They are particularly vicious, and will even attack you
| |
| as a group the second the round starts. In a nutshell, this round is ANNOYING!
| |
| I died just getting this information to include here. I cannot stress this
| |
| enough, for the entire tournament, but especially this round, MAGNEGA IS YOUR
| |
| FRIEND. Say it, learn it, and repeat it like a mantra, because it will save
| |
| your life and buy you precious time to heal or get your bearings, not to
| |
| mention some free damage opportunities. Magnega will take care of all three of
| |
| these sodding things, but not for long, so make good use of it. Be very
| |
| careful; I tend to fall into a pattern of getting caught with the spinning
| |
| tails and needing to heal, thus having no MP for Magnega, and getting myself
| |
| beaten to a pulp whilst my MP is recharging. Try to have a Magnega sphere in
| |
| the air before you use Curaga, you'll be glad you did. I must stress once more
| |
| how vicious this particular enemy set is. The Living Bone with the head on
| |
| will use that head to bite you repeatedly, and it isn't afraid to leap in the
| |
| air to grab you if you're gliding or jumping too low. And the lot of them will
| |
| use their spinning move so often it will make you swear at the television. Do
| |
| not assume that you are safe from them at any point; you're not. Ignore this
| |
| at your peril. Don't spend any more time on the ground than you absolutely
| |
| have to, and spam those aerial combos right after they scatter from the Magnega
| |
| magic. Try to kill the ones with the Shaman riders first if you can, because
| |
| the Living Bone by itself seems like much less of a threat.)
| |
| | |
| '''Round 45''' - Repeat of the 1,000 Heartless Battle (Maybe there aren't quite that
| |
| many, but this is exactly what it looks like. Use the same Reaction Commands
| |
| and all-out offensive you used there and you should be fine. The only
| |
| difference here is that you have a one minute timer that counts down, after
| |
| which the round ends; you need only survive. You don't even have to fight if
| |
| you don't want to, because you can glide around the outside of the stage the
| |
| entire time and never be accosted. Consider this a breather round.)
| |
| | |
| '''Round 46''' - One Devastator and two Hot Rods. (The Devastator is dangerous, but
| |
| not nearly as much so as the duo of Hot Rods. Get a Magnega sphere up
| |
| immediately to take them out of the picture for long enough to smack the
| |
| Devastator around, and repeat as necessary. As for the Hot Rods, Magnega is
| |
| still your best friend, but be careful when the Hot Rods do their driving
| |
| tantrum, because they're often far away from each other and Magnega will only
| |
| grab one of them. Don't attempt to ground combo them much, if at all, because
| |
| personally I'm never successful with it. I rely on Magnega and air combos, and
| |
| you should, too.
| |
| | |
| '''Round 47''' - One Bulky Vendor, followed by one Living Bone with Shaman rider and
| |
| two Lance Soldiers, followed by two Assault Riders and two Emerald Blues,
| |
| followed by three Morning Stars and five Crescendos (GAH! I guess they thought
| |
| it wasn't difficult enough so far, because now they lay this bloody marathon
| |
| upon us.) Where to begin. Well, the Shaman riding the Living Bone takes a
| |
| different tactic this time, using a blue fire attack that has two versions.
| |
| The first one is avoidable if you're moving, and basically sends several plumes
| |
| of fire up from the ground in a line that has amazing tracking capabilities.
| |
| If the first one hits you, you'll get hit by all of them, and I believe the
| |
| same goes for any of the hits in the chain, so watch out. The other version is
| |
| one I haven't found a way to counter at all, in which a ring of blue fireballs
| |
| surrounds you for a few seconds, and then explodes into the same 8-hit chain.
| |
| If anyone can let me know what to do about this, I would appreciate it.
| |
| Reflega does nothing, nor does Firaga. I haven't tried any other spells. At
| |
| any rate, ignore the Lance Soldiers unless they get in your face, because
| |
| unless they're that close, they really can't do much to hurt you. You need
| |
| that Living Bone and Shaman out of there, trust me. Magnega will trap it, so
| |
| as always, use that when you can. Lay on the aerial combos as thick as you
| |
| can, and try to lessen the amount of opportunities it has to trap you in that
| |
| fire. The next phase with Assault Riders and Emerald Blues isn't as bad. Lots
| |
| of Magnega will make you smile, because it works wonders here. Don't let the
| |
| Blues swarm you with those tornadoes; in fact, I would take them out first as
| |
| they're much more agile than the Assault Riders. Magega is especially good on
| |
| those, because their bulk allows you to land a lot of hits when they're in the
| |
| vortex. They also stun wonderfully, so have fun killing these easier enemies.
| |
| After that, we have the oh so delightful army of three Morning Stars and five
| |
| Crescendos, and I can't stress enough how important it is to KILL THEM FIRST!
| |
| The Morning Stars are bad enough without five snotty little bastards hopping
| |
| around healing them every five seconds. Crescendos are defenceless, so get
| |
| yourself a clear area and a few good seconds and end their lives post haste.
| |
| Do not attempt to take on the Morning Stars without doing this, or you will see
| |
| what I mean by "annoying." The Morning Stars by themselves are real bruisers,
| |
| but are very vulnerable in the air, so jump and swing away. They also jump a
| |
| lot, giving you more opportunities to use their Reaction Commands, so if you
| |
| see it, take advantage of it.
| |
| | |
| '''Round 48''' - Cerberus (Thankfully, he's only one enemy, and if you stay far
| |
| enough away from him when you need to heal, he can't do too much to you unless
| |
| he jumps over to you. Watch those shockwaves though! They happen EVERY TIME
| |
| he jumps, and will knock a lot of HP off of you. Be careful after you leap up
| |
| to attack his heads, because he likes to jump a lot, and I tend to get hit with
| |
| a shockwave as I'm falling from a jump. Glide as much as you can and be off
| |
| the ground when he jumps, at least as often as you can do. This isn't too
| |
| difficult, but it is rather annoying simply because you don't get too many hits
| |
| on him before he turns around or jumps away, so you constantly have to chase
| |
| him down. All three heads bite, but that seems to be less dangerous than it
| |
| was in the first game. Try to attack the centre head more often than not,
| |
| because you might be fortunate enough to get Cerberus' Reaction Command, which
| |
| culminates in a move that knocks him out for several seconds and lets you pound
| |
| him severely. Alternatively, if you happen to own ''Final Mix+'', enter into Limit Form, use the same strategy as above, and when the right time comes, spam Cerberus with the Ragnarok ability.)
| |
| | |
| '''Round 49''' - Cloud, Leon, Tifa, and Yuffie. (Holy This has got to be
| |
| more difficult than taking on Sephiroth or Xaldin or Demyx. One strategy
| |
| among many is to chip slowly away at everyone but Cloud using Thundaga, but
| |
| ONLY IF YOU HAVE THE ROOM! Do NOT jump in there and swing the Keyblade to your
| |
| heart's content. They will fillet you and serve you up on Sora Sandwiches if
| |
| you try that. Thundaga is nice because it lets you fry people from a distance,
| |
| but beware of several things. For one, do not use it on Cloud, because he's
| |
| immune. You'll only waste MP, and even worse, you'll waste the frightfully
| |
| little time it takes for one or more of them to close the distance to you.
| |
| Tifa likes running after you, as does Leon, and the both of them will make you
| |
| eat the arena floor if you stick around. Leon will slash four times, and the
| |
| last one has a delay that has tricked me more than once, so watch out. He also
| |
| has a fireball that he'll launch at you (listen for him to shout, "here goes!")
| |
| that can track you to an extent. It's difficult to dodge if you underestimate
| |
| it, so break out that Quick Run and dodge to either side, because it's fast and
| |
| can be used at any distance. Tifa will attack with her fists in a
| |
| multiple-strike combo, and of course her famous Final Heaven limit, but both
| |
| Tifa and Leon seem easier to attack if you're able to get away from their
| |
| initial strikes, so no matter what anyone else has said, I personally try to
| |
| take those two out first. Be very careful with Tifa in particular, because
| |
| often, she'll fire off a massive blue wall of fire spheres several metres in
| |
| front of her as a combo finisher, and she doesn't telegraph it at all so you
| |
| never know if it's coming. I realise that there is more than one strategy for
| |
| this battle, and I am not claiming mine to be the best. This is one of those
| |
| situations where you need to do whatever works for you. This fight, more than
| |
| any other, demands that you never, EVER stay in one spot very long. You have
| |
| four extremely lethal fighters running after you, and Cloud will often just
| |
| rush you and let his sword tip say hello to your chest. By the way, Cloud will
| |
| also perform a move that looks a lot like Omnislash, only here, he flies around
| |
| the arena at a laughably ridiculous speed, so quickly that you might see him
| |
| more than once as you glide along a wall. Most of this seems like it's just
| |
| for show, though. He will attack you, don't think he won't, but treat it like
| |
| any other threat and don't panic; just get away from there. Don't EVER stand
| |
| your ground when any of the four attack you. You're not strong enough. Fight
| |
| like wolves fight; strike quickly and get away. Cloud has his own
| |
| sword strikes on the ground, which will also shred you up badly, but his
| |
| specialty is a huge leap into a downward strike that kicks up a blue shockwave,
| |
| and is probably the finisher to that Omnislash flight he does. He says,
| |
| "farewell" before leaping straight up and coming down into it, so you have a
| |
| tiny warning, but it's probably not enough if he's very close to you when he
| |
| does it. Beware if you're fighting blade to blade with him, because he has
| |
| better frontal defence than a Fat Bandit. Yuffie is one I would just
| |
| leave for last. She is the only one who rarely threatens me when I'm fighting
| |
| everyone at once. If she says, "this one's gonna hurt," she's about to make
| |
| her shuriken larger and twirl it through the air, though I've never seen this
| |
| attack used with nearly the range of Leon's fireball or even Tifa's fire wall.
| |
| She will teleport with annoying frequency, but just keep up the pressure and
| |
| get away when you need to heal. This has all been for informational purposes,
| |
| mind you. Things are often very different when you're actually playing,
| |
| irrespective of how much strategy you pore over. My best advice is to pick
| |
| your target and engage them for as short a time as you can before getting away. They WILL all attack you at once if you get careless, and good luck
| |
| surviving that. Another tip is not to attempt to attack anyone during their
| |
| particular string of attacks. I have yet to meet blades with anyone and
| |
| actually deflect their strikes, so it's better to let them attack and just not
| |
| to be in the way. It gets easier as you take out opponents. Nobody likes
| |
| dodging Tifa or Cloud, only to be hit with Leon's fireball when they go to
| |
| complete a nice combo. TAKE YOUR TIME! This is not a short battle, and there
| |
| is nothing you can do to make it that way. Thundaga is good for chipping away
| |
| at peoples' HP bars, but not if you have no MP because you just got caught in
| |
| the middle of a four-way gangrape and had to heal. Chances are, if you think
| |
| you have enough room to attack with a full combo, then you better have made
| |
| sure nobody was rushing you beforehand. Take this fight slowly and wisely, and
| |
| heal every time you think you need to. That's all the advice I can give.)
| |
| (Editor's Note: since beginning this FAQ, new information regarding Reflect
| |
| magic has been brought to my attention. (Credit goes to Centarox from the
| |
| Gamefaqs message board for the game.) The strategy for Cloud and Tifa alone in
| |
| Round 25 includes this, but I need to remind you here. Reflect is a much, much
| |
| better spell than I previously believed, and Tifa in particular is susceptible
| |
| to it. Be careful with using it in this battle, because you're under twice the
| |
| opposition and can easily be beaten silly the instant you stop spamming Reflega
| |
| to try a combo on anyone. Tifa, however, can actually be defeated entirely
| |
| with Reflega; it somehow damages her greivously at the end of her combo. This
| |
| will work for anyone, actually, even Cloud, so try it and see how you like it.
| |
| Do not attempt to do this for long, however. You are under an assault the
| |
| likes to which little else in the game can compare, and being caught off guard
| |
| is lethal here. It can make your day, though, if Tifa is put out of commission
| |
| a minute into the fight. Just don't rely on it exclusively. Remember to
| |
| strike just after opponents finish their combos, because a good Keyblade run
| |
| can do just as much damage, and Explosion hits everyone in range.)
| |
| | |
| '''Round 50''' - Hades. (It's almost funny that they chose to end this nightmare with
| |
| such a relatively easy boss battle. This is the same thing as the Hades fight
| |
| way back when you had Hercules to help you out, complete with Aura powers and
| |
| everything. He usually sticks to his
| |
| fireballs (listen for "feel the heat" to warn you,) so treat him like you did
| |
| before, save for the increased damage he'll do to you. Just heal when you need
| |
| to. I can't imagine having much trouble with this battle, especially not after
| |
| that last one.)
| |
| [[Category:Olympus Coliseum Cups]] | | [[Category:Olympus Coliseum Cups]] |


_KHII.png)