Cerberus Cup: Difference between revisions
ShardofTruth (talk | contribs) m (replaced image link) |
(→Videos) |
||
| (37 intermediate revisions by 15 users not shown) | |||
| Line 1: | Line 1: | ||
{{game|KH2|FM2}} | {{game|KH2|FM2}} | ||
{{tab|o-info|360px}} | |||
{{tab|Cerberus Cup}} | |||
{{Coliseum | {{Coliseum | ||
|name=Cerberus Cup | |name=Cerberus Cup | ||
| Line 5: | Line 7: | ||
|romaji=Keruberosu Kappu | |romaji=Keruberosu Kappu | ||
|image=[[File:Cerberus Cup Trophy KHII.png|300px]] | |image=[[File:Cerberus Cup Trophy KHII.png|300px]] | ||
| | |rounds=10 | ||
| | |level=28{{KHII}}<br>30{{FMII}} | ||
|reward=[[Rising Dragon]] <br> [[Protect Belt]] | |reward=[[Rising Dragon]]<ref>[[Genji Shield]] in the original Japanese version.</ref><br>[[Protect Belt]]<ref>[[Skillful Ring]] in the original Japanese version.</ref>{{KHII}}<br>[[Serenity Crystal]]{{FMII}} | ||
|unlock=Clear [[Agrabah]], [[Halloween Town]], and [[Pride Lands]] for the first time. | |unlock=Clear [[Agrabah]], [[Halloween Town]], and [[Pride Lands]] for the first time. | ||
| | |rules=A solo fight using Sora.<br>The Drive Gauge fills faster than usual and Sora can use Drives alone.<br><br>No experience is gained. | ||
| | |missions=Give it a try.<br>Win with a score of 1000 or more. | ||
|round1=1 | |||
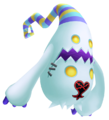
|enem1=Air Pirate x 2<br>Trick Ghost x 2 | |enem1=Air Pirate x 2<br>Trick Ghost x 2 | ||
| | |round2=2 | ||
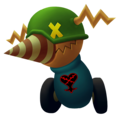
|enem2=Driller Mole x 3<br>Hammer Frame x 3 | |enem2=Driller Mole x 3<br>Hammer Frame x 3 | ||
| | |round3=3 | ||
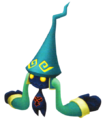
|enem3=Tornado Step x 3<br>Wight Knight x 3 | |enem3=Tornado Step x 3<br>Wight Knight x 3 | ||
| | |round4=4 | ||
|enem4=Silver Rock x 4<br>Living Bone x 1 | |enem4=Silver Rock x 4<br>Living Bone x 1 | ||
| | |round5=5 | ||
|enem5=Icy Cube x 5<br>Shaman x 1<br>Fiery Globe x 5 | |enem5=Icy Cube x 5<br>Shaman x 1<br>Fiery Globe x 5 | ||
| | |round6=6 | ||
|enem6=Fortuneteller x 2<br>Aerial Knocker x 2 | |enem6=Fortuneteller x 2<br>Aerial Knocker x 2 | ||
| | |round7=7 | ||
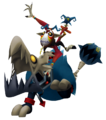
|enem7=Cannon Gun x 3<br> Toy Soldier x 1 | |enem7=Cannon Gun x 3<br> Toy Soldier x 1 | ||
| | |round8=8 | ||
|enem8=Luna Bandit x 5 | |enem8=Luna Bandit x 5 | ||
| | |round9=9 | ||
|enem9=Emerald Blues x 4<br>Fat Bandit x 1 | |enem9=Emerald Blues x 4<br>Fat Bandit x 1 | ||
| | |round10=10 | ||
|enem10=Cerberus | |enem10=Cerberus | ||
}} | |style=kh2 | ||
}}{{tab|c}} | |||
{{tab|Paradox Cup}} | |||
{{Coliseum | |||
|name=Cerberus Paradox Cup | |||
|katakana=裏ケルベロスカップ | |||
|romaji=Ura Keruberosu Kappu | |||
|image=[[File:Cerberus Cup Trophy KHII.png|300px]] | |||
|rounds=10 | |||
|level=70 | |||
|reward= | |||
|unlock= Reach Level 5 with all forms except Final Form and unlock the [[Pain and Panic Paradox Cup]]. | |||
|rules=A solo fight using Sora.<br>The Drive Gauge fills faster than usual and Sora can use Drives alone.<br><br>No experience is gained. | |||
|missions=Give it a try<br>Win with a score of 1300 or more. | |||
|round1=1 | |||
|enem1=Air Pirate x 2<br>Trick Ghost x 2 | |||
|round2=2 | |||
|enem2=Driller Mole x 3<br>Hammer Frame x 3 | |||
|round3=3 | |||
|enem3=Tornado Step x 3<br>Wight Knight x 3 | |||
|round4=4 | |||
|enem4=Silver Rock x 4<br>Living Bone x 1 | |||
|round5=5 | |||
|enem5=Icy Cube x 5<br>Shaman x 1<br>Fiery Globe x 5 | |||
|round6=6 | |||
|enem6=Fortuneteller x 2<br>Aerial Knocker x 2 | |||
|round7=7 | |||
|enem7=Cannon Gun x 3<br> Toy Soldier x 1 | |||
|round8=8 | |||
|enem8=Luna Bandit x 5 | |||
|round9=9 | |||
|enem9=Emerald Blues x 4<br>Fat Bandit x 1 | |||
|round10=10 | |||
|enem10=Cerberus | |||
|style=kh2 | |||
}}{{tab|c}}{{tab|c}} | |||
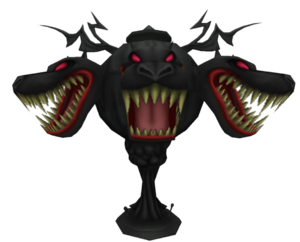
The {{nihongo|'''Cerberus Cup'''|ケルベロスカップ|Keruberosu Kappu}} is the second tournament at the [[Underdrome]] in ''[[Kingdom Hearts II]]'', and all enemies in it are set at level 28{{KHII}}/30{{FMII}}. It is so-named because its final seed is a battle against the three-headed [[Cerberus]]. It can be unlocked after clearing Agrabah, Halloween Town, and Pride Lands for the first time and, upon completion of the cup, the player receives the Rising Dragon staff for Donald, and a Protect Belt accessory. | |||
The {{nihongo|'''Cerberus Cup'''| | The {{nihongo|'''Cerberus Paradox Cup'''|裏ケルベロスカップ|Ura Keruberosu Kappu}} is a harder form of the Cerberus Cup and the second of the Paradox Cups. It can be unlocked by leveling up all Drive Forms to level 5, with the exception of Final Form, and unlocking the [[Pain and Panic Cup|Pain and Panic Paradox Cup]]. It can be accessed by talking to [[Hades]] in his [[Hades' Chamber|chamber]]. | ||
Though [[Sora]] is alone for this cup, he can use [[Drive Form]]s without any ally's help. Also, the [[Drive Gauge]] fills up much faster than it normally does. The match is timed, and time, though very little, is rewarded for completing each match. | |||
The | == Strategy == | ||
'''Round 1:''' The Air Pirates' Reaction Commands are useful in eliminating most of the enemies. The Trick Ghosts, however, are a huge priority. | |||
'''Round 2:''' The Hammer Frames can do a lot of damage if Sora is not alert, as their attacks hit a wide area on the ground. Just be sure to jump if one of them is about to pound its torso into the ground. Using aerial combos is also useful. | |||
'''Round | |||
'''Round | '''Round 3:''' The Wight Knights and Tornado Steps spinning attacks can really deplete Sora's HP. If Sora is caught in one of the Wight Knights mid-air spin attacks, either counter attack or block and then counter attack. Remember to use Tornado Ride Reaction Command, whenever the opportunity arises. | ||
'''Round | '''Round 4:''' Lock onto the Living Bone and quickly use the Shift Shot Reaction Command of the Silver Rocks to kill him quickly. If any Silver Rocks survive, evade their attacks until an opening or another RC chance. This way, most of the enemies can be slain easily. | ||
'''Round | '''Round 5:''' The Shaman is the strongest enemy in this round. Kill him first and quickly, before it starts to turn into the flying mask. The Icy Cubes and the Fiery Globes are vulnerable to [[Fire]] and [[Blizzard]] respectively, so be sure to use those. | ||
'''Round | '''Round 6:''' Since the Fortunetellers don't flinch if they are hit while firing, remember to block its shots back by Guarding or Reflecting it (while locked on). As for the Aerial Knockers, fight them normally, but remember that its Reaction Commands are unusable if Sora is in Standard Form. | ||
'''Round | '''Round 7:''' The Toy Soldier has a lot of health and can hit you from a distance. First, attack the Cannon Guns while staying outside of the targets. After that, carefully get rid of the toy soldier. If it turns into a box, watch out for his gun attack. Using magic form a distance is very helpful. Remember that you are timed, so don't take too long. | ||
'''Round | '''Round 8:''' The remainder of these rounds are in pitch black, and only a small area around Sora is visible. While the Luna Bandits are not difficult, the darkness means that battling them is slightly harder. | ||
'''Round | '''Round 9:''' The Emerald Blues are a major priority here, since their tornado attack is very dangerous. Take care of the Emerald Blues first and then take out the Fat Bandit by going behind him when he breathes fire and guarding his fireball. This will send the ball back to him, leading to a Full Swing Reaction Command. Hitting him with a Finishing Move also leads to a RC. | ||
'''Round 10:''' This one is the most difficult. From a distance, only Cerberus's teeth are visible. MP Rage is essential if Sora has learned it, since its effect means that Sora doesn't need much items. Since its middle head is the most dangerous, attack the side heads.. Attack the two outer heads in between bites. Watch out for his jumping attack. After Cerberus's HP falls to a certain amount, he will start to do an attack using the three heads at the same time. Jump in the middle of the heads in the right time to lead to a series of Reaction Commands, leaving Cerberus open for attacks. Repeat this tactic two or three times to quickly finish him. Wisdom and Master Forms are very useful in this battle | |||
'''Round 10:''' This one is the most difficult. From a distance, | |||
{{-}} | {{-}} | ||
==Enemies== | ==Enemies== | ||
===Heartless=== | ===Heartless=== | ||
{|class="wikitable collapsible collapsed" | {|class="wikitable mw-collapsible mw-collapsed" | ||
! | ! | ||
|- | |- | ||
| Line 78: | Line 105: | ||
<gallery> | <gallery> | ||
File:Air Pirate KHII.png|[[Air Pirate]] | File:Air Pirate KHII.png|[[Air Pirate]] | ||
File:Trick Ghost KHII.png| | File:Trick Ghost KHII.png|{{c|Trick Ghost|KHII}} | ||
File:Driller Mole KHII.png|[[Driller Mole]] | File:Driller Mole KHII.png|[[Driller Mole]] | ||
File:Hammer Frame KHII.png|[[Hammer Frame]] | File:Hammer Frame KHII.png|[[Hammer Frame]] | ||
| Line 98: | Line 125: | ||
|} | |} | ||
=== | ===Other=== | ||
{|class="wikitable collapsible collapsed" | {|class="wikitable mw-collapsible mw-collapsed" | ||
! | ! | ||
|- | |- | ||
| Line 107: | Line 134: | ||
</gallery> | </gallery> | ||
|} | |} | ||
{{-}} | |||
==Videos== | |||
{| class="video" | |||
! Cerberus Cup | |||
! Cerberus Paradox Cup | |||
|- | |||
| {{#widget:YouTube|id=XrKbeX-mmuc|width=320|height=240}} | |||
| {{#widget:YouTube|id=xGH9T1eGWLI|width=320|height=240}} | |||
|} | |||
==Notes and references== | |||
{{reflist}} | |||
{{Minigames}} | {{Minigames}} | ||
[[fr:Coupe Cerbère]] | [[fr:Coupe Cerbère]] | ||
[[Category:Olympus Coliseum Cups]] | [[Category:Olympus Coliseum Cups]] | ||
[[Category:Mini-games]] | [[Category:Mini-games]] | ||
Latest revision as of 11:27, 2 January 2023
| Cerberus Cup
| |
| |
| Katakana | ケルベロスカップ
|
|---|---|
| Romaji | Keruberosu Kappu |
| Unlocked | Clear Agrabah, Halloween Town, and Pride Lands for the first time.
|
| Rules | A solo fight using Sora. The Drive Gauge fills faster than usual and Sora can use Drives alone. No experience is gained. |
| Level | 28[KH II] 30[KH II FM] |
| Rounds | 10
|
| Missions | Give it a try. Win with a score of 1000 or more. |
| Rewards | Rising Dragon[1] Protect Belt[2][KH II] Serenity Crystal[KH II FM] |
| Round | Enemies
|
| 1 | Air Pirate x 2 Trick Ghost x 2 |
|---|---|
| 2 | Driller Mole x 3 Hammer Frame x 3 |
| 3 | Tornado Step x 3 Wight Knight x 3 |
| 4 | Silver Rock x 4 Living Bone x 1 |
| 5 | Icy Cube x 5 Shaman x 1 Fiery Globe x 5 |
| 6 | Fortuneteller x 2 Aerial Knocker x 2 |
| 7 | Cannon Gun x 3 Toy Soldier x 1 |
| 8 | Luna Bandit x 5 |
| 9 | Emerald Blues x 4 Fat Bandit x 1 |
| 10 | Cerberus |
| Cerberus Paradox Cup
| |

| |
| Katakana | 裏ケルベロスカップ
|
|---|---|
| Romaji | Ura Keruberosu Kappu |
| Unlocked | Reach Level 5 with all forms except Final Form and unlock the Pain and Panic Paradox Cup.
|
| Rules | A solo fight using Sora. The Drive Gauge fills faster than usual and Sora can use Drives alone. No experience is gained. |
| Level | 70 |
| Rounds | 10
|
| Missions | Give it a try Win with a score of 1300 or more. |
| Round | Enemies
|
| 1 | Air Pirate x 2 Trick Ghost x 2 |
|---|---|
| 2 | Driller Mole x 3 Hammer Frame x 3 |
| 3 | Tornado Step x 3 Wight Knight x 3 |
| 4 | Silver Rock x 4 Living Bone x 1 |
| 5 | Icy Cube x 5 Shaman x 1 Fiery Globe x 5 |
| 6 | Fortuneteller x 2 Aerial Knocker x 2 |
| 7 | Cannon Gun x 3 Toy Soldier x 1 |
| 8 | Luna Bandit x 5 |
| 9 | Emerald Blues x 4 Fat Bandit x 1 |
| 10 | Cerberus |
The Cerberus Cup (ケルベロスカップ Keruberosu Kappu) is the second tournament at the Underdrome in Kingdom Hearts II, and all enemies in it are set at level 28[KH II]/30[KH II FM]. It is so-named because its final seed is a battle against the three-headed Cerberus. It can be unlocked after clearing Agrabah, Halloween Town, and Pride Lands for the first time and, upon completion of the cup, the player receives the Rising Dragon staff for Donald, and a Protect Belt accessory.
The Cerberus Paradox Cup (裏ケルベロスカップ Ura Keruberosu Kappu) is a harder form of the Cerberus Cup and the second of the Paradox Cups. It can be unlocked by leveling up all Drive Forms to level 5, with the exception of Final Form, and unlocking the Pain and Panic Paradox Cup. It can be accessed by talking to Hades in his chamber.
Though Sora is alone for this cup, he can use Drive Forms without any ally's help. Also, the Drive Gauge fills up much faster than it normally does. The match is timed, and time, though very little, is rewarded for completing each match.
Strategy[edit]
Round 1: The Air Pirates' Reaction Commands are useful in eliminating most of the enemies. The Trick Ghosts, however, are a huge priority.
Round 2: The Hammer Frames can do a lot of damage if Sora is not alert, as their attacks hit a wide area on the ground. Just be sure to jump if one of them is about to pound its torso into the ground. Using aerial combos is also useful.
Round 3: The Wight Knights and Tornado Steps spinning attacks can really deplete Sora's HP. If Sora is caught in one of the Wight Knights mid-air spin attacks, either counter attack or block and then counter attack. Remember to use Tornado Ride Reaction Command, whenever the opportunity arises.
Round 4: Lock onto the Living Bone and quickly use the Shift Shot Reaction Command of the Silver Rocks to kill him quickly. If any Silver Rocks survive, evade their attacks until an opening or another RC chance. This way, most of the enemies can be slain easily.
Round 5: The Shaman is the strongest enemy in this round. Kill him first and quickly, before it starts to turn into the flying mask. The Icy Cubes and the Fiery Globes are vulnerable to Fire and Blizzard respectively, so be sure to use those.
Round 6: Since the Fortunetellers don't flinch if they are hit while firing, remember to block its shots back by Guarding or Reflecting it (while locked on). As for the Aerial Knockers, fight them normally, but remember that its Reaction Commands are unusable if Sora is in Standard Form.
Round 7: The Toy Soldier has a lot of health and can hit you from a distance. First, attack the Cannon Guns while staying outside of the targets. After that, carefully get rid of the toy soldier. If it turns into a box, watch out for his gun attack. Using magic form a distance is very helpful. Remember that you are timed, so don't take too long.
Round 8: The remainder of these rounds are in pitch black, and only a small area around Sora is visible. While the Luna Bandits are not difficult, the darkness means that battling them is slightly harder.
Round 9: The Emerald Blues are a major priority here, since their tornado attack is very dangerous. Take care of the Emerald Blues first and then take out the Fat Bandit by going behind him when he breathes fire and guarding his fireball. This will send the ball back to him, leading to a Full Swing Reaction Command. Hitting him with a Finishing Move also leads to a RC.
Round 10: This one is the most difficult. From a distance, only Cerberus's teeth are visible. MP Rage is essential if Sora has learned it, since its effect means that Sora doesn't need much items. Since its middle head is the most dangerous, attack the side heads.. Attack the two outer heads in between bites. Watch out for his jumping attack. After Cerberus's HP falls to a certain amount, he will start to do an attack using the three heads at the same time. Jump in the middle of the heads in the right time to lead to a series of Reaction Commands, leaving Cerberus open for attacks. Repeat this tactic two or three times to quickly finish him. Wisdom and Master Forms are very useful in this battle
Enemies[edit]
Heartless[edit]
|
|
Other[edit]
|
|
Videos[edit]
| Cerberus Cup | Cerberus Paradox Cup |
|---|---|
Notes and references[edit]
- ^ Genji Shield in the original Japanese version.
- ^ Skillful Ring in the original Japanese version.

