Keepers of the Arena: Difference between revisions
No edit summary |
NinjaSheik (talk | contribs) No edit summary |
||
| (71 intermediate revisions by 23 users not shown) | |||
| Line 1: | Line 1: | ||
{{ | {{Game|BBS|FMB}} | ||
[[File: | {{Arena | ||
Keepers of the Arena is the | |name=Keepers of the Arena | ||
|katakana=闘技場の支配者 | |||
|romaji=Tougijou no Shihaisha | |||
|jpname=Rulers of the Arena | |||
|image=[[File:MA Keepers of the Arena.png|300px]] | |||
|level=20 | |||
|risk=5 | |||
|rounds=9 | |||
|medals=400 | |||
|challenge=Tough as Nails | |||
|challengedesc=Heal 15 times or less. | |||
|bonus=1.5 | |||
|rewardT=[[Ultima Cannon]] | |||
|rewardV=[[Multivortex]] | |||
|rewardA=[[Lightbloom]] | |||
|enem1=[[Axe Flapper]] x 9<br>[[Flood]] x 6<br>[[Buckle Bruiser]] x 6<br>[[Mandrake]] x 9 | |||
|enem2=[[Monotrucker]] x 14<br>[[Archraven]] x 7<br>[[Blue Sea Salt]] x 6 | |||
|enem3=[[Chrono Twister]] x 4<br>[[Tank Toppler]] x 13<br>[[Mandrake]] x 6<br>[[Buckle Bruiser]] x 7 | |||
|enem4=[[Iron Imprisoner III]] | |||
|enem5=[[Triple Wrecker]] x 6<br>[[Bruiser]] x 10<br>[[Scrapper]] x 10<br>[[Blue Sea Salt]] x 6 | |||
|enem6=[[Thornbite]] x 6<br>[[Tank Toppler]] x 8<br>[[Axe Flapper]] x 7<br>[[Yellow Mustard]] x 9 | |||
|enem7=[[Triple Wrecker]] x 8<br>[[Mandrake]] x 8<br>[[Buckle Bruiser]] x 7<br>[[Scrapper]] x 7 | |||
|enem8=[[Sonic Blaster]] x 6<br>[[Yellow Mustard]] x 7<br>[[Mandrake]] x 12<br>[[Wild Bruiser]] x 7 | |||
|enem9=[[Iron Imprisoner IV]] | |||
}} | |||
'''Keepers of the Arena''' is the twelfth battle featured at the [[Mirage Arena]] in ''[[Kingdom Hearts Birth by Sleep]]''. | |||
== | ==Strategy== | ||
To vanquish the hordes of Unversed that populate this battle, make sure to equip crowd-control Commands like [[Mega Flare]], [[Quake]], [[Magnet|Magnega]] or [[Faith]]. | |||
== | ===Iron Imprisoner III=== | ||
As always, you will have to rely on a projectile Shotlock, like [[Bio Barrage]], to make it through this round, and you must have at least one [[Curaga]] in your deck. It is also a good idea to equip [[Vanish]], to give yourself more breathing room, and [[Firaga]], to deal extra damage while your Shotlock is charging. | |||
During his hammer spin mode, it is wise to keep dodging due to his increased movement speed as his [[HP]] dwindles. Any three-tier [[Command Style]] will always work due to the finishers. Another method to charge the Shotlock is to equip the Damage Syphon, Once More and Second Chance abilities to absorb and withstand the damage taken. | |||
As his HP dwindles, it is mandatory to block when he unleashes his true strength. | |||
===Iron Imprisoner IV=== | |||
As always, you will have to rely on a projectile Shotlock, like [[Bio Barrage]], to make it through this round, and you must have at least one [[Curaga]] in your deck. It is also a good idea to equip [[Vanish]], to give yourself more breathing room, and [[Firaga]], to deal extra damage while your Shotlock is charging. | |||
During his hammer spin mode, it is wise to keep dodging due to his increased movement speed as his HP dwindles. Any three-tier [[Command Style]] will always work due to the finishers. Another method to charge the Shotlock is to equip the Damage Syphon, Once More and Second Chance abilities to absorb and withstand the damage taken. | |||
During his Explosion phase, it is wise to stand further from the boss to avoid being sucked in. If the protagonist is caught, do not worry as it is mandatory to block his explosion. | |||
During his Possession phase, It is wise to keep running and dodging to avoid the flying tiles. Do this until the end of the phase. | |||
==Enemies== | |||
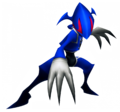
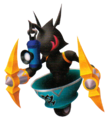
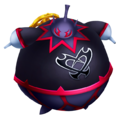
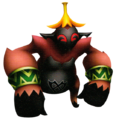
===Unversed=== | |||
{|class="wikitable mw-collapsible mw-collapsed" | |||
! | |||
|- | |||
| | |||
=== | <gallery perrow="4"> | ||
Flood KHBBS.png|[[Flood]] | |||
Scrapper KHBBS.png|[[Scrapper]] | |||
Bruiser KHBBS.png|[[Bruiser]] | |||
Monotrucker KHBBS.png|[[Monotrucker]] | |||
Thornbite KHBBS.png|[[Thornbite]] | |||
Archraven KHBBS.png|[[Archraven]] | |||
Tank Toppler KHBBS.png|[[Tank Toppler]] | |||
Sonic Blaster KHBBS.png|[[Sonic Blaster]] | |||
Triple Wrecker KHBBS.png|[[Triple Wrecker]] | |||
Wild Bruiser KHBBS.png|[[Wild Bruiser]] | |||
Blue Sea Salt KHBBS.png|[[Blue Sea Salt]] | |||
Yellow Mustard KHBBS.png|[[Yellow Mustard]] | |||
Mandrake KHBBS.png|[[Mandrake]] | |||
Buckle Bruiser KHBBS.png|[[Buckle Bruiser]] | |||
= | Chrono Twister KHBBS.png|[[Chrono Twister]] | ||
Axe Flapper KHBBS.png|[[Axe Flapper]] | |||
Iron Imprisoner III KHBBS.png|'''[[Iron Imprisoner III]]''' | |||
Iron Imprisoner IV KHBBS.png|'''[[Iron Imprisoner IV]]''' | |||
</gallery> | |||
|} | |||
{{Minigames}} | |||
Triple Wrecker | |||
Triple Wrecker | |||
[[ | |||
Latest revision as of 05:12, 7 December 2021
| Keepers of the Arena ★★★★★
| |
| |
| Katakana | 闘技場の支配者
|
| Romaji | Tougijou no Shihaisha |
| Japanese | Rulers of the Arena |
| Arena Level | 20 |
| Rounds | 9 |
| Medals | 400 |
| Bonus Challenge | Tough as Nails Heal 15 times or less. |
| Medal Bonus | Medals x1.5
|
| Rewards | Terra: Ultima Cannon Ventus: Multivortex Aqua: Lightbloom |
| Round | Enemies
|
| 1 | Axe Flapper x 9 Flood x 6 Buckle Bruiser x 6 Mandrake x 9 |
|---|---|
| 2 | Monotrucker x 14 Archraven x 7 Blue Sea Salt x 6 |
| 3 | Chrono Twister x 4 Tank Toppler x 13 Mandrake x 6 Buckle Bruiser x 7 |
| 4 | Iron Imprisoner III |
| 5 | Triple Wrecker x 6 Bruiser x 10 Scrapper x 10 Blue Sea Salt x 6 |
| 6 | Thornbite x 6 Tank Toppler x 8 Axe Flapper x 7 Yellow Mustard x 9 |
| 7 | Triple Wrecker x 8 Mandrake x 8 Buckle Bruiser x 7 Scrapper x 7 |
| 8 | Sonic Blaster x 6 Yellow Mustard x 7 Mandrake x 12 Wild Bruiser x 7 |
| 9 | Iron Imprisoner IV |
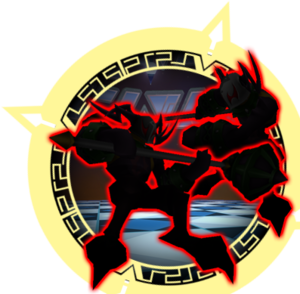
Keepers of the Arena is the twelfth battle featured at the Mirage Arena in Kingdom Hearts Birth by Sleep.
Strategy[edit]
To vanquish the hordes of Unversed that populate this battle, make sure to equip crowd-control Commands like Mega Flare, Quake, Magnega or Faith.
Iron Imprisoner III[edit]
As always, you will have to rely on a projectile Shotlock, like Bio Barrage, to make it through this round, and you must have at least one Curaga in your deck. It is also a good idea to equip Vanish, to give yourself more breathing room, and Firaga, to deal extra damage while your Shotlock is charging.
During his hammer spin mode, it is wise to keep dodging due to his increased movement speed as his HP dwindles. Any three-tier Command Style will always work due to the finishers. Another method to charge the Shotlock is to equip the Damage Syphon, Once More and Second Chance abilities to absorb and withstand the damage taken.
As his HP dwindles, it is mandatory to block when he unleashes his true strength.
Iron Imprisoner IV[edit]
As always, you will have to rely on a projectile Shotlock, like Bio Barrage, to make it through this round, and you must have at least one Curaga in your deck. It is also a good idea to equip Vanish, to give yourself more breathing room, and Firaga, to deal extra damage while your Shotlock is charging.
During his hammer spin mode, it is wise to keep dodging due to his increased movement speed as his HP dwindles. Any three-tier Command Style will always work due to the finishers. Another method to charge the Shotlock is to equip the Damage Syphon, Once More and Second Chance abilities to absorb and withstand the damage taken.
During his Explosion phase, it is wise to stand further from the boss to avoid being sucked in. If the protagonist is caught, do not worry as it is mandatory to block his explosion.
During his Possession phase, It is wise to keep running and dodging to avoid the flying tiles. Do this until the end of the phase.
Enemies[edit]
Unversed[edit]
|
|

