Traverse Town: Difference between revisions
HYDROSLASH (talk | contribs) |
|||
| (781 intermediate revisions by more than 100 users not shown) | |||
| Line 1: | Line 1: | ||
{{World | {{Game|KH1|FM1|COM|REC|KH2|FM2|358|KHC|RCO|FMB|DDD|DHD|MOM|FA}} | ||
|name=Traverse Town | {{suite}} | ||
| | {{cleanup|story section needs to be rewritten to be in-universe. In particular, when they only show flashbacks, place the remembered event in chronological order, then give a quick "flashed back to x event" in the game's section.}} | ||
| | {{About|the World||Traverse Town (disambiguation)}} | ||
| | {{World | ||
| | |name=Traverse Town | ||
| | |katakana=トラヴァースタウン | ||
| | |romaji=Toravāsu Taun | ||
| | |fr=Ville de Traverse | ||
| | |de=Die Stadt Traverse | ||
| | |es=Ciudad de Paso | ||
| | |KHimage=[[File:Traverse Town KH.png]] | ||
|KHlogo=[[File:Traverse Town Logo KH.png|300px]] | |||
|DDDimage=[[File:Traverse Town KH3D.png]] | |||
|DDDlogo=[[File:Traverse Town Logo KH3D.png|300px]] | |||
|game1=Kingdom Hearts | |||
|game2=Kingdom Hearts Chain of Memories | |||
|game3=Kingdom Hearts coded | |||
|game4=Kingdom Hearts 3D: Dream Drop Distance | |||
|game5=Kingdom Hearts Melody of Memory | |||
|KHnormalname=Traverse Town | |||
|KHnormalfile=Traverse Town KH.ogg | |||
|KHnormalname2=Merlin's Magical House | |||
|KHnormalfile2=Merlin's Magical House KH.ogg | |||
|KHbattlename=Night of Fate | |||
|KHbattlefile=Night of Fate KH.ogg | |||
|KHbattlename2=Hand in Hand | |||
|KHbattlefile2=Hand in Hand KH.ogg | |||
|COMnormalname=Traverse Town | |||
|COMnormalfile=Traverse Town KHRECOM.ogg | |||
|COMbattlename=Hand in Hand | |||
|COMbattlefile=Hand in Hand KHRECOM.ogg | |||
|RECnormalname=Traverse Town | |||
|RECnormalfile=Traverse Town KHREC.ogg | |||
|RECbattlename=Night of Fate | |||
|RECbattlefile=Night of Fate KHREC.ogg | |||
|DDDnormalname=Traverse in Trance | |||
|DDDnormalfile=Traverse in Trance KH3D.ogg | |||
|DDDbattlename=Hand to Hand | |||
|DDDbattlefile=Hand to Hand KH3D.ogg | |||
}} | }} | ||
'''Traverse Town''' is the | '''Traverse Town''' is a world in the [[Realm Between]] introduced in ''{{c|Kingdom Hearts|game}}'', where it serves as the game's main hub. It is a unique world that consists of the remnants of worlds which have been lost to [[darkness]], and serves as a haven to those whose worlds no longer exist in the Realm of Light.<ref>'''''[[Secret Ansem Report 11]]:''''' ''"My [[Mickey Mouse|friend]] has been fighting in the realm of darkness. Most likely he found his way there through Traverse Town. Like Castle Oblivion, that village also rests in the cleft between light and dark. It consists of the remnants of worlds whose hearts have been stolen by the Heartless. It is where those who have barely escaped the destruction of their worlds eventually find themselves."''</ref><ref>'''''[[Kingdom Hearts 3D: Dream Drop Distance]]''''', '''Joshua:''' This town has a little secret. It only appears when someone out there has need of shelter.</ref> In order to serve as a new home, it is able to reshape its own layout to meet their needs.<ref>'''''[[Kingdom Hearts Ultimania|Kingdom Hearts 3D: Dream Drop Distance Ultimania]]''''', '''Tetsuya Nomura''': "In the first place, the worlds in the rift between darkness and light have different rules than other worlds. The Mysterious Tower isn't always standing in a fixed place. Traverse Town too reforms its shape every time, which is why the version that appears in this title is clearly different than the version in KH1."</ref><!--http://www.khinsider.com/news/KH3D-Ultimania-Interviews-Translated-2602#Scenario Mysteries--> However, in all appearances it remains a quaint and calm town with a sky of unending night, in which stars can be clearly seen. | ||
[[ | ==Settings and Areas== | ||
===''Kingdom Hearts''=== | |||
[[File:First District (Art).png|thumb|left|200px|Artwork of the First District.]] | |||
Traverse Town is similar to a Victorian-age town in terms of design and layout. It is divided into three major districts along with several minor locations such as alleyways and caves. The {{nihongo|'''{{a|First District}}'''|1番街|Ichiban Gai}} is the most peaceful of the three, without the presence of Heartless (with the exception of the first visit where Heartless briefly appears prior to the fight against [[Leon]]). The First District is where most survivors of the destroyed worlds can be found. The most notable locations include the {{nihongo|'''{{a|Accessory Shop}}'''|アクセサリーショップ|Akusesarī Shoppu}} owned and managed by Cid, the {{nihongo|'''{{a|Item Shop}}'''|アイテムショップ|Aitemu Shoppu}} run by [[Huey]], [[Dewey]], and [[Louie]], and an {{nihongo|'''{{a|Item Workshop}}'''|アイテムアトリエ|Aitemu Atorie|lit. "Item Atelier"}} run by Moogles on the top floor of Cid's store. There is also a shop run by Cid after the [[keyhole]] of Traverse Town is locked; he sells [[Gummi Blocks]] near the gate to the Second District. To the left of the town entrance there is a restaurant with magical self-lighting candles. Later in the game {{nihongo|'''{{a|Geppetto's House}}'''|ゼペットの家|Zepetto no Ie}} appears diagonally to the right behind the Accessory Shop; a green-doored apartment that [[Geppetto]], [[Pinocchio]], and Cleo move into after they escape from [[Monstro]]. The mailbox used in the [[Postcard]] hunt is also found here, close to the door leading into the Third District. Directly across from the Accessory Shop is a large set of double-doors which serve as the entrance to the town and can return the player to the world map to choose another world to travel to. | |||
[[File:Second District (Art).png|thumb|200px|Artwork of the Second District.]] | |||
The {{nihongo|'''{{a|Second District}}'''|2番街|Niban Gai}} is infested with a variety of Heartless. It includes the {{nihongo|'''{{a|Gizmo Shop}}'''|からくり部屋|Karakuri Heya|lit. "Mechanism Room"}}, on whose roof a bell is eventually rung three times in order to reveal the world's Keyhole. Also present is the '''{{a|Dalmatians' House}}''', where [[Pongo]] and [[Perdita]] have settled due to the destruction of their world. The house consists of the {{nihongo|'''{{a|Dalmatians' Den}}'''|子犬たちの私室|Koinu-tachi no Shishitsu|lit. "Puppies' Den"}}, the {{nihongo|'''{{a|Living Room}}'''|子犬たちの居間|Koinu-tachi no Ima|lit. "Puppies' Living Room"}}, the {{nihongo|'''{{a|Dining Room}}'''|子犬たちの食堂|Koinu-tachi no Shokudō|lit. "Puppies' Dining Hall"}}, and the {{nihongo|'''{{a|Piano Room}}'''|子犬たちの客間|Koinu-tachi no Kyakuma|lit. "Puppies' Parlor"}}. The {{nihongo|'''{{a|Hotel}}'''|宿屋|Yadoya|lit. "Inn"}} is on the west side of the district and is often invaded by Heartless, but can be entered through the {{nihongo|'''{{a|Hallway}}'''|廊下|Rōka}}; in addition, the {{nihongo|'''{{a|Red Room}}'''|赤の間|Aka no Ma}} and {{nihongo|'''{{a|Green Room}}'''|緑の間|Midori no Ma}} are located within the Hotel, where Sora, [[Donald]], and [[Goofy]] are briefed by Leon and Aerith. The east side of town includes the entrance to the Third District, as well as a set of roofs that can be climbed to reach treasures and a hidden entrance to a balcony in the Third District. At the back of the Hotel lies the {{nihongo|'''{{a|Alleyway}}'''|2番街:路地裏|Niban Gai: Rojiura|lit. "Second District: Back Alley"}}; it has passages to the Dalmatians' House and the First District, and its drainage pipes lead to the Secret Waterway. | |||
A sign shaped like the Mad Hatter from ''{{w|Alice in Wonderland (1951 film)|Alice in Wonderland}}'' is also seen moving his hat up and down on top of a store, dealing with suits and dresses. | |||
[[File:Third District (Art).png|thumb|left|200px|Artwork of the Third District.]] | |||
[[ | The {{nihongo|'''{{a|Third District}}'''|3番街|Sanban Gai}} is a plaza also overrun with Heartless but is the smallest of the three main districts. Notable areas include the {{nihongo|'''{{a|Vacant House}}'''|空き家|Akiya}} next to the Second District's door, which [[Leon]] and his crew eventually claim as the {{nihongo|'''{{a|Small House}}'''|小さな家|Chīsana Ie}}, their headquarters. The most notable feature in this district is the golden fountain in the corner of the lower area, which depicts an image from Disney's 1955 film, ''{{w|Lady and the Tramp}}''. Casting [[Thunder]] on some exposed cable wires raises the platforms in the Second District's Gizmo Shop. Finally, a keyhole next to the giant door to First District can also be found and unlocked for faster access to that area. In another corner, a short alley leads to a door with a flame on it that goes to the {{nihongo|'''{{a|Mystical House}}'''|3番街:不思議な館|Sanban Gai: Fushigina-kan|lit. "Third District: Mysterious House"}}, and in turn the {{nihongo|'''{{a|Magician's Study}}'''|魔法使いの書斎|Mahōtsukai no Shosai}} and {{nihongo|'''{{a|Magician's Lab}}'''|魔法使いの実験室|Mahōtsukai no Jikkenshitsu|also referred to as the "Zero District" by Merlin in ''[[Kingdom Hearts II]]''}}, where Merlin and the Fairy Godmother take up residence. The book that serves as the entry point to [[100 Acre Wood]] can also be found in the study. Below Merlin's house is the {{nihongo|'''{{a|Secret Waterway}}'''|隠された水路|Kakusareta Suiro|lit. "Hidden Waterway"}}, which serves as Leon's secret training ground, as well as a back entrance to the Alleyway. | ||
{{-}} | |||
===''Kingdom Hearts Chain of Memories''=== | |||
At [[Castle Oblivion]], a version of Traverse Town is constructed based of off Sora's memories. The world can be explored through boxed-in areas resembling the original town, drawing heavy inspiration from the First District and Third District. In cutscenes, areas such as the '''Third District''', '''Vacant House''', and the '''Second District''' are visited, with the Third District being used for a tutorial battle against Leon, and the Second District also serving as a boss arena. In the original ''Chain of Memories'', a mix of both districts serves as the boss arena instead. | |||
=== | ===''Kingdom Hearts coded''=== | ||
[[ | [[File:Traverse Town 03 KHREC.png|thumb|right|The bugged version of the Second District.]] | ||
In ''Kingdom Hearts coded'' a data version of Traverse Town is explored. It's quite identical to the first game, but several areas are now inaccessible. The first area is still the {{nihongo|'''{{a|First District}}'''|1番街|1-ban Gai}} and looks the same, though where Geppetto's House once was there is now a ladder leading to some [[Bug Blox]]. Geppetto's House does however appear in cutscenes. The town's shops can no longer be access and the hole in the wall which used to lead to Alleyway is closed off. Cid can be found standing in front of the accessories shop and is later joined by Huey, Dewey, and Louie once they're rescued. Several other residents hang out in this district as well. Next to the item shop is one of the world's save points. | |||
At the start of the {{nihongo|'''{{a|Second District}}'''|2番街|2-ban Gai}} there's another save point and a [[Moogle Shop]] opposite it. The area is mostly the same as it was in the first game, but the three pillars atop of the gizmo shop are now missing. Down by the fountain there's a door which serves as the only entry point for the {{nihongo|'''{{a|Alleyway}}'''|路地裏|Rojiura|lit. "Back Alley"}}. There, two new ladders has been added to the area on opposite sides of the map, both leading to several Bug Blox that can be platformed. A third save point is found near the Alleyway's exit. To the east side of the Second District is the entrance to the {{nihongo|'''{{a|Third District}}'''|3番街|3-ban Gai}}. Down the stairs by the entrance is a second Moogle Shop, and other than that the area remains unchanged and still leads back to the First District. | |||
=== | A bugged version of the Second District temporally appears during the visit. It differs from the usual version with the gizmo shop being mostly covered with the Bug Blox pattern, as well as several of its walls spinning in circles. Shortly after the Second District has been fixed, the world's {{nihongo|'''{{a|Keyhole}}'''|鍵穴|Kagiana}} becomes accessible, containing four two-dimensional and linear areas named {{nihongo|'''{{a|Keyhole / 1st District|1st District}}'''|鍵穴:1番街|Kagiana: 1-ban Gai}}, {{nihongo|'''{{a|Keyhole / 2nd District|2nd District}}'''|鍵穴:2番街|Kagiana: 2-ban Gai}}, {{nihongo|'''{{a|Keyhole / 3rd District|3rd District}}'''|鍵穴:3番街|Kagiana: 3-ban Gai}} and {{nihongo|'''{{a|Keyhole / Terminus|Terminus}}'''|鍵穴:最深部|Kagiana: Saishinbu|lit. "Keyhole: Deepest Part"}}. | ||
Across Traverse Town's four areas are a bunch of Bug Blox appearing both on ground and in air. The world also contains six [[System Sector]]s. The two first are found in the First District, one on the large door to the south, and the another on the second-floor door to the accessory shop. Two more are found in the Second District. One on the ground, next to the west wall on the bottom level of the area, and a second one on the northwestern door to the hotel. In the Alleyway one appears on the red door, on the second balcony from the north. And the last one appears on the door with the flame found in the Third District. | |||
{|class="wikitable mw-collapsible mw-collapsed" | |||
!Area Map in ''Kingdom Hearts Re:coded'' | |||
|- | |||
| | |||
[[File:Minimap (Traverse Town) KHREC.png|500px]] | |||
|} | |||
{{-}} | |||
===''Kingdom Hearts 3D: Dream Drop Distance''=== | |||
[[File:Fourth District (Art).png|thumb|left|150px|Artwork of the Fourth District.]] | |||
In ''Kingdom Hearts 3D: Dream Drop Distance'', Traverse Town has now relocated to the [[Sleeping Worlds]]. Only three areas return, the {{nihongo|'''{{a|First District}}'''|1番街|1-ban Gai}}, the {{nihongo|'''{{a|Second District}}'''|2番街|2-ban Gai}}, and the {{nihongo|'''{{a|Third District}}'''|3番街|3-ban Gai}}. All three areas have received minor changes. To the west of the First District there is now a new door leading to the Back Streets. On the bottom level of the Second District there are now a couple new lamps near the gizmo shop, and the lamps in the Third District are missing their flags. The broken electric wire has also been removed and replaced by a pile of planks and some crates. Generally, a lot of crates are placed around town blocking previously accessible entrances. There's also an abundance of barrels around town which can be used in combat. For Riku the doorway between the First and Third District is blocked. The Third District also serves as a battle arena for the fight against the Nightmare Bosses summonned by [[Spellican]] for Sora to fight in the second visit. | |||
The aforementioned {{nihongo|'''{{a|Back Streets}}'''|裏通り|Uradōri}} is a twisting mass of streets interconnected by a long series of waterways, and can only be accessed by Riku. At the of the Back Streets is a passage that leads up to the {{nihongo|'''{{a|Fountain Plaza}}'''|噴水広場|Funsui Hiroba}}. Through a narrow and long alleyway you reach a huge open area wherein a massive eponymous fountain lies. On one of the walls is a huge graffiti taken straight from ''{{w|The World Ends with You}}''. Parallel to the long alleyway is another shorter and wide alleyway leading to the {{nihongo|'''{{a|Post Office}}'''|ポストオフィス|Posuto Ofisu}}, a massive area filled with boxes and letters and many contraptions, both animated and still. A circular elevator in a small room of the Post Office leads up to the mailbox in the First District. The Post Office is an area that can only be accessed by Sora. There is in front of the Fountain Plaza a huge manhole cover, beneath which [[Julius]] sleeps. Once the game has been cleared, it is required to take him down once to access the plaza and traverse it. Behind the Fountain Plaza's massive fountain is a door which leads to the Fourth District. | |||
[[File:Fifth District (Art).png|thumb|right|200px|Artwork of the Fifth District.]] | |||
The {{nihongo|'''{{a|Fourth District}}'''|4番街|4-ban Gai}} is a shopping area infested with Dream Eaters. It is largely populated by Moogles, who run both the [[Medal Shop]] and the district's main feature, the [[Flick Rush]] Colosseum. The district also houses the entrance to the Fifth District, which is framed with red and white cubes and has handles shaped like the face of the [[Hockomonkey]]. The district is embellished with many bright lights and decorations such as streamers. It houses multiple shops, including a Dream Eater shop which has a balloon in the shape of a paw hanging outside the door. The largest and most prominent feature within the district is a large tower similar to a lighthouse, to which various streamers are tied. | |||
The {{nihongo|'''{{a|Fifth District}}'''|5番街|5-ban Gai}} lies beyond the door in the Fourth District. The majority of the district is taken up by the {{nihongo|'''{{a|Garden}}'''|植物園|Shokubutsu-en|lit. "Botanical Garden"}}, which is filled with many varieties of plants. The Garden is a large, three-floor greenhouse surrounded by a small waterway that can be entered by crossing a bridge to its front entrance, which holds a sign that reads "Flower & Plant." The surrounding alleys of the district are mainly empty. Those areas also serve as battle arenas for both incarnations of [[Hockomonkey]]. | |||
{|class="wikitable mw-collapsible mw-collapsed" | |||
!Area Map in ''Kingdom Hearts Dream Drop Distance HD'' | |||
|- | |||
| | |||
[[File:Minimap (Traverse Town) KHDDD.png|404px]] | |||
|} | |||
{{-}} | |||
==Story== | ==Story== | ||
[[ | ===Between ''Kingdom Hearts Birth by Sleep'' and ''Kingdom Hearts''=== | ||
==='' | [[Maleficent]] invades [[Radiant Garden]] with her army of [[Heartless]], and [[Cid]] takes young [[Leon]], [[Yuffie]], and [[Aerith]] to Traverse Town in a [[Gummi Ship]].<!--also Cloud?--> | ||
===''Kingdom Hearts''=== | |||
Donald and Goofy first arrive in Traverse Town with [[Pluto]] on a mission given to them by [[King Mickey]] to look for Leon and the person who holds "[[Kingdom Key|the key]]". They arrive in Traverse Town at the same time that the destruction of [[Destiny Islands]] is taking place (a reference to this is made when Donald and Goofy see the world's star going out). Donald and Goofy continue searching for their objectives while Pluto finds a sleeping Sora in the alleyway of the First District. After being woken up by Pluto, Sora begins to wander around the town, hoping to find his friends from the island. When he reaches the Second district, he sees a man lose his [[heart]] and become a Heartless. While exploring the world, Sora defeats many Heartless and he barely misses encountering Donald and Goofy several times as they independently explored the town. Eventually, Sora meets Leon, who challenges him in a battle for the [[Keyblade]]. After the fight, Sora passes out from exhaustion, and Leon and Yuffie bring him to a room in the Hotel, while Aerith finds Donald and Goofy and brings them to a separate room. There, they independently explain the Keyblade, the [[Heartless]] and they tell of the [[Ansem Reports]]. | |||
{{Canon|In the manga, Sora is bothered by a sultry woman, only for a [[Soldier]] to steal her heart and summon [[Shadow]]s. Sora escapes into Cid's shop, where Cid blows away the Heartless with a cannon.}} | |||
Heartless attack the Hotel, and Leon and Sora take off to fend them off. Before going ahead, Leon tells Sora not to worry about the attacking [[Soldier]] and [[Shadow]] Heartless and to find their leader. As Sora enters the Third District, Donald and Goofy are blown off a balcony above by an attack from a Soldier and land on him, this is when Donald and Goofy first see the Keyblade and realize Sora is the person they are looking for. The three battle and defeat a battalion of Soldiers before the [[Guard Armor]] comes out, the trio beats this giant Heartless and Upon its defeat, Donald and Goofy explain their mission to find the [[Keyblade wielder]], and they ask Sora to come with them, Sora is hesitant at first but when Leon tells Sora that going with them would provide the best chance to find his friends Sora agrees to accompany them on their journey. Before they leave, Leon and the others give Sora [[munny]] to spend in preparing for his journey, and Donald and Goofy teach Sora [[magic]] and [[Dodge Roll]], respectively. | |||
Sora returns to town with a [[Navi-G Piece]] that he got from [[Deep Jungle]] and asks [[Cid]] to install it in the [[Gummi Ship]], while he delivers the [[100 Acre Wood]] book to [[Merlin]] in exchange. While Delivering the book, Sora meets Merlin and the [[Fairy Godmother]], the former helps Sora improve his magic and the latter shows Sora how to [[Summon]]. On the way back from Merlin's, Sora is briefly reunited with Riku, only for him to mysteriously vanish again shortly after. At a house in Traverse Town, Sora, Donald, and Goofy meet with Leon and company, who tells them about Maleficent and her forces of darkness. While Leon is warning them, Maleficent is actually watching outside with Riku and she slowly starts to turn him against Sora, saying Sora now values Donald and Goofy more than Riku and [[Kairi]]. Sora defeats the Guard Armor a second time and seals the world's Keyhole shortly after. Before leaving, Sora and the gang also encounter [[Pinocchio]] in the accessory shop. | |||
After learning from [[Captain Hook]] that Riku took Kairi to [[Hollow Bastion]], Sora, Donald, and Goofy return for their third visit so they can have Cid install a Navi-G Piece that would allow the trio to journey to Hollow Bastion. While waiting on Cid, Sora becomes slightly depressed at not being able to save Kairi on Hook's ship, and he asks Donald and Goofy how they can remain so cheerful despite not having seen any sign of their king throughout their journey. Donald and Goofy respond to his question by saying everything will be okay as long as they continue to believe in themselves, which manages to cheer Sora up. Sora then proceeds to see a vision from the past where [[Kairi's Grandma]] tells her the story of [[light]] and darkness, and she assures a young Kairi that even in the deepest darkness, there will always be a light to guide her. Sora wakes from the vision confused, but Cid returns with the news that the Gummi Ship is ready, so Sora, Donald, and Goofy depart for Hollow Bastion. | |||
Sora returns for a fourth visit after saving Kairi from Hollow Bastion. After discussing it with Leon, Sora decides he has to go back to Hollow Bastion to save Riku and the other six [[Princesses of Heart]] as well as seal the [[Final Keyhole]]. Before he heads out, Sora has a conversation with Kairi in the Secret Waterway where he thanks Kairi for saving him when he was a Heartless. Kairi gives him a [[Wayfinder]] for luck and makes him promise to return it to her after he gets things fixed, which he agrees to. The powerful bond between Sora and Kairi that the Wayfinder represents gives it the power to act as a [[Keychain]] token for Sora's Keyblade, transforming it into the [[Oathkeeper]]. | |||
{{Canon|In the manga, Sora never leaves Hollow Bastion. Instead, Leon's group arrives to help destroy the [[Behemoth]] blocking the Keyhole.}} | |||
==='' | ===''Kingdom Hearts Chain of Memories''=== | ||
Traverse Town | When Sora enters [[Castle Oblivion]], [[Marluxia]] gives him a [[world card]], which leads Sora into a memory-based Traverse Town. Here Marluxia teaches Sora how to fight while in the castle. | ||
While exploring the town, Sora, Donald, and Goofy encounter Leon, Yuffie, and Aerith, who do not remember them, but paradoxically know their names. Aerith speculates that their memories are resonating with Sora's. | |||
Sora continues exploring the town, and he encounters Cid, who also recognizes Sora, but doesn't remember him. He tells Sora about the giant Heartless that appears when the Gizmo Shop bell rings. When the bell does after Cid leaves, the Guard Armor appears, and Sora fights and defeats it. After the battle, Sora says goodbye to the others, ready to continue on his way through the castle, but Aerith tells him that the town and its inhabitants are figments of Sora's mind and that he should careful about trusting his memory. | |||
== | Later, Riku explores the memory-based Traverse Town, but he only encounters the Guard Armor. He promptly defeats the Heartless and takes his leave. | ||
===''Kingdom Hearts 358/2 Days''=== | |||
Although [[Roxas]] never visits this world, he sometimes sees it in his dreams and flashbacks reliving Sora's memories. | |||
===''Kingdom Hearts II''=== | |||
While Sora's memories are being restored, Roxas continues to dream of his memories from Traverse Town, including his meeting Leon, Yuffie, and Aerith and teaming up with Donald and Goofy. | |||
Although Sora does not visit this world during his second journey, Merlin claims that he retrieved [[Winnie the Pooh]]'s storybook out of the town's Zero District. | |||
Traverse Town is mentioned several times in the [[Secret Ansem Reports]]. | |||
===''Kingdom Hearts coded''=== | |||
In the [[datascape]], [[Data-Sora]] is sent to Traverse Town after debugging the Destiny Islands. He is woken up by Pluto in the First District, paralleling when the real-world Sora first arrived at the real town. Data-Sora finds the town overrun with [[Bug Blox]] and Heartless, and he is asked by Cid to search for Huey, Dewey, and Louie in the other districts. He finds them one by one, and each of them gives Sora a [[Mystery Piece|shiny object]] they found while exploring. Sora notices that the objects fit together to make an incomplete Keyhole. | |||
While searching the town, Sora encounters the [[Data-Riku|black-coated figure]], and after he finds the last of the triplets, the figure gives him one last piece of the Keyhole. From the [[Disney Castle]] library, Mickey tells Sora that the Keyhole probably leads to the source of the bugs. Inside the Keyhole, Sora traverses a strange space filled with bugs and Heartless. In the end, he encounters a Guard Armor, fights, and defeats it, clearing the town of bugs. | |||
After Sora debugs Traverse Town, a new power awakens inside of him.<!--coded only--> Meanwhile, in the castle library, a new message appears in [[Jiminy's Journal]], that reads "There are more hurts than the one you have just undone."<ref>In the original ''Kingdom Hearts coded'', the message reads, "Their torment has been lessened."</ref> | |||
Sora | ===''Kingdom Hearts 3D: Dream Drop Distance''=== | ||
In order to save the existence of his friends, [[Joshua]] takes the last remnants of their dreams and searches for a safe place for them. Traverse Town appears before him in the Realm of Dreams, and [[Rhyme]]'s dreams open a portal to the town. Joshua is surprised to discover that dreams take physical form in that world, and he decides to try restoring his friends' existence by piecing their dreams together. | |||
Sora and Riku arrive in the sleeping Traverse Town at the beginning of their [[Mark of Mastery exam]], but they are separated into two separate, yet connected, iterations of the town. They meet the former [[Shibuya]] residents, who, despite being separated from their partners, continue to play the Reaper's Game. [[Neku]] and Joshua introduce Sora and Riku, respectively, to using [[Dream Eater]]s in battle. | |||
Riku | In Sora's iteration of the town, Neku brings Sora to the Third District, to where a [[Young Xehanort|hooded figure]] is waiting. While Neku tries to stop him from hurting Sora, Sora [[drop]]s for the first time. | ||
On Riku's side, [[Beat]] encounters him and Joshua in the Second District, and he tries to make his [[Kooma Panda]] attack Joshua, to no avail. After Riku defeats the Dream Eater, Beat gives up, and he expresses his wish to protect Rhyme, just before Riku drops. | |||
Sora begins searching the town for Neku, while looking for his partner, and he finds Rhyme in the Fourth District. Although she doesn't remember whose partner she is, Sora takes her with him to find Neku. | |||
Riku sees [[Shiki]] being chased by Dream Eaters into the First District. He saves her, then agrees to accompany her through the town. They arrive in the Fifth District, where they encountered the hooded figure, who tells Riku he will wander in sleep forever. Beat arrives to take care of Shiki, and he tells Riku the hooded figure had told Shiki he could send her home if she brought him Riku. The mysterious youth reveals his face, then summons the [[Hockomonkey]], which enters the Garden. The youth disappears in a [[Corridor of Darkness]], and Riku follows the Hockomonkey into the Garden, leaving Beat to watch over Shiki. | |||
Sora and Rhyme arrive in the Fifth District, where they find Neku on the roof of the Garden. Neku explains that the black-coated figure told him he could send Neku and his partner home, in exchange for Sora. Sora forgives Neku and asks if Rhyme is his partner. Even as Neku says no, Rhyme disappears. The mysterious youth appears and summons the Hockomonkey, before disappearing in a Dark Corridor. Sora defeats the Hockomonkey, and as it breaks into pieces overhead, images of Shiki and Riku appear. Joshua appears, having used Rhyme's portal to save her and move between two Traverse Towns. Joshua explains the nature of the town, including the two iterations, and he speculates that the world was split because of the figure in the black coat. Sora, Neku, and Rhyme watch the images of Riku, Shiki, and Beat. | |||
In the meantime, Riku defeats the Hockomonkey, and when it breaks into pieces, he, Beat, and Shiki see images of Sora, Rhyme, Neku, and Joshua standing around in the middle of the district. Although Beat is frustrated that he can't touch Rhyme, Riku reassures him that they will reach each other as long as their hearts are connected. | |||
Joshua talks to both Sora and Riku, across the separation between their two sides, explaining how he and his friends came to Traverse Town. He surprises them by sprouting wings and flying away, leaving them to lock the Traverse Town Keyhole. | |||
By the time Sora and Riku return to the town, the partners are reunited. As Joshua explains to Sora, they continue to play the Reaper's Game in order to save themselves from being erased from existence and return to their homeworld. In their new mission, they must defeat the [[Spellican]], which has the power to summon many Dream Eater minions. Joshua asks Sora if he and Riku can help them out with their mission, and Sora agrees readily and goes to assist Neku and Shiki in the Fountain Plaza. After Sora beats the Spellican's minions, it escapes to Riku's side. While Sora is meeting Shiki, Joshua arrives and tells them his plan to corner the Spellican in the Third District. | |||
Joshua also meets up with Riku when he arrives in the First District. He tells him about the Players' new mission, adding that Sora is already helping them out, and asks Riku to help Beat and Rhyme in the Fountain Plaza. He also tells Riku about the time disparity between the two Traverse Towns, suggesting that the two worlds are somehow distinct from each other. Joshua notes that it implies that they are within a dream, and tells Riku that it could be very significant for him and Sora. | |||
Riku finds Beat and Rhyme facing the Spellican, which becomes agitated when the three of them become wrapped up in introductions and banter between Beat and Rhyme. While the two Players take on the Spellican's summoned minions, Riku follows it into the Back Streets. It summons a herd of [[Cera Terror]]s to hold him off, but he defeats them, and Joshua points him towards the Third District. | |||
When Riku, Beat, and Rhyme corner the Spellican in the Third District, it moves to Sora's side. Joshua warns Riku about trusting the dream he is in, and Riku locks the second Traverse Town Keyhole. | |||
Sora arrives in the Third District just as the Spellican emerges. While Neku and Shiki take on the lesser minions, Sora fights and defeats the Hockomonkey, [[Wargoyle]], and [[Char Clawbster]] the Spellican summons. With its minions beaten, the Spellican escapes the town through its Keyhole, but Sora promises to go after it in order to complete the Players' mission. Neku and Shiki invite Sora to visit them in Shibuya, and he locks the Keyhole. | |||
Traverse Town is also mentioned by [[Ienzo]] while [[Lea]] is searching for [[Braig]] and [[Isa]]. Ienzo explains that if a person who has lost their heart is recompleted, they normally appear in the world where they lost their heart in the first place; if that world is destroyed or otherwise unavailable, they would appear in Traverse Town instead.<ref>'''''[[Kingdom Hearts 3D: Dream Drop Distance]]''''', '''Ienzo''': "When someone who's lost their heart is recompleted, they should return to the place where it happened. And if that world is unavailable for whatever reason, a refuge is made for them in the realm between—a world called "Traverse Town". They would be sent there."</ref> | |||
After Sora and Riku finish the Mark of Mastery exam, Sora returns to the sleeping Traverse Town, where he reunites with his Spirit Dream Eaters. | |||
=== | ==Other appearances== | ||
===''A fragmentary passage''=== | |||
While not visitable, Traverse Town is briefly shown with Donald and Goofy walking through it. | |||
== | ==Characters== | ||
<gallery> | |||
File:Leon KH.png|[[Leon]]<br>{{KH}}{{KHCoM}} | |||
File:Yuffie KH.png|[[Yuffie]]<br>{{KH}}{{KHCoM}} | |||
File:Aerith KH.png|[[Aerith]]<br>{{KH}}{{KHCoM}} | |||
File:Cid KHREC.png|[[Cid]]<br>{{KH}}{{KHCoM}}{{KHc}} | |||
File:Moogle KH.png|[[Moogle]]s<br>{{KH}}{{KHCoM}}{{KHc}}{{KH3D}} | |||
File:Huey KH.png|[[Huey, Dewey, and Louie|Huey]]<br>{{KH}}{{KHc}} | |||
File:Dewey KH.png|[[Huey, Dewey, and Louie|Dewey]]<br>{{KH}}{{KHc}} | |||
File:Louie KH.png|[[Huey, Dewey, and Louie|Louie]]<br>{{KH}}{{KHc}} | |||
File:Pongo KH.png|[[Pongo]]<br>{{KH}} | |||
File:Perdita KH.png|[[Perdita]]<br>{{KH}} | |||
File:99 Puppies KH.png|[[99 Puppies]]<br>{{KH}} | |||
File:Merlin KH.png|[[Merlin]]<br>{{KH}} | |||
File:Fairy Godmother KH.png|[[Fairy Godmother]]<br>{{KH}} | |||
File:Pinocchio KH.png|[[Pinocchio]]<br>{{KH}} | |||
File:Geppetto KH.png|[[Geppetto]]<br>{{KH}} | |||
File:Cleo KH.png|[[Cleo]]<br>{{KH}} | |||
File:Neku Sakuraba KH3D.png|[[Neku Sakuraba]]<br>{{KH3D}} | |||
File:Joshua KH3D.png|[[Joshua]]<br>{{KH3D}} | |||
File:Shiki KH3D.png|[[Shiki]]<br>{{KH3D}} | |||
File:Beat KH3D.png|[[Daisukenojo Bito]]<br>{{KH3D}} | |||
File:Rhyme KH3D.png|[[Rhyme]]<br>{{KH3D}} | |||
File:Julius KH3D.png|[[Julius]]<br>{{KH3D}} | |||
</gallery> | |||
;Cameos | |||
<gallery> | |||
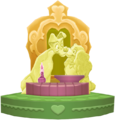
File:Lady and the Tramp Fountain KH.png|Lady and Tramp on the fountain. | |||
</gallery> | |||
== | ==NPCs== | ||
{| | <gallery> | ||
| | File:Traverse Town NPC 1 KH.png|The Accessory Shop assistant.<br>{{KH}} | ||
File:Traverse Town NPC 2 KH.png|The man standing in front of the shop.<br>{{KH}} | |||
File:Traverse Town NPC 3 KH.png|The woman near the cafe bar.<br>{{KH}} | |||
File:Traverse Town NPC 4 KH.png|The boy roaming the First District.<br>{{KH}} | |||
File:Traverse Town NPC 1 KHREC.png|The boy near the mailbox.<br>{{KHc}} | |||
File:Traverse Town NPC 2 KHREC.png|The woman near the cafe bar.<br>{{KHc}} | |||
File:Traverse Town NPC 3 KHREC.png|The man near the Third District entrance<br>{{KHc}} | |||
</gallery> | |||
==Enemies== | |||
| | ===Heartless=== | ||
{|class="wikitable mw-collapsible mw-collapsed" | |||
! | |||
|- | |- | ||
| | | | ||
<gallery> | |||
File:Shadow KHII.png|[[Shadow]]<br>{{KH}}{{KHCoM}}{{KHc}} | |||
File:Soldier KHII.png|[[Soldier]]<br>{{KH}}{{KHCoM}}{{KHc}} | |||
File:Air Soldier KH.png|[[Air Soldier]]<br>{{KH}} | |||
File:Large Body KHII.png|[[Large Body]]<br>{{KH}}{{KHc}} | |||
File:Red Nocturne KH.png|[[Red Nocturne]]<br>{{KH}}{{KHCoM}} | |||
File:Blue Rhapsody KH.png|[[Blue Rhapsody]]<br>{{KH}}{{KHCoM}} | |||
File:Yellow Opera KH.png|[[Yellow Opera]]<br>{{KH}} | |||
File:Green Requiem KH.png|[[Green Requiem]]<br>{{KH}} | |||
File:Sniperwild KHFM.png|[[Sniperwild]]<br>{{FM}} | |||
File:Search Ghost KH.png|[[Search Ghost]]<br>{{KH}} | |||
File:Darkball KH.png|[[Darkball]]<br>{{KH}} | |||
File:Wyvern KH.png|[[Wyvern]]<br>{{KH}}{{KHc}} | |||
File:Defender KH.png|[[Defender]]<br>{{KH}} | |||
File:Eliminator KHREC.png|[[Eliminator]]<br>{{KHc}} | |||
File:Wizard KH.png|[[Wizard]]<br>{{KH}} | |||
File:White Mushroom KH.png|[[White Mushroom]]<br>{{KH}}{{KHCoM}} | |||
File:Black Fungus KH.png|[[Black Fungus]]<br>{{KHCoM}} | |||
File:Gold Tricholoma KHREC.png|[[Gold Tricholoma]]<br>{{KHc}} | |||
File:Blox Bug KHREC.png|[[Blox Bug]]<br>{{KHc}} | |||
File:Danger Bug KHREC.png|[[Danger Bug]]<br>{{KHc}} | |||
File:Prize Bug KHREC.png|[[Prize Bug]]<br>{{KHc}} | |||
File:Guard Armor KH.png|'''[[Guard Armor]]'''<br>{{KH}}{{KHCoM}}{{KHc}} | |||
File:Opposite Armor KH.png|'''[[Opposite Armor]]'''<br>{{KH}} | |||
</gallery> | |||
|} | |||
===Nobodies=== | |||
{|class="wikitable mw-collapsible mw-collapsed" | |||
! | |||
|- | |- | ||
| | | | ||
<gallery> | |||
File:Mysterious Figure KHFM.png|'''[[Game:Marluxia|Unknown]]'''<br>{{KHCoM}} | |||
</gallery> | |||
|} | |||
===Dream Eaters=== | |||
{|class="wikitable mw-collapsible mw-collapsed" | |||
! | |||
|- | |- | ||
| | | | ||
<gallery> | |||
File:Meow Wow (Nightmare) KH3D.png|[[Meow Wow]]<br>{{KH3D}} | |||
File:Komory Bat (Nightmare) KH3D.png|[[Komory Bat]]<br>{{KH3D}} | |||
File:Kooma Panda (Nightmare) KH3D.png|[[Kooma Panda]]<br>{{KH3D}} | |||
File:Kooma Panda (Spirit) KH3D.png|Beat's Kooma Panda<br>{{KH3D}} | |||
File:Pricklemane (Nightmare) KH3D.png|[[Pricklemane]]<br>{{KH3D}} | |||
File:Hebby Repp (Nightmare) KH3D.png|[[Hebby Repp]]<br>{{KH3D}} | |||
File:Yoggy Ram (Nightmare) KH3D.png|[[Yoggy Ram]]<br>{{KH3D}} | |||
File:Fin Fatale (Nightmare) KH3D.png|[[Fin Fatale]]<br>{{KH3D}} | |||
File:Tama Sheep (Nightmare) KH3D.png|[[Tama Sheep]]<br>{{KH3D}} | |||
File:Tatsu Blaze (Nightmare) KH3D.png|[[Tatsu Blaze]]<br>{{KH3D}} | |||
File:Thunderaffe (Nightmare) KH3D.png|[[Thunderaffe]]<br>{{KH3D}} | |||
File:Fishboné (Nightmare) KH3D.png|[[Fishboné]]<br>{{KH3D}} | |||
File:Peepsta Hoo (Nightmare) KH3D.png|[[Peepsta Hoo]]<br>{{KH3D}} | |||
File:Chef Kyroo (Nightmare) KH3D.png|[[Chef Kyroo]]<br>{{KH3D}} | |||
File:Zolephant (Nightmare) KH3D.png|[[Zolephant]]<br>{{KH3D}} | |||
File:Staggerceps (Nightmare) KH3D.png|[[Staggerceps]]<br>{{KH3D}} | |||
File:Jestabocky (Nightmare) KH3D.png|[[Jestabocky]]<br>{{KH3D}} | |||
File:Necho Cat (Nightmare) KH3D.png|[[Necho Cat]]<br>{{KH3D}} | |||
File:Cera Terror (Nightmare) KH3D.png|[[Cera Terror]]<br>{{KH3D}} | |||
File:Hockomonkey (Brute) KH3D.png|'''[[Hockomonkey|Hockomonkey (Sora's Side)]] (Sora only)'''<br>{{KH3D}} | |||
File:Hockomonkey (Mage) KH3D.png|'''[[Hockomonkey|Hockomonkey (Riku's Side)]] (Riku only)'''<br>{{KH3D}} | |||
File:Spellican KH3D.png|'''[[Spellican]] (Sora only)'''<br>{{KH3D}}<ref>Is intangible during the whole fight.</ref> | |||
File:Wargoyle (Sora's Side) KH3D.png|'''[[Wargoyle]] (Sora only)'''<br>{{KH3D}} | |||
File:Char Clawbster KH3D.png|'''[[Char Clawbster]] (Sora only)'''<br>{{KH3D}} | |||
</gallery> | |||
|} | |||
===Other=== | |||
{|class="wikitable mw-collapsible mw-collapsed" | |||
! | |||
|- | |- | ||
| | | | ||
<gallery> | |||
File:Leon KH.png|'''[[Game:Leon|Leon]]'''<br>{{KH}} | |||
File:Julius KH3D.png|'''[[Julius]]'''<br>{{KH3D}} | |||
|[[ | </gallery> | ||
|} | |} | ||
<!--Development | |||
== | ==Trivia== | ||
* | *In ''Kingdom Hearts coded'', Geppetto's house is present during cutscenes, however, while freely running around in the first district, his house is nowhere to be seen. | ||
* | *The town appears in ''Kingdom Hearts 3D: Dream Drop Distance''<nowiki>'</nowiki>s first two non-canon trailers and screenshots, where Sora is shown fighting a [[Twilight Thorn]] and several [[Shadow]]s, and facing [[Xemnas]] in the Second District while Riku faces off against [[Ansem, Seeker of Darkness]] in the same place. Tetsuya Nomura has stated that his original intention was for the Heartless and Nobodies to return as the game's enemies, but scrapped them in favor of the Dream Eaters. | ||
--> | |||
== | ==Notes and references== | ||
{| | {{reflist|2}} | ||
==See also== | |||
*[[100 Acre Wood]] | |||
* | |||
[[ | {{KH1}} | ||
[[Category: | {{COM}} | ||
[[Category: | {{Coded}} | ||
{{DDD}} | |||
{{MOM}} | |||
[[Category:Featured articles]] | |||
[[Category:Realm Between]] | |||
[[Category:Datascape]] | |||
Latest revision as of 03:25, 8 January 2024
Oh no! The water! I'm in big trouble if I don't fetch it!
| |
 |
This article requires cleanup or improvement.
Please help out by editing this page. Please see the Manual of Style and editing help before getting started. Issues: story section needs to be rewritten to be in-universe. In particular, when they only show flashbacks, place the remembered event in chronological order, then give a quick "flashed back to x event" in the game's section. |
| This article is about the World. For other uses, see Traverse Town (disambiguation). |


Traverse Town is a world in the Realm Between introduced in Kingdom Hearts, where it serves as the game's main hub. It is a unique world that consists of the remnants of worlds which have been lost to darkness, and serves as a haven to those whose worlds no longer exist in the Realm of Light.[1][2] In order to serve as a new home, it is able to reshape its own layout to meet their needs.[3] However, in all appearances it remains a quaint and calm town with a sky of unending night, in which stars can be clearly seen.
Settings and Areas[edit]
Kingdom Hearts[edit]
.png)
Traverse Town is similar to a Victorian-age town in terms of design and layout. It is divided into three major districts along with several minor locations such as alleyways and caves. The First District (1番街 Ichiban Gai) is the most peaceful of the three, without the presence of Heartless (with the exception of the first visit where Heartless briefly appears prior to the fight against Leon). The First District is where most survivors of the destroyed worlds can be found. The most notable locations include the Accessory Shop (アクセサリーショップ Akusesarī Shoppu) owned and managed by Cid, the Item Shop (アイテムショップ Aitemu Shoppu) run by Huey, Dewey, and Louie, and an Item Workshop (アイテムアトリエ Aitemu Atorie, lit. "Item Atelier") run by Moogles on the top floor of Cid's store. There is also a shop run by Cid after the keyhole of Traverse Town is locked; he sells Gummi Blocks near the gate to the Second District. To the left of the town entrance there is a restaurant with magical self-lighting candles. Later in the game Geppetto's House (ゼペットの家 Zepetto no Ie) appears diagonally to the right behind the Accessory Shop; a green-doored apartment that Geppetto, Pinocchio, and Cleo move into after they escape from Monstro. The mailbox used in the Postcard hunt is also found here, close to the door leading into the Third District. Directly across from the Accessory Shop is a large set of double-doors which serve as the entrance to the town and can return the player to the world map to choose another world to travel to.
.png)
The Second District (2番街 Niban Gai) is infested with a variety of Heartless. It includes the Gizmo Shop (からくり部屋 Karakuri Heya, lit. "Mechanism Room"), on whose roof a bell is eventually rung three times in order to reveal the world's Keyhole. Also present is the Dalmatians' House, where Pongo and Perdita have settled due to the destruction of their world. The house consists of the Dalmatians' Den (子犬たちの私室 Koinu-tachi no Shishitsu, lit. "Puppies' Den"), the Living Room (子犬たちの居間 Koinu-tachi no Ima, lit. "Puppies' Living Room"), the Dining Room (子犬たちの食堂 Koinu-tachi no Shokudō, lit. "Puppies' Dining Hall"), and the Piano Room (子犬たちの客間 Koinu-tachi no Kyakuma, lit. "Puppies' Parlor"). The Hotel (宿屋 Yadoya, lit. "Inn") is on the west side of the district and is often invaded by Heartless, but can be entered through the Hallway (廊下 Rōka); in addition, the Red Room (赤の間 Aka no Ma) and Green Room (緑の間 Midori no Ma) are located within the Hotel, where Sora, Donald, and Goofy are briefed by Leon and Aerith. The east side of town includes the entrance to the Third District, as well as a set of roofs that can be climbed to reach treasures and a hidden entrance to a balcony in the Third District. At the back of the Hotel lies the Alleyway (2番街:路地裏 Niban Gai: Rojiura, lit. "Second District: Back Alley"); it has passages to the Dalmatians' House and the First District, and its drainage pipes lead to the Secret Waterway.
A sign shaped like the Mad Hatter from Alice in Wonderland is also seen moving his hat up and down on top of a store, dealing with suits and dresses.
.png)
The Third District (3番街 Sanban Gai) is a plaza also overrun with Heartless but is the smallest of the three main districts. Notable areas include the Vacant House (空き家 Akiya) next to the Second District's door, which Leon and his crew eventually claim as the Small House (小さな家 Chīsana Ie), their headquarters. The most notable feature in this district is the golden fountain in the corner of the lower area, which depicts an image from Disney's 1955 film, Lady and the Tramp. Casting Thunder on some exposed cable wires raises the platforms in the Second District's Gizmo Shop. Finally, a keyhole next to the giant door to First District can also be found and unlocked for faster access to that area. In another corner, a short alley leads to a door with a flame on it that goes to the Mystical House (3番街:不思議な館 Sanban Gai: Fushigina-kan, lit. "Third District: Mysterious House"), and in turn the Magician's Study (魔法使いの書斎 Mahōtsukai no Shosai) and Magician's Lab (魔法使いの実験室 Mahōtsukai no Jikkenshitsu, also referred to as the "Zero District" by Merlin in Kingdom Hearts II), where Merlin and the Fairy Godmother take up residence. The book that serves as the entry point to 100 Acre Wood can also be found in the study. Below Merlin's house is the Secret Waterway (隠された水路 Kakusareta Suiro, lit. "Hidden Waterway"), which serves as Leon's secret training ground, as well as a back entrance to the Alleyway.
Kingdom Hearts Chain of Memories[edit]
At Castle Oblivion, a version of Traverse Town is constructed based of off Sora's memories. The world can be explored through boxed-in areas resembling the original town, drawing heavy inspiration from the First District and Third District. In cutscenes, areas such as the Third District, Vacant House, and the Second District are visited, with the Third District being used for a tutorial battle against Leon, and the Second District also serving as a boss arena. In the original Chain of Memories, a mix of both districts serves as the boss arena instead.
Kingdom Hearts coded[edit]

In Kingdom Hearts coded a data version of Traverse Town is explored. It's quite identical to the first game, but several areas are now inaccessible. The first area is still the First District (1番街 1-ban Gai) and looks the same, though where Geppetto's House once was there is now a ladder leading to some Bug Blox. Geppetto's House does however appear in cutscenes. The town's shops can no longer be access and the hole in the wall which used to lead to Alleyway is closed off. Cid can be found standing in front of the accessories shop and is later joined by Huey, Dewey, and Louie once they're rescued. Several other residents hang out in this district as well. Next to the item shop is one of the world's save points.
At the start of the Second District (2番街 2-ban Gai) there's another save point and a Moogle Shop opposite it. The area is mostly the same as it was in the first game, but the three pillars atop of the gizmo shop are now missing. Down by the fountain there's a door which serves as the only entry point for the Alleyway (路地裏 Rojiura, lit. "Back Alley"). There, two new ladders has been added to the area on opposite sides of the map, both leading to several Bug Blox that can be platformed. A third save point is found near the Alleyway's exit. To the east side of the Second District is the entrance to the Third District (3番街 3-ban Gai). Down the stairs by the entrance is a second Moogle Shop, and other than that the area remains unchanged and still leads back to the First District.
A bugged version of the Second District temporally appears during the visit. It differs from the usual version with the gizmo shop being mostly covered with the Bug Blox pattern, as well as several of its walls spinning in circles. Shortly after the Second District has been fixed, the world's Keyhole (鍵穴 Kagiana) becomes accessible, containing four two-dimensional and linear areas named 1st District (鍵穴:1番街 Kagiana: 1-ban Gai), 2nd District (鍵穴:2番街 Kagiana: 2-ban Gai), 3rd District (鍵穴:3番街 Kagiana: 3-ban Gai) and Terminus (鍵穴:最深部 Kagiana: Saishinbu, lit. "Keyhole: Deepest Part").
Across Traverse Town's four areas are a bunch of Bug Blox appearing both on ground and in air. The world also contains six System Sectors. The two first are found in the First District, one on the large door to the south, and the another on the second-floor door to the accessory shop. Two more are found in the Second District. One on the ground, next to the west wall on the bottom level of the area, and a second one on the northwestern door to the hotel. In the Alleyway one appears on the red door, on the second balcony from the north. And the last one appears on the door with the flame found in the Third District.
| Area Map in Kingdom Hearts Re:coded |
|---|
|
|
_KHREC.png)
Kingdom Hearts 3D: Dream Drop Distance[edit]
.png)
In Kingdom Hearts 3D: Dream Drop Distance, Traverse Town has now relocated to the Sleeping Worlds. Only three areas return, the First District (1番街 1-ban Gai), the Second District (2番街 2-ban Gai), and the Third District (3番街 3-ban Gai). All three areas have received minor changes. To the west of the First District there is now a new door leading to the Back Streets. On the bottom level of the Second District there are now a couple new lamps near the gizmo shop, and the lamps in the Third District are missing their flags. The broken electric wire has also been removed and replaced by a pile of planks and some crates. Generally, a lot of crates are placed around town blocking previously accessible entrances. There's also an abundance of barrels around town which can be used in combat. For Riku the doorway between the First and Third District is blocked. The Third District also serves as a battle arena for the fight against the Nightmare Bosses summonned by Spellican for Sora to fight in the second visit.
The aforementioned Back Streets (裏通り Uradōri) is a twisting mass of streets interconnected by a long series of waterways, and can only be accessed by Riku. At the of the Back Streets is a passage that leads up to the Fountain Plaza (噴水広場 Funsui Hiroba). Through a narrow and long alleyway you reach a huge open area wherein a massive eponymous fountain lies. On one of the walls is a huge graffiti taken straight from The World Ends with You. Parallel to the long alleyway is another shorter and wide alleyway leading to the Post Office (ポストオフィス Posuto Ofisu), a massive area filled with boxes and letters and many contraptions, both animated and still. A circular elevator in a small room of the Post Office leads up to the mailbox in the First District. The Post Office is an area that can only be accessed by Sora. There is in front of the Fountain Plaza a huge manhole cover, beneath which Julius sleeps. Once the game has been cleared, it is required to take him down once to access the plaza and traverse it. Behind the Fountain Plaza's massive fountain is a door which leads to the Fourth District.
.png)
The Fourth District (4番街 4-ban Gai) is a shopping area infested with Dream Eaters. It is largely populated by Moogles, who run both the Medal Shop and the district's main feature, the Flick Rush Colosseum. The district also houses the entrance to the Fifth District, which is framed with red and white cubes and has handles shaped like the face of the Hockomonkey. The district is embellished with many bright lights and decorations such as streamers. It houses multiple shops, including a Dream Eater shop which has a balloon in the shape of a paw hanging outside the door. The largest and most prominent feature within the district is a large tower similar to a lighthouse, to which various streamers are tied.
The Fifth District (5番街 5-ban Gai) lies beyond the door in the Fourth District. The majority of the district is taken up by the Garden (植物園 Shokubutsu-en, lit. "Botanical Garden"), which is filled with many varieties of plants. The Garden is a large, three-floor greenhouse surrounded by a small waterway that can be entered by crossing a bridge to its front entrance, which holds a sign that reads "Flower & Plant." The surrounding alleys of the district are mainly empty. Those areas also serve as battle arenas for both incarnations of Hockomonkey.
| Area Map in Kingdom Hearts Dream Drop Distance HD |
|---|
|
|
_KHDDD.png)
Story[edit]
Between Kingdom Hearts Birth by Sleep and Kingdom Hearts[edit]
Maleficent invades Radiant Garden with her army of Heartless, and Cid takes young Leon, Yuffie, and Aerith to Traverse Town in a Gummi Ship.
Kingdom Hearts[edit]
Donald and Goofy first arrive in Traverse Town with Pluto on a mission given to them by King Mickey to look for Leon and the person who holds "the key". They arrive in Traverse Town at the same time that the destruction of Destiny Islands is taking place (a reference to this is made when Donald and Goofy see the world's star going out). Donald and Goofy continue searching for their objectives while Pluto finds a sleeping Sora in the alleyway of the First District. After being woken up by Pluto, Sora begins to wander around the town, hoping to find his friends from the island. When he reaches the Second district, he sees a man lose his heart and become a Heartless. While exploring the world, Sora defeats many Heartless and he barely misses encountering Donald and Goofy several times as they independently explored the town. Eventually, Sora meets Leon, who challenges him in a battle for the Keyblade. After the fight, Sora passes out from exhaustion, and Leon and Yuffie bring him to a room in the Hotel, while Aerith finds Donald and Goofy and brings them to a separate room. There, they independently explain the Keyblade, the Heartless and they tell of the Ansem Reports.
| This information is based on alternate scenes or materials and is not considered canon within the overall plot of the series. |
|---|
| In the manga, Sora is bothered by a sultry woman, only for a Soldier to steal her heart and summon Shadows. Sora escapes into Cid's shop, where Cid blows away the Heartless with a cannon. |
Heartless attack the Hotel, and Leon and Sora take off to fend them off. Before going ahead, Leon tells Sora not to worry about the attacking Soldier and Shadow Heartless and to find their leader. As Sora enters the Third District, Donald and Goofy are blown off a balcony above by an attack from a Soldier and land on him, this is when Donald and Goofy first see the Keyblade and realize Sora is the person they are looking for. The three battle and defeat a battalion of Soldiers before the Guard Armor comes out, the trio beats this giant Heartless and Upon its defeat, Donald and Goofy explain their mission to find the Keyblade wielder, and they ask Sora to come with them, Sora is hesitant at first but when Leon tells Sora that going with them would provide the best chance to find his friends Sora agrees to accompany them on their journey. Before they leave, Leon and the others give Sora munny to spend in preparing for his journey, and Donald and Goofy teach Sora magic and Dodge Roll, respectively.
Sora returns to town with a Navi-G Piece that he got from Deep Jungle and asks Cid to install it in the Gummi Ship, while he delivers the 100 Acre Wood book to Merlin in exchange. While Delivering the book, Sora meets Merlin and the Fairy Godmother, the former helps Sora improve his magic and the latter shows Sora how to Summon. On the way back from Merlin's, Sora is briefly reunited with Riku, only for him to mysteriously vanish again shortly after. At a house in Traverse Town, Sora, Donald, and Goofy meet with Leon and company, who tells them about Maleficent and her forces of darkness. While Leon is warning them, Maleficent is actually watching outside with Riku and she slowly starts to turn him against Sora, saying Sora now values Donald and Goofy more than Riku and Kairi. Sora defeats the Guard Armor a second time and seals the world's Keyhole shortly after. Before leaving, Sora and the gang also encounter Pinocchio in the accessory shop.
After learning from Captain Hook that Riku took Kairi to Hollow Bastion, Sora, Donald, and Goofy return for their third visit so they can have Cid install a Navi-G Piece that would allow the trio to journey to Hollow Bastion. While waiting on Cid, Sora becomes slightly depressed at not being able to save Kairi on Hook's ship, and he asks Donald and Goofy how they can remain so cheerful despite not having seen any sign of their king throughout their journey. Donald and Goofy respond to his question by saying everything will be okay as long as they continue to believe in themselves, which manages to cheer Sora up. Sora then proceeds to see a vision from the past where Kairi's Grandma tells her the story of light and darkness, and she assures a young Kairi that even in the deepest darkness, there will always be a light to guide her. Sora wakes from the vision confused, but Cid returns with the news that the Gummi Ship is ready, so Sora, Donald, and Goofy depart for Hollow Bastion.
Sora returns for a fourth visit after saving Kairi from Hollow Bastion. After discussing it with Leon, Sora decides he has to go back to Hollow Bastion to save Riku and the other six Princesses of Heart as well as seal the Final Keyhole. Before he heads out, Sora has a conversation with Kairi in the Secret Waterway where he thanks Kairi for saving him when he was a Heartless. Kairi gives him a Wayfinder for luck and makes him promise to return it to her after he gets things fixed, which he agrees to. The powerful bond between Sora and Kairi that the Wayfinder represents gives it the power to act as a Keychain token for Sora's Keyblade, transforming it into the Oathkeeper.
| This information is based on alternate scenes or materials and is not considered canon within the overall plot of the series. |
|---|
| In the manga, Sora never leaves Hollow Bastion. Instead, Leon's group arrives to help destroy the Behemoth blocking the Keyhole. |
Kingdom Hearts Chain of Memories[edit]
When Sora enters Castle Oblivion, Marluxia gives him a world card, which leads Sora into a memory-based Traverse Town. Here Marluxia teaches Sora how to fight while in the castle.
While exploring the town, Sora, Donald, and Goofy encounter Leon, Yuffie, and Aerith, who do not remember them, but paradoxically know their names. Aerith speculates that their memories are resonating with Sora's.
Sora continues exploring the town, and he encounters Cid, who also recognizes Sora, but doesn't remember him. He tells Sora about the giant Heartless that appears when the Gizmo Shop bell rings. When the bell does after Cid leaves, the Guard Armor appears, and Sora fights and defeats it. After the battle, Sora says goodbye to the others, ready to continue on his way through the castle, but Aerith tells him that the town and its inhabitants are figments of Sora's mind and that he should careful about trusting his memory.
Later, Riku explores the memory-based Traverse Town, but he only encounters the Guard Armor. He promptly defeats the Heartless and takes his leave.
Kingdom Hearts 358/2 Days[edit]
Although Roxas never visits this world, he sometimes sees it in his dreams and flashbacks reliving Sora's memories.
Kingdom Hearts II[edit]
While Sora's memories are being restored, Roxas continues to dream of his memories from Traverse Town, including his meeting Leon, Yuffie, and Aerith and teaming up with Donald and Goofy.
Although Sora does not visit this world during his second journey, Merlin claims that he retrieved Winnie the Pooh's storybook out of the town's Zero District.
Traverse Town is mentioned several times in the Secret Ansem Reports.
Kingdom Hearts coded[edit]
In the datascape, Data-Sora is sent to Traverse Town after debugging the Destiny Islands. He is woken up by Pluto in the First District, paralleling when the real-world Sora first arrived at the real town. Data-Sora finds the town overrun with Bug Blox and Heartless, and he is asked by Cid to search for Huey, Dewey, and Louie in the other districts. He finds them one by one, and each of them gives Sora a shiny object they found while exploring. Sora notices that the objects fit together to make an incomplete Keyhole.
While searching the town, Sora encounters the black-coated figure, and after he finds the last of the triplets, the figure gives him one last piece of the Keyhole. From the Disney Castle library, Mickey tells Sora that the Keyhole probably leads to the source of the bugs. Inside the Keyhole, Sora traverses a strange space filled with bugs and Heartless. In the end, he encounters a Guard Armor, fights, and defeats it, clearing the town of bugs.
After Sora debugs Traverse Town, a new power awakens inside of him. Meanwhile, in the castle library, a new message appears in Jiminy's Journal, that reads "There are more hurts than the one you have just undone."[4]
Kingdom Hearts 3D: Dream Drop Distance[edit]
In order to save the existence of his friends, Joshua takes the last remnants of their dreams and searches for a safe place for them. Traverse Town appears before him in the Realm of Dreams, and Rhyme's dreams open a portal to the town. Joshua is surprised to discover that dreams take physical form in that world, and he decides to try restoring his friends' existence by piecing their dreams together.
Sora and Riku arrive in the sleeping Traverse Town at the beginning of their Mark of Mastery exam, but they are separated into two separate, yet connected, iterations of the town. They meet the former Shibuya residents, who, despite being separated from their partners, continue to play the Reaper's Game. Neku and Joshua introduce Sora and Riku, respectively, to using Dream Eaters in battle.
In Sora's iteration of the town, Neku brings Sora to the Third District, to where a hooded figure is waiting. While Neku tries to stop him from hurting Sora, Sora drops for the first time.
On Riku's side, Beat encounters him and Joshua in the Second District, and he tries to make his Kooma Panda attack Joshua, to no avail. After Riku defeats the Dream Eater, Beat gives up, and he expresses his wish to protect Rhyme, just before Riku drops.
Sora begins searching the town for Neku, while looking for his partner, and he finds Rhyme in the Fourth District. Although she doesn't remember whose partner she is, Sora takes her with him to find Neku.
Riku sees Shiki being chased by Dream Eaters into the First District. He saves her, then agrees to accompany her through the town. They arrive in the Fifth District, where they encountered the hooded figure, who tells Riku he will wander in sleep forever. Beat arrives to take care of Shiki, and he tells Riku the hooded figure had told Shiki he could send her home if she brought him Riku. The mysterious youth reveals his face, then summons the Hockomonkey, which enters the Garden. The youth disappears in a Corridor of Darkness, and Riku follows the Hockomonkey into the Garden, leaving Beat to watch over Shiki.
Sora and Rhyme arrive in the Fifth District, where they find Neku on the roof of the Garden. Neku explains that the black-coated figure told him he could send Neku and his partner home, in exchange for Sora. Sora forgives Neku and asks if Rhyme is his partner. Even as Neku says no, Rhyme disappears. The mysterious youth appears and summons the Hockomonkey, before disappearing in a Dark Corridor. Sora defeats the Hockomonkey, and as it breaks into pieces overhead, images of Shiki and Riku appear. Joshua appears, having used Rhyme's portal to save her and move between two Traverse Towns. Joshua explains the nature of the town, including the two iterations, and he speculates that the world was split because of the figure in the black coat. Sora, Neku, and Rhyme watch the images of Riku, Shiki, and Beat.
In the meantime, Riku defeats the Hockomonkey, and when it breaks into pieces, he, Beat, and Shiki see images of Sora, Rhyme, Neku, and Joshua standing around in the middle of the district. Although Beat is frustrated that he can't touch Rhyme, Riku reassures him that they will reach each other as long as their hearts are connected.
Joshua talks to both Sora and Riku, across the separation between their two sides, explaining how he and his friends came to Traverse Town. He surprises them by sprouting wings and flying away, leaving them to lock the Traverse Town Keyhole.
By the time Sora and Riku return to the town, the partners are reunited. As Joshua explains to Sora, they continue to play the Reaper's Game in order to save themselves from being erased from existence and return to their homeworld. In their new mission, they must defeat the Spellican, which has the power to summon many Dream Eater minions. Joshua asks Sora if he and Riku can help them out with their mission, and Sora agrees readily and goes to assist Neku and Shiki in the Fountain Plaza. After Sora beats the Spellican's minions, it escapes to Riku's side. While Sora is meeting Shiki, Joshua arrives and tells them his plan to corner the Spellican in the Third District.
Joshua also meets up with Riku when he arrives in the First District. He tells him about the Players' new mission, adding that Sora is already helping them out, and asks Riku to help Beat and Rhyme in the Fountain Plaza. He also tells Riku about the time disparity between the two Traverse Towns, suggesting that the two worlds are somehow distinct from each other. Joshua notes that it implies that they are within a dream, and tells Riku that it could be very significant for him and Sora.
Riku finds Beat and Rhyme facing the Spellican, which becomes agitated when the three of them become wrapped up in introductions and banter between Beat and Rhyme. While the two Players take on the Spellican's summoned minions, Riku follows it into the Back Streets. It summons a herd of Cera Terrors to hold him off, but he defeats them, and Joshua points him towards the Third District.
When Riku, Beat, and Rhyme corner the Spellican in the Third District, it moves to Sora's side. Joshua warns Riku about trusting the dream he is in, and Riku locks the second Traverse Town Keyhole.
Sora arrives in the Third District just as the Spellican emerges. While Neku and Shiki take on the lesser minions, Sora fights and defeats the Hockomonkey, Wargoyle, and Char Clawbster the Spellican summons. With its minions beaten, the Spellican escapes the town through its Keyhole, but Sora promises to go after it in order to complete the Players' mission. Neku and Shiki invite Sora to visit them in Shibuya, and he locks the Keyhole.
Traverse Town is also mentioned by Ienzo while Lea is searching for Braig and Isa. Ienzo explains that if a person who has lost their heart is recompleted, they normally appear in the world where they lost their heart in the first place; if that world is destroyed or otherwise unavailable, they would appear in Traverse Town instead.[5]
After Sora and Riku finish the Mark of Mastery exam, Sora returns to the sleeping Traverse Town, where he reunites with his Spirit Dream Eaters.
Other appearances[edit]
A fragmentary passage[edit]
While not visitable, Traverse Town is briefly shown with Donald and Goofy walking through it.
Characters[edit]
![Leon [KH I][KH CoM]](/File:Leon_KH.png)
![Yuffie [KH I][KH CoM]](/File:Yuffie_KH.png)
![Moogles [KH I][KH CoM][KH coded][KH 3D]](/File:Moogle_KH.png)
![Huey [KH I][KH coded]](/File:Huey_KH.png)
![Dewey [KH I][KH coded]](/File:Dewey_KH.png)
![Louie [KH I][KH coded]](/File:Louie_KH.png)
![Pongo [KH I]](/File:Pongo_KH.png)
![Perdita [KH I]](/File:Perdita_KH.png)
![99 Puppies [KH I]](/File:99_Puppies_KH.png)
![Merlin [KH I]](/File:Merlin_KH.png)
![Fairy Godmother [KH I]](/File:Fairy_Godmother_KH.png)
![Pinocchio [KH I]](/File:Pinocchio_KH.png)
![Geppetto [KH I]](/File:Geppetto_KH.png)
![Cleo [KH I]](/File:Cleo_KH.png)
![Neku Sakuraba [KH 3D]](/File:Neku_Sakuraba_KH3D.png)
![Rhyme [KH 3D]](/File:Rhyme_KH3D.png)
![Julius [KH 3D]](/File:Julius_KH3D.png)
- Cameos
Lady and Tramp on the fountain.

NPCs[edit]
![The Accessory Shop assistant. [KH I]](https://kh.wiki.gallery/images/thumb/c/ca/Traverse_Town_NPC_1_KH.png/59px-Traverse_Town_NPC_1_KH.png)
The Accessory Shop assistant.
[KH I]![The man standing in front of the shop. [KH I]](https://kh.wiki.gallery/images/thumb/1/15/Traverse_Town_NPC_2_KH.png/67px-Traverse_Town_NPC_2_KH.png)
The man standing in front of the shop.
[KH I]![The woman near the cafe bar. [KH I]](https://kh.wiki.gallery/images/thumb/e/e5/Traverse_Town_NPC_3_KH.png/31px-Traverse_Town_NPC_3_KH.png)
The woman near the cafe bar.
[KH I]![The boy roaming the First District. [KH I]](https://kh.wiki.gallery/images/thumb/2/2b/Traverse_Town_NPC_4_KH.png/46px-Traverse_Town_NPC_4_KH.png)
The boy roaming the First District.
[KH I]![The boy near the mailbox. [KH coded]](https://kh.wiki.gallery/images/thumb/e/e9/Traverse_Town_NPC_1_KHREC.png/41px-Traverse_Town_NPC_1_KHREC.png)
The boy near the mailbox.
[KH coded]![The woman near the cafe bar. [KH coded]](https://kh.wiki.gallery/images/thumb/5/5c/Traverse_Town_NPC_2_KHREC.png/44px-Traverse_Town_NPC_2_KHREC.png)
The woman near the cafe bar.
[KH coded]![The man near the Third District entrance [KH coded]](https://kh.wiki.gallery/images/thumb/4/4c/Traverse_Town_NPC_3_KHREC.png/40px-Traverse_Town_NPC_3_KHREC.png)
The man near the Third District entrance
[KH coded]
![The Accessory Shop assistant. [KH I]](/File:Traverse_Town_NPC_1_KH.png)
![The man standing in front of the shop. [KH I]](/File:Traverse_Town_NPC_2_KH.png)
Enemies[edit]
Heartless[edit]
|
|
![Shadow [KH I][KH CoM][KH coded]](/File:Shadow_KHII.png)
![Soldier [KH I][KH CoM][KH coded]](/File:Soldier_KHII.png)
![Air Soldier [KH I]](/File:Air_Soldier_KH.png)
![Large Body [KH I][KH coded]](/File:Large_Body_KHII.png)
![Red Nocturne [KH I][KH CoM]](/File:Red_Nocturne_KH.png)
![Blue Rhapsody [KH I][KH CoM]](/File:Blue_Rhapsody_KH.png)
![Yellow Opera [KH I]](/File:Yellow_Opera_KH.png)
![Green Requiem [KH I]](/File:Green_Requiem_KH.png)
![Sniperwild [KH I FM]](/File:Sniperwild_KHFM.png)
![Search Ghost [KH I]](/File:Search_Ghost_KH.png)
![Darkball [KH I]](/File:Darkball_KH.png)
![Wyvern [KH I][KH coded]](/File:Wyvern_KH.png)
![Defender [KH I]](/File:Defender_KH.png)
![Eliminator [KH coded]](/File:Eliminator_KHREC.png)
![Wizard [KH I]](/File:Wizard_KH.png)
![White Mushroom [KH I][KH CoM]](/File:White_Mushroom_KH.png)
![Black Fungus [KH CoM]](/File:Black_Fungus_KH.png)
![Gold Tricholoma [KH coded]](/File:Gold_Tricholoma_KHREC.png)
![Blox Bug [KH coded]](/File:Blox_Bug_KHREC.png)
![Danger Bug [KH coded]](/File:Danger_Bug_KHREC.png)
![Prize Bug [KH coded]](/File:Prize_Bug_KHREC.png)
![Guard Armor [KH I][KH CoM][KH coded]](/File:Guard_Armor_KH.png)
![Opposite Armor [KH I]](/File:Opposite_Armor_KH.png)
Nobodies[edit]
|
|
![Unknown [KH CoM]](/File:Mysterious_Figure_KHFM.png)
Dream Eaters[edit]
|
![Meow Wow [KH 3D]](/File:Meow_Wow_(Nightmare)_KH3D.png)
![Komory Bat [KH 3D]](/File:Komory_Bat_(Nightmare)_KH3D.png)
![Kooma Panda [KH 3D]](/File:Kooma_Panda_(Nightmare)_KH3D.png)
![Beat's Kooma Panda [KH 3D]](/File:Kooma_Panda_(Spirit)_KH3D.png)
![Pricklemane [KH 3D]](/File:Pricklemane_(Nightmare)_KH3D.png)
![Hebby Repp [KH 3D]](/File:Hebby_Repp_(Nightmare)_KH3D.png)
![Yoggy Ram [KH 3D]](/File:Yoggy_Ram_(Nightmare)_KH3D.png)
![Fin Fatale [KH 3D]](/File:Fin_Fatale_(Nightmare)_KH3D.png)
![Tama Sheep [KH 3D]](/File:Tama_Sheep_(Nightmare)_KH3D.png)
![Tatsu Blaze [KH 3D]](/File:Tatsu_Blaze_(Nightmare)_KH3D.png)
![Thunderaffe [KH 3D]](/File:Thunderaffe_(Nightmare)_KH3D.png)
![Fishboné [KH 3D]](/File:Fishbon%C3%A9_(Nightmare)_KH3D.png)
![Peepsta Hoo [KH 3D]](/File:Peepsta_Hoo_(Nightmare)_KH3D.png)
![Chef Kyroo [KH 3D]](/File:Chef_Kyroo_(Nightmare)_KH3D.png)
![Zolephant [KH 3D]](/File:Zolephant_(Nightmare)_KH3D.png)
![Staggerceps [KH 3D]](/File:Staggerceps_(Nightmare)_KH3D.png)
![Jestabocky [KH 3D]](/File:Jestabocky_(Nightmare)_KH3D.png)
![Necho Cat [KH 3D]](/File:Necho_Cat_(Nightmare)_KH3D.png)
![Cera Terror [KH 3D]](/File:Cera_Terror_(Nightmare)_KH3D.png)
![Hockomonkey (Sora's Side) (Sora only) [KH 3D]](/File:Hockomonkey_(Brute)_KH3D.png)
![Hockomonkey (Riku's Side) (Riku only) [KH 3D]](/File:Hockomonkey_(Mage)_KH3D.png)
![Spellican (Sora only) [KH 3D][6]](/File:Spellican_KH3D.png)
![Wargoyle (Sora only) [KH 3D]](/File:Wargoyle_(Sora%27s_Side)_KH3D.png)
![Char Clawbster (Sora only) [KH 3D]](/File:Char_Clawbster_KH3D.png)
Other[edit]
|
|
Notes and references[edit]
- ^ Secret Ansem Report 11: "My friend has been fighting in the realm of darkness. Most likely he found his way there through Traverse Town. Like Castle Oblivion, that village also rests in the cleft between light and dark. It consists of the remnants of worlds whose hearts have been stolen by the Heartless. It is where those who have barely escaped the destruction of their worlds eventually find themselves."
- ^ Kingdom Hearts 3D: Dream Drop Distance, Joshua: This town has a little secret. It only appears when someone out there has need of shelter.
- ^ Kingdom Hearts 3D: Dream Drop Distance Ultimania, Tetsuya Nomura: "In the first place, the worlds in the rift between darkness and light have different rules than other worlds. The Mysterious Tower isn't always standing in a fixed place. Traverse Town too reforms its shape every time, which is why the version that appears in this title is clearly different than the version in KH1."
- ^ In the original Kingdom Hearts coded, the message reads, "Their torment has been lessened."
- ^ Kingdom Hearts 3D: Dream Drop Distance, Ienzo: "When someone who's lost their heart is recompleted, they should return to the place where it happened. And if that world is unavailable for whatever reason, a refuge is made for them in the realm between—a world called "Traverse Town". They would be sent there."
- ^ Is intangible during the whole fight.
See also[edit]
| Kingdom Hearts |
|---|
| Characters |
| Party members |
| Sora - Donald Duck - Goofy Tarzan - Aladdin - Ariel - Jack Skellington - Peter Pan - Beast |
| Summons |
| Simba - Genie - Dumbo - Bambi - Tinker Bell - Mushu |
| Antagonists |
| Ansem - Clayton Villains Maleficent - Riku - Hades - Captain Hook - Oogie Boogie - Ursula - Jafar |
| Non-playable characters |
| 99 Puppies - Abu - Aerith - Alice - Aurora - Bathtub - Belle - Card Soldiers - Carpet - Cave of Wonders Guardian - Cerberus - Chernabog - Cheshire Cat - Chip and Dale - Cid - Cinderella - Cloud - Crocodile - Daisy Duck - Dark Figure - Doorknob - Dr. Finkelstein - Eeyore - Enchanted Brooms - Fairy Godmother - Flotsam and Jetsam - Flounder - Flower - Geppetto - Hercules - Huey, Dewey, and Louie - Iago - Ice Titan - Jane Porter - Jasmine - Jiminy Cricket - Kairi - Kairi's Grandma - Kala - Kerchak - King Triton - Lock, Shock, and Barrel - Merlin - Mickey Mouse - Minnie Mouse - Moogles - Mr. Smee - Owl - Philoctetes - Piglet - Pinocchio - Pluto - Pongo and Perdita - Queen of Hearts - Rabbit - Rock Titan - Roo - Roxas - Sabor - Sally - Sebastian - Selphie - Sephiroth - Snow White - Squall Leonhart - Terk - The Mayor - The Peddler - The Shark - Tidus - Tigger - Wakka - Wendy - White Rabbit - Winnie the Pooh - Yuffie - Xemnas - Zero |
| Locations |
| Worlds |
| Destiny Islands - Disney Castle - Traverse Town - Wonderland - Olympus Coliseum - Deep Jungle - 100 Acre Wood - Agrabah - Monstro - Atlantica - Halloween Town - Neverland - Hollow Bastion - End of the World |
| Places |
| Dive to the Heart |
| Terms |
| Ansem's Reports - Door to Darkness - Final Keyhole - Keyblade - Keyhole - Kingdom Hearts - Mickey's Letter - Postcard - Princesses of Heart - The End - Trinity Mark |
| Music |
| Kingdom Hearts Original Soundtrack - Kingdom Hearts Original Soundtrack Complete - Simple and Clean |
| Archives |
| Accessories - Artwork - Bosses - Enemies - Items - Keyblades - Other Weapons - Removed content |
| Kingdom Hearts Chain of Memories |
|---|
| Characters |
| Party members |
| Sora - Riku - Donald Duck - Goofy - Mickey Mouse Aladdin - Ariel - Jack Skellington - Peter Pan - Beast |
| Summons |
| Simba - Genie - Cloud - Dumbo - Bambi - Tinker Bell - Mushu |
| Antagonists |
| Ansem Organization XIII Marluxia - Lexaeus - Larxene - Vexen - Zexion - Axel - Riku Replica Villains Hades - Jafar - Ursula - Oogie Boogie - Captain Hook - Maleficent |
| Non-playable characters |
| Aerith - Alice - Ansem the Wise - Belle - Card Soldiers - Cave of Wonders Guardian - Cheshire Cat - Cid - Dark Figure - Dr. Finkelstein - Eeyore - Flounder - Geppetto - Hercules - Iago - Jasmine - Jiminy Cricket - Kairi - Moogles - Naminé - Owl - Philoctetes - Piglet - Pinocchio - Pluto - Queen of Hearts - Rabbit - Roo - Sally - Sebastian - Selphie - Squall Leonhart - Tidus - Tigger - Wakka - Wendy - White Rabbit - Winnie the Pooh - Yuffie |
| Locations |
| Worlds |
| Traverse Town - Agrabah - Olympus Coliseum - Wonderland - Monstro - Halloween Town - Atlantica - Neverland - 100 Acre Wood - Hollow Bastion - Twilight Town - Destiny Islands - Castle Oblivion |
| Terms |
| Attack Card - Card break - Cards - Enemy Card - Friend Card - Gimmick Card - Item Card - Keyblade - Wayfinder - Magic Card - Map Card - Memory - Pod - Premium Cards - Reload Card - Replica - Sleight - Special Card - Summon Card - World Cards - The End |
| Music |
| Kingdom Hearts Original Soundtrack Complete - Simple and Clean |
| Archives |
| Artwork - Bosses - Enemies - Keyblades - Removed content |
| Kingdom Hearts coded |
|---|
| Characters |
| Party members |
| Data-Sora Cloud - Hercules - Donald Duck - Goofy |
| Antagonists |
| Maleficent - Pete - Sora's Heartless |
| Non-playable characters |
| Aladdin - Alice - Card Soldier - Cave of Wonders Guardian - Cerberus - Cheshire Cat - Chip and Dale - Cid - Data-Naminé - Data-Riku - Data-Roxas - Hades - Huey, Dewey, and Louie - Iago - Jafar - Jasmine - Jiminy Cricket - Mickey Mouse - Moogle - Philoctetes - Pluto - Queen of Hearts - Rock Titan - Selphie - Squall Leonhart - The Peddler - Tidus - Wakka - White Rabbit - Yuffie |
| Locations |
| Worlds |
| Disney Castle - Datascape - Dive to the Heart - Destiny Islands - Traverse Town - Wonderland - Olympus Coliseum - Agrabah - Hollow Bastion - Castle Oblivion |
| Terms |
| Bug Blox - Command Matrix - Datascape - Debug Ability - Ending Card - Gear Matrix - Hero's License - Keyblade - Keyhole - Mickey's Letters - Questploration - Stat Matrix - The End - World Card |
| Music |
| Kingdom Hearts Birth by Sleep & 358/2 Days Original Soundtrack - Simple and Clean |
| Archives |
| Artwork - Bosses - Items - Removed content |
| Kingdom Hearts 3D: Dream Drop Distance |
|---|
| Characters |
| Party members |
| Sora - Riku |
| Dream Eater Spirits |
| Meow Wow - Tama Sheep - Yoggy Ram - Komory Bat - Pricklemane - Hebby Repp - Sir Kyroo - Toximander - Fin Fatale - Tatsu Steed - Necho Cat - Thunderaffe - Kooma Panda - Pegaslick - Iceguin Ace - Peepsta Hoo - Escarglow - KO Kabuto - Wheeflower - Ghostabocky - Zolephant - Juggle Pup - Halbird - Staggerceps - Fishboné - Flowbermeow - Cyber Yog - Chef Kyroo - Lord Kyroo - Tatsu Blaze - Electricorn - Woeflower - Jestabocky - Eaglider - Me Me Bunny - Drill Sye - Tyranto Rex - Majik Lapin - Cera Terror - Skelterwild - Ducky Goose - Aura Lion - Ryu Dragon - Drak Quack - Keeba Tiger - Meowjesty - Sudo Neku - Frootz Cat - Ursa Circus - Kab Kannon - R & R Seal |
| Antagonists |
| Real Organization XIII (Seekers of Darkness) Master Xehanort - Young Xehanort - Terra-Xehanort - Ansem - Xemnas - Vanitas - Xigbar - Saïx - Luxord - Marluxia - Larxene - Dark Riku Villains Maleficent - Pete - Ursula Claude Frollo - CLU - Rinzler - Beagle Boys |
| Non-playable characters |
| Aeleus - Ansem the Wise - Anti Black Coat - Aqua - Axel - Black Guard - Blue Fairy - Braig - Chernabog - Daisukenojo Bito - Dark Figure - Dilan - Donald Duck - Enchanted Brooms - Esmeralda - Even - Geppetto - Goofy - Ienzo - Jiminy Cricket - Joshua - Julius - Kairi - Kevin Flynn - Lea - Maleficent's Raven - Mickey Mouse - Minnie Mouse - Monstro - Moogle - Naminé - Neku Sakuraba - Phoebus - Pinocchio - Pluto - Quasimodo - Quorra - Rhyme - Roxas - Sam Flynn - Shiki - Terra - Ventus - Victor, Hugo, and Laverne - Xion - Yen Sid |
| Locations |
| Worlds |
| Traverse Town - La Cité des Cloches - The Grid - Prankster's Paradise - Country of the Musketeers - Symphony of Sorcery - The World That Never Was |
| Destiny Islands - Mysterious Tower - Disney Castle - Radiant Garden - Dive to the Heart |
| Places |
| Sleeping Worlds |
| Terms |
| Another Guardian of Light - Dream Eater - Glossary - Keyblade War - Mark of Mastery exam - Real Organization XIII - Sleeping Keyhole - Sleeping Worlds - The End |
| Gameplay terms |
| Ability Link - AR Card - Deck Commands - Dive Mode - Drop System - Flick Rush - Flowmotion - Forecast - Link System - Reality Shift - Spirit |
| Music |
| Kingdom Hearts: Dream Drop Distance Original Soundtrack - Simple and Clean - Sanctuary |
| Archives |
| Artwork - Bosses - Enemies - Keyblades - Removed content |
| Kingdom Hearts Melody of Memory |
|---|
| Characters |
| Party members |
| Kairi - Sora - Roxas - Aqua - Riku Donald Duck - Goofy - Axel - Xion - Terra - Ventus - Meow Wow - Komory Bat - Mickey Mouse Hercules - Aladdin - Ariel - Peter Pan - Beast - Fa Mulan - Simba - Stitch |
| Antagonists |
| Xehanort - Ansem, Seeker of Darkness - Xemnas - Maleficent |
| Non-playable characters |
| Aeleus - Ansem the Wise - Even - Fairy Godmother - Ienzo - Nameless Star - Terra-Xehanort - Yen Sid |
| Locations |
| Worlds |
| Mysterious Tower - Radiant Garden - The Final World |
| Terms |
| An Oath to Return - Another Key - Key Art - Keyblade - Museum - Music Stage - Rhythm Points - Story Scene - The End - VS Battle - World Tour |
| Music |
| Kingdom Hearts Melody of Memory - Special Disc - Unnamed tracks |
| Archives |
| Artwork - Bosses - Enemies - Items - Trophy - Songs |