User:JTD95: Difference between revisions
| Line 232: | Line 232: | ||
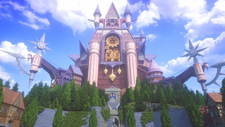
Through [[Data Greeting]], areas such as the Central Square, Merlin's House, Garden of Assemblage, and the Data-Organization XIII Arena can be freely explored. | Through [[Data Greeting]], areas such as the Central Square, Merlin's House, Garden of Assemblage, and the Data-Organization XIII Arena can be freely explored. | ||
{{-}} | {{-}} | ||
==Worksheet: The World That Never Was== | |||
===''Kingdom Hearts II''=== | |||
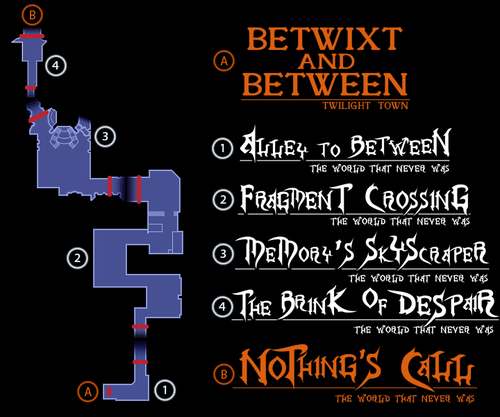
The {{nihongo|'''{{a|Alley to Between}}'''|狭間につながる路地|Hazama ni Tsunagaru Roji}} hides a portal to [[Betwixt and Between]]. Sora, Donald, Goofy, and King Mickey used this portal to get into the world, thanks to Axel's sacrifice. The alley way connects to the main route that leads to the Castle That Never Was. The first [[Save Point]] of the world can be found here. | |||
Exiting the alley leads to the {{nihongo|'''{{a|Fragment Crossing}}'''|断片を紡ぐ道|Danpen o Tsumugu Michi|lit. "Fragment-Spinning Road"}}, a long series of winding streets that lead to Memory's Skyscraper. It is full of neon signs attached to vacant buildings as well as a power plant which seems to power some or all of the city. Many Shadow Heartless are here, but in ''Kingdom Hearts II Final Mix'', they are eventually replaced with Nobodies. Sora, Donald, Goofy, and King Mickey took this route on their way to the Castle That Never Was. [[Pluto]] also had an encounter with Axel here. | |||
Following the Fragment Crossing is {{nihongo|'''{{a|Memory's Skyscraper}}'''|記憶の摩天楼|Kioku no Matenrō}}, an imposingly tall building that presides over Dark City, in a plaza near the cliffs surrounding the Castle That Never Was. At its feet lies a plaza staircase leading to glass doors, and on its face is a massive television screen, which displays memories of those nearby in ''[[Another side, Another story...]]''. In the corner of the plaza is a wrecked truck, flipped on its side. During his battle with Xemnas, Sora was pulled into an area that included Memory's Skyscraper, called [[Memory's Contortion]], in a battle similar to the one Roxas and Riku had. In ''Dream Drop Distance'', Memory's Skyscraper is accessible only for Riku. However, this is where Sora first landed when he dived into this world before being put to sleep. | |||
The left road behind Memory's Skyscraper leads to the {{nihongo|'''{{a|Brink of Despair}}'''|絶望を望む断崖|Zetsubō o Nozomu Dangai|lit. "Cliff Overlooking Despair"}}, a cliff with a clear view of the hovering Castle That Never Was. Sora, Donald, Goofy, and King Mickey arrive here and access the castle via a path using the Keyblade. It has the second Save Point of this world in ''Kingdom Hearts II''. | |||
[[File:Castle That Never Was 01 KHII.png|thumb|left|Sora, Donald, Goofy, and King Mickey entering Nothing's Call.]] | |||
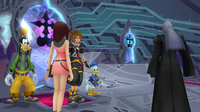
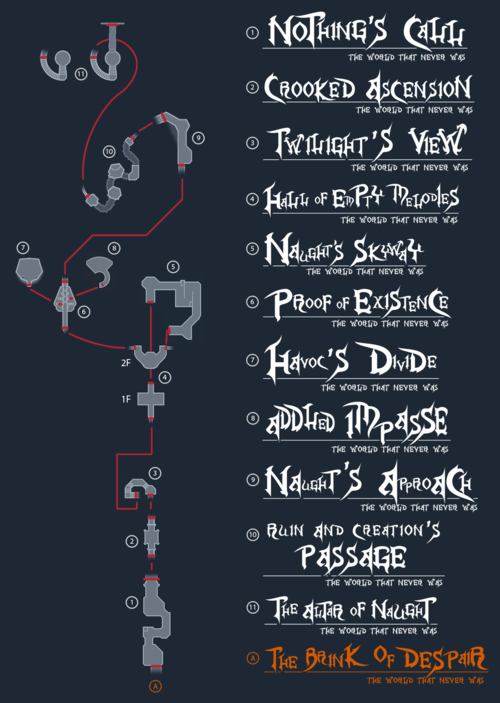
{{nihongo|'''{{a|Nothing's Call}}'''|虚無への誘い|Kyomu e no Sasoi}} is one of the lowest known areas of the Castle That Never Was, acting as a sort of "basement". It appears to be the only entrance into the castle for people who are not members of the Organization. Sora, [[Donald]], [[Goofy]], and [[King Mickey]] enter the castle here. They are soon attacked by Nobodies, but make it to the next area. It is also here where Roxas fights Saïx when leaving the Organization in ''[[Kingdom Hearts 358/2 Days]]''. | |||
The castle contains a number of dungeons, such as the {{nihongo|'''{{a|Soundless Prison}}'''|無音の牢獄|Muon no Rōgoku}} that lies near one of its towers, which appearance corresponds to the one seen in the '''Verge of Chaos''' in ''Kingdom Hearts 3D: Dream Drop Distance''. Oddly, the bars of the cells are far enough apart that a prisoner could easily just walk out between them. Saïx uses the cells to imprison Kairi and [[Pluto]], informing them that they are being used as bait to force Sora to slay more Heartless. After he leaves, however, [[Naminé]] enters through a Corridor of Darkness to help them escape. In the ''{{c|Kingdom Hearts II|manga}}'' manga, Kairi escapes through the bars without help, but runs into Demyx as she and Pluto make their escape, and willingly returns to confinement out of pity when he begs her to keep him from being punished by Saïx. | |||
{{nihongo|'''{{a|Crooked Ascension}}'''|歪みを貫く柱|Yugami no Tsuranuku Hashira|lit. "Distortion-Penetrating Pillar"}} is an area of the Castle That Never Was that seems to be a giant elevator that ascends and descends without actually appearing to do anything. While inside, Sora, Donald, Goofy and Riku may be attacked by either [[Samurai]] or [[Dragoon]] Nobodies if going down to Nothing's Call or up to Twilight's View, respectively. | |||
{{nihongo|'''{{a|Twilight's View}}'''|黄昏から望む場所|Tasogare kara Nozomu Basho}} is a stairway leading to the next floor of the castle. Sora can meet a [[Moogle]] here and [[Item synthesis|synthesize]] new items. According to a flashback in ''[[Kingdom Hearts II Final Mix]]'', occurring at some point before ''[[Kingdom Hearts 358/2 Days]]'', [[Zexion]] and Xigbar discuss Xemnas's frequent visits to the [[Chamber of Repose]] and the discovery of [[Castle Oblivion]] here. | |||
[[File:The Freeshooter, Xigbar 01 KHII.png|thumb|right|Sora in the Hall of Empty Melodies, before encountering Xigbar.]] | |||
{{nihongo|'''{{a|Hall of Empty Melodies}}'''|虚ろなる旋律の空間|Utsuro-naru Senritsu no Kūkan}} is a large, two-part room sometimes used as a combat training station for the Organization.<!--In ''Kingdom Hearts 358/2 Days'', this room is where [[Roxas]] must complete [[Mission 10: Prove Your Endurance|Mission 10]], [[Mission 71: Prove Your Endurance|Mission 71]], and [[Mission 33: Break the Jars|Mission 33]].--> It is composed of a large platform over an indefinite abyss, with a recessed second floor accessible via Naught's Skyway and multiple high balconies overlooking the room. The domed glass ceiling provides a view of the castle's highest tower. When Sora, Donald, and Goofy arrive, Saïx taunts them and sics a horde of Heartless upon them, but Riku and Kairi arrive in time to help fight the Heartless on the upper floor as Maleficent and Pete watch. Xigbar enters and challenges Sora himself, but is defeated just as Mickey and Ansem encounter the scene, and the two kings leave with full faith in Sora and his friends. Afterward, Sora's group sprints to the second floor via the skyway and are reunited with Riku and Kairi. Afterward, the room becomes a haunt for [[Sniper]] and [[Assassin]]. | |||
{{nihongo|'''{{a|Naught's Skyway}}'''|虚空を辿る道|Kokū o Tadoru Michi}} is a small outside path in a high section of the castle. It overlooks the eerie red-tinged clouds of Dark City. This is where Mickey finds DiZ, who is revealed to be Ansem the Wise, being attacked by Nobodies. After they are defeated, the two walk off with Ansem's encoding machine. Sora and his companions pass through here in order to find King Mickey and Ansem the Wise. | |||
[[File:The Path Opens 01 KHII.png|thumb|left|Sora and the others entering Proof of Existence after defeating Luxord.]] | |||
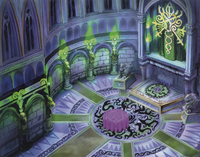
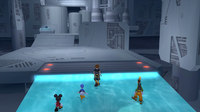
{{nihongo|'''{{a|Proof of Existence}}'''|存在の証|Sonzai no Akashi}} is a multi-tiered mock graveyard for the members of the Organization. It contains twelve {{w|stele}}, arranged by the rank of each member from left to right then top to bottom, with digital panels in the floor before the stele acting as epitaphs depicting the member's title and weapon. Demyx's stele incorrectly has number XI instead of IX. These stele actually operate as portals to other rooms in the castle, while the doorway to the next room takes the place of a stele for Xemnas. The stele for the destroyed members of the Organization have been smashed, but the epitaphs remain active for those that are conscious—therefore the epitaph representing Roxas, who has already been reunited with Sora, remains active, although his stele is smashed, while the stele for Luxord and Saïx remain active portals even after their epitaphs go dark with their destruction. Zexion's own epitaph was damaged to the point it no longer depicted his weapon,<ref>'''''[[Kingdom Hearts II Ultimania]]''''', '''Tetsuya Nomura''': "Probably because he's quite enigmatic. He's the only member who showed up with no weapons but it's not because he doesn't have his own weapon, it's more of because he died without fighting, so nobody knows what's his weapon. I have an idea on what his weapon is and I might have a chance of showing it in the near future so I'll keep it as a secret for now. That reminds me, in the World that Never Was, each XIII Organization member had a gravestone for them and each of those have a picture of their weapons and that's when Zexion became a problem for us. “Eh, we're gonna put a spoiler on Zexion's weapon there!?” (laugh) That's a bit too much so we decided to destroy the gravestone so that his weapon couldn't be seen."</ref> while Roxas's depicts the [[Oathkeeper]] and [[Oblivion]] he obtained after leaving the Organization. Sora and his friends pass through the graveyard on their way up the tower, but are forced to put an end to Luxord and Saïx in order to open the way to Xemnas. | |||
{{nihongo|'''{{a|Havoc's Divide}}'''|混沌の狭間|Konton no Hazama}} is an area favored by Luxord. The area is sloped and leads to a steep drop downwards. The top of the area can be partially seen from Naught's Approach. | |||
{{nihongo|'''{{a|Addled Impasse}}'''|惑わしの空間|Madowashi no Kūkan|lit. "Bewildered Space"}} is a large chamber with a clear view of the Kingdom Hearts moon, and appears to be where Saïx spends a large amount of time. | |||
{{nihongo|'''{{a|Naught's Approach}}'''|虚空を目指す道|Kokū o Mezasu Michi}} is an exterior passage which leads to Xemnas's tower. Eerie red and blue vapors leak from Ruin and Creation's Passage and out onto the walkway. | |||
{{nihongo|'''{{a|Ruin and Creation's Passage}}'''|破壊と創造の回廊|Hakai to Sōzō no Kairō}} is the biggest area in the castle with platforms floating in the air. Invisible paths can be used to reach each platform and eventually navigate to the other side. The room is filled with swirling red and blue smoke, with some collecting in a spiral at the top of the chamber. There are numerous windows at the sides of the room. | |||
[[File:Why Do You Hate the Darkness 01 KHII.png|thumb|right|The Altar of Naught, viewing the remnants of Kingdom Hearts]] | |||
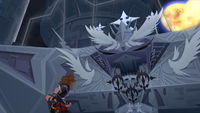
The {{nihongo|'''{{a|Altar of Naught}}'''|虚空の祭壇|Kokū no Saidan|lit. "Altar of Empty Space"}} is a giant tower that is high above the rest of the castle. Hidden off the side is a [[Sidecar Glider|glider]]. Xemnas often comes here to commune with Kingdom Hearts or present it to the other members. After [[Sora]] and his friends confront Xemnas here and he retreats into this Kingdom Hearts, the worlds create a doorway leading within so that Sora and his friends to follow him. The tower later collapses after Xemnas's Dragon Form collides into its side. | |||
{{nihongo|'''{{a|Memory's Contortion}}'''|記憶の歪み|Kioku no Yugami}} is a strange, wavering illusion of the [[Memory's Skyscraper]] that Xemnas draws Sora into for a battle. As it is an illusion, Sora cannot "return" here, but a simulation of it can be found within the [[Garden of Assemblage]]. | |||
[[File:Where Nothing Gathers.png|thumb|200px|left|Where Nothing Gathers is the Organization's meeting room.]] | |||
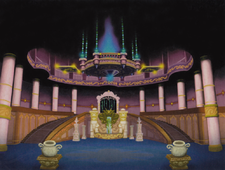
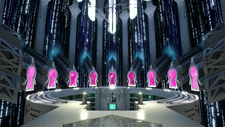
{{nihongo|'''{{a|Where Nothing Gathers}}'''|虚無が集う場所|Kyomu ga Tsudou Basho}}, known to Organization members as the {{nihongo|'''Round Room'''|円卓|Entaku|lit. "Round Table"}}<ref>'''''[[Roxas's Diary#Day 7: Entry 1|Roxas's Diary, Day 7: Entry 1]]''''': "Today they told us to go to the Round Room, where we met our new member, No. XIV."</ref>, is a circular room containing throne-like chairs ranging in height, where the Nobodies of Organization XIII can gather and discuss developments and for Xemnas to give out orders. There are thirteen throne-like pillars which each member uses as a seat, but these pillars can move up or down at the user's will, or at the leader's<!--The possibility of the thrones changing heights is also seen in ''[[Kingdom Hearts 3D: Dream Drop Distance]]'', when the throne where Sora's body is sitting lifts up.-->. Out of respect for their leader, the other members keep their thrones below Xemnas's, and later, Xehanort's.<ref>'''''[[Kingdom Hearts II Final Mix+ Ultimania]]''''', pg. 502; '''Interviewer''': "During the meetings, the members of Organization XIII are sitting in chairs. Is the height of these chairs determined by things like their skills and abilities?" / ''' Tetsuya Nomura''': "No, the height of the chairs is not fixated, they move. That is to say, the height is up to each person. The leader, Xemnas, is always the highest and to be at the same height as him would have a pretty bad feeling, so the other members wouldn't do that." [https://www.khinsider.com/news/New-Nomura-Interview-Hoards-of-new-Information-388 Translation via TheWertle and Xaldin].</ref><!--explain as out-of-universe: Mission Mode of 358/2 Days shows that the thrones change height based on how well the members of the Organization do on missions. --> | |||
The seats are arranged in a circle with Xemnas at the prominent seat. At Xemnas's left are the odd numbered members, and to his right are the even numbered members, increasing in numerical value up until number thirteen, Roxas's seat.<!---, which is directly opposite Xemnas's. this isn't possible with an odd number--> The "fourteenth member", Xion, has no throne as she was neither a true member nor even a real Nobody, but a replica meant to absorb Roxas so she would gain his powers, thus the reason for the group's name remaining as "Organization XIII". In ''Kingdom Hearts 3D: Dream Drop Distance'', [[Riku]] and [[Mickey Mouse]] battle [[Ansem, Seeker of Darkness|Ansem]], Xemnas, [[Young Xehanort]], and the other members of the [[real Organization XIII]] in Where Nothing Gathers, while attempting to rescue Sora, who was rendered comatose and captured by [[Master Xehanort]] to become a new vessel for himself, who sits in Xemnas's throne while watching the struggle. After the battle, Master Xehanort lifts the throne Sora is in and tries to put a fragment of his heart on him. Fortunately, [[Lea]] appears and rescues Sora. Shortly afterwards, [[Donald]] and [[Goofy]] also appear and literally fall on top of Ansem's Guardian, which had captured Riku and Mickey, just before the real Organization XIII vanishes and each of his members returns to its own time. | |||
{{-}} | |||
{|class="wikitable mw-collapsible mw-collapsed" | |||
!Area Map of the Dark City in ''Kingdom Hearts II'' | |||
|- | |||
| | |||
[[File:Minimap (Dark City) TWTNW KHII.png|500px]] | |||
|} | |||
{|class="wikitable mw-collapsible mw-collapsed" | |||
!Area Map of Castle That Never Was in ''Kingdom Hearts II'' | |||
|- | |||
| | |||
[[File:Minimap (Castle That Never Was) KHII.png|500px]] | |||
|} | |||
{{-}} | |||
====The World of Nothing==== | |||
[[File:In the Writhing City 01 KHII.png|thumb|200px|Sora and the others standing in the door leading to The World of Nothing.]] | |||
After Xemnas's first defeat within Memory's Contortion, he flees into his Kingdom Hearts. However, a door appears that leads Sora and his friends within that Kingdom Hearts to an area named "The World of Nothing"<!--, where the Dark City stretches to the horizon and a black hole sits in the sky while a gigantic dragon-shaped Nobody patrols the area. | |||
are the endless Dark City and the World of Nothing visible from outside the door?-->. The first area inside the door is '''{{a|The World of Nothing—End's Beginning}}''', a passageway resembling the Dark City where skyscrapers suddenly erupt from the ground in order to repel Sora. A strange black-and-white tunnel leads from this room to a platform looking out on the gigantic Nobody that Xemnas is riding<!--what is this room named?-->. From there, Sora can climb falling skyscrapers to walkways surrounding the lower cannons of the Nobody, '''{{a|The World of Nothing—Twin Cannons}}'''. Once he destroys those, Sora swings his way up to the ship's Energy Core, which is kept in a room appropriately named '''{{a|The World of Nothing—Energy Core}}'''. After disabling the ship's energy core<!--which does what, exactly?-->, he makes it up '''{{a|The World of Nothing—Xemnas's Throne Room}}''', where Xemnas sits in his [[Keyblade Armor]], enthroned atop the dragon Nobody's head in a chamber equipped with the weapons of the defeated Organization members.<!--describe cast back into space portion: What is that room called? What is Sidecar portion called?--> After completely destroying the gigantic Nobody, Sora and Riku are left in {{nihongo|'''{{a|The World of Nothing}}'''|虚無の世界|Kyomu no Sekai}}, a nearly-empty void of shifting greys and whites where Xemnas makes his last attempt to destroy them. He fails, however, and the boys are deposited at the '''[[Dark Margin]]'''. | |||
===''Kingdom Hearts 358/2 Days''=== | |||
[[File:Grey Area KHD.png|thumb|left|Roxas in the Grey Area.]] | |||
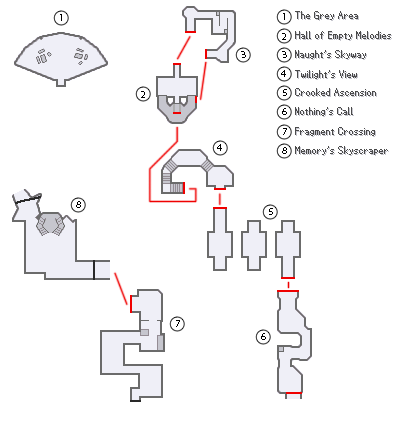
The {{nihongo|'''{{a|Grey Area}}'''|闇と光を紡ぐ庭|Yami to Hikari o Tsumugu Niwa|lit. "The Garden that Interweaves Darkness and Light"}} is a room in the castle that serves as a lounge for the Organization's members, as well as the place where the members receive their mission briefings from [[Saïx]]. The room is wedge shaped with one wall made entirely out of a giant window, out of which [[Kingdom Hearts]] can eventually be seen floating in the distance. The room has couches and tables spread around it, and Organization members are often seen lounging about between missions. There is also a [[Moogle]] here, dressed in the [[Black Cloak|Organization coat]], that allows Roxas to synthesize panels and access a shop that uses heart points as currency. | |||
The castle has a room with a computer that seems to contain information on all the Organization projects including the [[Replica Program]] and [[Castle Oblivion]]. In the ''Kingdom Hearts 358/2 Days'' novel, this room is said to be Saïx's study room. | |||
[[File:Day 357 02 KHD.png|thumb|Axel's bedroom.]] | |||
The Castle also contains a library filled with literature on various subjects. In here, Axel finds a book titled "The Truth about Naminé," authored by Vexen. In the ''Kingdom Hearts 358/2 Days'' novel, this room is said to be in Castle Oblivion, and was Vexen's research room.<!--are we certain it's in TWTNW in the first place?--> | |||
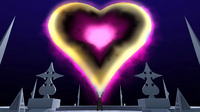
Each of the members of the Organization has an individual bedroom in the castle. The rooms are white with metal-like walls, a single bed with the headboard in the shape of the Nobodies' symbol and a window showing the heart-shaped moon of [[Kingdom Hearts]]. | |||
{|class="wikitable mw-collapsible mw-collapsed" | |||
!Area Map in ''Kingdom Hearts 358/2 Days'' | |||
|- | |||
| | |||
[[File:Minimap (The World That Never Was) KHD.png|404px]] | |||
|} | |||
{{-}} | |||
===''Kingdom Hearts 3D: Dream Drop Distance''=== | |||
In ''Kingdom Hearts 3D: Dream Drop Distance'', only Memory's Skyscraper, the Brink of Despair, and the real Castle That Never Was are visited in the realm between. Sora visits a dream of a dream of the Dark City of The World that Never Was, which appears more contorted and ethereal than the city initially appeared in ''Kingdom Hearts II'', similar to the World of Nothing within Kingdom Hearts, while Riku visits a dream of the Castle That Never Was. Although the locations of the areas Riku visits can be pinpointed, whether or not the locations they visit exist in the real world version of the world is not yet known. | |||
====Side:Sora==== | |||
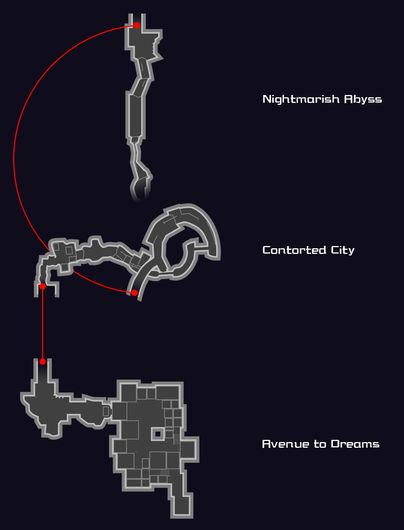
The {{nihongo|'''{{a|Avenue to Dreams}}'''|夢境の街路|Yumesakai no Gairo}} is a large urban area beginning with an enclosed alley featuring a save point and a Moogle hologram. Up a long flight of stairs lies a piece of destroyed building, blocking the path into the city that must be scaled to advance. Beyond is an area of twisting alleys surrounded by skyscrapers that can be scaled with [[Flowmotion]]. Several buildings are adorned in blue stripes with a geometric pattern and when stood upon, they rapidly elevate, throwing Sora into the air. Another building has similar white stripes and can be destroyed by using a [[Reality Shift]]. The pattern on these stripes are similar to the ones seen in the area of the final battle against Xemnas in ''Kingdom Hearts II''. Perhaps the most notable feature of this area is a stream of blue-green mist that falls from the roof of a massive tower extremely similar to Memory's Skyscraper and flows through the streets. The Castle that Never Was can be seen from this area, but instead of floating above a giant crater, it floats above several tall buildings. Beyond this tower, the pavement is revealed to be floating and broken, away from the rest of the city and leads off into a more urban area. | |||
The Avenue to Dreams directly leads to the {{nihongo|'''{{a|Contorted City}}'''|歪みに満ちた街|Yugami ni Michita Machi|lit. "City Filled with Distortion"}}, which seems to emerge from a canyon of strange blue-green rock. This area does not have a save point. Much of the architecture here is coated in blue-green mist. Many buildings float of their own accord, attached to chunks of rock separate from the road, and several shake and swing. The blue markings appear again on the shaking section that is able to launch Sora skyward. Beyond several overturned buildings, a path of broken pavement and destroyed buildings forms an upward spiral. Neon strips and signs on the buildings can be traversed with Flowmotion. In several places, floating buildings marked with red symbols will hurtle toward Sora and must be destroyed with a Reality Shift or they will cause damage. Unlike the other areas, the Castle that Never Was cannot be seen from here. | |||
The {{nihongo|'''{{a|Nightmarish Abyss}}'''|凶夢の深淵|Kyōmu no Shin'en}} features a large open plaza surrounded on three sides by skyscrapers, with a crashed truck (identical to the one near Memory's Skyscraper) blocking access to a side-street. The fourth side drops off to an abyss that is spanned by floating skyscrapers laid on their sides, forming a mostly straight path between two cliff faces and leading toward what appears to be Memory's Skyscraper and the Castle That Never Was seen from the left. Several neon strips appear here that can be traversed through Flowmotion, as in the Contorted City area. It is the area where Sora fights Xemnas. | |||
====Side:Riku==== | |||
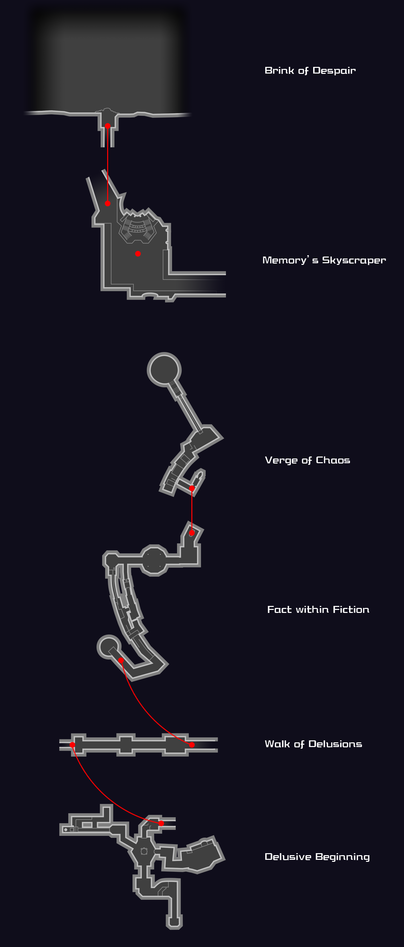
The {{nihongo|'''{{a|Delusive Beginning}}'''|幻想のはじまり|Gensō no Hajimari}} is the lowest known area of the Castle That Never Was, situated just inside the large spinning ring at the base of the castle. It is comprised of four hallways connecting to a circular central chamber, two connecting at the ground floor, two high above. In the central chamber rests an energy beam housed in an impenetrable shield that damages enemies of the Organization. It must be destroyed by entering the shield through a portal and using a [[Reality Shift]] on it. This will cease its attack, destroy the shield, and create a walkway to the upper levels. | |||
The {{nihongo|'''{{a|Walk of Delusions}}'''|幻惑の歩廊|Genwaku no Horō|lit. "Gallery of Entrancement"}} initially appears as a shifting maze. Scattered throughout the maze are devices that require the use of a [[Reality Shift]] to destroy. Once disabled, the layout of the area changes, with new pathways opening up leading to the next device. Once three devices have been destroyed, the maze disappears entirely and reveals the area to be a long, straight bridge leading from the outer edge of the castle to the castle itself, across the open area beneath it. The large spinning ring, the large crater underneath the castle, and several support beams can be seen from the walk. | |||
{{nihongo|'''{{a|Fact within Fiction}}'''|虚実を紡ぐ回廊|Kyojitsu o Tsumugu Kairō|lit. "Corridor Spinning Fact and Fiction"}} is a large, open-air level at the top of the castle's spinning ring, giving a view of the mechanism that spins it. It consists of several high-walled passages and thick metal pipes. Along one passage, beams of purple energy move back and forth that damage any enemy who crosses them. Near the end of the area is a large circular platform where many enemies spawn. After a flight of stairs, there is a lift that rises seemingly magically to higher floors. | |||
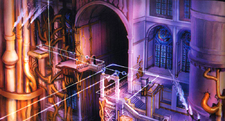
The {{nihongo|'''{{a|Verge of Chaos}}'''|混沌を見下ろす場所|Konton o Miorosu Basho|lit. "Place Overlooking Chaos"}} is primarily a large, slightly curved balcony. The only way out of it is to take the elevator back to the lower levels, or to use Flowmotion on the massive pipes attached to the walls. Several other, smaller balconies sit on the wall with no way on or off but through Flowmotion. Eventually, up the wall, one reaches another small balcony attached to a larger one by a staircase. A narrow bridge off this area connects to the multi-turreted tower, where [[Riku]] fights the [[Anti Black Coat]] Nightmare, that can be traversed by using Flowmotion on a large pipe. The roof of this tower is also considered a part of the Verge of Chaos. This very tower can be seen far away from outside the castle, where its location is on its left side. | |||
[[File:Power Over Time 01 KH3D.png|thumb|220px|The arena Young Xehanort transports Riku to in order to battle him.]] | |||
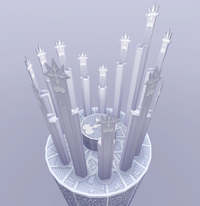
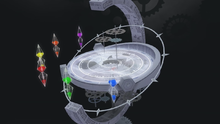
The {{nihongo|'''{{a|Sanctum of Time}}'''|時の祭壇|Toki no Saidan|lit. "Altar of Time'}} is an area visited only during the battle with [[Young Xehanort]]. After being possessed by his future Master Xehanort self, Young Xehanort transports [[Riku]] and himself to the Sanctum of Time in a similar fashion to how [[Ansem, Seeker of Darkness]] transported Riku to the facsimile of Kingdom Hearts in the final battle of ''Kingdom Hearts Chain of Memories'' and ''Kingdom Hearts: Re:Chain of Memories''. The battlefield is a large circular area with several cogs and clockwork devices integrated below the floor as well as atop pillars on either side of the battlefield, and it is surrounded by six different colored hourglasses. The area as a whole resembles a fractured {{w|Sundial#Universal equinoctial ring dial|ring dial}}. Peculiarly, at certain times during battle, the poles sticking out of the ground cannot have Flowmotion used on them. Beneath the glass is a red Nobody symbol. | |||
{{nihongo|'''{{a|Darkness's Call}}'''|闇への誘い|Yami e no Sasoi|lit. "Invitation to Darkness"}} is an arena-shaped area with a spiraling violet vortex below. Streams of darkness rise around the central area. This is where Riku fights [[Ansem, Seeker of Darkness]] the first time during his Mark of Mastery exam. A platform may appear in the area if Riku uses Reality Shift on Ansem. | |||
{{nihongo|'''{{a|Darkest End}}'''|闇の果て|Yami no Hate|lit. "Edge of Darkness"}} is a long arena that has huge dark pillars that resemble the ones found in the [[Realm of Darkness]] and a violet spiral in front of the place. In the back, there is a bottomless abyss. This is the place where Riku fights [[Ansem, Seeker of Darkness]] in his second form, where the Heartless can manipulate the space within the area at will, by either stretching it to send his enemies to the back or by compressing it to pull his enemies in front of him. | |||
{{-}} | |||
{|class="wikitable mw-collapsible mw-collapsed" | |||
!Area Maps in ''Kingdom Hearts Dream Drop Distance HD'' | |||
|- | |||
| | |||
[[File:Minimap (Dark City) TWTNW KHDDD.png|404px]] | |||
[[File:Minimap (Castle That Never Was) TWTNW KHDDD.png|404px]] | |||
|} | |||
==Favorites== | ==Favorites== | ||
Revision as of 05:56, 26 June 2023
| Joseph T. Dalton | |
| |
| Date of Birth | |
| 8th of July 1995 | |
| Member since: | |
| 16th of July 2009 | |
| KH Games I Own | |
Hi, I'm Joseph but just call me JTD95 or simply JTD. I do some edits on here when I feel like it/have time. I draw a lot on my spare time and procrastinate my exams.
Projects
χ Cards Gallery
Worlds
KH1
- Dive to the Heart

- Destiny Islands

- Disney Castle

- Traverse Town

- Wonderland

- Olympus Coliseum

- Deep Jungle

- Agrabah

- Monstro

- Halloween Town

- Atlantica

- Neverland

- 100 Acre Wood

- Hollow Bastion
- End of the World

COM
KH2
- Twilight Town

- Simulated Twilight Town

- Mysterious Tower

- Radiant Garden
- Beast's Castle
- The Land of Dragons

- Timeless River

- Port Royal

- Pride Lands

- Space Paranoids

- The World That Never Was
- End of Sea
BBS
- Land of Departure
- Enchanted Dominion
- Castle of Dreams
- Dwarf Woodlands
- Mirage Arena

- Disney Town

- Deep Space
- The Keyblade Graveyard
- Realm of Darkness
Coded
DDD
KHX
KH3
- Olympus
- Toy Box
- Kingdom of Corona
- Arendelle
- Monstropolis
- The Caribbean
- San Fransokyo
- The Final World
- Scala ad Caelum
Worksheet: Hollow Bastion
Kingdom Hearts
Sora, Donald, and Goofy enter Hollow Bastion at the Rising Falls (逆巻く滝の底 Sakamaku Taki no Soko, lit. "Bottom of the Reverse-Winding Waterfall"), appropriately named as there are waterfalls that run up instead of down. This area, as well as all other areas on the bottom reaches of the castle, contains magical bubbles that can transport the team under the solid water, or can be frozen to be used as platforms. Jumping on icy floating rocks and ledges takes the party to some broken stairs with a lift at the end. The lift takes Sora to the Castle Gates (正門 Seimon, lit. "Main Gates"), the main entrance of Hollow Bastion which is made up of a set of balconies and lifts running both outside and inside the castle. From here, the party can travel down into the underground water system or enter the castle itself.
Going down the nearby platform or leaping off the edge of the balcony takes the party to Base Level (基部 Kibu), an area full of ledges, switches, and enemies. Successfully climbing to the balcony near the entrance earns extra treasures, while taking a nearby bubble carries them to the Waterway (虚ろなる城:地下水路 Utsuronaru Shiro: Chika Suiro, lit. "Hollow Castle: Underground Waterway"), where a series of gates, switches, and bubbles must be navigated to operate the castle gate controls. Off of the Waterway is a small room called the Dungeon (地下牢 Chika Rō, lit. "Underground Dungeon").
Going through the doors at the other end of the Castle Gates area takes the party to the massive two-level Entrance Hall (虚ろなる城:エントランス Utsoronaru Shiro: Entoransu, lit. "Hollow Castle: Entrance"), where a fight against Riku takes place. To continue onwards through the castle a puzzle at the end of the hall must be solved. When solved it'll allow access to the second half of the Castle Gates. Taking the left door in the Entrance Hall leads the party to the Library (虚ろなる城:書庫 Utsuronaru Shiro: Shoko, lit. "Hollow Castle: Archive"), which is also the site of a large puzzle involving organizing the Hollow Bastion Library books. The room also contains one of the world's save points. After the world's Keyhole has been lock, Belle, Yuffie, Leon and Aerith can be found here.
Also accessible from the Library is the first of many entrances to the Lift Stop (トロッコ乗場 Torokko Noriba, lit. "Minecart Boarding Place"), a junction point for many of the castle's lifts, which snake throughout the castle through magical tram lines. Each route is separated from the others by mystical barriers, and many passages and hallways also converge at this hub. The ceiling of the Lift Stop is decorated with stained glass.
By taking the lift on the other side of the Castle Gates, the party can continuing up the castle to reach the Great Crest (虚ろなる城:大紋壁 Utsuronaru Shiro: Daimon Kabe, lit. "Hollow Castle: Great Crest Wall"), which consists of three large balconies on opposite side of the castle's enormous Heartless emblem. From the first balcony, Sora can travel by use of the castle's largest lift, and after a slow journey across the front of the bastion, the party is dropped off at the second balcony. From there they can take the Lift Stop up to the third balcony, which further leads to the next area, the High Tower (高楼 Kōrō, lit. "Skyscraper"). Located here is a smaller Heartless crest that can be moved to create a route up to the upper levels of the castle. The High Tower is divided into two areas which is connected by a passage through the Lift Stop. At the second level of the High Tower is an entrance which eventually leads to the Castle Chapel (虚ろなる城:礼拝堂 Utsuronaru Shiro: Raihaidō, lit. "Hollow Castle: Chapel"), where Maleficent is fought. After her defeat, a portal to a secret area of the chapel can be temporarily found here, leading a fight against Maleficent in her dragon form. The portal later appears again for a fight against Xemnas.
After defeating Maleficent twice, one of the walls to the right of the Castle Chapel will reveal a hidden entrance. Through there the Lift Stop can be quickly accessed which ultimately leads to the Grand Hall (虚ろなる城:大広間 Utsuronaru Shiro: Ōhiroma, lit. "Hollow Castle: Grand Hall"), where the Princesses of Heart are held captive and the Final Keyhole forms. Inside the Grand Hall is a Heartless Emblem-shaped portal leading to a small dimension known as the Dark Depths (闇の淵 Yami no Fuchi). Here, Sora and company fight off the Behemoth guarding the Keyhole from being sealed.
Kingdom Hearts Chain of Memories
In Kingdom Hearts Chain of Memories, Hollow Bastion appears within Castle Oblivion as a memory. The world can be explored through boxed-in areas that draw heavy inspiration from the various balconies across the castle, as well as the Lift Stop areas. In cutscenes, areas such the Castle Gates, the Library, the Entrance Hall, and the Castle Chapel are visited. The secret part of the Castle Chapel also serve as arena for the fight against Dragon Maleficent
When Riku visits the memories of Hollow Bastion, a new area called Riku's Room is shown in cutscene. It's quite similar to the Library in design, but is a lot smaller with also a bed in it.
Kingdom Hearts II
Kingdom Hearts coded
Hollow Bastion I
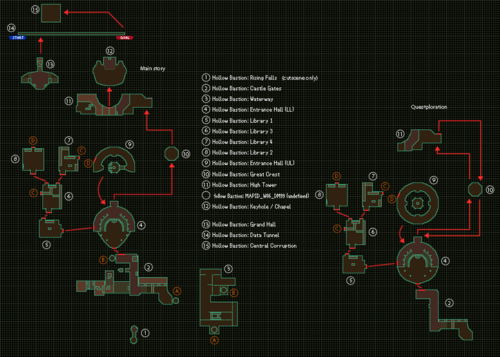
In Kingdom Hearts coded Hollow Bastion is divided into two worlds. Hollow Bastion I and Hollow Bastion II. The former one is very similar to the Hollow Bastion from Kingdom Hearts. The Rising Falls are briefly seen in cutscenes, but Data-Sora's real journey here starts at the Castle Gates (正門).
He then goes to the Waterway (地下水路) as soon as he finds the gate is locked shut to find a way to unlock the gate. After opening the gate, he soon joins with Goofy at the Entrance Hall (LL) (エントランス(下部) Entoransu (Kabu), lit. "Entrance (Lower Level)"). After examining the Heartless slot on a door, Data-Sora and Goofy visit the library, which is broken down into Library 1 (書庫1 Shoko Ichi, lit. "Archive 1"), Library 2 (書庫2 Shoko Ni, lit. "Archive 2"), Library 3 (書庫3 Shoko San, lit. "Archive 3") and Library 4 (書庫4 Shoko Yon, lit. "Archive 4"), to search for the missing emblems. Data-Sora also chases after Donald in the Waterway.
After the party is set, they travel to the Great Crest (大紋壁 ) via a huge lift, leading to the High Tower (高楼). After obtaining the last emblem, they can finally chase after Pete who waits in the Grand Hall. Data-Sora encounters Pete and Data-Riku at the Keyhole / Chapel (鍵穴:礼拝堂 Kagiana: Raihaidō, lit. "Keyhole: Chapel").
Entrance Hall (UL) (エントランス(上部))
Grand Hall (大広間), Data Tunnel, Central Corruption
| Area Map of Hollow Bastion I in Kingdom Hearts Re:coded |
|---|
Hollow Bastion II
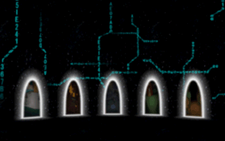
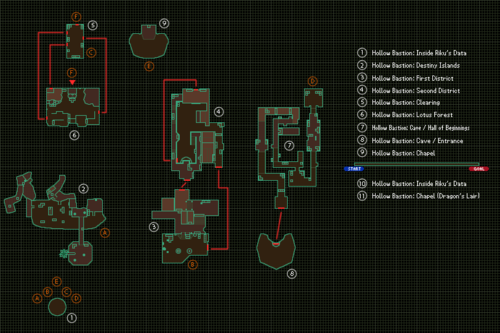
Hollow Bastion II is set within Data-Riku, who is lying comatose in the Grand Hall. Entering Data-Riku will take Data-Sora to Inside Riku's Data (リク データ内部 Riku Dēta Naibu), where five doors are located. These five entry points lead to desaturated versions of past worlds from the game that are overrun by Bug Blox.
The first door takes Data-Sora to the Destiny Islands (デスティニーアイランド Desutinī Airando). The second takes him to Traverse Town, divided into the First District (1番街 Ichiban Machi) and Second District (2番街 Niban Machi). The third takes him to Wonderland at the Clearing (中央広場 Chūō Hiroba, lit. "Central Square"), leading to the Lotus Forest (ハスの森 Hasu no Mori). The fourth takes him to Agrabah at the Cave / Hall of Beginnings (魔法の洞窟 始まりの間 Mahō no Dōkutsu Hajimari no Ma), where he must travel backwards out of the cave to the Cave / Entrance (タイガーヘッド Taigā Heddo, lit. "Tiger Head"). The final door takes him to Hollow Bastion's Chapel (礼拝堂 Raihaidō) where he encounters the bugged Data-Riku.
After clearing all five doors, an exit appears leading to a side-scrolling segment through Inside Riku's Data, and ends with an encounter against Dragon Maleficent at the Chapel (Dragon's Lair) (礼拝堂(竜の間) Raihaidō (Ryū no Ma)). Data-Sora also revisits the Grand Hall before a 3D shooting segment takes place in the Data Tunnel (データホール). Data-Sora then fights and defeats Sora's Heartless at the Central Corruption (変異データ中枢 Hen'i Dēta Chūsū, lit. "Central Data Mutation").
| Area Map of Hollow Bastion II in Kingdom Hearts Re:coded |
|---|
Worksheet: Radiant Garden
Kingdom Hearts II
Radiant Garden
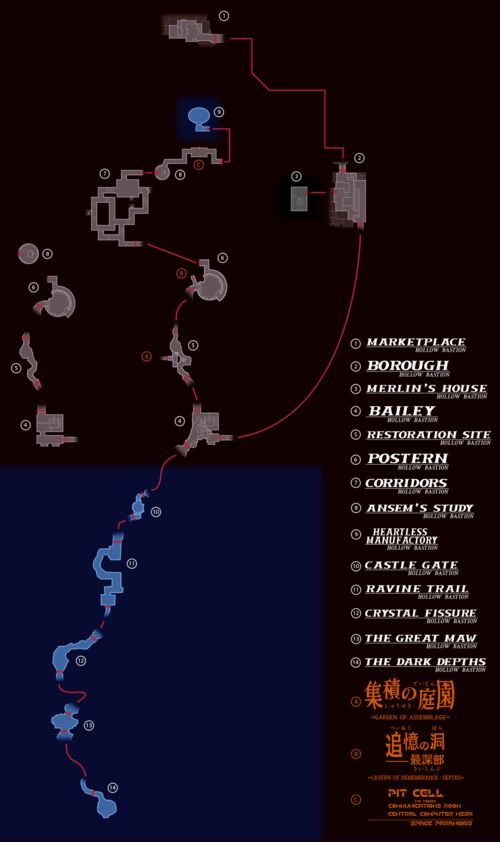
Sora first arrives in the Radiant Garden (still known as Hollow Bastion at the time) at the Marketplace (商店街 Shōten Machi, lit. "Shopping District"), which houses the world's Moogle Shop, as well as Scrooge McDuck and the accessory, weapon, and items shops of his nephews Huey, Dewey, and Louie. Down the stairs past the item shop is the Borough (住宅街 Jūtakugai, lit. "Residential Area"), a residential area where Merlin's House (マーリンの家 Mārin no Ie) is located. It's also the Hollow Bastion Restoration Committee's base of operations, as well as where the 100 Acre Wood book is located.
Continuing on leads to the Bailey (城壁広場 Jōheki Hiroba, lit. "Castle Walls Square") which has a great view of the varies valleys outside of the town. Far off in the distance, the Villain's Vale can be seen. From here the Restoration Site (建設中通路 Kensetsu-chū Tsūro) can be accessed. The area contain some equipment used to restore the town and the castle, and is changed after the first visit to Space Paranoids, by the brick walls to the left being shattered, now offering a slightly quicker path through the area.
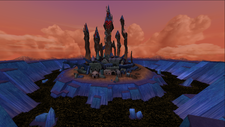
Passing through the Restoration Site leads to the Postern (城通用口 Shiro Tsūyō Kuchi), the site of a save point and the base entrance to the castle itself. Going inside, the party must navigate the twisting and maze-like Corridors (廊下 Rōka) before reaching the end at Ansem's Study (アンセムの研究室 Ansemu no Kenkyūshitsu, lit. "Ansem's Laboratory"). The room contains a desk, several bookshelves, broken containers formerly filled with hearts, as well as a portrait of Terra-Xehanort. A secret passage can be found here that leads to Ansem the Wise's computer room. Ansem's Computer contains a complex data system and an elaborate network copied from ENCOM, which was updated and modified for research purposes. From here the party can transport inside the computer and access the Space Paranoids world. On the other side of the computer room is a small balcony overlooking the Heartless Manufactory (ハートレス製造施設), which can also be accessed by use of the elevator found there. Below the Manufactory area is an inaccessible Underground Facility (地下施設), only seen in cutscenes. The area contains a long downward spiral staircase with a long hallway at the end, with several prison cells on each side of the corridor. A the end lies the entrance to the Chamber of Repose.
After the events of the first visit to Space Paranoids, the layout of the Bailey is altered; the outer wall of the town are broken down, and the Castle Gate (城門前 Jōmon Mae, lit. "Gate Before the Castle") can now be accessed from here. From the Castle Gate, Sora can reach the long and winding Ravine Trail (谷間の道 Tanima no Michi) that eventually leads to the Crystal Fissure (結晶の狭間 Kesshō no Hazama, lit. "Crystal Interstice"), a small cave-like area with glowing crystals. From here The Great Maw (大渓谷 Dai Keikoku, lit. "Great Valley") is accessed, a large open area where the climax of the Battle of the 1000 Heartless takes place. The next and last location down this route is the Dark Depths (闇の淵 Yami no Fuchi), where Sora and his friends encounter Xemnas, Axel, Saïx, and Maleficent.
The Dark Depths is the closest Sora can come to the Villain's Vale (ヴィラン砦 Viran Toride, lit. "Villain's Fort"), which contains five ramshackle set of towers arranged in a castle configuration, with pipes twirling around them, rising from a pile of ruined masonry and machinery. A big Heartless emblem can be seen atop of the tower in the middle. Villain's Vale contains a room inside, also known as Villain's Vale (ヴィラン砦の一室 Viran Toride no Isshitsu, lit. "Chamber of the Villain's Fort"), which acts as a base of operations for Maleficent and Pete.
| Area Map of Radiant Garden in Kingdom Hearts II |
|---|
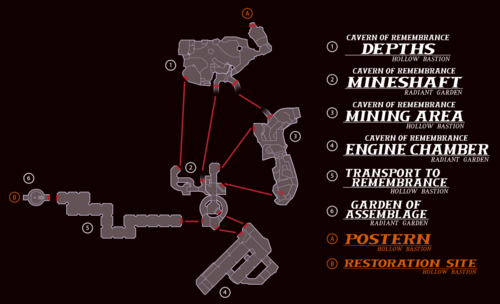
Cavern of Remembrance
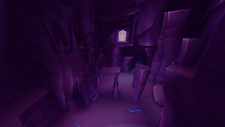
As the Battle of the 1000 Heartless attack begins, a hole in the castle wall at the Postern appears, revealing the entrance to the Cavern of Remembrance (追憶の洞 Tsuioku no Hora). Climbing down the hole leads to the cave's first area called the Depths (最深部 Saishinbu). The area appears at first to be a small cave with a stream of water pouring down a high ledge, next to a Drive Orb crystal, however, past the ledge is a short tunnel leading to an immense, beautiful crystalline cave, containing many ledges, stalactites, and stalagmites which can be ascended to reach an ornate door, as well as a healthy population of powerful Heartless.
Through the door lies the lowest part of the Mineshaft (坑道 Kōdō), a purple, deep, and winding pit cave which is crisscrossed with pipes across multiple "floors". Each floor contains openings in the pipes that require specialized, maximum leveled Growth Abilities to traverse, as well as the appropriate Drive Form for each obstacle; the first two are also guarded by event battles with several waves of Heartless. Crossing the first chasm with Quick Run brings Sora to another ornate door, as well as a passage leading to an upper cubby of the Depths, where he can dislodge a stalactite in order to create a shortcut.
Both the door and the cubby lead to the Mining Area (採鉱部 Saikōbu), a complex area of pistons, vents, and engines that is initially inert. By activating the engines lying at the very bottom of the chamber, Sora awakens the powerful machinery that he must navigate to reach the next room. Passing through the door leads to the second floor of the Mineshaft, which is much greener and has several pipes that must be bypassed with Aerial Dodge in order to reach the next door. Through this door is the busy Engine Chamber (機関部 Kikanbu), filled with conveyor belts, pistons, scalding jets of steam bursting from pipes, and more powerful Heartless, as well as several hidden balconies. At the end of this is another door leading to the final section of the Mineshaft, with a final pipe obstacle which must be threaded using Glide.
Exiting the cavern through this door brings Sora to the Transport to Remembrance (追憶への誘い Tsuioku e no Izunai, lit. "Invitation to Remembrance"), a long balcony hallway built in the same style as Castle Oblivion, with Radiant Garden's characteristic inverted waterfalls against the open sides of the path. The hall is bursting with powerful Nobodies, and Sora's initial traversal of it requires him to conquer three separate event battles, each with multiple waves of Nobodies.
The final door leads out of the subterranean caves to the Garden of Assemblage (集積の庭園 Shūseki no Teien), which can be used to bring to face against the Organization XIII's Replica Data as well as a secret passageway, veiled by an illusion, back to the Restoration Site.
| Area Map of Cavern of Remembrance in Kingdom Hearts II |
|---|
Kingdom Hearts Birth by Sleep
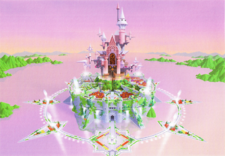
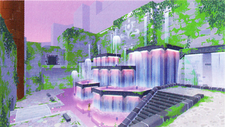
In Kingdom Hearts Birth by Sleep, Radiant Garden is shown in its originally glory, before it got turned into Hollow Bastion. The world's castle is shown to originally have a relevantly pastel palette, with the castle sitting on top of a large town filled with trees, grass, and flowers. The walls surrounding the town have several massive fountains, and are generally covered in climbers plants. Outside the walls is an ocean, with several green mountains in the distance.
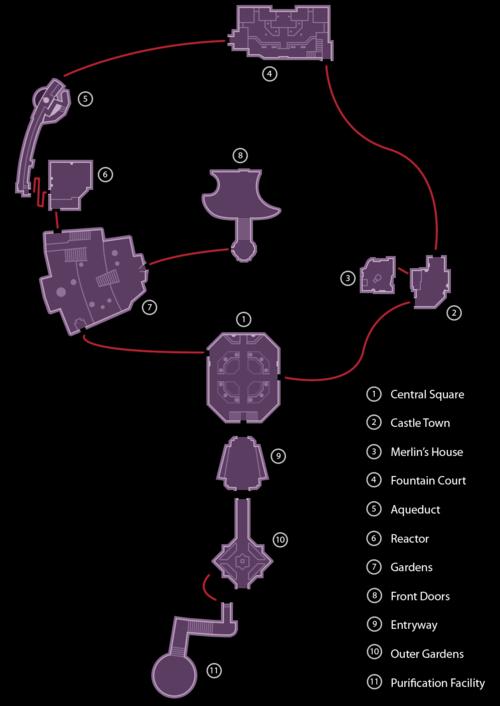
The Central Square (中央広場 Chūō Hiroba) is a town square located in the middle of the world, filled with beautiful flowers and trees, as well as many homes surrounding the area. Going northwest leads to the massive Gardens (庭園 Teien) area. Ascending the garden and leaving through a gate will lead to the Front Doors (正面扉口 Shōmen Tobira Kuchi), a small circular area with stairs leading to a wide open space outside the castle's gates.
By heading east from the Central Square, Terra, Aqua, and Ven will arrive at the Castle Town (住宅街 Jūtakugai, lit. "Residential Area"), a smaller back street with a Moogle Shop. Also located here is Merlin's House (マーリンの家 Mārin no Ie), where the Hunny Pot Board can acquired. Continuing through the tunnel at the end of Castle Town will lead to the Fountain Court (噴水広場 Funsui Hiroba, lit. "Fountain Square"), home to several large fountain layered on top of each other. By climbing the fountains and heading for the exit will take the characters to the Aqueduct (水路 Suiro), Radiant Garden's irrigation system. Running up some stairs and across the outer walls will eventually lead down to the world's Reactor (動力炉 Dōryoku-ro, lit. "Power Reactor"), where the Trinity Armor is fought. The Reactor can also be accessed through a broken gate at the Gardens Area.
Heading south from the Central Square will lead to a pair of stairs, one on either side, which leads down to the Entryway (エントランス Entoransu, lit. "Entrance"). A resting area within the wall which also houses a save point. Heading outside is the Outer Gardens (城外庭園 Jōgai Teien, lit. "Outer Castle Gardens"), a lotus shaped platform surrounded by water with even more flower beds. In the middle of the area is a fountain with a secret door in it, which leads down to the Purification Facility (浄化施設 Jōka Shisetsu), a large platform in an open area situated below the gardens.
| Area Map in Kingdom Hearts Birth by Sleep |
|---|
Kingdom Hearts III
In Kingdom Hearts III, the world appears to finally have been restored to its former self, and is almost identical to how it appeared in Kingdom Hearts Birth by Sleep. The world itself is inaccessible, but appears in several cutscenes. Areas show are the computer room in Ansem's Study, as well as the Central Square outside of the castle.
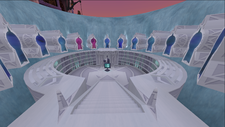
In Kingdom Hearts III Re Mind, Merlin's House (マーリンの家) becomes playable during the Limitcut Episode, and retains its appearance from Kingdom Hearts II. Though the outside portion resembles its appearance as Castle Town in Kingdom Hearts Birth by Sleep. Inside, by accessing Cid's computer, a data version of the Garden of Assemblage (集積の庭園) can be entered, though it looks relatively different. The digital replica lacks a sky and replaces the waterfalls with dark streams of data, as well as dark pillars seen between them. The passage which used to lead to the Restoration Site is simply replaced with a wall. From the garden the Real Organization XIII's Recreated Data can be fought. Master Xehanort and Xion's portals are unavailable until the eleven other members have been beaten. The area also contains a save point and a Moogle Shop. All thirteen battles take place at the Data-Organization XIII Arena, which consists of massively detailed circular platforms, with noen blue and purple lines springing out of the platform. Surrounding the arena are dark and ominous clouds.
Through Data Greeting, areas such as the Central Square, Merlin's House, Garden of Assemblage, and the Data-Organization XIII Arena can be freely explored.
Worksheet: The World That Never Was
Kingdom Hearts II
The Alley to Between (狭間につながる路地 Hazama ni Tsunagaru Roji) hides a portal to Betwixt and Between. Sora, Donald, Goofy, and King Mickey used this portal to get into the world, thanks to Axel's sacrifice. The alley way connects to the main route that leads to the Castle That Never Was. The first Save Point of the world can be found here.
Exiting the alley leads to the Fragment Crossing (断片を紡ぐ道 Danpen o Tsumugu Michi, lit. "Fragment-Spinning Road"), a long series of winding streets that lead to Memory's Skyscraper. It is full of neon signs attached to vacant buildings as well as a power plant which seems to power some or all of the city. Many Shadow Heartless are here, but in Kingdom Hearts II Final Mix, they are eventually replaced with Nobodies. Sora, Donald, Goofy, and King Mickey took this route on their way to the Castle That Never Was. Pluto also had an encounter with Axel here.
Following the Fragment Crossing is Memory's Skyscraper (記憶の摩天楼 Kioku no Matenrō), an imposingly tall building that presides over Dark City, in a plaza near the cliffs surrounding the Castle That Never Was. At its feet lies a plaza staircase leading to glass doors, and on its face is a massive television screen, which displays memories of those nearby in Another side, Another story.... In the corner of the plaza is a wrecked truck, flipped on its side. During his battle with Xemnas, Sora was pulled into an area that included Memory's Skyscraper, called Memory's Contortion, in a battle similar to the one Roxas and Riku had. In Dream Drop Distance, Memory's Skyscraper is accessible only for Riku. However, this is where Sora first landed when he dived into this world before being put to sleep.
The left road behind Memory's Skyscraper leads to the Brink of Despair (絶望を望む断崖 Zetsubō o Nozomu Dangai, lit. "Cliff Overlooking Despair"), a cliff with a clear view of the hovering Castle That Never Was. Sora, Donald, Goofy, and King Mickey arrive here and access the castle via a path using the Keyblade. It has the second Save Point of this world in Kingdom Hearts II.
Nothing's Call (虚無への誘い Kyomu e no Sasoi) is one of the lowest known areas of the Castle That Never Was, acting as a sort of "basement". It appears to be the only entrance into the castle for people who are not members of the Organization. Sora, Donald, Goofy, and King Mickey enter the castle here. They are soon attacked by Nobodies, but make it to the next area. It is also here where Roxas fights Saïx when leaving the Organization in Kingdom Hearts 358/2 Days.
The castle contains a number of dungeons, such as the Soundless Prison (無音の牢獄 Muon no Rōgoku) that lies near one of its towers, which appearance corresponds to the one seen in the Verge of Chaos in Kingdom Hearts 3D: Dream Drop Distance. Oddly, the bars of the cells are far enough apart that a prisoner could easily just walk out between them. Saïx uses the cells to imprison Kairi and Pluto, informing them that they are being used as bait to force Sora to slay more Heartless. After he leaves, however, Naminé enters through a Corridor of Darkness to help them escape. In the Kingdom Hearts II manga, Kairi escapes through the bars without help, but runs into Demyx as she and Pluto make their escape, and willingly returns to confinement out of pity when he begs her to keep him from being punished by Saïx.
Crooked Ascension (歪みを貫く柱 Yugami no Tsuranuku Hashira, lit. "Distortion-Penetrating Pillar") is an area of the Castle That Never Was that seems to be a giant elevator that ascends and descends without actually appearing to do anything. While inside, Sora, Donald, Goofy and Riku may be attacked by either Samurai or Dragoon Nobodies if going down to Nothing's Call or up to Twilight's View, respectively.
Twilight's View (黄昏から望む場所 Tasogare kara Nozomu Basho) is a stairway leading to the next floor of the castle. Sora can meet a Moogle here and synthesize new items. According to a flashback in Kingdom Hearts II Final Mix, occurring at some point before Kingdom Hearts 358/2 Days, Zexion and Xigbar discuss Xemnas's frequent visits to the Chamber of Repose and the discovery of Castle Oblivion here.
Hall of Empty Melodies (虚ろなる旋律の空間 Utsuro-naru Senritsu no Kūkan) is a large, two-part room sometimes used as a combat training station for the Organization. It is composed of a large platform over an indefinite abyss, with a recessed second floor accessible via Naught's Skyway and multiple high balconies overlooking the room. The domed glass ceiling provides a view of the castle's highest tower. When Sora, Donald, and Goofy arrive, Saïx taunts them and sics a horde of Heartless upon them, but Riku and Kairi arrive in time to help fight the Heartless on the upper floor as Maleficent and Pete watch. Xigbar enters and challenges Sora himself, but is defeated just as Mickey and Ansem encounter the scene, and the two kings leave with full faith in Sora and his friends. Afterward, Sora's group sprints to the second floor via the skyway and are reunited with Riku and Kairi. Afterward, the room becomes a haunt for Sniper and Assassin.
Naught's Skyway (虚空を辿る道 Kokū o Tadoru Michi) is a small outside path in a high section of the castle. It overlooks the eerie red-tinged clouds of Dark City. This is where Mickey finds DiZ, who is revealed to be Ansem the Wise, being attacked by Nobodies. After they are defeated, the two walk off with Ansem's encoding machine. Sora and his companions pass through here in order to find King Mickey and Ansem the Wise.
Proof of Existence (存在の証 Sonzai no Akashi) is a multi-tiered mock graveyard for the members of the Organization. It contains twelve stele, arranged by the rank of each member from left to right then top to bottom, with digital panels in the floor before the stele acting as epitaphs depicting the member's title and weapon. Demyx's stele incorrectly has number XI instead of IX. These stele actually operate as portals to other rooms in the castle, while the doorway to the next room takes the place of a stele for Xemnas. The stele for the destroyed members of the Organization have been smashed, but the epitaphs remain active for those that are conscious—therefore the epitaph representing Roxas, who has already been reunited with Sora, remains active, although his stele is smashed, while the stele for Luxord and Saïx remain active portals even after their epitaphs go dark with their destruction. Zexion's own epitaph was damaged to the point it no longer depicted his weapon,[1] while Roxas's depicts the Oathkeeper and Oblivion he obtained after leaving the Organization. Sora and his friends pass through the graveyard on their way up the tower, but are forced to put an end to Luxord and Saïx in order to open the way to Xemnas.
Havoc's Divide (混沌の狭間 Konton no Hazama) is an area favored by Luxord. The area is sloped and leads to a steep drop downwards. The top of the area can be partially seen from Naught's Approach.
Addled Impasse (惑わしの空間 Madowashi no Kūkan, lit. "Bewildered Space") is a large chamber with a clear view of the Kingdom Hearts moon, and appears to be where Saïx spends a large amount of time.
Naught's Approach (虚空を目指す道 Kokū o Mezasu Michi) is an exterior passage which leads to Xemnas's tower. Eerie red and blue vapors leak from Ruin and Creation's Passage and out onto the walkway.
Ruin and Creation's Passage (破壊と創造の回廊 Hakai to Sōzō no Kairō) is the biggest area in the castle with platforms floating in the air. Invisible paths can be used to reach each platform and eventually navigate to the other side. The room is filled with swirling red and blue smoke, with some collecting in a spiral at the top of the chamber. There are numerous windows at the sides of the room.
The Altar of Naught (虚空の祭壇 Kokū no Saidan, lit. "Altar of Empty Space") is a giant tower that is high above the rest of the castle. Hidden off the side is a glider. Xemnas often comes here to commune with Kingdom Hearts or present it to the other members. After Sora and his friends confront Xemnas here and he retreats into this Kingdom Hearts, the worlds create a doorway leading within so that Sora and his friends to follow him. The tower later collapses after Xemnas's Dragon Form collides into its side.
Memory's Contortion (記憶の歪み Kioku no Yugami) is a strange, wavering illusion of the Memory's Skyscraper that Xemnas draws Sora into for a battle. As it is an illusion, Sora cannot "return" here, but a simulation of it can be found within the Garden of Assemblage.
Where Nothing Gathers (虚無が集う場所 Kyomu ga Tsudou Basho), known to Organization members as the Round Room (円卓 Entaku, lit. "Round Table")[2], is a circular room containing throne-like chairs ranging in height, where the Nobodies of Organization XIII can gather and discuss developments and for Xemnas to give out orders. There are thirteen throne-like pillars which each member uses as a seat, but these pillars can move up or down at the user's will, or at the leader's. Out of respect for their leader, the other members keep their thrones below Xemnas's, and later, Xehanort's.[3]
The seats are arranged in a circle with Xemnas at the prominent seat. At Xemnas's left are the odd numbered members, and to his right are the even numbered members, increasing in numerical value up until number thirteen, Roxas's seat. The "fourteenth member", Xion, has no throne as she was neither a true member nor even a real Nobody, but a replica meant to absorb Roxas so she would gain his powers, thus the reason for the group's name remaining as "Organization XIII". In Kingdom Hearts 3D: Dream Drop Distance, Riku and Mickey Mouse battle Ansem, Xemnas, Young Xehanort, and the other members of the real Organization XIII in Where Nothing Gathers, while attempting to rescue Sora, who was rendered comatose and captured by Master Xehanort to become a new vessel for himself, who sits in Xemnas's throne while watching the struggle. After the battle, Master Xehanort lifts the throne Sora is in and tries to put a fragment of his heart on him. Fortunately, Lea appears and rescues Sora. Shortly afterwards, Donald and Goofy also appear and literally fall on top of Ansem's Guardian, which had captured Riku and Mickey, just before the real Organization XIII vanishes and each of his members returns to its own time.
| Area Map of the Dark City in Kingdom Hearts II |
|---|
| Area Map of Castle That Never Was in Kingdom Hearts II |
|---|
The World of Nothing
After Xemnas's first defeat within Memory's Contortion, he flees into his Kingdom Hearts. However, a door appears that leads Sora and his friends within that Kingdom Hearts to an area named "The World of Nothing". The first area inside the door is The World of Nothing—End's Beginning, a passageway resembling the Dark City where skyscrapers suddenly erupt from the ground in order to repel Sora. A strange black-and-white tunnel leads from this room to a platform looking out on the gigantic Nobody that Xemnas is riding. From there, Sora can climb falling skyscrapers to walkways surrounding the lower cannons of the Nobody, The World of Nothing—Twin Cannons. Once he destroys those, Sora swings his way up to the ship's Energy Core, which is kept in a room appropriately named The World of Nothing—Energy Core. After disabling the ship's energy core, he makes it up The World of Nothing—Xemnas's Throne Room, where Xemnas sits in his Keyblade Armor, enthroned atop the dragon Nobody's head in a chamber equipped with the weapons of the defeated Organization members. After completely destroying the gigantic Nobody, Sora and Riku are left in The World of Nothing (虚無の世界 Kyomu no Sekai), a nearly-empty void of shifting greys and whites where Xemnas makes his last attempt to destroy them. He fails, however, and the boys are deposited at the Dark Margin.
Kingdom Hearts 358/2 Days
The Grey Area (闇と光を紡ぐ庭 Yami to Hikari o Tsumugu Niwa, lit. "The Garden that Interweaves Darkness and Light") is a room in the castle that serves as a lounge for the Organization's members, as well as the place where the members receive their mission briefings from Saïx. The room is wedge shaped with one wall made entirely out of a giant window, out of which Kingdom Hearts can eventually be seen floating in the distance. The room has couches and tables spread around it, and Organization members are often seen lounging about between missions. There is also a Moogle here, dressed in the Organization coat, that allows Roxas to synthesize panels and access a shop that uses heart points as currency.
The castle has a room with a computer that seems to contain information on all the Organization projects including the Replica Program and Castle Oblivion. In the Kingdom Hearts 358/2 Days novel, this room is said to be Saïx's study room.
The Castle also contains a library filled with literature on various subjects. In here, Axel finds a book titled "The Truth about Naminé," authored by Vexen. In the Kingdom Hearts 358/2 Days novel, this room is said to be in Castle Oblivion, and was Vexen's research room.
Each of the members of the Organization has an individual bedroom in the castle. The rooms are white with metal-like walls, a single bed with the headboard in the shape of the Nobodies' symbol and a window showing the heart-shaped moon of Kingdom Hearts.
| Area Map in Kingdom Hearts 358/2 Days |
|---|
Kingdom Hearts 3D: Dream Drop Distance
In Kingdom Hearts 3D: Dream Drop Distance, only Memory's Skyscraper, the Brink of Despair, and the real Castle That Never Was are visited in the realm between. Sora visits a dream of a dream of the Dark City of The World that Never Was, which appears more contorted and ethereal than the city initially appeared in Kingdom Hearts II, similar to the World of Nothing within Kingdom Hearts, while Riku visits a dream of the Castle That Never Was. Although the locations of the areas Riku visits can be pinpointed, whether or not the locations they visit exist in the real world version of the world is not yet known.
Side:Sora
The Avenue to Dreams (夢境の街路 Yumesakai no Gairo) is a large urban area beginning with an enclosed alley featuring a save point and a Moogle hologram. Up a long flight of stairs lies a piece of destroyed building, blocking the path into the city that must be scaled to advance. Beyond is an area of twisting alleys surrounded by skyscrapers that can be scaled with Flowmotion. Several buildings are adorned in blue stripes with a geometric pattern and when stood upon, they rapidly elevate, throwing Sora into the air. Another building has similar white stripes and can be destroyed by using a Reality Shift. The pattern on these stripes are similar to the ones seen in the area of the final battle against Xemnas in Kingdom Hearts II. Perhaps the most notable feature of this area is a stream of blue-green mist that falls from the roof of a massive tower extremely similar to Memory's Skyscraper and flows through the streets. The Castle that Never Was can be seen from this area, but instead of floating above a giant crater, it floats above several tall buildings. Beyond this tower, the pavement is revealed to be floating and broken, away from the rest of the city and leads off into a more urban area.
The Avenue to Dreams directly leads to the Contorted City (歪みに満ちた街 Yugami ni Michita Machi, lit. "City Filled with Distortion"), which seems to emerge from a canyon of strange blue-green rock. This area does not have a save point. Much of the architecture here is coated in blue-green mist. Many buildings float of their own accord, attached to chunks of rock separate from the road, and several shake and swing. The blue markings appear again on the shaking section that is able to launch Sora skyward. Beyond several overturned buildings, a path of broken pavement and destroyed buildings forms an upward spiral. Neon strips and signs on the buildings can be traversed with Flowmotion. In several places, floating buildings marked with red symbols will hurtle toward Sora and must be destroyed with a Reality Shift or they will cause damage. Unlike the other areas, the Castle that Never Was cannot be seen from here.
The Nightmarish Abyss (凶夢の深淵 Kyōmu no Shin'en) features a large open plaza surrounded on three sides by skyscrapers, with a crashed truck (identical to the one near Memory's Skyscraper) blocking access to a side-street. The fourth side drops off to an abyss that is spanned by floating skyscrapers laid on their sides, forming a mostly straight path between two cliff faces and leading toward what appears to be Memory's Skyscraper and the Castle That Never Was seen from the left. Several neon strips appear here that can be traversed through Flowmotion, as in the Contorted City area. It is the area where Sora fights Xemnas.
Side:Riku
The Delusive Beginning (幻想のはじまり Gensō no Hajimari) is the lowest known area of the Castle That Never Was, situated just inside the large spinning ring at the base of the castle. It is comprised of four hallways connecting to a circular central chamber, two connecting at the ground floor, two high above. In the central chamber rests an energy beam housed in an impenetrable shield that damages enemies of the Organization. It must be destroyed by entering the shield through a portal and using a Reality Shift on it. This will cease its attack, destroy the shield, and create a walkway to the upper levels.
The Walk of Delusions (幻惑の歩廊 Genwaku no Horō, lit. "Gallery of Entrancement") initially appears as a shifting maze. Scattered throughout the maze are devices that require the use of a Reality Shift to destroy. Once disabled, the layout of the area changes, with new pathways opening up leading to the next device. Once three devices have been destroyed, the maze disappears entirely and reveals the area to be a long, straight bridge leading from the outer edge of the castle to the castle itself, across the open area beneath it. The large spinning ring, the large crater underneath the castle, and several support beams can be seen from the walk.
Fact within Fiction (虚実を紡ぐ回廊 Kyojitsu o Tsumugu Kairō, lit. "Corridor Spinning Fact and Fiction") is a large, open-air level at the top of the castle's spinning ring, giving a view of the mechanism that spins it. It consists of several high-walled passages and thick metal pipes. Along one passage, beams of purple energy move back and forth that damage any enemy who crosses them. Near the end of the area is a large circular platform where many enemies spawn. After a flight of stairs, there is a lift that rises seemingly magically to higher floors.
The Verge of Chaos (混沌を見下ろす場所 Konton o Miorosu Basho, lit. "Place Overlooking Chaos") is primarily a large, slightly curved balcony. The only way out of it is to take the elevator back to the lower levels, or to use Flowmotion on the massive pipes attached to the walls. Several other, smaller balconies sit on the wall with no way on or off but through Flowmotion. Eventually, up the wall, one reaches another small balcony attached to a larger one by a staircase. A narrow bridge off this area connects to the multi-turreted tower, where Riku fights the Anti Black Coat Nightmare, that can be traversed by using Flowmotion on a large pipe. The roof of this tower is also considered a part of the Verge of Chaos. This very tower can be seen far away from outside the castle, where its location is on its left side.
The Sanctum of Time (時の祭壇 Toki no Saidan, lit. "Altar of Time') is an area visited only during the battle with Young Xehanort. After being possessed by his future Master Xehanort self, Young Xehanort transports Riku and himself to the Sanctum of Time in a similar fashion to how Ansem, Seeker of Darkness transported Riku to the facsimile of Kingdom Hearts in the final battle of Kingdom Hearts Chain of Memories and Kingdom Hearts: Re:Chain of Memories. The battlefield is a large circular area with several cogs and clockwork devices integrated below the floor as well as atop pillars on either side of the battlefield, and it is surrounded by six different colored hourglasses. The area as a whole resembles a fractured ring dial. Peculiarly, at certain times during battle, the poles sticking out of the ground cannot have Flowmotion used on them. Beneath the glass is a red Nobody symbol.
Darkness's Call (闇への誘い Yami e no Sasoi, lit. "Invitation to Darkness") is an arena-shaped area with a spiraling violet vortex below. Streams of darkness rise around the central area. This is where Riku fights Ansem, Seeker of Darkness the first time during his Mark of Mastery exam. A platform may appear in the area if Riku uses Reality Shift on Ansem.
Darkest End (闇の果て Yami no Hate, lit. "Edge of Darkness") is a long arena that has huge dark pillars that resemble the ones found in the Realm of Darkness and a violet spiral in front of the place. In the back, there is a bottomless abyss. This is the place where Riku fights Ansem, Seeker of Darkness in his second form, where the Heartless can manipulate the space within the area at will, by either stretching it to send his enemies to the back or by compressing it to pull his enemies in front of him.
| Area Maps in Kingdom Hearts Dream Drop Distance HD |
|---|
Favorites
Heartless
Nobodies
Unversed
Dream Eaters
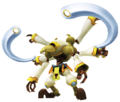
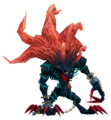
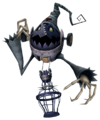
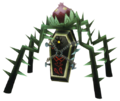
I really don't like the Dream Eaters, but a few of them are cute, and some even are decently cool.
Keyblade
Trivia
- I have tourette syndrome.
- I have a BA in acting.
- Favorite tv shows are Avatar, the Last Airbender, Attack on Titan, and Boy Meets World.
- ^ Kingdom Hearts II Ultimania, Tetsuya Nomura: "Probably because he's quite enigmatic. He's the only member who showed up with no weapons but it's not because he doesn't have his own weapon, it's more of because he died without fighting, so nobody knows what's his weapon. I have an idea on what his weapon is and I might have a chance of showing it in the near future so I'll keep it as a secret for now. That reminds me, in the World that Never Was, each XIII Organization member had a gravestone for them and each of those have a picture of their weapons and that's when Zexion became a problem for us. “Eh, we're gonna put a spoiler on Zexion's weapon there!?” (laugh) That's a bit too much so we decided to destroy the gravestone so that his weapon couldn't be seen."
- ^ Roxas's Diary, Day 7: Entry 1: "Today they told us to go to the Round Room, where we met our new member, No. XIV."
- ^ Kingdom Hearts II Final Mix+ Ultimania, pg. 502; Interviewer: "During the meetings, the members of Organization XIII are sitting in chairs. Is the height of these chairs determined by things like their skills and abilities?" / Tetsuya Nomura: "No, the height of the chairs is not fixated, they move. That is to say, the height is up to each person. The leader, Xemnas, is always the highest and to be at the same height as him would have a pretty bad feeling, so the other members wouldn't do that." Translation via TheWertle and Xaldin.
