Vanitas Remnant: Difference between revisions
(typos fixed: counter attack → counterattack (5)) |
|||
| Line 63: | Line 63: | ||
The crest that must be approached by the player to begin the battle has a very similar appearance to an Absent Silhouette portal, varying shades of purple in coloration with shards of black, rock-like material floating around it. The symbol appearing on the crest displays two halves of a gear which join to form an "S", the [[Keychain]] of the Void Gear Keyblade, both Vanitas and his Remnant's primary weapon. | The crest that must be approached by the player to begin the battle has a very similar appearance to an Absent Silhouette portal, varying shades of purple in coloration with shards of black, rock-like material floating around it. The symbol appearing on the crest displays two halves of a gear which join to form an "S", the [[Keychain]] of the Void Gear Keyblade, both Vanitas and his Remnant's primary weapon. | ||
==Strategy== | ==Strategy== | ||
===Attacks=== | |||
* Shadow Clone- Usually the first attack. The Remnant will encase itself in an impenetrable barrier while sending various shadow clones to slash at the player or slam down at the player before charging straight through the barrier. Inflicts Blind on contact | |||
* Dark Spiral- Speedy dashes in the air around the area while encased in dark energy. Will occur more often has the Remnant's HP dwindles | |||
* Dark Splicer- Slashes at the player while teleporting. Extends combo as HP dwindles | |||
* Shadow Dash + Dark Spikes- Dashes quickly in a circle around the player and summons spikes on each side of the player, which closes upon the player immediately. Will instantly kill the player, or leave them in critical condition while Blinded | |||
* Afterimage- Will leave an afterimage when caught in a combo or in mid-combo, and usually teleports above the player to retaliate | |||
* X-Blade Combo- Charges Keyblade, then slashes at the player, and follows up with releasing an X-shaped crescent of energy which homes on the player. May leave an afterimage halfway through the combo | |||
* Strike- Simultaneously dashes and slashes at the player, and follows up with an upward somersault slash that releases a crescent of dark energy, which homes on the player and inflicts Confuse status upon contact. | |||
* Jumping Blizzaga- Downward strike on the player upon teleporting above them, and simultaneously casting Blizzaga | |||
* Erupt + Firaga- Dives straight into the ground, and homes in on the player in a pool of dark energy. Upon reaching the player, the Remnant will erupt from the ground while casting multiple Firagas to rain down on the player | |||
* Cure/Cura/Curaga- Will be cast if the Remnant witnesses the player casting the same spell. | |||
===Terra=== | ===Terra=== | ||
While he has strength on his side, Terra is hampered by his poor dodging ability and slow speed overall, which can be dangerous when pitted against the extremely fast Remnant. It is recommended that the player fill their Command Deck with the fastest of attacks, as well as at least two sets of Potions and either a high-leveled Mine Square or Mine Shield. All three levels of the HP Boost ability, as well as both Second Chance and Once More, should be equipped as well. The player's choice in Keyblades does not matter, but Chaos Ripper is recommended for the best performance in physical damage. While not necessary for victory, the player lastly may wish to fully level up Terra's combo finisher to the point where Demolition has been unlocked. | While he has strength on his side, Terra is hampered by his poor dodging ability and slow speed overall, which can be dangerous when pitted against the extremely fast Remnant. It is recommended that the player fill their Command Deck with the fastest of attacks, as well as at least two sets of Potions and either a high-leveled Mine Square or Mine Shield. All three levels of the HP Boost ability, as well as both Second Chance and Once More, should be equipped as well. The player's choice in Keyblades does not matter, but Chaos Ripper is recommended for the best performance in physical damage. While not necessary for victory, the player lastly may wish to fully level up Terra's combo finisher to the point where Demolition has been unlocked. | ||
Revision as of 20:22, 17 May 2015
Oh no! The water! I'm in big trouble if I don't fetch it!
| |
 |
This article requires cleanup or improvement.
Please help out by editing this page. Please see the Manual of Style and editing help before getting started. Issues: Rewrite strategy sections to have a section on the Remnant's techniques, then much smaller sections for each character on how to counter them. |
Template:Enemy The Vanitas Remnant makes its first and only appearance as a secret, optional boss in Kingdom Hearts Birth by Sleep. After the player clears the Final Episode, a crest similar to an Absent Silhouette portal will appear in the Badlands area of the Keyblade Graveyard. Simply approach the portal and select the "That's a danger I'm willing to face" option to initiate the battle. Defeating the Vanitas Remnant earns the player a Secret Gem in the Japanese version of Kingdom Hearts Birth by Sleep, and the Void Gear in the North American, PAL, and Final Mix versions. The Vanitas Remnant also must be challenged if the player wishes to challenge the even more powerful Unknown. However, the player can simply unlock, and not defeat the Vanitas Remnant, and still be able to challenge the Unknown.
Story
Terra, Ventus, and Aqua separately return to the Badlands to find a mysterious sphere of dark energy hovering in the air. They each accept the challenge it presents, and the Vanitas Remnant then takes shape before them from another sphere of dark energy, much like the true Vanitas did during his creation, before drawing its Void Gear and attacking. After the Remnant's defeat, it transforms back into the dark energy sphere from which it originally spawned and vanishes.
Design
The Vanitas Remnant, true to its name, is a palette swap of the helmeted Vanitas. Its smooth helmet is completely black with an Unversed insignia emblazoned on it. Its torso and legs are covered by a black bodysuit reminiscent of Riku's Dark Mode, with faintly glowing white highlights on the chest. The material over its arms shifts in color from black to grey to white, before shifting to black again on the palms of its hands. Its boots are white with black soles. It also wears a white, skirt-like garment with black tips around its waist, held up by several grey straps.
The crest that must be approached by the player to begin the battle has a very similar appearance to an Absent Silhouette portal, varying shades of purple in coloration with shards of black, rock-like material floating around it. The symbol appearing on the crest displays two halves of a gear which join to form an "S", the Keychain of the Void Gear Keyblade, both Vanitas and his Remnant's primary weapon.
Strategy
Attacks
- Shadow Clone- Usually the first attack. The Remnant will encase itself in an impenetrable barrier while sending various shadow clones to slash at the player or slam down at the player before charging straight through the barrier. Inflicts Blind on contact
- Dark Spiral- Speedy dashes in the air around the area while encased in dark energy. Will occur more often has the Remnant's HP dwindles
- Dark Splicer- Slashes at the player while teleporting. Extends combo as HP dwindles
- Shadow Dash + Dark Spikes- Dashes quickly in a circle around the player and summons spikes on each side of the player, which closes upon the player immediately. Will instantly kill the player, or leave them in critical condition while Blinded
- Afterimage- Will leave an afterimage when caught in a combo or in mid-combo, and usually teleports above the player to retaliate
- X-Blade Combo- Charges Keyblade, then slashes at the player, and follows up with releasing an X-shaped crescent of energy which homes on the player. May leave an afterimage halfway through the combo
- Strike- Simultaneously dashes and slashes at the player, and follows up with an upward somersault slash that releases a crescent of dark energy, which homes on the player and inflicts Confuse status upon contact.
- Jumping Blizzaga- Downward strike on the player upon teleporting above them, and simultaneously casting Blizzaga
- Erupt + Firaga- Dives straight into the ground, and homes in on the player in a pool of dark energy. Upon reaching the player, the Remnant will erupt from the ground while casting multiple Firagas to rain down on the player
- Cure/Cura/Curaga- Will be cast if the Remnant witnesses the player casting the same spell.
Terra
While he has strength on his side, Terra is hampered by his poor dodging ability and slow speed overall, which can be dangerous when pitted against the extremely fast Remnant. It is recommended that the player fill their Command Deck with the fastest of attacks, as well as at least two sets of Potions and either a high-leveled Mine Square or Mine Shield. All three levels of the HP Boost ability, as well as both Second Chance and Once More, should be equipped as well. The player's choice in Keyblades does not matter, but Chaos Ripper is recommended for the best performance in physical damage. While not necessary for victory, the player lastly may wish to fully level up Terra's combo finisher to the point where Demolition has been unlocked.
At the start of the battle, the Vanitas Remnant will encase himself within a dark orb, from which seven shadow replicas of the Remnant will spawn, immune to all damage until the resulting combo has ended. The player should immediately use Slide when the shadow replicas are close to the player to avoid them, and not use Sonic Impacts as these do not provide invincibility and have a large lag time before and after use. The seven shadow replicas that spawn from within the orb and travel to Terra's location perform a downward or sideways swing (each hit inflicts the Blind status), then there is a finishing lunge performed by the true Remnant. The player can delay or even prevent this attack's execution by attempting to strike the boss with the Keyblade or a long-ranged, fast-paced attack like Thunder Surge, or if they have enough time, they can activate a max-locked Shotlock in order to be invulnerable for the duration of the attack, though it's possible for Vanitas to attack as soon as the Shotlock ends. If either of these miss, Slide multiple times to avoid the boss's countering χ-blade combo, two-hit slash, or upward fireball strike. If it hits, do not get cocky, as the Vanitas Remnant will attempt a downward counterattack.
A majority of the battle will be spent avoiding the boss's fast-paced and seemingly endless chains of attacks. If the Remnant rushes at Terra and spawns several dark crystals that will rush at him from both sides after a certain period of time, Slide to the boss's position after he spawns the crystals (where he'll be open to attack) and lay a Mine Square or Mine Shield. As the boss runs towards Terra or performs his teleporting slash combo, there is a strong chance that he'll blunder into the Mines and take large quantities of damage. The player also may use this opening to perform a few hits with the Keyblade, but be prepared to face any counterattacks from the boss. Slide to avoid the boss's rush combo (it'll shout "There's no escape!" or "Darkness waits!" prior to its execution), and take advantage of the situation if the boss prepares a Dark Cannon Shotlock attack. While the dark energy beam it shoots from the tip of its Void Gear has a great deal of range, one can carefully Slide to the boss's location as it attempts to hit Terra with the Shotlock to perform several physical combos. Ars Solum works also, but you risk Vanitas Remnant attacking you after his shotlock ends. Continue to lay Mine Squares until at least half of the boss's HP has been depleted. Another tactic during the Dark Cannon is to drink a Vanilla Glitz, which will activate Critical Impact and allow Terra's blows to deal more damage until the Shotlock is finished.
After the boss's HP hits half or lower, the player can get serious in terms of offense. While dodging is still the first priority, attack whenever possible or lay a Mine Square or Shield. If the boss attempts to perform its teleporting slash combo, Block it and counter with physical attacks until Terra's Command Gauge has been filled. Rather than a Command Style's activation, the player will gain access to whatever combo finisher was last equipped. If Demolition has been obtained, be sure to use it. Not only can it hit multiple times, but it makes Terra completely immune to damage while dealing a great deal of it to the boss. Continue to dodge the Vanitas Remnant's combos and heal with Potions if necessary. Eventually, the Vanitas Remnant will fall, Terra's prize being either the Void Gear or a Secret Gem depending on which version (English or Japanese) of the game the player has.
Ventus
Ventus is the quickest of the three characters, and his Dodge Roll provides some invincibility during use. Superglide is also useful in dodging some of the wider ranged attacks of the remnant, and usually is useful in escaping and restoring your HP.
For Ventus to easily defeat the Remnant, use of the Tornado command is suggested, as well as Mine Square. The Tornado, however, has the disadvantage of immobilizing Ventus for a few seconds, so if the Tornado causes the Remnant to teleport, it will strike Ventus from behind and easily kill him, even with Once More and Second Chance equipped. Also, keep two or three stocks of Potion commands ready. Most, if not all, of the Remnant's attacks will reduce your HP to 1, making the use of a full HP bar low, so using a stronger kind of potion is not advised.
When the battle begins, roll towards the boss and quickly attack, forcing him to postpone his shadow attack. There is a chance he'll use it right after dodging/being hit by your initial attack. When he is using the shadow attack, either dodge rolling continuously or countering with a Shotlock is recommended. The Shotlock will not damage him but at least the player can escape being damaged. The player can (and should) block its Dark Splicer attack mid-way by using Block. Renewal Block is recommended as it restores some probably much needed HP. Vanitas Remnant is able to use a Shotlock, so in order to avoid this, the player should jump behind him as the boss performs the attack. Here, the player can exact some free strikes, 3 at most. Trying to pull off a full combo might be risky. The boss might quickly spin in a circle around the player, summoning 2 rows of spikes that can blind the player. To avoid these, simply Dodge Roll into them, as Dodge Roll gives you slight invulnerability.
The Remnant is most vulnerable to the tornado command especially after its X-Combo, its shadow attack, and its lightning attack. For the X-combo, once it holds its Keyblade upwards and begins an energy charged combo, dodge roll around it until it jumps into the air and fires an X-Shaped beam. Roll under it and quickly let loose a Tornado. For the shadow attack, cast Tornado immediately after it charges after you at the end of its combo. Just quickly repeat the strategy used for the X-combo to cast Tornado after the lightning attack. If the player has caught the boss in the spell, one can move him around depending on your current condition. If low on HP, move him further away from Ventus and use a potion once your Tornado wears off. If your HP is high/full, drop him above yourself and quickly use a Mine Square to continue to damage the boss, but be mindful that he might counter your Mine Squares by reappearing above you. Dodge Roll is recommended, as are Once More and Second Chance. Also, Ventus's LV6 finisher, Stratosphere, is able to damage the Remnant and should be used when available, as Ven is invincible while performing the Finisher (as with most, if not all, finishers).
Repeating the above process roughly twice should deplete the Remnant's HP to 0, netting the player victory.
Aqua
As Aqua, deactivate any advanced forms of Cartwheel before the battle, since they lack the invulnerability that the basic Cartwheel has. Also be sure to replace all advanced Commands in your Command Deck with at least three sets of Potions (taking up three of the available eight slots). Fill four of the remaining open slots with Fabracadabra items, and fill the last slot with Seeker Mine. The Vanitas Remnant is beatable at any level. It is also advised that the player equip all three levels of HP Boost, as well. The player's choice of Keyblade does not matter, but the Ultima Weapon is recommended for use if the player wishes to deal the most damage possible in both physical and magical attacks. If the player has yet to obtain the Ultima Weapon, Stormfall can be used as a good alternative due to its even boosts to Aqua's stats.
The first thing the player should do at the start of the battle is attempt to attack the Vanitas Remnant in order to prevent him from using his shadow attack. If the player lands an unlikely hit, immediately Cartwheel away to prevent taking damage from the possible counterattack. If the player misses, then the Remnant will either use a two-hit combo that sends a homing crescent-shaped wave of energy at Aqua (use Aqua's Payback ability to damage Vanitas, and then avoid the energy wave with Cartwheel if possible. Note that failure to do so has a 100% chance of giving Aqua the Confused status effect), begin the true Vanitas's χ-blade combo (a forward lunge followed by a downward surge of energy ended by a combo finisher which causes the boss to launch an X-shaped energy wave at the player. Use a chain of Cartwheels to avoid this attack), or it may leap back and sink into the ground to perform Vanitas's upward lunge from the pool of darkness that represents it, granted this time the attack adds the spawning of numerous fireballs to the mix (this attack can be avoided through a chain of Cartwheels and leaves the boss temporarily vulnerable to an attack of the player's).
The Vanitas Remnant will mainly use these three attacks (as well as the shadow attack, which can be avoided through chaining multiple Cartwheels together so long as the player traverses away from the boss to avoid his lunging combo finisher) for a majority of the battle. If it shouts "Darkness waits!" and lunges at Aqua while airborne, be prepared to Cartwheel numerous times to avoid each of the following lunges (only a single Cartwheel is necessary to avoid each lunge). The boss also may rush at Aqua, causing several dark crystals to appear behind him that will then rush at Aqua as the screen blackens (a well-timed Cartwheel during this attack's execution can prevent taking damage). The Vanitas Remnant will remain stationary for a time after this attack is used, so use this opening to lay a trap of Seeker Mines. The boss may blunder into them during a simple run to reach Aqua, his X-blade combo, or even his teleporting slash attacks. The homing Mines will deplete a great deal of HP from the boss's single HP bar (granted all if not most of the Mines hit). If the boss attempts to hit Aqua with a downward counterattack that spawns three large pillars of ice (a common side-effect of being hit with Seeker Mine), Cartwheel to avoid it. Should the Vanitas Remnant continue the offensive and interrupt a slashing combo to launch a fireball, immediately chain together Cartwheels to avoid the three smaller, homing fireballs that follow.
Once about three quarters of the boss's HP has been depleted through the laying of Seeker Mines (a time-consuming strategy since the player must wait for an opening after the boss's upward rush attack or dark crystal attack to lay them and spend the rest of the time dodging in hopes that the boss comes in contact with the Mines), the player may activate the Spellweaver Command Style through the usage of a Fabracadabra. Immediately use a second if an opening is present to instantly gain access to the Command Style's finisher. While not particularly powerful, the "Spellweaver" Deck Command makes Aqua invincible, has a great range, and can hit the Vanitas Remnant multiple times. The usage of "Spellweaver" can easily deplete a large portion of HP if the player's Attack stat is high enough. Otherwise, the player can continue to combine Spellweaver with Seeker Mines until the Vanitas Remnant is defeated. Granted this is a time-consuming strategy, it almost always has a chance of being successful, so long as the player finds openings in which a Potion can be used if Aqua is low on HP. Do not get discouraged if Aqua is defeated, as repeated attempts will help the player learn good strategies to use in terms of avoiding the Vanitas Remnant's attacks. Correct methods of dodging, when combined with this Command Deck, will ensure victory eventually if it is not obtained on the first playthrough.
Another strategy the player may wish to attempt that involves less item consumption still makes use of and relies on Seeker Mine as the main source of offense. Only two to three of the eight slots in Aqua's Command Deck need to be filled with items. The others should only be filled with the fastest of attacks, such as Thunder Surge (be advised that the Remnant will attempt its downward counterattack after being hit). There is little need, in actuality, for any Commands other than items to be used. It is also highly recommended that the player fully level up the Magic Pulse combo finisher in order to unlock Teleport Spike before attempting this strategy. Use Seeker Mine until at least three quarters of the boss's HP has been depleted, and be sure to use Potions if Aqua's Cartwheel fails to protect against an attack. Once the Vanitas Remnant has taken enough damage through Seeker Mine, the player may begin to block its teleporting or two-hit slash attacks with Barrier and follow with a damaging Counter Blast (granted the boss will often counter, which is avoidable through a Cartwheel or two). Consecutive Counter Blasts or even the occasional Keyblade strike will fill the Command Gauge (as would any Command). Instead of a Command Style being activated as a result of filling the Gauge, however, Aqua's Teleport Spike finisher will become available. Once Teleport Spike is used, it will allow the player to strike the boss multiple times while Aqua is completely immune to damage. The player simply must continue to dodge and counter the boss's attacks, using Teleport Spike whenever it is available in order to be victorious in this battle. Heal if necessary using a Potion, and the Vanitas Remnant will fall.
All
A glitch in the Remnant's A.I. can provide an easy victory to those experiencing difficulty in taking victory. A column of rock in the battlefield's corner is shaped such that luring the Remnant to it and retreating to the opposite side will cause it to consistently run straight towards the player without attacking. By filling the Command Deck completely with Strike Raid attacks, or similar variants, and ensuring the player is Locked-On to the Remnant, the attack will pass through the column of stone and connect with the Remnant.
Terra's strength is the strongest of the three, and as such he can easily do twice as much damage with a basic Strike Raid than Ventus or Aqua. Ventus' variant Wind Raid can land multiple hits per throw, and can be used more efficiently than other Raid commands. As Aqua's stats are heavily inclined towards magic, it is best to save this particular strategy as a last resort.
The prize for defeating the Vanitas Remnant, regardless of character used, is a Secret Gem in the original Japanese release of Kingdom Hearts Birth by Sleep. The Void Gear Keyblade is rewarded to the player in the North American and Final Mix[1] versions.
Gallery

The crest which initiates to the battle with the Vanitas Remnant.
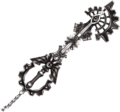
The Vanitas Remnant's version of the Void Gear.

_KHBBS.png)
Video
| Vanitas Remnant (Kingdom Hearts Birth by Sleep—Terra) | Vanitas Remnant (Kingdom Hearts Birth by Sleep—Ventus) | Vanitas Remnant (Kingdom Hearts Birth by Sleep - Aqua) |
| <youtube width="320" height="240">lQ7gc4quIHo</youtube> | <youtube width="320" height="240">kwkFMd1Smow</youtube> | <youtube width="320" height="240">bayCGtttAyg</youtube> |
Notes and references
| Unversed |
|---|
| Enemy Unversed |
Archraven | Axe Flapper | Blobmob | Blue Sea Salt | Bruiser | Buckle Bruiser | Chrono Twister | Flood | Glidewinder | Hareraiser | Jellyshade | Mandrake | Monotrucker | Prize Pod | Red Hot Chili | Scrapper | Shoegazer | Sonic Blaster | Spiderchest | Tank Toppler | Thornbite | Triple Wrecker | Vile Phial | Wild Bruiser | Yellow Mustard
Belly Balloon | Element Cluster | Flame Box | Floating Flora | Gluttonous Goo | Lone Runner | Ringer | Vitality Vial
|
| Boss Unversed |
Cursed Coach | Iron Imprisoner | Mad Treant | Metamorphosis | Mimic Master | Spirit of the Magic Mirror | Symphony Master | Trinity Armor | Vanitas Remnant | Wheel Master
|