KHWiki:Sandbox: Difference between revisions
(Game:Xemnas page, reimagined with quotes.) |
No edit summary |
||
| Line 8: | Line 8: | ||
<br><big><font color=white>'''The Kingdom Hearts Wiki is not a news site.'''</font> While we may in certain cases cover properly vetted information from interviews, trailers, and messages from the developers, this is ''not'' the site to come to for "hot KH scoops", such as content or voice actors in unreleased games. Please see [[Forum:Ansem's Computer|<font color=white>the forums</font>]] to discuss possible edits based on upcoming games, or visit [http://kh13.com <font color=white>KH13</font>] and [http://khinsider.com <font color=white>KHInsider</font>] for ''Kingdom Hearts''-related news.</big> | <br><big><font color=white>'''The Kingdom Hearts Wiki is not a news site.'''</font> While we may in certain cases cover properly vetted information from interviews, trailers, and messages from the developers, this is ''not'' the site to come to for "hot KH scoops", such as content or voice actors in unreleased games. Please see [[Forum:Ansem's Computer|<font color=white>the forums</font>]] to discuss possible edits based on upcoming games, or visit [http://kh13.com <font color=white>KH13</font>] and [http://khinsider.com <font color=white>KHInsider</font>] for ''Kingdom Hearts''-related news.</big> | ||
|} | |} | ||
== | The ''{{c|Kingdom Hearts|series}}'' series uses a huge array of recurring symbols, some original and some derived from real-world sources, with deep significance to its story and characters. This page compiles the most important of these symbols and details their use in the series. | ||
==Main symbols== | |||
===Heart=== | |||
[[File:Symbol - Heart1.png|64px]] | |||
[[File:Symbol - Heart2.png|64px]] | |||
[[File:Symbol - Heart3.png|64px]] | |||
[[File:Symbol - Heart4.png|x64px]] | |||
[[File:Symbol - Heart Mobile.png|64px]]<br> | |||
Hearts are some of the most recognizable and prominent symbols associated with the series; one type of heart symbol is featured on the series logo and, as a result, on the majority of real-world ''Kingdom Hearts'' merchandise. The symbol also appears on the back of every [[Card]], [[Limit Form]]'s outfit in [[Halloween Town]], in several worlds, such as [[Hollow Bastion]], [[The World That Never Was]], [[Traverse Town]], and [[Radiant Garden]], and several [[Keyblades]] and miscellaneous weapons. Simplified heart symbols appear less frequently, but are featured in [[Trinity Marks]], several Keyblades, [[Wonderland]], typically with the [[Queen of Hearts]], and, most notably, the heart-shaped moon, [[Kingdom Hearts]]. A few Pureblood Heartless have heart-shaped holes in their chests.<!--Auto-Life Gummi icon--> | |||
The most recognizable heart symbol is depicted as the outline of a heart with tips that curl inward at its top. More simplified heart, solid designs also appear in the series, although they are featured less prominently. | |||
===Heartless=== | |||
[[File:Heartless Emblem.png|x64px]] | |||
[[File:Symbol Character - Riku.png|64px]] | |||
[[File:Way to the Dawn Keychain KHII.png|60px]] | |||
[[File:Χ-blade Keychain KHBBS.png|60px]]<br> | |||
In | The Heartless symbol is used, as its name suggests, to represent the [[Heartless]], specifically Emblem Heartless. The standard Heartless emblem is displayed on every single Emblem Heartless, as well as [[Ansem, Seeker of Darkness]]'s chest and certain weapons related to Heartless, such as the [[Akashic Record]] and [[Precious Mushroom]]. In the [[End of the World]], the doorway leading to the Final Rest area is shaped like the Heartless emblem. The Heartless emblem without the spiked "X" is commonly associated with [[Riku]]. When using [[Dark Mode]], Riku wears the symbol on his chest, and it is the [[Keychain]] token of his main Keyblade, [[Way to the Dawn]]. The Keychain token of the [[χ-blade]] is a black and red heart resembling the Heartless emblem, but with two [[Kingdom Key]]s crossed over it in place of the normal red design. | ||
The | The Heartless emblem is comprised of a heart with a fleur-de-lis at its base. It is typically black with a red outline and spiked "X" crossing through the heart in the symbol, which symbolizes the fact that Heartless act without emotions, hence their name. A common variation of the Heartless emblem is a completely black silhouette, lacking the cross over the heart. A third variation is simply a heart featuring the color scheme of the standard Heartless symbol, a black body and red outline, but also lacks the cross. | ||
===Nobody=== | |||
[[File:Nobody.png|x64px]] | |||
[[File:Symbol - Nobody Variation.png|64px]] | |||
[[File:Proof of Nonexistence KHIIFM.png|64px]]<br> | |||
The {{nihongo|[[Nobody]] symbol|ノーバディのマーク}} is primarily associated with [[Organization XIII]] and the Nobodies it commands, and many of the members' weapons incorporate the symbol into their design. Every single lesser Nobody is emblazoned with the Nobody symbol, and a few are even shaped like it. The [[Proof of Nonexistence]], [[Challenge Sigil]], [[Unity Badge]], and [[Ordeal Badge]] all feature the symbol. Certain accessories with connections to Organization XIII, such as the [[Full Bloom]] and [[Shadow Archive]], also use the symbol. The symbol is featured countless times in the architecture and decorations of the [[Castle That Never Was]] and other areas related to the Organization. [[Two Become One]] is the only Keyblade to sport the full Nobody emblem in its design. A variant of the Nobody emblem based on the original's top half appears on several [[Nobody#Gummi Nobodies|Gummi Nobodies]]. | |||
The Nobody emblem resembles an upside-down Heartless emblem in shape, but with several circular notches taken out of its edges. The symbol's base is shaped like an upside-down heart, while its top is a thin, spiked cross. Spikes and sharp edges often evoke the Nobody emblem without the full symbol being displayed. The symbol is usually depicted as white or silver, like most Nobodies. [[Xemnas]] created the symbol based on [[Terra]]'s fragmented memories, and, as a result, the Nobody emblem bears a strong resemblance to Terra's mark. | |||
===Unversed=== | |||
[[File:Unversedlogo.png|x64px]] | |||
[[File:Symbol - Unversed.png|x64px]]<br> | |||
The [[Unversed]] emblem is emblazoned at least once on every single Unversed, with the exception of the [[Flood]]. After [[Vanitas]] forcibly merges with [[Ventus]], Ventus's [[Dive to the Heart]] Station changes appearance, incorporating Unversed emblems into Vanitas’s half of the pillar.<!-- | |||
https://www.reddit.com/r/KingdomHearts/comments/5rdq0d/khddd_media_unversed_symbol_can_be_seen_on_a/ | |||
https://www.reddit.com/r/KingdomHearts/comments/5re0tu/khddd_adding_on_to_the_other_post_unversed/?st=iymuxg6u&sh=6e6ce54c | |||
https://www.reddit.com/r/KingdomHearts/comments/5rg7bb/khddd_unversed_symbol_in_the_3ds_version_as_well/ | |||
--> | |||
The Unversed emblem is designed to resemble a heart expressing emotion. It uses sharp corners, deep curves, and straight edges to form a heart shape in its center. Certain parts of the Unversed symbol's design resemble some Unversed's eyes. The symbol is virtually always black. | |||
===Dream Eater=== | |||
[[File:Symbol - Dream Eater (Spirit).png|x64px]] | |||
[[File:Sweet Dreams Keychain KH3D.png|x64px]] | |||
[[File:Symbol - Dream Eater (Nightmare).png|x64px]] | |||
[[File:Knockout Punch Keychain KH3D.png|x64px]]<br> | |||
The [[Dream Eater]] emblems appear on almost every Dream Eater.<!--do any not have one?--> | |||
The Dream Eater symbols are designed in the form of hearts with certain aspects that display whether they are Spirit or Nightmare. The Spirit variant is always a faded pale peach fading to a deep hot pink with a dark purple border, the tail at the bottom of the heart-shaped is bowl-shaped. Its wings are shaped more like swirls as it is given a simplistic innocent look, compared to the Nightmare version. The Nightmare variant is always colored a deep navy fading into a bright neon purple with a thick white border, the tail at the bottom of the heart-shaped symbol is cone-shaped. Its wings are shaped like bat wings with small spikes in the center and growing larger near the sides. They bear a very vague resemblance to the Heartless symbol, specifically the Nightmare version. | |||
Due to his nature within [[Sora]]'s dreams as a Dream Eater, Riku has the Spirit emblem on the back of his vest during most of ''[[Kingdom Hearts 3D: Dream Drop Distance]]''. | |||
===Terra's Mark=== | |||
[[File:Symbol - Keyblade Master.png|64px]] | |||
[[File:Keyblade Master Emblem.png|x64px]] | |||
[[File:Symbol - Keyblade Master2.png|x64px]] | |||
[[File:Master's Defender Keychain KHBBSFM.png|x64px]]<br> | |||
Terra, [[Aqua]], and Ventus wear an emblem on their clothes as badges. While it is not uniquely associated with Terra, and appears to be a signature of Keyblade wielders that train in the [[Land of Departure]], it is referred to as {{nihongo|"Terra's Mark"|テラたちのマーク|Tera-tachi no Māku|lit. "The Mark of Terra and his friends"}} in official materials. [[Master Eraqus]] wears the emblem on his armored chest piece, and it is also the Keychain token of [[Master's Defender|his Keyblade]]. Aqua's [[Wayfinder]]s have the emblem in their centers. Terra's mark is featured on several Dive to the Heart Stations, including two of Ventus's Stations and the character selection screen of ''Kingdom Hearts Birth by Sleep''. It also appears on the walls of the [[Chamber of Waking]]. | |||
; | Terra's mark resembles the Heartless and Nobody symbols in shape; it is a heart with a sharp cross at its base. The symbol is very angular and squared, and the points of its cross are much more compact and close together than those of the Nobody symbol. The symbol appears in several different colors, such as gold and silver. | ||
===Crown=== | |||
[[File:Symbol - Crown.png|64px]] | |||
[[File:Icon Crown.png|x64px]] | |||
[[File:Limit Form Orb KHIIFM.png|64px]] | |||
[[File:Other Emblem.png|x64px]]<br> | |||
Crowns are another heavily featured symbol of the series and are part of the ''Kingdom Hearts'' logo along with the curled heart symbol. Sora notably wears a silver crown necklace in most of his forms and can in fact wear a [[crown]] in ''Kingdom Hearts II Final Mix''. [[Puzzle]] pieces and [[Mission Crowns]] are represented by golden crowns. Limit Form and, in Halloween Town, [[Final Form]], is represented by crowns. The tops of the cards used in [[Castle Oblivion]] are shaped like the standard crown, and are featured on the front of some cards. The [[Crown-G]], the Keychain token of the [[Oblivion]], accessories such as the [[Draw Ring]], the [[Save the King]] shield, and the [[Ultima Weapon]] all incorporate crowns into their designs. Every one of Sora’s Dive to the Heart Stations feature crowns. A large, glowing crown appears underneath Sora when he unlocks a World [[Gate]]. | |||
The most widely used crown symbol in the series is a flat, three-pronged crown that appears in a wide variety of colors, most commonly gold and silver. The shape of the crowns prongs create a negative space silhouette of the [[Kingdom Key]]'s teeth. Strategy guides for the series occasionally use a yellow symbol that could be a crown viewed from above. This symbol is a ring with spikes along its outer edge and an "X" in its center, and is used to represent characters and enemies that cannot be classified as Heartless, Nobodies, Unversed or Dream Eaters. | |||
=== | ===Keyhole=== | ||
[[File: | [[File:Symbol - Keyhole.png|64px]] | ||
[[File:Symbol - Keyhole3.png|64px]] | |||
[[File:Symbol - Keyhole2.png|64px]] | |||
[[File:Symbol - Gate Keyhole.png|64px]]<br> | |||
Sora | Every World has a [[Keyhole]] that leads to its heart and can be locked by the Keyblade. Locking all of the Keyholes is Sora's primary objective in the original ''Kingdom Hearts''. In ''Kingdom Hearts II'', Sora seeks out and unlocks [[Gate]]s, which are represented by large, glowing keyholes. When the χ-blade was destroyed, it released several small, glowing keyhole symbols, but it is unclear what significance this has. The Wonderland [[Doorknob]]'s mouth is a Keyhole. | ||
The Keyhole symbol is normally depicted as a simple silhouette of an old-fashioned keyhole, one that a [[Kingdom Key|skeleton key]] could unlock. | |||
===Key=== | |||
[[File:Symbol - Keyblade1.png|64px]] | |||
[[File:Symbol - Keyblade2.png|64px]] | |||
[[File:Symbol - Keyblade3.png|x64px]] | |||
[[File:Proof of Connection KHIIFM.png|x64px]]<br> | |||
Keys are recurring symbols in the series, mainly through the use of the Keyblade by the main characters. The simplified key symbol is used to represent physical attacks with the Keyblade in the [[Command Menu]] and [[Command Deck]] and similar menus. | |||
Excluding the many different forms that Keyblades take, the common key symbol resembles simplified Kingdom Key. The Kingdom Key, in turn, is modeled after a skeleton key, a type of key that was designed to open any lock. | |||
As | ===Chi and the Recusant's Sigil=== | ||
[[File:Symbol - Chi.png|64px]] | |||
[[File:Symbol - Recusant's Sigil.png|64px]]<br> | |||
{{Q|As your flesh bears the sigil, so your name shall be known as that...of a recusant.|Xemnas to Sora, at the beginning of their battle.}} | |||
Chi is the twenty-second letter in the Greek alphabet, from which the Latin letter "X" is derived. Master [[Xehanort]] can form a glowing, stylized version of the letter in his hand. According to him, χ is "a most ancient letter" that represents death and endings, and it can be pronounced "kye" or "key". The letter χ lends its name and form to the χ-blade, which features two Kingdom Keys crossed in an "X"-shape on the blade and Keychain token. | |||
Xemnas | [[Xemnas]]<!--and the Master, per Back Cover prophecy--> adds a similar-looking "X" known as the {{nihongo|'''Recusant's Sigil'''|異端の印|Itan no shirushi|lit. "Mark of heresy"}} to the names of all members of Organization XIII. This is because he vaguely remembers Master Xehanort's fascination with the χ-blade.<ref>'''''Kingdom Hearts Birth by Sleep Ultimania''''':<br>''-Where did the Organization’s coat and mark come from?''<br>'''Nomura:''' One year after '''Birth by Sleep''', Xehanort, as well as five other apprentices toss aside their hearts. Then the Nobody Xemnas was born, and the Organization which he creates take a lot of things from his memories, as a human. But as Xemnas had two people who he was, Terra and Master Xehanort, he takes from both of their memories. [...] Xemnas gives Organization members names with an X in them. This has something to do with Master Xehanort’s interest in the X-Blade. </ref> According to Young Xehanort, the Recusant's Sigil can be used to track a person's location once he or she has been marked with it. During his [[Mark of Mastery exam]] in the [[Sleeping Worlds]], [[Sora]] is marked with the Recusant's Sigil by [[Ansem, Seeker of Darkness]] so that the [[Real Organization XIII|other incarnations]] of [[Xehanort]] can keep an eye on him. The Recusant's Sigil appears on Sora's shirt in the form of a silver "X." | ||
The designs of Terra, Aqua, and Ventus's outfits were each inspired by the Latin letter "X."<ref>'''''Kingdom Hearts Birth by Sleep Ultimania''''':<br>''-Did deciding on the three main character’s design go smoothly?''<br>'''Nomura:''' No, I had a relatively hard time with that. Especially with those three armored suits they transform into, when I was first designing them I had decided that it’d be “armor that becomes a round device.” However thinking of how to incorporate that sort of device into clothing was difficult. But once “X” became a keyword for this story, the shape of that symbol became inspiration for the main three’s outfits.</ref> | |||
===Stars=== | |||
[[File:Symbol - Lucky Charm.png|64px]] | |||
[[File:Symbol - Lux.png|64px]] | |||
[[File:Star Shard (Art) KHBBS.png|64px]]<br> | |||
Stars are frequently-seen symbols in the series and are often associated with the various Worlds in the ''Kingdom Hearts'' universe. [[Star]]s in the night sky are actually other, distant Worlds. Stars fade out when the corresponding world has been destroyed; the disappearance of many stars is what prompted [[Mickey Mouse|King Mickey]] to find a way to stop the Heartless, beginning the events of the original ''Kingdom Hearts''. | |||
An artifact called the [[Star Shard]] allowed for transportation from one World to another, albeit randomly. Several accessories and Keyblades incorporate stars into their designs, such as the [[Star Seeker]]. [[Paopu Fruit]] are star-shaped fruit which supposedly create bonds between friends that can span many different Worlds. [[Wayfinder]]s, lucky charms modeled after Paopu Fruit, have a similar reputation. The Wayfinders made by Aqua in ''Kingdom Hearts Birth by Sleep'' manifest these bonds of friendship physically, in the form of the [[Dimension Link]] system. Paopu Fruit and Wayfinders are featured in the designs of several important Keyblades, including the Ultima Weapon and [[Oathkeeper]]. [[Yen Sid]]'s powerful sorcerer's hat is adorned with several stars and moons. | |||
In | In ''Kingdom Hearts χ [chi]'' [[Lux]], a form of light, is introduced that together with the related Crystals of Light are also star-shaped. Additionally, every Keyblade releases a unique star when hitting an object or enemy. | ||
== | ==Minor symbols== | ||
=== | ===Fleur-de-lis=== | ||
[[File:Symbol - Fleur-de-lis.png|64px]] | |||
[[File:Symbol - TR Door.png|64px]] | |||
[[File:Valor Form Orb KHII.png|64px]] | |||
[[File:Symbol - Valor Form.png|64px]] | |||
[[File:Master Form Orb KHII.png|64px]] | |||
[[File:Symbol - Master Form.png|64px]] | |||
[[File:Symbol - Old Mansion.png|64px]] | |||
[[File:Symbol - Fleur-de-lis (CotM).png|64px]]<br> | |||
Even in the real world, the {{w|fleur-de-lis}} is an extremely old and widespread symbol. It is a stylized flower, specifically a lily or iris, with a diverse range of meanings, but it has been most commonly associated with royalty or purity, and is the symbol of the French monarchy. Within the ''Kingdom Hearts'' series, the fleur-de-lis appears on several accessories and weapons, such as the [[Master Ring]] and [[Midnight Roar]], the door to [[Timeless River]], various areas and uniforms in the [[Country of the Musketeers]] and two Dive to the Heart Stations: one of Ventus's Stations and the Station displaying silhouettes of [[Alice]], [[Jasmine]], and Kairi. A standard fleur-de-lis is used to represent [[Valor Form]], while a stylized version of the symbol—one shaped like an "X"—represents [[Master Form]]. The [[Old Mansion]] features a unique symbol that combines the crown, heart, and fleur-de-lis symbols. In [[Traverse Town]] the fleur-de-lis symbol appears as a huge sign for the Accessory Shop. | |||
===Roxas's zipper pull=== | |||
[[File:Symbol Character - Roxas.png|64px]]<br> | |||
During his time in [[Twilight Town]], Roxas wears a jacket with a distinctive, X-shaped zipper pull. The zipper pull is modeled after the Nobody symbol, specifically the notched cross that comprises the Nobody emblem's top half, and hints at Roxas's background. The symbol is also the Keychain token of the [[Two Become One]] Keyblade, which is directly connected to Roxas. Similar symbols are often used to evoke the Nobody sigil, such as in [[Saïx]]'s [[Lunatic]] Claymore and [[Larxene]]'s [[Foudre]] Knives. | |||
===Mickey Head=== | |||
[[File:Symbol Character - Mickey.png|64px]] | |||
[[File:Kingdom Key Keychain KHII.png|64px]] | |||
[[File:Kingdom Key D Keychain KHII.png|64px]] | |||
[[File:Victory Line Keychain KHBBS.png|64px]]<br> | |||
The silhouette of Mickey Mouse's head is frequently used to represent not only Mickey himself, but Disney as a whole. [[Disney Town]] and [[Disney Castle]] feature the symbol heavily, and three of the many craters in the [[Keyblade Graveyard]] form the silhouette as well. The symbol is also incorporated into the [[Trinity Limit]] circle, [[Gimmick Card]]s, the Keychain tokens of the [[Kingdom Key]], [[Kingdom Key D]], and [[Victory Line]], and other weapons, such as the [[Dream Sword]]. King Mickey uses the symbol to seal all of his official letters.<!--Goofy: Gawrsh, that's the king's seal!--> In the Sleeping Worlds, [[La Cite Des Cloches]], [[The Grid]] and [[Prankster's Paradise]] are arranged to make up a Hidden Mickey. | |||
In the real world, Disney places {{w|Hidden Mickey}}s in many of its properties, including Disney theme parks and scenes in many Disney movies. | |||
===Gazing Eye=== | |||
[[File:Symbol - Eye of Darkness.png|64px]]<br> | |||
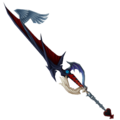
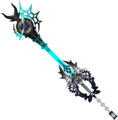
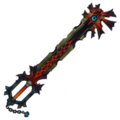
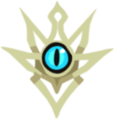
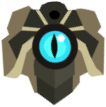
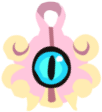
The {{nihongo|'''Gazing Eye'''|見つめる目|Mitsumeru Me}} is a blue eye with a cat-like iris which belongs to the [[Master of Masters]]. He placed it within [[Master Xehanort's Keyblade|his Keyblade]],{{?}} then asked [[Luxu]] to pass it down from apprentice to apprentice, eventually reaching [[Xehanort]] in order to have it observe its surroundings throughout the eons and pass those back to the Master in his own era. The eye itself is present in both forms of this Keyblade, [[Master Xehanort's Keyblade]] and [[Young Xehanort's Keyblade]], while the symbol appears on the Keyblades or Keychain tokens of his other apprentices, the [[Foreteller]]s, as well as those of [[Xehanort]]: Vanitas's [[Void Gear]], Terra's [[Chaos Ripper]] and [[Darkgnaw]], Riku's [[Soul Eater]] and [[Way to the Dawn]], Riku and [[Sora]]'s [[End of Pain]], [[Ansem, Seeker of Darkness|Ansem]]'s dual Soul Eater polearm, and [[Zexion]]'s illusory copy of the Soul Eater. | |||
{|class="wikitable collapsible collapsed" | |||
! | |||
{| | |||
|- | |- | ||
| | |||
<gallery> | |||
File:Soul Eater KH.png | |||
File:Dual Soul Eater KH.png | |||
File:Way to the Dawn KHII.png | |||
File:Void Gear (Vanitas) KHBBS.png | |||
File:Void Gear (Vanitas Remnant) KHBBS.png | |||
File:Master Xehanort's Keyblade Keychain KHBBS.png | |||
File:Young Xehanort's Keyblade KH3D.png | |||
File:End of Pain Keychain KH3D.png | |||
File:Chaos Ripper KHBBS.png | |||
File:Darkgnaw Keychain KHBBS.png | |||
File:Foreteller Invi's Keyblade Keychain KHX.png | |||
File:Foreteller Gula's Keyblade Keychain KHX.png | |||
File:Foreteller Ira's Keyblade Keychain KHX.png | |||
File:Foreteller Aced's Keyblade Keychain KHX.png | |||
File:Foreteller Ava's Keyblade Keychain KHX.png | |||
</gallery> | |||
|} | |} | ||
== | ==Character symbols== | ||
[[File:Symbol Character - Kairi.png|64px|Kairi]] | |||
[[File:Symbol Character - Namine.png|64px|Naminé]] | |||
[[File:Symbol Character - Donald.png|64px|Donald Duck]] | |||
[[File:Symbol Character - Goofy.png|64px|Goofy]] | |||
[[File:Symbol Character - Jiminy.png|64px|Jiminy]] | |||
[[File:Symbol Character - Pluto.png|64px|Pluto]] | |||
[[File:Symbol Character - DiZ.png|64px|Ansem the Wise]] | |||
[[File:Symbol Character - Pete.png|64px|Pete]] | |||
[[File:Symbol - Pete's Door.png|x64px|Pete's insignia on his door to Timeless River]] | |||
[[File:Symbol Character - Maleficent.png|64px|Maleficent]] | |||
[[File:Symbol Character - Vanitas.png|64px|Vanitas]]<br> | |||
The Ultimania strategy guides use miscellaneous symbols not used anywhere else to represent certain important characters. [[Kairi]]'s symbol is made of three small circles superimposed over a thin cross. [[Naminé]] is represented by a white flower superimposed over a black four-pointed star, and resembles Roxas's symbol. Both Donald and Goofy are represented by stylized crosses; Donald's is formed by four silhouettes of his mage's hat, while Goofy's seems to be based on the Hidden Mickey symbol on his shield. [[Jiminy Cricket]] and [[Pluto]]'s symbols are X-shaped and formed by crossed silhouettes of umbrellas and bones, respectively. [[Ansem the Wise]]'s symbol is based on the odd, squared cross shape formed by the front of DiZ's cloak. [[Pete]] is represented by a stylized silhouette of his own head, and [[Maleficent]]'s symbol is a cross formed by four silhouettes of her horned hood. | |||
[[Pete]] has an additional symbol, a coat of arms seen above his door to Timeless River. The coat of arms is a grayscale shield adorned by the same stylized symbol of Pete's head, two arms with closed fists along the top, a letter "P", a cigar, and another closed fist at its base. Vanitas's crest is depicted as two halves of a gear arranged in an "S" shape, and appears on his and Ventus's fused Dive to the Heart Station, as the Keychain token for both versions of the [[Void Gear]], and on the portal that initiates the battle with the [[Vanitas Remnant]]. | |||
==Organization XIII weapon symbols== | |||
[[File:Xemnas's Replica Data KHIIFM.png|64px|Xemnas's Dragon Form's shield]] | |||
[[File:Xigbar's Replica Data KHIIFM.png|64px|Xigbar's Sharpshooter]] | |||
[[File:Xaldin's Replica Data KHIIFM.png|64px|Xaldin's Lindworm]] | |||
[[File:Vexen's Replica Data KHIIFM.png|64px|Vexen's Frozen Pride]] | |||
[[File:Lexaeus's Replica Data KHIIFM.png|64px|Lexaeus's Skysplitter]] | |||
[[File:Zexion's Replica Data KHIIFM.png|64px|Zexion's Book of Retribution]] | |||
[[File:Saïx's Replica Data KHIIFM.png|64px|Saïx's Lunatic]] | |||
[[File:Axel's Replica Data KHIIFM.png|64px|Axel's Eternal Flames]] | |||
[[File:Demyx's Replica Data KHIIFM.png|64px|Demyx's Arpeggio]] | |||
[[File:Luxord's Replica Data KHIIFM.png|64px|Luxord's Fair Game]] | |||
[[File:Marluxia's Replica Data KHIIFM.png|64px|Marluxia's Graceful Dahlia]] | |||
[[File:Larxene's Replica Data KHIIFM.png|64px|Larxene's Foudre]] | |||
[[File:Roxas's Replica Data KHIIFM.png|64px|Roxas's Oblivion and Oathkeeper]]<br> | |||
Each Organization XIII member has a symbol displaying a black silhouette of his or her exclusive weapon. For members that carry multiple weapons, such as [[Xaldin]], only the silhouette of one weapon is shown. However, both of Roxas's Keyblades and three of Larxene's Knives are silhouetted on their personal panels. Xemnas is the only member whose primary weapons, the [[Interdiction]] Ethereal Blades, are not silhouetted. Instead, Xemnas is represented by the silhouette of the shield used by his dragon form. | |||
The symbols are used like tombstones to represent each member in [[Proof of Existence]] and the [[Garden of Assemblage]]. | |||
==Additional world symbols== | |||
Whole Worlds are represented by simple symbols of their own that appear in the screen fade when transitioning from one room to the other in the appropriate World. | |||
<gallery> | <gallery> | ||
File: | File:Symbol - Honey Pot.png|[[100 Acre Wood]] is represented by one of [[Winnie the Pooh]]'s honey pots and is also seen on the [[Magic card|Honey card]]. | ||
File:Symbol - Lamp.png|[[Genie]]'s magic lamp not only represents [[Agrabah]] and the [[Ancient Highway]], but is also the Keychain token of [[Three Wishes]] and [[Wishing Lamp]]. | |||
File:Symbol - Note.png|The musical notes represent [[Atlantica]] and [[Splash Island]]. | |||
File:Symbol - Rose.png|[[Beast|The Beast's]] rose represents [[Beast's Castle|his castle]], [[Stardust Sweep]], and is also featured in [[Belle]]'s Dive to the Heart Station and the Keychain tokens of [[Divine Rose]] and [[Rumbling Rose]]. | |||
File:Symbol - Glass Slipper.png|[[Cinderella]]'s glass slipper represents the [[Castle of Dreams]] and is the token of the [[Stroke of Midnight]]. | |||
File:Symbol - Fleur-de-lis (CotM).png|A Fleur-de-lis symbolizes [[Country of the Musketeers]], in a similar style shown on Mickey, Donald, and Goofy's outfits; it also makes up the teeth of [[All for One]]. | |||
File:Symbol - Imprint.png|[[Deep Space]] is represented by [[Stitch]]'s paw print. | |||
File:Symbol - Apple.png|The [[Dwarf Woodlands]] are represented by one of the [[The Queen|Queen's]] poisoned apples. | |||
File:Symbol - Book.png|The [[Enchanted Dominion]] is represented by a book with some of Maleficent's thorns coiling around it. | |||
File:Symbol - Pumpkin.png|A pumpkin symbolizes [[Halloween Town]] and is the [[Pumpkinhead]]'s Keychain token. | |||
File:Symbol - Bell.png|[[La Cité des Cloches]] is represented by one of the titular bells within Notre Dame, which is also the Keychain token of the [[Guardian Bell]]. | |||
File:Symbol - Magic Hat.png|[[Yen Sid]]'s magical sorcerer's hat represents his [[Mysterious Tower]]. | |||
File:Symbol - Feather.png|The feather in [[Peter Pan]]'s cap represents [[Neverland]] hat in ''Kingdom Hearts 358/2 Days'', and is also the token of the [[Fairy Harp]] and [[Pixie Petal]] | |||
File:Symbol - Skull Rock.png|In ''Kingdom Hearts Birth by Sleep'', Neverland is represented by the silhouette of Skull Rock. | |||
File:Symbol - Lightning.png|[[Olympus Coliseum]]'s symbol—a cloud with a lightning bolt striking from it, a reference to Zeus—appears on many different objects. It appears on the [[Phantom Storm]] Gummi Course, the [[Olympus Stone]], [[Herc's Shield]], and is the Keychain token of all three Keyblades that are obtained in the World; [[Olympia]], [[Hero's Crest]], and [[Mark of a Hero]]. | |||
File:Symbol - Skull & Crossbones.png|[[Port Royal]] and the [[Floating Island]] are represented by a skull and crossbones, a symbol commonly associated with pirates. | |||
File:Symbol - Pinocchio.png|[[Prankster's Paradise]] is represented by the profile of [[Pinocchio]]'s head. The symbol also appeared on the book in the beginning of his original movie. | |||
File:Symbol - Lion.png|The [[Pride Lands]] and [[Sunlight Storm]] are both represented by [[Rafiki]]'s cave painting of a young [[Simba]], and a different version of the symbol is the [[Circle of Life]]'s Keychain token. | |||
File:Symbol - Identity Disk.png|[[Tron]]'s [[Identity Disk]] is the Keychain token of the [[Photon Debugger]] and the symbol of [[Space Paranoids]]. | |||
File:Symbol - Identity disk (Tron Legacy).png|[[The Grid]] is represented by a ''TRON: Legacy'' era Identity Disk. | |||
File:Symbol - Note (SoS).png|[[Symphony of Sorcery]] is represented by a musical note and a star twinkle. | |||
File:Symbol - Chinese Ornament.png|[[The Land of Dragons]] and [[Asteroid Sweep]] are represented by a generic Chinese pattern, which also appears on several Heartless in the World. | |||
File:Symbol - Reaper.png|[[Traverse Town]] is represented by the Reapers' logo from ''The World Ends with You'' in ''Kingdom Hearts: Dream Drop Distance'', due to the Reapers' game taking place there. | |||
File:Symbol - Spade.png|[[Wonderland]] is represented by a spade in ''Kingdom Hearts 358/2 Days'' - one of the four suits of cards - which also appear on the [[Card of Spades]] and the [[Lady Luck]]. In ''Kingdom Hearts χ [chi]'', the head of the [[Cheshire Cat]] is used instead. | |||
File:Symbol - Data.png|[[System Sector]]s are represented by the [[Bug Blox]] corrupting them. | |||
File:Symbol - Whirl.png|The [[Realm of Darkness]] is symbolized by a swirl of darkness. | |||
File:Symbol - Circle.png|The [[Timeless River]] is symbolized by a circle, representing the {{w|iris shot}} technique characteristic of cartoons, as well as silent films and certain post-silent era comedies. | |||
</gallery> | </gallery> | ||
==Compilations== | |||
[[File:Basement Key KHII.svg|x128px|Naminé's Drawing]] | |||
[[File:Symbols1.png|x128px|A compilation used in the Ultimania]] | |||
[[File:Symbols2.png|x128px|Another compilation from the Ultimania]]<br> | |||
Some important recurring symbols in the series are occasionally compiled into larger ones and used for a few specific events. A symbol from one of Naminé's drawings in the Old Mansion—a compilation of the Nobody, Heartless, and standard crown symbols—is used to gain access to Ansem the Wise's laboratory in the virtual Twilight Town. Two more compilations—one of the Nobody, Heartless, and "Other" symbols, the other of the standard crown and heart symbols, as well as the Nobody emblem and Roxas's zipper pull—are used in the Ultimania. | |||
==Uses in magic== | |||
[[File:Symbols Trinity Limit.png|x128px|The Trinity Limit from ''Kingdom Hearts'']] | |||
[[File:Symbols Trinity Limit KHBBS.png|x128px|The Trinity Limit from ''Kingdom Hearts Birth by Sleep'']] | |||
[[File:Sephiroth's Spell Circle KH.png|x128px|Sephiroth's spell circle from ''Kingdom Hearts'']] | |||
[[File:Roxas Magic Hour Spell Circle KHIIFM.png|x128px|Roxas's Magic Hour spell circle from ''Kingdom Hearts II Final Mix'']] | |||
[[File:Lingering Will's Spell Circle KHIIFM.png|x128px|The Lingering Will's spell circle from ''Kingdom Hearts II Final Mix'']] | |||
[[File:Young Xehanort's Spell Circle KHBBS.png|x128px|Young Xehanort's spell circle from ''Kingdom Hearts Birth by Sleep'']] | |||
[[File:Armor of Eraqus's Spell Circle KHBBSFM.png|x128px|Armor of Eraqus's spell circle from ''Kingdom Hearts Birth by Sleep Final Mix'']] | |||
<br> | |||
The Trinity Limit circle is a compilation of small heart symbols, fleur-de-lis symbols, and Mickey Heads. | |||
==Notes and References== | |||
{{reflist}} | |||
[[Category:Symbol images]] | |||
Revision as of 17:50, 30 March 2017
| Site Notice |
|---|
| Our special-edition issue of the Twilight Times magazine, all about our recent 10th anniversary, out now! Remember to pay a visit to our IRC channel and chat with our community!
|
The Kingdom Hearts series uses a huge array of recurring symbols, some original and some derived from real-world sources, with deep significance to its story and characters. This page compiles the most important of these symbols and details their use in the series.
Main symbols
Heart
Hearts are some of the most recognizable and prominent symbols associated with the series; one type of heart symbol is featured on the series logo and, as a result, on the majority of real-world Kingdom Hearts merchandise. The symbol also appears on the back of every Card, Limit Form's outfit in Halloween Town, in several worlds, such as Hollow Bastion, The World That Never Was, Traverse Town, and Radiant Garden, and several Keyblades and miscellaneous weapons. Simplified heart symbols appear less frequently, but are featured in Trinity Marks, several Keyblades, Wonderland, typically with the Queen of Hearts, and, most notably, the heart-shaped moon, Kingdom Hearts. A few Pureblood Heartless have heart-shaped holes in their chests.
The most recognizable heart symbol is depicted as the outline of a heart with tips that curl inward at its top. More simplified heart, solid designs also appear in the series, although they are featured less prominently.
Heartless
The Heartless symbol is used, as its name suggests, to represent the Heartless, specifically Emblem Heartless. The standard Heartless emblem is displayed on every single Emblem Heartless, as well as Ansem, Seeker of Darkness's chest and certain weapons related to Heartless, such as the Akashic Record and Precious Mushroom. In the End of the World, the doorway leading to the Final Rest area is shaped like the Heartless emblem. The Heartless emblem without the spiked "X" is commonly associated with Riku. When using Dark Mode, Riku wears the symbol on his chest, and it is the Keychain token of his main Keyblade, Way to the Dawn. The Keychain token of the χ-blade is a black and red heart resembling the Heartless emblem, but with two Kingdom Keys crossed over it in place of the normal red design.
The Heartless emblem is comprised of a heart with a fleur-de-lis at its base. It is typically black with a red outline and spiked "X" crossing through the heart in the symbol, which symbolizes the fact that Heartless act without emotions, hence their name. A common variation of the Heartless emblem is a completely black silhouette, lacking the cross over the heart. A third variation is simply a heart featuring the color scheme of the standard Heartless symbol, a black body and red outline, but also lacks the cross.
Nobody


The Nobody symbol (ノーバディのマーク) is primarily associated with Organization XIII and the Nobodies it commands, and many of the members' weapons incorporate the symbol into their design. Every single lesser Nobody is emblazoned with the Nobody symbol, and a few are even shaped like it. The Proof of Nonexistence, Challenge Sigil, Unity Badge, and Ordeal Badge all feature the symbol. Certain accessories with connections to Organization XIII, such as the Full Bloom and Shadow Archive, also use the symbol. The symbol is featured countless times in the architecture and decorations of the Castle That Never Was and other areas related to the Organization. Two Become One is the only Keyblade to sport the full Nobody emblem in its design. A variant of the Nobody emblem based on the original's top half appears on several Gummi Nobodies.
The Nobody emblem resembles an upside-down Heartless emblem in shape, but with several circular notches taken out of its edges. The symbol's base is shaped like an upside-down heart, while its top is a thin, spiked cross. Spikes and sharp edges often evoke the Nobody emblem without the full symbol being displayed. The symbol is usually depicted as white or silver, like most Nobodies. Xemnas created the symbol based on Terra's fragmented memories, and, as a result, the Nobody emblem bears a strong resemblance to Terra's mark.
Unversed
The Unversed emblem is emblazoned at least once on every single Unversed, with the exception of the Flood. After Vanitas forcibly merges with Ventus, Ventus's Dive to the Heart Station changes appearance, incorporating Unversed emblems into Vanitas’s half of the pillar.
The Unversed emblem is designed to resemble a heart expressing emotion. It uses sharp corners, deep curves, and straight edges to form a heart shape in its center. Certain parts of the Unversed symbol's design resemble some Unversed's eyes. The symbol is virtually always black.
Dream Eater
The Dream Eater emblems appear on almost every Dream Eater.
The Dream Eater symbols are designed in the form of hearts with certain aspects that display whether they are Spirit or Nightmare. The Spirit variant is always a faded pale peach fading to a deep hot pink with a dark purple border, the tail at the bottom of the heart-shaped is bowl-shaped. Its wings are shaped more like swirls as it is given a simplistic innocent look, compared to the Nightmare version. The Nightmare variant is always colored a deep navy fading into a bright neon purple with a thick white border, the tail at the bottom of the heart-shaped symbol is cone-shaped. Its wings are shaped like bat wings with small spikes in the center and growing larger near the sides. They bear a very vague resemblance to the Heartless symbol, specifically the Nightmare version.
Due to his nature within Sora's dreams as a Dream Eater, Riku has the Spirit emblem on the back of his vest during most of Kingdom Hearts 3D: Dream Drop Distance.
Terra's Mark
Terra, Aqua, and Ventus wear an emblem on their clothes as badges. While it is not uniquely associated with Terra, and appears to be a signature of Keyblade wielders that train in the Land of Departure, it is referred to as "Terra's Mark" (テラたちのマーク Tera-tachi no Māku, lit. "The Mark of Terra and his friends") in official materials. Master Eraqus wears the emblem on his armored chest piece, and it is also the Keychain token of his Keyblade. Aqua's Wayfinders have the emblem in their centers. Terra's mark is featured on several Dive to the Heart Stations, including two of Ventus's Stations and the character selection screen of Kingdom Hearts Birth by Sleep. It also appears on the walls of the Chamber of Waking.
Terra's mark resembles the Heartless and Nobody symbols in shape; it is a heart with a sharp cross at its base. The symbol is very angular and squared, and the points of its cross are much more compact and close together than those of the Nobody symbol. The symbol appears in several different colors, such as gold and silver.
Crown

![]()


Crowns are another heavily featured symbol of the series and are part of the Kingdom Hearts logo along with the curled heart symbol. Sora notably wears a silver crown necklace in most of his forms and can in fact wear a crown in Kingdom Hearts II Final Mix. Puzzle pieces and Mission Crowns are represented by golden crowns. Limit Form and, in Halloween Town, Final Form, is represented by crowns. The tops of the cards used in Castle Oblivion are shaped like the standard crown, and are featured on the front of some cards. The Crown-G, the Keychain token of the Oblivion, accessories such as the Draw Ring, the Save the King shield, and the Ultima Weapon all incorporate crowns into their designs. Every one of Sora’s Dive to the Heart Stations feature crowns. A large, glowing crown appears underneath Sora when he unlocks a World Gate.
The most widely used crown symbol in the series is a flat, three-pronged crown that appears in a wide variety of colors, most commonly gold and silver. The shape of the crowns prongs create a negative space silhouette of the Kingdom Key's teeth. Strategy guides for the series occasionally use a yellow symbol that could be a crown viewed from above. This symbol is a ring with spikes along its outer edge and an "X" in its center, and is used to represent characters and enemies that cannot be classified as Heartless, Nobodies, Unversed or Dream Eaters.
Keyhole
Every World has a Keyhole that leads to its heart and can be locked by the Keyblade. Locking all of the Keyholes is Sora's primary objective in the original Kingdom Hearts. In Kingdom Hearts II, Sora seeks out and unlocks Gates, which are represented by large, glowing keyholes. When the χ-blade was destroyed, it released several small, glowing keyhole symbols, but it is unclear what significance this has. The Wonderland Doorknob's mouth is a Keyhole.
The Keyhole symbol is normally depicted as a simple silhouette of an old-fashioned keyhole, one that a skeleton key could unlock.
Key
Keys are recurring symbols in the series, mainly through the use of the Keyblade by the main characters. The simplified key symbol is used to represent physical attacks with the Keyblade in the Command Menu and Command Deck and similar menus.
Excluding the many different forms that Keyblades take, the common key symbol resembles simplified Kingdom Key. The Kingdom Key, in turn, is modeled after a skeleton key, a type of key that was designed to open any lock.
Chi and the Recusant's Sigil
- "As your flesh bears the sigil, so your name shall be known as that...of a recusant."
- —Xemnas to Sora, at the beginning of their battle.
Chi is the twenty-second letter in the Greek alphabet, from which the Latin letter "X" is derived. Master Xehanort can form a glowing, stylized version of the letter in his hand. According to him, χ is "a most ancient letter" that represents death and endings, and it can be pronounced "kye" or "key". The letter χ lends its name and form to the χ-blade, which features two Kingdom Keys crossed in an "X"-shape on the blade and Keychain token.
Xemnas adds a similar-looking "X" known as the Recusant's Sigil (異端の印 Itan no shirushi, lit. "Mark of heresy") to the names of all members of Organization XIII. This is because he vaguely remembers Master Xehanort's fascination with the χ-blade.[1] According to Young Xehanort, the Recusant's Sigil can be used to track a person's location once he or she has been marked with it. During his Mark of Mastery exam in the Sleeping Worlds, Sora is marked with the Recusant's Sigil by Ansem, Seeker of Darkness so that the other incarnations of Xehanort can keep an eye on him. The Recusant's Sigil appears on Sora's shirt in the form of a silver "X."
The designs of Terra, Aqua, and Ventus's outfits were each inspired by the Latin letter "X."[2]
Stars

 File:Star Shard (Art) KHBBS.png
Stars are frequently-seen symbols in the series and are often associated with the various Worlds in the Kingdom Hearts universe. Stars in the night sky are actually other, distant Worlds. Stars fade out when the corresponding world has been destroyed; the disappearance of many stars is what prompted King Mickey to find a way to stop the Heartless, beginning the events of the original Kingdom Hearts.
An artifact called the Star Shard allowed for transportation from one World to another, albeit randomly. Several accessories and Keyblades incorporate stars into their designs, such as the Star Seeker. Paopu Fruit are star-shaped fruit which supposedly create bonds between friends that can span many different Worlds. Wayfinders, lucky charms modeled after Paopu Fruit, have a similar reputation. The Wayfinders made by Aqua in Kingdom Hearts Birth by Sleep manifest these bonds of friendship physically, in the form of the Dimension Link system. Paopu Fruit and Wayfinders are featured in the designs of several important Keyblades, including the Ultima Weapon and Oathkeeper. Yen Sid's powerful sorcerer's hat is adorned with several stars and moons.
In Kingdom Hearts χ [chi] Lux, a form of light, is introduced that together with the related Crystals of Light are also star-shaped. Additionally, every Keyblade releases a unique star when hitting an object or enemy.
Minor symbols
Fleur-de-lis
Even in the real world, the fleur-de-lis is an extremely old and widespread symbol. It is a stylized flower, specifically a lily or iris, with a diverse range of meanings, but it has been most commonly associated with royalty or purity, and is the symbol of the French monarchy. Within the Kingdom Hearts series, the fleur-de-lis appears on several accessories and weapons, such as the Master Ring and Midnight Roar, the door to Timeless River, various areas and uniforms in the Country of the Musketeers and two Dive to the Heart Stations: one of Ventus's Stations and the Station displaying silhouettes of Alice, Jasmine, and Kairi. A standard fleur-de-lis is used to represent Valor Form, while a stylized version of the symbol—one shaped like an "X"—represents Master Form. The Old Mansion features a unique symbol that combines the crown, heart, and fleur-de-lis symbols. In Traverse Town the fleur-de-lis symbol appears as a huge sign for the Accessory Shop.
Roxas's zipper pull
During his time in Twilight Town, Roxas wears a jacket with a distinctive, X-shaped zipper pull. The zipper pull is modeled after the Nobody symbol, specifically the notched cross that comprises the Nobody emblem's top half, and hints at Roxas's background. The symbol is also the Keychain token of the Two Become One Keyblade, which is directly connected to Roxas. Similar symbols are often used to evoke the Nobody sigil, such as in Saïx's Lunatic Claymore and Larxene's Foudre Knives.
Mickey Head


The silhouette of Mickey Mouse's head is frequently used to represent not only Mickey himself, but Disney as a whole. Disney Town and Disney Castle feature the symbol heavily, and three of the many craters in the Keyblade Graveyard form the silhouette as well. The symbol is also incorporated into the Trinity Limit circle, Gimmick Cards, the Keychain tokens of the Kingdom Key, Kingdom Key D, and Victory Line, and other weapons, such as the Dream Sword. King Mickey uses the symbol to seal all of his official letters. In the Sleeping Worlds, La Cite Des Cloches, The Grid and Prankster's Paradise are arranged to make up a Hidden Mickey.
In the real world, Disney places Hidden Mickeys in many of its properties, including Disney theme parks and scenes in many Disney movies.
Gazing Eye

The Gazing Eye (見つめる目 Mitsumeru Me) is a blue eye with a cat-like iris which belongs to the Master of Masters. He placed it within his Keyblade, then asked Luxu to pass it down from apprentice to apprentice, eventually reaching Xehanort in order to have it observe its surroundings throughout the eons and pass those back to the Master in his own era. The eye itself is present in both forms of this Keyblade, Master Xehanort's Keyblade and Young Xehanort's Keyblade, while the symbol appears on the Keyblades or Keychain tokens of his other apprentices, the Foretellers, as well as those of Xehanort: Vanitas's Void Gear, Terra's Chaos Ripper and Darkgnaw, Riku's Soul Eater and Way to the Dawn, Riku and Sora's End of Pain, Ansem's dual Soul Eater polearm, and Zexion's illusory copy of the Soul Eater.
|
Character symbols
The Ultimania strategy guides use miscellaneous symbols not used anywhere else to represent certain important characters. Kairi's symbol is made of three small circles superimposed over a thin cross. Naminé is represented by a white flower superimposed over a black four-pointed star, and resembles Roxas's symbol. Both Donald and Goofy are represented by stylized crosses; Donald's is formed by four silhouettes of his mage's hat, while Goofy's seems to be based on the Hidden Mickey symbol on his shield. Jiminy Cricket and Pluto's symbols are X-shaped and formed by crossed silhouettes of umbrellas and bones, respectively. Ansem the Wise's symbol is based on the odd, squared cross shape formed by the front of DiZ's cloak. Pete is represented by a stylized silhouette of his own head, and Maleficent's symbol is a cross formed by four silhouettes of her horned hood.
Pete has an additional symbol, a coat of arms seen above his door to Timeless River. The coat of arms is a grayscale shield adorned by the same stylized symbol of Pete's head, two arms with closed fists along the top, a letter "P", a cigar, and another closed fist at its base. Vanitas's crest is depicted as two halves of a gear arranged in an "S" shape, and appears on his and Ventus's fused Dive to the Heart Station, as the Keychain token for both versions of the Void Gear, and on the portal that initiates the battle with the Vanitas Remnant.
Organization XIII weapon symbols
Each Organization XIII member has a symbol displaying a black silhouette of his or her exclusive weapon. For members that carry multiple weapons, such as Xaldin, only the silhouette of one weapon is shown. However, both of Roxas's Keyblades and three of Larxene's Knives are silhouetted on their personal panels. Xemnas is the only member whose primary weapons, the Interdiction Ethereal Blades, are not silhouetted. Instead, Xemnas is represented by the silhouette of the shield used by his dragon form.
The symbols are used like tombstones to represent each member in Proof of Existence and the Garden of Assemblage.
Additional world symbols
Whole Worlds are represented by simple symbols of their own that appear in the screen fade when transitioning from one room to the other in the appropriate World.
100 Acre Wood is represented by one of Winnie the Pooh's honey pots and is also seen on the Honey card.
Genie's magic lamp not only represents Agrabah and the Ancient Highway, but is also the Keychain token of Three Wishes and Wishing Lamp.
The musical notes represent Atlantica and Splash Island.
The Beast's rose represents his castle, Stardust Sweep, and is also featured in Belle's Dive to the Heart Station and the Keychain tokens of Divine Rose and Rumbling Rose.
Cinderella's glass slipper represents the Castle of Dreams and is the token of the Stroke of Midnight.
A Fleur-de-lis symbolizes Country of the Musketeers, in a similar style shown on Mickey, Donald, and Goofy's outfits; it also makes up the teeth of All for One.
Deep Space is represented by Stitch's paw print.
The Dwarf Woodlands are represented by one of the Queen's poisoned apples.
The Enchanted Dominion is represented by a book with some of Maleficent's thorns coiling around it.
A pumpkin symbolizes Halloween Town and is the Pumpkinhead's Keychain token.
La Cité des Cloches is represented by one of the titular bells within Notre Dame, which is also the Keychain token of the Guardian Bell.
Yen Sid's magical sorcerer's hat represents his Mysterious Tower.
The feather in Peter Pan's cap represents Neverland hat in Kingdom Hearts 358/2 Days, and is also the token of the Fairy Harp and Pixie Petal
Olympus Coliseum's symbol—a cloud with a lightning bolt striking from it, a reference to Zeus—appears on many different objects. It appears on the Phantom Storm Gummi Course, the Olympus Stone, Herc's Shield, and is the Keychain token of all three Keyblades that are obtained in the World; Olympia, Hero's Crest, and Mark of a Hero.
Port Royal and the Floating Island are represented by a skull and crossbones, a symbol commonly associated with pirates.
Prankster's Paradise is represented by the profile of Pinocchio's head. The symbol also appeared on the book in the beginning of his original movie.
The Pride Lands and Sunlight Storm are both represented by Rafiki's cave painting of a young Simba, and a different version of the symbol is the Circle of Life's Keychain token.
Tron's Identity Disk is the Keychain token of the Photon Debugger and the symbol of Space Paranoids.
- Symbol - Identity disk (Tron Legacy).png
The Grid is represented by a TRON: Legacy era Identity Disk.
Symphony of Sorcery is represented by a musical note and a star twinkle.
The Land of Dragons and Asteroid Sweep are represented by a generic Chinese pattern, which also appears on several Heartless in the World.
Traverse Town is represented by the Reapers' logo from The World Ends with You in Kingdom Hearts: Dream Drop Distance, due to the Reapers' game taking place there.
Wonderland is represented by a spade in Kingdom Hearts 358/2 Days - one of the four suits of cards - which also appear on the Card of Spades and the Lady Luck. In Kingdom Hearts χ [chi], the head of the Cheshire Cat is used instead.
System Sectors are represented by the Bug Blox corrupting them.
The Realm of Darkness is symbolized by a swirl of darkness.
The Timeless River is symbolized by a circle, representing the iris shot technique characteristic of cartoons, as well as silent films and certain post-silent era comedies.
Compilations


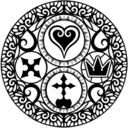
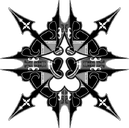
Some important recurring symbols in the series are occasionally compiled into larger ones and used for a few specific events. A symbol from one of Naminé's drawings in the Old Mansion—a compilation of the Nobody, Heartless, and standard crown symbols—is used to gain access to Ansem the Wise's laboratory in the virtual Twilight Town. Two more compilations—one of the Nobody, Heartless, and "Other" symbols, the other of the standard crown and heart symbols, as well as the Nobody emblem and Roxas's zipper pull—are used in the Ultimania.
Uses in magic

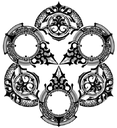
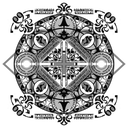
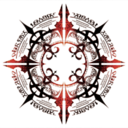

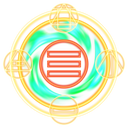
The Trinity Limit circle is a compilation of small heart symbols, fleur-de-lis symbols, and Mickey Heads.
Notes and References
- ^ Kingdom Hearts Birth by Sleep Ultimania:
-Where did the Organization’s coat and mark come from?
Nomura: One year after Birth by Sleep, Xehanort, as well as five other apprentices toss aside their hearts. Then the Nobody Xemnas was born, and the Organization which he creates take a lot of things from his memories, as a human. But as Xemnas had two people who he was, Terra and Master Xehanort, he takes from both of their memories. [...] Xemnas gives Organization members names with an X in them. This has something to do with Master Xehanort’s interest in the X-Blade. - ^ Kingdom Hearts Birth by Sleep Ultimania:
-Did deciding on the three main character’s design go smoothly?
Nomura: No, I had a relatively hard time with that. Especially with those three armored suits they transform into, when I was first designing them I had decided that it’d be “armor that becomes a round device.” However thinking of how to incorporate that sort of device into clothing was difficult. But once “X” became a keyword for this story, the shape of that symbol became inspiration for the main three’s outfits.








![Wonderland is represented by a spade in Kingdom Hearts 358/2 Days - one of the four suits of cards - which also appear on the Card of Spades and the Lady Luck. In Kingdom Hearts χ [chi], the head of the Cheshire Cat is used instead.](https://kh.wiki.gallery/images/f/f8/Symbol_-_Spade.png)


