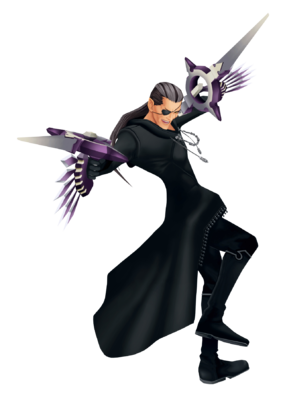
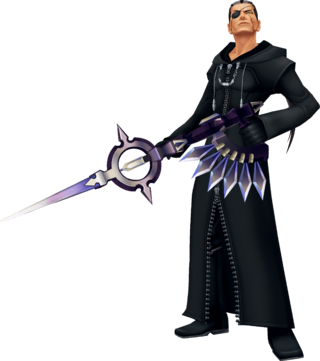
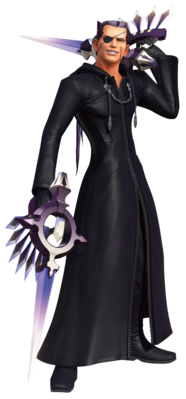
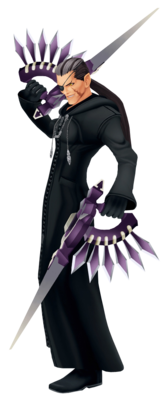
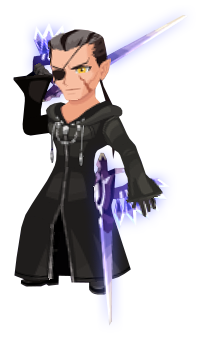
Game:Xigbar
| Xigbar | |||||||||||||||||||
|---|---|---|---|---|---|---|---|---|---|---|---|---|---|---|---|---|---|---|---|
| Japanese | シグバール | ||||||||||||||||||
| Rōmaji | Shigubāru
| ||||||||||||||||||
| Type | Organization XIII | ||||||||||||||||||
| Games | Kingdom Hearts II Kingdom Hearts 358/2 Days Kingdom Hearts III | ||||||||||||||||||
| |||||||||||||||||||
| |||||||||||||||||||
| Xigbar
|
|---|
| Kingdom Hearts 358/2 Days |
| The Organization's No. II, a master of the arrowgun and spatial manipulation. As a long-range fighter, he'll try to keep foes from closing in by warping away as he fires. The full salvo attack he uses in desperate situations is truly devastating. |
| Enemy Card | ||||
|---|---|---|---|---|

| ||||
| Ability | Duration | Cost | ||
| Shot Charge | 2 reloads | 80 CP | ||
| Description | ||||
| Powers up missile attacks such as Strike Raid and Fire. Resistant to fire, ice, lightning, and special attacks. | ||||
| Obtained | ||||
| Hollow Bastion Room of Rewards[3] | ||||
| Location | HP | Strength | Defense | EXP | ||
| The World That Never Was | 1300 | 45 | 26 | 0 | ||
| Physical | Fire | Blizzard | ||||
| ×1.0 | ×0.25 | ×0.25 | ||||
| Thunder | Dark | Neutral | ||||
| ×0.25 | ×0.25 | ×0.25
| ||||
| Rewards | ||||||
| Sora: Magnet element Donald: Item slot Goofy: Max HP +5 Secret Ansem Report 3 | ||||||
| World(s) | ||||||
| The World That Never Was | ||||||
| Location | HP | Strength | Defense | EXP | ||
| The World That Never Was | 1300 | 45 | 26 | 0 | ||
| Physical | Fire | Blizzard | ||||
| ×1.0 | ×0.25 | ×0.25 | ||||
| Thunder | Dark | Neutral | ||||
| ×0.25 | ×0.25 | ×0.25
| ||||
| Rewards | ||||||
| Sora: Max MP +10 Donald: Item slot Goofy: Max HP +4 Secret Ansem Report 3 | ||||||
| World(s) | ||||||
| The World That Never Was | ||||||
| Mission | HP | EXP | STR/DEF | ||||
|---|---|---|---|---|---|---|---|
| International | Japanese | ||||||
| 61 | 900 | 1125 | 0 | 53 | |||
| Fire | Blizzard | Thunder | Aero | ||||
| x1.40 | x1.56 | x0.59 | x1.75 | ||||
| Ignite | Freeze | Jolt | Air-Toss | ||||
| x0 | x0.02 | x0.02 | x0 | ||||
| Defense Power Adjustment | Heart Points | ||||||
| • Full Body: 1.00 | — | ||||||
| Flinch? | Bloom-Out? | ||||||
| △ | X | ||||||
| Rewards | |||||||
|
Missions 51-61 | |||||||
| World(s) | |||||||
| Olympus Coliseum | |||||||
| Games | HP | EXP | STR/DEF | ||||
|---|---|---|---|---|---|---|---|
| International | Japanese | ||||||
| Day 224 |
• Round 5: Xigbar | ||||||
| 900 | 1125 | 0 | 53 | ||||
| Fire | Blizzard | Thunder | Aero | ||||
| x1.40 | x1.56 | x0.59 | x1.75 | ||||
| Ignite | Freeze | Jolt | Air-Toss | ||||
| x0 | x0.02 | x0.02 | x0 | ||||
| Defense Power Adjustment | Heart Points | ||||||
| • Full Body: 1.00 | — | ||||||
| Flinch? | Bloom-Out? | ||||||
| △ | X | ||||||
| Rewards
| |||||||
| Games (Day 224) — | |||||||
| Mission | HP | EXP | STR/DEF | ||||
|---|---|---|---|---|---|---|---|
| 61 | 1125 | 0 | 53 | ||||
| 61SP | 1791 | 0 | 98 | ||||
| Fire | Blizzard | Thunder | Aero | ||||
| x1.40 | x1.56 | x0.59 | x1.75 | ||||
| Ignite | Freeze | Jolt | Air-Toss | ||||
| x0 | x0.02 | x0.02 | x0 | ||||
| Defense Power Adjustment | Heart Points | ||||||
| • Full Body: 1.00 | — | ||||||
| Flinch? | Bloom-Out? | ||||||
| △ | X | ||||||
| Rewards | |||||||
|
Missions 51-61 | |||||||
| World(s) | |||||||
| Olympus Coliseum | |||||||
| Games | HP | EXP | STR/DEF | ||||
|---|---|---|---|---|---|---|---|
| Day 224 |
• Round 5: Xigbar | ||||||
| 1125 | 0 | 53 | |||||
| Day 224 (SP) |
• Round 5: Xigbar | ||||||
| 1791 | 0 | 98 | |||||
| Fire | Blizzard | Thunder | Aero | ||||
| x1.40 | x1.56 | x0.59 | x1.75 | ||||
| Ignite | Freeze | Jolt | Air-Toss | ||||
| x0 | x0.02 | x0.02 | x0 | ||||
| Defense Power Adjustment | Heart Points | ||||||
| • Full Body: 1.00 | — | ||||||
| Flinch? | Bloom-Out? | ||||||
| △ | X | ||||||
| Rewards
| |||||||
| Games (Day 224) — | |||||||
| Location | HP | Strength | Defense | EXP | |||||||
| Keyblade Graveyard | 1600 | 59 | 30 | 0 | |||||||
| Physical | Fire | Blizzard | Thunder | Water | |||||||
| ×1.0 | ×0.7 | ×0.7 | ×0.7 | ×0.7 | |||||||
| Aero | Dark | Neutral | Rapid-fire | ||||||||
| ×0.7 | ×0.7 | ×0.7 | ×0.5 | ||||||||
| Freeze | Electrify | Stun | Hunny | ||||||||
| ✕ | ✕ | ✕ | ✕ | ||||||||
| Reaction Endurance |
Revenge Value |
Attraction Magnification |
Damage Limit | ||||||||
| 0 | 7 | ×0.5 | 24
| ||||||||
| Rewards | |||||||||||
| First Battle Sora: Max MP +5[4] Re Mind Sora: Max MP +3[4] | |||||||||||
| World(s) | |||||||||||
| Keyblade Graveyard | |||||||||||
| Xigbar's Recreated Data | ||||||||||||||
|---|---|---|---|---|---|---|---|---|---|---|---|---|---|---|
| Japanese | シグバールの再現データ | |||||||||||||
| Rōmaji | Shigubāru no Saigen Dēta | |||||||||||||
| Translation | Xigbar's Recreated Data
| |||||||||||||
| Type | Organization XIII | |||||||||||||
| Games | Kingdom Hearts II Final Mix Kingdom Hearts Union χ Kingdom Hearts III Re Mind | |||||||||||||
| ||||||||||||||
| ||||||||||||||
| Location | HP | Strength | Defense | EXP | ||
| Radiant Garden Garden of Assemblage |
2896 | 86 | 51 | 0 | ||
| Physical | Fire | Blizzard | ||||
| ×1.0 | ×0.25 | ×0.25 | ||||
| Thunder | Dark | Neutral | ||||
| ×0.25 | ×0.25 | ×0.25
| ||||
| Rewards | ||||||
| Defense Boost | ||||||
| World(s) | ||||||
| Radiant Garden | ||||||
| Location | HP | Strength | Defense | EXP | |||||||
| Radiant Garden (Garden of Assemblage) |
3000 | 110 | 57 | 0 | |||||||
| Resistances (Not staggered) | |||||||||||
| Physical | Fire | Blizzard | Thunder | Water | |||||||
| ×0.2 | ×0.1 | ×0.1 | ×0.1 | ×0.1 | |||||||
| Aero | Dark | Neutral | Rapid-fire | ||||||||
| ×0.1 | ×0.1 | ×0.1 | ×0.5 | ||||||||
| Resistances (Staggered) | |||||||||||
| Physical | Fire | Blizzard | Thunder | Water | |||||||
| ×1.0 | ×0.5 | ×0.5 | ×0.5 | ×0.5 | |||||||
| Aero | Dark | Neutral | Rapid-fire | ||||||||
| ×0.5 | ×0.5 | ×0.5 | ×0.5 | ||||||||
| Reaction Endurance |
Revenge Value |
Attraction Magnification |
Damage Limit | ||||||||
| 0 | 7 | — | 13
| ||||||||
| Rewards | |||||||||||
| AP Boost | |||||||||||
| World(s) | |||||||||||
| Radiant Garden | |||||||||||
Xigbar is a boss in Kingdom Hearts II at The World That Never Was, in Kingdom Hearts 358/2 Days at Olympus Coliseum, and in Kingdom Hearts III as one of the bosses of the Keyblade Graveyard, fought alongside Dark Riku.
In Kingdom Hearts II Final Mix and Kingdom Hearts III Re Mind, a data version of him can be fought in the Garden of Assemblage.
Strategy[edit]
Kingdom Hearts II[edit]
Because Xigbar spends the entire battle hovering in midair, Sora's primary source of damage should be air combos. To facilitate this, Sora should have the Hero's Crest Keyblade equipped for its Air Combo Boost ability, as well as any Air Combo Pluses and Aerial Dodge from leveling up Master Form.
Xigbar begins the battle by warping to a ledge overlooking the arena Sora is on, and a HUD display appears. Xigbar fires combos of laser arrows at Sora just after the circles and rotating dots on the HUD align. Use the Reaction Command "Warp Snipe" to deflect Xigbar's shots. Once Sora has deflected three shots in a row, Xigbar teleports back to the ground. He may repeat this attack at least once more in the battle.
Despite the presence of party members, Summons can't be used during this battle. For most of the battle, Xigbar rapidly teleports around the arena, firing combos of laser arrows at Sora. These arrows can be dodged, or reflected back at Xigbar with Guard. Reflect, or Aerial Dodge for minor damage. After approximately three combos, Xigbar temporarily stops attacking to reload his Arrowguns. At this time, Sora can easily strike him with air combos. Aerial Dodge not only allows Sora to deflect Xigbar's bullets back at him with proper timing, but also gives Sora more time to strike Xigbar with air combos.
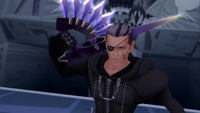
Throughout the battle, Xigbar frequently shifts the shape of the arena. In one shift, Xigbar narrows the arena, firing at Sora rapidly from the opposite end. In the second, Xigbar converts the arena into a narrow box-shaped path, with a single platform extending into the middle of the arena, over which Xigbar hovers. In the third, Xigbar creates a box-shaped arena with an intersection of platforms meeting in the middle. Xigbar combos to bombards Sora with laser arrows; Sora must strike him with a finishing move to shift the arena back.
Later in the fight, Xigbar charges large, blue laser arrows, several of which ricochet around the arena. These arrows bounce in addition to Xigbar's normal Arrowgun attacks and teleportation. Sora can use the Reaction Command "Warp Snipe" to deflect up to three of these blue arrows at Xigbar to damage him. Xigbar also begins firing multiple shots in quick succession.
When low on HP, Xigbar adds a new attack to his repertoire. He shifts the arena again into a small, square platform, and fires a barrage of laser arrows while rotating in a circle. He then teleports into the space around the platform to unleash several more attacks. Finally, he teleports into the air above the platform and fires countless laser arrows above him. This can be avoided by jumping to the far left corner of the platform, then running counter-clockwise, behind Xigbar's shots.
The final phase of this barrage is easily Xigbar's most dangerous attack, capable of stunning Sora until the combo is over, rendering him unable to heal while stunned, and usually also dealing enough damage to where Sora wouldn't survive without Once More. It can be avoided fairly easily, as Sora's movement speed is just fast enough to outrun Xigbar's shots. Alternately, Limits can be used to avoid it. Reflect is not a good option to block the attack's final phase as there's a small time period after the third Reflect ends where Sora can't use it again, making it easy for Sora to get caught in an attack combo he can't use Reflect to get out of.
Xigbar's normal attacks can be blocked with Guard, Reflect or Warp Snipe. Due to Xigbar's constantly teleporting and shifting the face of the arena, getting close enough to do damage can be difficult. Make good use of Sora's various abilities to stay mobile while evading or deflecting Xigbar's long-range attacks.
Data Rematch[edit]
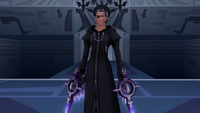
In the data rematch, Xigbar begins by transforming the stage. Xigbar no longer needs to reload his weapons, so the only way to approach him is to deflect his shots back at him using Guard or Reflect, which stuns him for a brief period. His shots now move much faster as well.
When he leaves the area to snipe, he can now shoot rapid-fire at Sora before the "Warp Snipe" Reaction Command is available. His charged blue shot now takes almost no time to charge and becomes far too quick to reliably use the Reaction Command, so it is better to cast Reflect before it hits to dissipate it.
| Technique | Element | Power | Guard? | |||
|---|---|---|---|---|---|---|
| Shot (ショット Shotto) |
Neutral | x0.25 | ◯[5] | |||
| Xigbar fires four rapid shots.
| ||||||
| Xigbar fires the shots from where he is, warps above Sora's location in two-three successions while firing down at him each time, or warps the arrowguns via wormholes and shoots at Sora's sides. In the initial fight only, he reloads after approximatively three uses of the technique. In the Data Rematch, this technique can be used if Xigbar recovers from being stunned if left unharmed. | ||||||
| Charged Shot (チャージショット Chāji Shotto, lit. "Charge Shot") |
Neutral | x2.0 | X (Reaction Command: ◯) | |||
| Xigbar charges and fires arcing blue shots into the sky. These bullets will ricochet across the arena.
| ||||||
| Used when at 70% HP and below. In the Data Rematch, it is used when at 75% HP and below, and Xigbar fires the shots instantly. When at lower HP, he fires two blue shots in a row. | ||||||
| Ultimate Shot (アルテマショット Arutema Shotto, lit. "Ultima Shot") |
Neutral | x0.25 | X | |||
| Xigbar shifts the arena to a small square shape. He teleports outside the arena's boundaries, then fires a series of bullets at Sora as he circles the arena. He finishes by warping into the center of the arena and finishes by firing a barrage of bullets at wormholes that will rain down at Sora.
| ||||||
| Used when at 35% HP and occasionally below. In the Data Rematch, it is used when at 40% HP and below. Xigbar is invincible as long as he has a white aura. | ||||||
| Sniper (狙撃 Sogeki) |
Neutral | Rapid fire: x1.0 Snipe: x2.0 |
△ (Reaction Command: ◯) | |||
| Xigbar teleports outside the arena and snipes at Sora.
| ||||||
| During the initial fight, Xigbar starts with this attack.
| ||||||
| Aside from the arena shift caused by Ultimate Shot, Xigbar may also shift the arena into various shapes, such as a long rectangle, a big square with four square holes, or a big square with a square U-shaped hole. Any shapeshift of the arena caused by Xigbar causes Sora to stagger. The shape of the arena can be forced back to normal by hitting Xigbar with a combo finish. | ||||||
| Guard/Block: △ = Can be blocked; O = Can be blocked and interrupted (melee) or deflected back (projectile); X = Cannot be blocked. | ||||||
| Reaction Commands | |||||||
|---|---|---|---|---|---|---|---|
| Reaction Command | Element | Power | Description | ||||
| Break (ブレイク Bureiku) |
Neutral | x1.0 Data battle: x0.5 |
Can be used when Xigbar's scope zooms in during his Sniper attack. Parry Xigbar's shot before it hits him, and reflect the bullet towards him. | ||||
| Warp Snipe (ワープスナイプ Wāpu Sunaipu) |
Neutral | x1.0 Data battle: x0.5 |
Can be used when near a projectile generated by either Charge Shot or Sniper. Warp in front of an arrowgun bolt and reflect it back at the shooter with a swing of the Keyblade. Can be used up to three times in succession. | ||||
Kingdom Hearts 358/2 Days[edit]
Xigbar challenges Roxas as the other finalist in the Olympus Coliseum's games. This battle is not a fight to the finish, but immediately ends once Xigbar's health is lowered enough.
Xigbar occasionally leaps back and fires two shots at Roxas from the air. Xigbar only performs this attack twice in a row. If Roxas travels out of his range, he teleports to a nearby location. Xigbar can only fire sixteen shots before running out of ammo; so exploit the chance to get closer to deal some damage while Xigbar stops to Reload. Dodge Roll, and Glide allows Roxas to dodge his shots while staying mobile. The bullets can also be blocked.
Kingdom Hearts III[edit]
Xigbar serves as one of the bosses of the Keyblade Graveyard, fought alongside Dark Riku against Sora and Riku. Ansem is initially present in the fight, but leaves after a few moments. The battle against him is highly reminiscent of the boss fight in Kingdom Hearts II. It is recommended to defeat Xigbar first as his long-ranged attacks make fighting Dark Riku difficult. Xigbar mainly hovers upside-down in midair, out of reach from Sora and Riku, and attacks by firing homing arrows from his guns and firing a spread shot of arrows after charging up energy. Any arrows that don't hit Sora will linger on the ground, acting as mines that will explode and damage Sora if he makes contact with him.
After performing several attacks in a row, Xigbar will stop to reload his arrowguns, leaving him vulnerable to attack. All of Xigbar's attacks can be easily avoided, or more preferably, reflected back at him with Guard to deal damage. Hero's Origin's Counter Shield and Grand Chef's Frying Pan can be useful in this regard because using Shield Charge on Xigbar's shots can gather energy for their respective Wrathful Flurry and Flame Barrage reprisals. For players who wish to fight at a distance, Shooting Star's Double Arrowguns and Magic Launcher and Hunny Spout's Hunny Blasters and Hunny Launcher are ideal choices (though Hunny Spout's Formchanges are better options as Guardian Form's Barrier ability makes it easier to reflect Xigbar's shots). The airstep maneuver is also a great way to close the distance between Sora and Xigbar while avoiding his attacks.
After enough damage, Xigbar will begin glowing with dark energy and use his Arrow Rain attack. The Freeshooter will teleport to the center of the room and combine his arrowguns into a large bow. He will then fire an energy arrow into the air, opening a spatial rift that rains down countless arrows of dark energy which will slowly expand outward to the edge of the room. Despite the attack's wide reach, it can easily be avoided with either a well-timed Dodge Roll, airstepping towards Xigbar, or by guarding against the arrows. So long as Sora reflects Xigbar's shots, makes good use of the airstep maneuver, and routinely heals himself and Riku, Xigbar will fall with ease.
| Technique | Element | Status | Power | Block? | Repel LV | |
|---|---|---|---|---|---|---|
| Shot (ショット Shotto) |
Neutral | — | 0.5 per hit | ◯ |
1 | |
| Xigbar fires energy arrows that home in on Sora. | ||||||
| Cluster Shot (クラスターショット Kurasutā Shotto) |
(Bullet) | Neutral | — | 0.5 per hit | △ | 1
|
| (Explosion) | Neutral | — | 0.5 per hit | △ | — | |
| Xigbar charges up energy and fires a spread of large energy arrows. Any arrows that don't hit Sora will linger on the ground, acting as energy mines that will explode if Sora comes into contact with them. | ||||||
| Arrow Rain (アローレイン Arō Rein) |
(Shockwave) | — | — | — | X | —
|
| (Light arrow) | Neutral | — | 2.0 | X | — | |
| (Arrow rain) | Neutral | — | 0.5 per hit | △ | — | |
| Xigbar teleports to the center of the room and combines his arrowguns into a large bow. He will then fire an energy arrow into the air, opening a spatial rift that rains down countless arrows of dark energy which will slowly expand outward to the edge of the room.
| ||||||
| Xigbar reloads after using Shot or Cluster Shot three times. | ||||||
| Guard/Block: △ = Can be blocked; O = Can be blocked and interrupted (melee) or deflected back (projectile); X = Cannot be blocked. | ||||||
Kingdom Hearts III Re Mind[edit]
Keyblade Graveyard[edit]
Xigbar's first fight in Kingdom Hearts III Re Mind is nearly identical to in the base game. Before the battle begins, the player can choose to play as Sora with ![]() or Riku with
or Riku with ![]() .
.
Data Rematch[edit]
As with the rest of the real Organization, Xigbar's data is significantly harder and stronger. Aside from his attacks from the base game, he now has several more tricks up his sleeve.
Several of Xigbar's attacks can be done standing upright or standing upside-down in the air, but whichever he picks does not change the behavior of his attacks. Focus on the movements of his guns and shots, and try not to be thrown off if he's unexpectedly upside-down/upright.
Xigbar will start the battle by changing the arena to a donut-like shape, with a rift in the middle. Sora cannot Airstep across this rift, so approaching Xigbar will require moving around it instead. He will perform various moves, listed below. It is easiest to think of this move as having four sets.
- Xigbar starts by firing four slow shots overhead, then follow with four fast shots directly at Sora, which will connect just before the slow shots do. Block the fast shots before the slow shots. He will follow by charging a purple glow on one gun while the other rotate-ticks like a clock hand, but this is a feint and will not actually fire anything.
- He will run to the side while firing, then repeat the purple glow feint but actually fire this time. This will place a set of pink mines that surround Sora. The mines will linger and, after a couple seconds, will move in Sora's direction. For a visual cue on when to block, watch the ticking gun, which will start at a 12:00 position, tick four times, and stop at a 5:00 position when he will fire. Wait a brief moment and block the mines when they continue, or jump into the air when the mines move to avoid them completely. He will follow up with another set of four slow shots and four fast direct shots. Guard just before the fast shots connect to block the mines, and this should block the entire barrage of shots. Xigbar will finish this set with another feint shot.
- Xigbar will spin his guns and then fire them together with a blue glow, creating a blue-and-black shot that bounces on the walls and floor of the stage (resembling a similar ricochet shot from Kingdom Hearts II). This shot will always bounce three times before approaching Sora, and blocking it will deflect it, but repeat the three-bounce process. Once it has been blocked or dodged for the third time, or once it hits Xigbar himself, it will disappear. While the ricochet shot is bouncing around, Xigbar will fire some quick shots directly at Sora, then four slow shots overhead, before teleporting up close to Sora and side-flip while shooting. Xigbar will then perform a set of running shots upside-down, then stand still and be open to attack. Block the fast shots, wait until the side-flip shots to block the slow shots, and block the ricochet shot if it gets close, then Airstep to attack Xigbar after blocking the set of upside-down running shots.
- Xigbar will teleport far away and combine his guns into a bow, then fire a purple shot skyward (Sora will be knocked back when he shoots, but will not take damage). A cloud will appear and start to rain down purple arrows in an expanding circle, centered on Xigbar's initial position. Xigbar will perform three side-flips, firing a set of shots each time. He will then fire four slow shots overhead and create small portals near Sora, which he will put his hands through to fire four shots. Block the flip shots, then wait until the portal shots to block the slow shots. He will finish with a set of direct shots. The purple arrows will not have time to reach Sora, so don't worry about them. After this, the donut sequence will end - the stage will return to normal.
It is safest to play defensively during most of the donut phase, however it is possible to approach and attack Xigbar at the end of his second set. Block the first set, then dodge out of guard and start running as he does the running shots. Block these, dodge out of guard, run and wait a moment for his gun to glow purple, then Doubleflight to get above the mines. Glide toward Xigbar, block the four fast shots and four slow upward shots, then immediately Airstep as he prepares to fire the feint shot, and attack.
- If Sora is close to Xigbar during the feint shot, then it will no longer be a feint shot, and will instead act the same as a pink mines shot.
- Try not to do the Doubleflight too early, or Xigbar may aim the mines at Sora in the air, instead of at the ground.
- Sora's approach must be done quickly so that he gets a direct line of sight for the Airstep. If the rift is even slightly in the way, then Airstep will not work.
Sometimes later in the fight, Xigbar may restart the donut phase with the same patterns. If this happens, handle the moves the same as the first time around.
Once the stage is back to normal, Xigbar will use different combos.
When Xigbar does a flip sideways and shoots, he will follow with four slow shots upward and four fast shots directly at Sora. He will then summon two small portals and put his hands through them to fire. Block each set, though be careful not to block the slow shots too early. When Xigbar uses the portals, block at least two of the portal shots and Airstep to him after the fourth is blocked for a chance to attack.
- Try not to Airstep too early - a good indicator is just as the portals close and his hands return to him, which is indicated by an expanding white circle around his hands.
- Xigbar will always do this move immediately after the first donut phase.
- It is possible to attack Xigbar earlier in this sequence, right after he does his four slow shots upward. However, the bullets will still be heading towards Sora, so this will require weaving guards and reprisals into the combo when the bullets approach.
When Xigbar teleports to the edge of the stage, spins his guns, and then fires them together with a blue glow, he will be using his ricochet shot again. He will follow with a side flip and shoot, summon small portals and shoot three sets of shots, then run sideways upside-down with additional shots, and finally finish with some shots while standing still. There are three ways to handle this:
- Xigbar is open while charging the initial ricochet shot, so if he teleports to the edge to start the move, Airstep to him quickly to attack. To get this opening more consistently, prepare focus whenever he finishes any of his other moves (including his ultimate attack!), just in case.
- If the first opportunity is missed, Airstep to Xigbar while he is doing the side flip shots, or just after blocking them, then attack. The ricochet shot may still be bouncing around and can hit Sora, so mix a roll into the combo just in case.
- If both of the above are missed, block the last set of shots where Xigbar stands still, then Airstep to attack.
When Xigbar appears slowly walking with his guns hanging loosely from his hands, he is taunting Sora and should not be approached. He will fire one set of small-portal shots, walk slowly again, fire another set of portal shots, then teleport, fire two sets of direct shots at Sora, then finally run and shoot. He is open after finishing his running shots. Block the shots and then reprisal or Airstep after the running shots to attack.
- If Xigbar is attacked while walking, he will teleport away and use a portal attack immediately. This can speed up the move overall, however it is dangerous if one is not prepared to block the portal shots immediately after attacking.
When one of Xigbar's guns glows purple while the other slowly rotate-ticks like a clock hand, he will fire his mines. Again, for a visual cue watch the rotating gun until it reaches a 5:00 position, then block. Xigbar will follow up with four slow shots upward and four fast shots directly at Sora. Wait until slightly after he fires upward, then guard to block both the mines and the shots. It is also possible to destroy the mines before they reach Sora, by using Fire when Xigbar prepares to shoot.
- Alternatively, after blocking the initial mines shot, there is a small opportunity to Airstep to Xigbar and hit him, then press
 to use Rising Spiral, and continue the combo into the air. Rising Spiral is important here, as it will get Sora off of the ground and away from the mines before they move.
 - If the punish opportunity is missed, then Xigbar will always follow this move with the move that starts with side-flip shots.
When Xigbar goes to the center of the arena, combines his guns into a bow, and fires skyward, he is doing his Arrow Rain attack. Purple arrows will rain down from above in a slowly-expanding circle, centered on Xigbar's inital position. He will follow up by firing mines, then four slow shots upward, then four fast shots directly at Sora. Guard the initial mine shot at 5:00, then block the moving mines after he's done firing upward to block the whole set. He will teleport and fire four more slow shots upward, then side-flip shoot just as the purple arrows approach the edge of the stage. Block the side-flip shots, and Sora should be able to block both the arrows and the slow shots right afterwards. Xigbar will follow with a side flip and shooting, then teleport away and fire some small portal shots. Block the side flip shots and at least two portal shots, then prepare to Airstep to attack after the fourth portal shot is blocked.
Blocking enough of Xigbar's normal shots will eventually prompt the "Showdown" Situation Command, which causes Xigbar and Sora to engage in a standoff akin to Wild West films. When Xigbar moves, Sora has to quickly retaliate with Quick Shot. Using this command at the right time will have Sora fire a shot that stuns Xigbar for a substantial amount of damage; otherwise, using it too early or too late will have Xigbar shoot Sora for massive damage. For a good visual indicator, look at Xigbar's head and attack when it moves.
- This Situation Command has no expiry timer, and can be used at any time except during Xigbar's ultimate attack. Try to save it for when Sora fails a punish or is otherwise in a bad situation, as it will cancel whatever Xigbar's current move is.
- It is possible to get this command to appear a second time, but it will be very near the end of the fight.
If Xigbar's revenge value is hit, then he will teleport away and immediately start his next move. This sounds harmless, but can be dangerous depending on the attack he chooses. Try to either avoid hitting Xigbar's revenge value, or be prepared for the next attack.
- If Sora is mid-combo and Xigbar starts his slow walking move, a strike will count as provoking him, and will make him fire the portal shots immediately. Be prepared to block them.
- If Sora is mid-combo when Xigbar starts the ricochet shot move across the stage, Sora will likely not have time to Airstep for the initial opening. be prepared to block his side flip shots.
After about seven bars of HP have been depleted, Xigbar will start his ultimate attack. He will transform the arena into a small circle and fire a barrage of blue shots, all of which cannot be blocked.
- Xigbar will start by firing several shots and rotating clockwise. Dodge twice counter-clockwise to avoid this, then he will disappear.
- Shots will rain down in the center of the stage, and a black pool will appear below them. Run clockwise around the arena, and when the black pool disappears, dodge roll to avoid a volley of shots. Do this twice. For consistency, try to aim the camera at the center to catch each cue to dodge.
- Additional shots will rain down and divide the stage into quadrants, along the long blue spikes in the floor's pattern. The black pool will appear in the middle again, then Xigbar will appear and do clockwise shots again. As soon as he appears, dodge three times counter-clockwise, being careful to end within one of the stage's quadrants.
- Xigbar will re-appear in the middle and rain down shots from above, each set leaving a small black pool upon hitting the ground. Run in a circle around the edge of the stage until four black pools have been placed, then run in a smaller circle in the remaining part of the stage until three pools have been placed, and finally approach the middle of the stage. The move will now end.
After using his ultimate attack, Xigbar will be in his second phase, and will have two new moves:
- Xigbar can use a new ricochet combo that initially fires three ricochet shots at once, followed by walking slowly, then running upside-down and firing blue shots, then finishing by walking slowly. These blue shots cannot be blocked. Guard the ricochet shots if they get close, but be prepared to dodge twice to avoid the blue shots. Alternatively, Airstep to Xigbar before he fires the initial ricochet shots for a chance to attack.
- Xigbar can perform a variation of his arrow rain attack. It starts the same way, with the upward bow shot, pink mines, and four upward slow shots. However, when the purple arrows reach the end of the stage, instead of side-flip shots he will fire four slow shots upward, then do running shots, then side-flip shots. He will follow with four portal shots, however the portals will be close to him. He will finish with two sets of direct shots. This time, Sora will need to guard the purple arrows themselves. Block the running and side-flip shots, and when Xigbar does his portal shots, do not approach him as he is not open - instead, prepare to block the two sets of direct shots.
At about three or fewer HP bars remaining, Xigbar will transform the stage back into the donut shape, and perform a variation of his opening moves. He will start with the third set (the ricochet shot), then the fourth set (the arrow rain), then the first set (the feint), and finally the second set (the mines). These moves can be dealt with the same way as in the opener, however the purple arrows can actually reach Sora this time, so block when they get close. After the last set finishes, the stage will return to normal once more.
For PRO Code players, try to limit magic uses to Thunder, rather than Fire or Blizzard. Fire or Blizzard will swirl around and may hit Xigbar during the slow walking move, provoking him to attack. Thunder ends quickly enough for it not to face this issue.
| Technique | Element | Status | Power | Block? | Repel LV | |
|---|---|---|---|---|---|---|
| Shot (ショット Shotto) |
Neutral | — | 0.2 per hit | ◯ |
1 | |
| Xigbar fires energy arrows that home in on Sora in various patterns. | ||||||
| Warp Shot | Neutral | — | 0.7 per hit | △ | — | |
| Xigbar fires bullets via wormholes. The wormholes are either at Sora's sides, or at other positions. | ||||||
| Cluster Shot (クラスターショット Kurasutā Shotto) |
(bullet) | Neutral | — | 0.5 per hit | △ |
1
|
| (explosion) | Neutral | — | 0.5 per hit | △ | — | |
| Xigbar charges up energy and fires a spread of large energy arrows. Any arrows that don't hit Sora will linger on the ground, acting as energy mines that will explode if Sora comes into contact with them. Those arrows then move forward according to Sora's position relative to the center of the salvo of arrows on the ground. | ||||||
| Arrow Rain (アローレイン Arō Rein) |
(shockwave) | — | — | — | X | —
|
| (light arrow) | Neutral | — | 2.0 | X | — | |
| (arrow rain) | Neutral | — | 0.5 per hit | △ | — | |
| Xigbar teleports to the center of the room and combines his arrowguns into a large bow. He will then fire an energy arrow into the air, opening a spatial rift that rains down countless arrows of dark energy which will slowly expand outward to the edge of the room. | ||||||
| Charged Shot | Neutral | — | 2.5 | ◯ |
2 | |
| Charges up energy and fires one or a few concentrated shots at Sora in a fan-shaped formation which ricochet around the arena. | ||||||
| Ultimate Shot | Neutral | — | 0.5 per hit | X | — | |
| Used when below half HP. Shrinks the arena and fires a massive volley of shots in various patterns. Xigbar will start by firing several shots and rotating clockwise, then disappears. Shots will rain down in the center of the stage, and a black pool will appear below them. Additional shots will rain down and divide the stage into quadrants, along the long blue spikes in the floor's pattern. The black pool will appear in the middle again, then Xigbar will appear and do clockwise shots again. Xigbar will finally re-appear in the middle and rain down shots from above, each set leaving a small black pool upon hitting the ground. If one bullet hits Sora, many other shots will be aimed at him. | ||||||
| Quick Battle Shot | Neutral | — | 4.0 | X | — | |
| Used during the Showdown Situation Command after a random delay or if Sora attempts using Quick Shot too soon. Xigbar fires a devastating shot at Sora.
| ||||||
| Xigbar reloads after using Shot or Cluster Shot three times. Xigbar may change the shape of the arena into a donut shape, the regular shape or a small circle for Ultimate Shot. | ||||||
| Guard/Block: △ = Can be blocked; O = Can be blocked and interrupted (melee) or deflected back (projectile); X = Cannot be blocked. | ||||||
| Situation Commands | |||||||
|---|---|---|---|---|---|---|---|
| Situation Command | Element | Power | Description | ||||
| Showdown (ショーダウン Shōdaun) |
— | — | Becomes available after blocking enough of Xigbar's shots, but becomes no longer available during Ultimate Shot. Xigbar challenges Sora to a standoff. | ||||
| Quick Shot (クイックショット Kuikku Shotto) |
Neutral Rapid-fire |
10.0 | Becomes available during the Showdown sequence and can be used by pressing | ||||
Videos[edit]
| Xigbar – Kingdom Hearts II | Xigbar's Replica Data – Kingdom Hearts II Final Mix |
|---|---|
| Xigbar – Kingdom Hearts 358/2 Days | |
| Xigbar and Dark Riku – Kingdom Hearts III | Xigbar – Kingdom Hearts III |
| Xigbar and Dark Riku – Kingdom Hearts III Re Mind | Xigbar's Recreated Data – Kingdom Hearts III Re Mind |
Notes and references[edit]
- ^ With Dark Riku and Ansem
- ^ With Dark Riku or alone
- ^ Becomes available after clearing Kingdom Hearts II Final Mix in the original Japanese version, clearing "Sora's Story" and "Reverse/Rebirth" in the original English version, and completing Kingdom Hearts 358/2 Days in Kingdom Hearts HD 1.5 ReMIX.
- ^ a b Shared with Dark Riku
- ^ Stuns Xigbar after having deflected enough shots back at him in the Data Rematch.
| Nobodies |
|---|
| Organization XIII |
| I. Xemnas | II. Xigbar | III. Xaldin | IV. Vexen | V. Lexaeus | VI. Zexion | VII. Saïx | VIII. Axel | IX. Demyx | X. Luxord | XI. Marluxia | XII. Larxene | XIII. Roxas |
| Enemy Nobodies |
| Sorcerer - Sniper - Dragoon - Berserker - Assassin - Dancer - Gambler - Reaper - Ninja - Samurai Dusk - Creeper - Twilight Thorn - Fake Vivi |
| Special Nobodies |
| Naminé - Absent Silhouettes - Organization XIII's Replica Data - Anti-Saïx - Data-Roxas - Data-Naminé |
