Avatar Menu: Difference between revisions
(→Customize Avatar: ok, i don't know what 王妃 is supposed to be...) |
(→Customize Avatar: stopping here for now) |
||
| Line 1,506: | Line 1,506: | ||
|width="50%" style="color:white; text-align:center"|'''Name''' | |width="50%" style="color:white; text-align:center"|'''Name''' | ||
|- bgcolor="#E6E6FA" | |- bgcolor="#E6E6FA" | ||
|1||[[Image:Items-1-Kingdom Key.png]]||{{nihongo|'''Kingdom Key'''|キングダムチェーン|Kingudamu Chēn|lit. "Kingdom Chain"}} | |1||[[Image:Items-1-Kingdom Key.png]]||{{nihongo|'''Kingdom Key'''|キングダムチェーン|<br>Kingudamu Chēn|lit. "Kingdom Chain"}} | ||
|- bgcolor="#E6E6FA" | |- bgcolor="#E6E6FA" | ||
|2||[[Image:Items-2-Buster Sword A.png]]||{{nihongo|'''Buster Sword A'''||}} | |2||[[Image:Items-2-Buster Sword A.png]]||{{nihongo|'''Buster Sword A'''|バスターソードA|<br>Basutā Sōdo}} | ||
|- bgcolor="#E6E6FA" | |- bgcolor="#E6E6FA" | ||
|3||[[Image:Items-3-Maleficent's Staff.png]]||{{nihongo|'''Maleficent's Staff'''||}} | |3||[[Image:Items-3-Maleficent's Staff.png]]||{{nihongo|'''Maleficent's Staff'''|マレフィセントの杖|<br>Marefisento no Tsue}} | ||
|- bgcolor="#E6E6FA" | |- bgcolor="#E6E6FA" | ||
|4||[[Image:Items-4-Blitzball.png]]||{{nihongo|'''Blitzball'''||}} | |4||[[Image:Items-4-Blitzball.png]]||{{nihongo|'''Blitzball'''|ブリッツボール|<br>Burittsubōru}} | ||
|- bgcolor="#E6E6FA" | |- bgcolor="#E6E6FA" | ||
|5||[[Image:Items-5-Selphie's Jump Rope.png]]||{{nihongo|'''Selphie's Jump Rope'''||}} | |5||[[Image:Items-5-Selphie's Jump Rope.png]]||{{nihongo|'''Selphie's Jump Rope'''|セルフィのなわとび|<br>Serufi no Nawatobi}} | ||
|- bgcolor="#E6E6FA" | |- bgcolor="#E6E6FA" | ||
|6||[[Image:Items-6-Tidus A's Stick.png]]||{{nihongo|'''Tidus A's Stick'''||}} | |6||[[Image:Items-6-Tidus A's Stick.png]]||{{nihongo|'''Tidus A's Stick'''|ティーダAの棒きれ|<br>Tīda A no }} | ||
|- bgcolor="#E6E6FA" | |- bgcolor="#E6E6FA" | ||
|7||[[Image:Items-7-Gummi Scepter.png]]||{{nihongo|'''Gummi Scepter'''||}} | |7||[[Image:Items-7-Gummi Scepter.png]]||{{nihongo|'''Gummi Scepter'''|グミシップステッキ|<br>Gumi Shippu Sutekki|lit. "Gummi Ship Stick"}} | ||
|- bgcolor="#E6E6FA" | |- bgcolor="#E6E6FA" | ||
|8||[[Image:Items-8-Scepter of Spades.png]]||{{nihongo|'''Scepter of Spades'''||}} | |8||[[Image:Items-8-Scepter of Spades.png]]||{{nihongo|'''Scepter of Spades'''|スペードステッキ|<br>Supēdo Sutekki|lit. "Spade Stick"}} | ||
|- bgcolor="#E6E6FA" | |- bgcolor="#E6E6FA" | ||
|9||[[Image:Items-9-Scepter of Hearts.png]]||{{nihongo|'''Scepter of Hearts'''||}} | |9||[[Image:Items-9-Scepter of Hearts.png]]||{{nihongo|'''Scepter of Hearts'''|ハートステッキ|<br>Hāto Sutekki|lit. "Heart Stick"}} | ||
|- bgcolor="#E6E6FA" | |- bgcolor="#E6E6FA" | ||
|10||[[Image:Items-10-Scepter of Diamonds.png]]||{{nihongo|'''Scepter of Diamonds'''||}} | |10||[[Image:Items-10-Scepter of Diamonds.png]]||{{nihongo|'''Scepter of Diamonds'''|ダイヤステッキ|<br>Diaya Sutekki|lit. "Dia. Stick"}} | ||
|- bgcolor="#E6E6FA" | |- bgcolor="#E6E6FA" | ||
|11||[[Image:Items-11-Scepter of Clubs.png]]||{{nihongo|'''Scepter of Clubs'''||}} | |11||[[Image:Items-11-Scepter of Clubs.png]]||{{nihongo|'''Scepter of Clubs'''|クローバーステッキ|<br>Kurōbā Sutekki|lit. "Club Stick"}} | ||
|- bgcolor="#E6E6FA" | |- bgcolor="#E6E6FA" | ||
|12||[[Image:Items-12-Mini Honey Pot.png]]||{{nihongo|'''Mini Honey Pot'''||}} | |12||[[Image:Items-12-Mini Honey Pot.png]]||{{nihongo|'''Mini Honey Pot'''|小さなハチミツつぼ|<br>Chiisana Hachimitsu Tsubo}} | ||
|- bgcolor="#E6E6FA" | |- bgcolor="#E6E6FA" | ||
|13||[[Image:Items-13-Leaf Wand.png]]||{{nihongo|'''Leaf Wand'''||}} | |13||[[Image:Items-13-Leaf Wand.png]]||{{nihongo|'''Leaf Wand'''|リーフステッキ|<br>Rīfu Sutekki|lit. "Leaf Stick"}} | ||
|- bgcolor="#E6E6FA" | |- bgcolor="#E6E6FA" | ||
|14||[[Image:Items-14-Leaf Shield.png]]||{{nihongo|'''Leaf Shield'''||}} | |14||[[Image:Items-14-Leaf Shield.png]]||{{nihongo|'''Leaf Shield'''|ガードオブリーフ|<br>Gādo obu Rīfu|lit. "Guard of Leaf"}} | ||
|- bgcolor="#E6E6FA" | |- bgcolor="#E6E6FA" | ||
|15||[[Image:Items-15-Rockity Hammer.png]]||{{nihongo|'''Rockity Hammer'''||}} | |15||[[Image:Items-15-Rockity Hammer.png]]||{{nihongo|'''Rockity Hammer'''|グラグラハンマー|<br>Gura Gura Hanmā|lit. "Gura Gura Hammer"}} | ||
|- bgcolor="#E6E6FA" | |- bgcolor="#E6E6FA" | ||
|16||[[Image:Items-16-Rockity Shield.png]]||{{nihongo|'''Rockity Shield'''||}} | |16||[[Image:Items-16-Rockity Shield.png]]||{{nihongo|'''Rockity Shield'''|ガードオブグラグラ|<br>Gādo obu Gura Gura|lit. "Guard of Gura Gura"}} | ||
|- bgcolor="#E6E6FA" | |- bgcolor="#E6E6FA" | ||
|17||[[Image:Items-17-Sack of Presents.png]]||{{nihongo|'''Sack of Presents'''||}} | |17||[[Image:Items-17-Sack of Presents.png]]||{{nihongo|'''Sack of Presents'''|プレゼント袋|<br>Purezento Fukuro|lit. "Present Sack"}} | ||
|- bgcolor="#E6E6FA" | |- bgcolor="#E6E6FA" | ||
|18||[[Image:Items-18-Christmas Bells.png]]||{{nihongo|'''Christmas Bells'''||}} | |18||[[Image:Items-18-Christmas Bells.png]]||{{nihongo|'''Christmas Bells'''|クリスマスベル|<br>Kurisumasu Beru}} | ||
|- bgcolor="#E6E6FA" | |- bgcolor="#E6E6FA" | ||
|19||[[Image:Items-19-Shuriken A.png]]||{{nihongo|'''Shuriken A'''||}} | |19||[[Image:Items-19-Shuriken A.png]]||{{nihongo|'''Shuriken A'''|手裏剣A|}} | ||
|- bgcolor="#E6E6FA" | |- bgcolor="#E6E6FA" | ||
|20||[[Image:Items-20-Gunblade.png]]||{{nihongo|'''Gunblade'''||}} | |20||[[Image:Items-20-Gunblade.png]]||{{nihongo|'''Gunblade'''|ガンブレード|<br>Ganburēdo}} | ||
|- bgcolor="#E6E6FA" | |- bgcolor="#E6E6FA" | ||
|21||[[Image:Items-21-Mage's Staff.png]]||{{nihongo|'''Mage's Staff'''|まどうしの杖|Madōshi no Tsue}} | |21||[[Image:Items-21-Mage's Staff.png]]||{{nihongo|'''Mage's Staff'''|まどうしの杖|<br>Madōshi no Tsue}} | ||
|- bgcolor="#E6E6FA" | |- bgcolor="#E6E6FA" | ||
|22||[[Image:Items-22-Knight's Shield.png]]||{{nihongo|'''Knight's Shield'''|騎士の盾|Kishi no Tate}} | |22||[[Image:Items-22-Knight's Shield.png]]||{{nihongo|'''Knight's Shield'''|騎士の盾|<br>Kishi no Tate}} | ||
|- bgcolor="#E6E6FA" | |- bgcolor="#E6E6FA" | ||
|23||[[Image:Items-23-Morning Star.png]]||{{nihongo|'''Morning Star'''||}} | |23||[[Image:Items-23-Morning Star.png]]||{{nihongo|'''Morning Star'''|モーニングスター|<br>Mōningu Sutā}} | ||
|- bgcolor="#E6E6FA" | |- bgcolor="#E6E6FA" | ||
|24||[[Image:Items-24-Dream Shield.png]]||{{nihongo|'''Dream Shield'''|ガードオブドリーム|Gādo obu Dorīmu|lit. "Guard of Dream"}} | |24||[[Image:Items-24-Dream Shield.png]]||{{nihongo|'''Dream Shield'''|ガードオブドリーム|<br>Gādo obu Dorīmu|lit. "Guard of Dream"}} | ||
|- bgcolor="#E6E6FA" | |- bgcolor="#E6E6FA" | ||
|25||[[Image:Items-25-Metal Chocobo.png]]||{{nihongo|'''Metal Chocobo'''|メタルチョコボ|Metaru Chokobo}} | |25||[[Image:Items-25-Metal Chocobo.png]]||{{nihongo|'''Metal Chocobo'''|メタルチョコボ|<br>Metaru Chokobo}} | ||
|- bgcolor="#E6E6FA" | |- bgcolor="#E6E6FA" | ||
|26||[[Image:Items-26-Fluffy Grab Bag.png]]||{{nihongo|'''Fluffy Grab Bag'''||}} | |26||[[Image:Items-26-Fluffy Grab Bag.png]]||{{nihongo|'''Fluffy Grab Bag'''|モッチリ福袋|}} | ||
|- bgcolor="#E6E6FA" | |- bgcolor="#E6E6FA" | ||
|27||[[Image:Items-27-Fluffy Hagoita Paddle.png]]||{{nihongo|'''Fluffy Hagoita Paddle'''||}} | |27||[[Image:Items-27-Fluffy Hagoita Paddle.png]]||{{nihongo|'''Fluffy Hagoita Paddle'''|モッチリ羽子板|<br>Mochiri Hagoita}} | ||
|- bgcolor="#E6E6FA" | |- bgcolor="#E6E6FA" | ||
|28||[[Image:Items-28-Warrior of Light's Sword.png]]||{{nihongo|'''Warrior of Light's Sword'''||}} | |28||[[Image:Items-28-Warrior of Light's Sword.png]]||{{nihongo|'''Warrior of Light's Sword'''|ウォーリアオブライトの剣|<br>Wōria obu Raito no Tsurugi}} | ||
|- bgcolor="#E6E6FA" | |- bgcolor="#E6E6FA" | ||
|29||[[Image:Items-29-Warrior of Light's Shield.png]]||{{nihongo|'''Warrior of Light's Shield'''||}} | |29||[[Image:Items-29-Warrior of Light's Shield.png]]||{{nihongo|'''Warrior of Light's Shield'''|ウォーリアオブライトの盾|<br>Wōria obu Raito no Tate}} | ||
|- bgcolor="#E6E6FA" | |- bgcolor="#E6E6FA" | ||
|30||[[Image:Items-30-Garland's Sword.png]]||{{nihongo|'''Garland's Sword'''||}} | |30||[[Image:Items-30-Garland's Sword.png]]||{{nihongo|'''Garland's Sword'''|ガーランドの剣|<br>Gārando no Tsurugi}} | ||
|- bgcolor="#E6E6FA" | |- bgcolor="#E6E6FA" | ||
|31||[[Image:Items-31-Stuffed Moogle.png]]||{{nihongo|'''Stuffed Moogle'''||}} | |31||[[Image:Items-31-Stuffed Moogle.png]]||{{nihongo|'''Stuffed Moogle'''|モーグリぬいぐるみ|<br>Mōguri Nuigurumi|lit. "Moguri Stuffed Animal"}} | ||
|- bgcolor="#E6E6FA" | |- bgcolor="#E6E6FA" | ||
|32||[[Image:Items-32-Sword.png]]||{{nihongo|'''Sword'''||}} | |32||[[Image:Items-32-Sword.png]]||{{nihongo|'''Sword'''|剣|<br>Tsurugi}} | ||
|- bgcolor="#E6E6FA" | |- bgcolor="#E6E6FA" | ||
|33||[[Image:Items-33-Hook for a Hand.png]]||{{nihongo|'''Hook for a Hand'''||}} | |33||[[Image:Items-33-Hook for a Hand.png]]||{{nihongo|'''Hook for a Hand'''||}} | ||
| Line 1,756: | Line 1,756: | ||
|3||[[Image:Bodysuits-3-Reindeer Getup.png]]||{{nihongo|'''Reindeer Getup'''|トナカイ全身セット|<br>Tonakai Zenshin Setto|lit. "Reindeer Full-length Set"}} | |3||[[Image:Bodysuits-3-Reindeer Getup.png]]||{{nihongo|'''Reindeer Getup'''|トナカイ全身セット|<br>Tonakai Zenshin Setto|lit. "Reindeer Full-length Set"}} | ||
|- bgcolor="#E6E6FA" | |- bgcolor="#E6E6FA" | ||
|4||[[Image:Bodysuits-4-Fluffy Lion Dance.png]]||{{nihongo|'''Fluffy Lion Dance'''|モッチリ獅子舞|Mocchiri Shishimai}} | |4||[[Image:Bodysuits-4-Fluffy Lion Dance.png]]||{{nihongo|'''Fluffy Lion Dance'''|モッチリ獅子舞|<br>Mocchiri Shishimai}} | ||
|- bgcolor="#E6E6FA" | |- bgcolor="#E6E6FA" | ||
|5||[[Image:Bodysuits-5-Warrior of Light's Armor.png]]||{{nihongo|'''Warrior of Light's Armor'''|ウォーリアオブライトの鎧|<br>Wōria obu Raito no Yoroi}} | |5||[[Image:Bodysuits-5-Warrior of Light's Armor.png]]||{{nihongo|'''Warrior of Light's Armor'''|ウォーリアオブライトの鎧|<br>Wōria obu Raito no Yoroi}} | ||
| Line 1,915: | Line 1,915: | ||
|62||[[Image:Ensembles-62-DiZ.png]]||{{nihongo|'''DiZ'''|DIZ|}} | |62||[[Image:Ensembles-62-DiZ.png]]||{{nihongo|'''DiZ'''|DIZ|}} | ||
|- bgcolor="#E6E6FA" | |- bgcolor="#E6E6FA" | ||
|63||[[Image:Ensembles-63-Sora (Valor Form).png]]||{{nihongo|'''Sora (Valor Form)'''|ソラ(ブレイヴフォーム)|<br>Sora(Bureivu Fōmu)|lit. "Sora (Brave Form)"}} | |63||[[Image:Ensembles-63-Sora (Valor Form).png]]||{{nihongo|'''Sora (Valor Form)'''|ソラ(ブレイヴフォーム)|<br>Sora (Bureivu Fōmu)|lit. "Sora (Brave Form)"}} | ||
|- bgcolor="#E6E6FA" | |- bgcolor="#E6E6FA" | ||
|64||[[Image:Ensembles-64-Sora (Wisdom Form).png]]||{{nihongo|'''Sora (Wisdom Form)'''|ソラ(ウィズダムフォーム)|<br>Sora (Wizudamu Fōmu)}} | |64||[[Image:Ensembles-64-Sora (Wisdom Form).png]]||{{nihongo|'''Sora (Wisdom Form)'''|ソラ(ウィズダムフォーム)|<br>Sora (Wizudamu Fōmu)}} | ||
Revision as of 07:58, 18 March 2011
The Avatar Menu is a multiplayer game mode in Kingdom Hearts Re:coded that is largely a port of Kingdom Hearts Mobile, with the addition of the "Avatar Sector". The Avatar Menu is subdivided into "Customize Avatar", where the player can design their personal avatar, "Avatar Sector", the special 100-floor System Sector, and "Tag Mode", which allows the player to send and receive Balloon Letters.
Customize Avatar
The "Customize Avatar" menu houses the Avatar Parts, a feature based upon the avatar system in Kingdom Hearts Mobile. There is a total of 800 Avatar Parts for the player to collect, consisting of various pieces of clothing and body features, and a list of "Ensembles" which allow the player to place a coordinated set of parts at the same time. The player starts with a set collection of Avatar Parts, and can collect more pieces either through clearing the challenges in the Avatar Sector, or winning them randomly from Scratch Cards.
Almost every Avatar Part is obtained randomly through the above-mentioned methods. However, there are eight Avatar Parts which are awarded for obtaining a set amount of Trophies; the "King Mickey's Hair", "King Mickey A's Shoes", "King Mickey A Outfit", "King Mickey's Tail", "King Mickey's Gloves", "King Mickey B's Shoes", "King Mickey B Outfit", and "King Mickey Ears" are given for obtaining 2, 5, 8, 12, 16, 20, 25, and 30 trophies, respectively.
|


.png)


.png)
.png)
.png)
.png)


Avatar Sector
The Avatar Sector is a special System Sector that is built by the player, one floor at a time. Unlike other System Sectors, the Heartless within grow progressively stronger the deeper Data-Sora dives in, reaching level 99 by the end of the Sector. The Avatar Sector has a maximum of one hundred floors, and ninety of them must be obtained from Balloon Letters in Tag Mode. These floors can be deleted by the player at will, and if the player keeps obtaining Balloon Letters once the Avatar Sector is complete, the lowest floor will be deleted to make room.
Each floor is represented by an avatar, either one of the fifty prefabricated avatars, or a random avatar made from mixed parts. Each time Data-Sora clears one of these floors while fulfilling its associated challenge, he will win an Avatar Part, starting with those the floor's avatar uses, and then random pieces once those have been exhausted. For every nine floors obtained from Scratch Cards, the Avatar Sector will automatically add a special tenth floor that has an SP challenge. The ten SP challenge floors eventually culminate in a battle against a bugged Data-Riku.
In addition to Avatar Parts, the Avatar Sector has its own list of Sector Rewards, which grows as Data-Sora goes further into the Sector. Furthermore, Data-Sora is given an honorary rank based on how far he has gone into the Sector.
Tag Mode
Tag Mode is a communications system which allows the player to obtain Balloon Letters from other avatars, which contain Avatar Sector floors and Scratch Cards. To enter Tag Mode, the player must choose which Floor Code and Floor Challenge they would like to share; these lists are initially short, but once the player has completed the Avatar Sector, they will be able to share any of the Floor Codes and Floor Challenges which appear in the Avatar Sector, excluding the Boss Floor Code.
Balloon Letters can be given by a friend's avatar, a special avatar, or a random avatar. When the player receives a Balloon Letter from a friend who is also playing Kingdom Hearts Re:coded, the two players will share their personal avatars, and whichever Floor Codes and Floor Challenges they selected. If Tag Mode has been used for a suitably long interval, usually an hour or two, the player can also receive an avatar constructed from random Avatar Parts; this avatar's name and quote will reference each other, but not its appearance or any of its stats. More infrequently, a special avatar will appear in place of the random avatar.
If the player enters Tag Mode while receiving a DS-compatible wireless signal that is not from another Kingdom Hearts Re:coded game (for example, if it is receiving a broadcast from the Wii's Nintendo Channel, or from another DS's PictoChat), they will immediately receive a special avatar, whose quote and other stats are references to the character the avatar depicts. Balloon Letters received this way are generated by the compatible wireless signals; the more signals the DS is receiving, the more Balloon Letters will be received in the same amount of time. While the player can generally receive only one of each of the fifty special avatars, the random generator for the special avatars is based on the DS's internal clock, so if the DS receives multiple wireless signals and generates more than one Balloon Letter at the same time, it is possible to receive multiple Balloon Letters with the same avatar.
|


Scratch Cards

Scratch Cards are one of the prizes attached to Balloon Letters. Every Scratch Card is set in a specific world, as specified by the background, and contains several hidden icons depicting characters from that world. The cards also list a "Character Hunt" that requires the player to uncover a set amount of a specific character within a set amount of chances, and almost always lists a Bonus Hunt as well, which requires the player to uncover a single, specific character. Clearing a Character or Bonus Hunt will result in Data-Sora winning a random command or Avatar Part; these are completely random, and it is even possible for Data-Sora to win an Avatar Part that he already has.
In addition to the basic icons, there are three special icons: Dalmatian puppy, Mickey, and Captain Dark.
- Dalmatian puppy: Activates "Lucky Puppy!", which adds a puppy to Data-Sora's total. Once Data-Sora rescues all 99 puppies, he is rewarded with D-Firaga.
- Mickey: Activates "Bonus Chances", which adds one to three extra chances to Data-Sora's total.
- Captain Dark: Activates "Sneak Peek!", which allows the player to see all the character icons, uncovered for a second.
Gallery
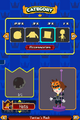
The Customize Avatar menu
| Kingdom Hearts coded |
|---|
| Characters |
| Party members |
| Data-Sora Cloud - Hercules - Donald Duck - Goofy |
| Antagonists |
| Maleficent - Pete - Sora's Heartless |
| Non-playable characters |
| Aladdin - Alice - Card Soldier - Cave of Wonders Guardian - Cerberus - Cheshire Cat - Chip and Dale - Cid - Data-Naminé - Data-Riku - Data-Roxas - Hades - Huey, Dewey, and Louie - Iago - Jafar - Jasmine - Jiminy Cricket - Mickey Mouse - Moogle - Philoctetes - Pluto - Queen of Hearts - Rock Titan - Selphie - Squall Leonhart - The Peddler - Tidus - Wakka - White Rabbit - Yuffie |
| Locations |
| Worlds |
| Disney Castle - Datascape - Dive to the Heart - Destiny Islands - Traverse Town - Wonderland - Olympus Coliseum - Agrabah - Hollow Bastion - Castle Oblivion |
| Terms |
| Bug Blox - Command Matrix - Datascape - Debug Ability - Ending Card - Gear Matrix - Hero's License - Keyblade - Keyhole - Mickey's Letters - Questploration - Stat Matrix - The End - World Card |
| Music |
| Kingdom Hearts Birth by Sleep & 358/2 Days Original Soundtrack - Simple and Clean |
| Archives |
| Artwork - Bosses - Items - Removed content |