Walkthrough:Kingdom Hearts II/Agrabah: Difference between revisions
m (Protected "Walkthrough:Kingdom Hearts II/Agrabah": Finish KH first (as requested by Erry) ([edit=sysop] (indefinite) [move=sysop] (indefinite))) |
m (Text replacement - " " to " ") |
||
| (16 intermediate revisions by 4 users not shown) | |||
| Line 1: | Line 1: | ||
== | ==<center>[[File:Agrabah Logo KHII.png|300px|link=Agrabah]]</center>== | ||
<center>[[File:Agrabah Logo KHII.png|300px|link=]]</center> | |||
===First Visit=== | ===First Visit=== | ||
An old enemy of ours, a parrot named {{Wtext|Iago|e}}, takes a break on the streets of {{Wtext|Agrabah|l}}. He then spots {{Wtext|Sora|c}}, {{Wtext|Donald|c}} and {{Wtext|Goofy|c}} walking around, and appoches them from behind. {{Wtext|Sora|c}} and {{Wtext|Donald|c}} then prepare to attack, but {{Wtext|Iago|c}} tries to claim that he's turned over a new leaf, yet only {{Wtext|Goofy|c}} believes him at first. Suddenly, the quaret are ambushed by a group of Heartless known as {{Wtext|Luna Bandits|e}}. You now have control of the party. The battle's connected to a timer, so defeat as many of the {{Wtext|Luna Bandits|e}} as possible before time runs out. | |||
{{Wtext|Sora|c}} then wonders where all the Heartless are coming from. {{Wtext|Iago}} is then ambushed, but his clumsy flying manages to send some crates falling... onto some of the {{Wtext|Luna Bandits|e}}, creating a path to a run-down shop fall of garbage. The trio then run inside, with {{Wtext|Iago|c}} not far behind. Because of this, {{Wtext|Sora|c}} and {{Wtext|Donald|c}} now trust {{Wtext|Iago|c}}, yet if he wants {{Wtext|Aladdin|c}} to also forgive him, he has to do it himself. Speaking of which; where is {{Wtext|Aladdin|c}}, anyway? {{Wtext|Iago|c}} thinks he's at the Palace, so let's head over there. | |||
Once you arive at the Palace, you'll be reunited with {{Wtext|Jasmine|c}}, Princess of {{Wtext|Agrabah|l}}, and a [[Princess of Heart]]. She's worried about {{Wtext|Aladdin|c}}, who's been leaving the {{Wtext|Palace|c}} every day since {{Wtext|Genie|c}} and {{Wtext|Carpet|c}} took off to see the world. She spots {{Wtext|Iago|c}} behind {{Wtext|Goofy|c}}'s back; thinking him to still be a bad guy, she tells {{Wtext|Sora|c}} to catch him, then runs off to warn the guards and everyone in the Palace. | |||
[[File:Aladdin KHII.png|right|140px|Aladdin]] | |||
The party then head off back to the town to find {{Wtext|Aladdin|c}}. They spot {{Wtext|Abu|c}} running off with a {{Wtext|Lamp|i}}, being chased by both {{Wtext|Aladdin|c}} and the {{Wtext|Peddler|}}. {{Wtext|Aladdin|c}} takes the lamp back and returns it to the grumpy {{Wtext|Peddler|c}}. {{Wtext|Sora|c}} and his friends explain that {{Wtext|Jasmine|c}} is worried about him, and {{Wtext|Aladdin|c}} explains that he goes to the town every day because there is always something going on. {{Wtext|Iago|c}} is then shown shivering; it's because the {{Wtext|Lamp|i}} that {{Wtext|Abu|c}} has stolen is the one to contain {{Wtext|Jafar|c}}. The party decided to get the lamp to prevent somebody from releasing {{Wtext|Jafar|c}}. At this point, {{Wtext|Aladdin|c}} will join the party. | |||
Head back to {{Wtext|The Peddler's Shop|l}}. The greedy {{Wtext|Peddler|c}} will offer to trade the lamp for a treasure... fit for a sultan! This could be a problem, and we cannot just take a piece of treasure from the Palace without upseting the Sultan. {{Wtext|Iago|c}} suggested that there might be a suiable piece of treasure at the {{Wtext|Cave of Wonders|l}}. | |||
After the cutscene ends, take the exit to the left of the shop, then head towards the back of the {{Wtext|Bazzar|l}}, where a Giant Door is located. You'll soon enter the {{Wtext|Palace Walls|l}}, which contains a save point and a {{Wtext|Treasure Chest|t}} containing a {{Wtext|Skill Ring|i}}. Take the left exit, and you'll soon reach the {{Wtext|Cave of Wonders|l}}, though {{Wtext|Pete|c}} is just a few minutes ahead. | |||
<!--It's fustrating to write this world's walkthrough down, and it's late at night here. I'll just leave the prizes and work on it more once I have the time - UxieLover--> | |||
Stone Guardians | |||
Sora = HP+ | |||
Donald = Bizzard | |||
Goofy = HP+ | |||
Aladdin = HP+ | |||
50 Heartless | |||
Sora = HP+ | |||
Donald = HP+ | |||
Goofy = Auto Healing | |||
Aladdin = HP+ | |||
Lords | |||
Sora = Explosion | |||
Donald = HP+ | |||
Goofy = Armor Slot+ | |||
Aladdin = HP+ | |||
<center><big>*****</big></center> | |||
Once you beat the Lords, here are the next worlds. If this is completed before Halloween Town, a cutscene with Kairi will play, unlocking Twilight Town. | |||
[[Walkthrough:Kingdom Hearts II/Halloween Town|Click here to visit Halloween Town >>>>]]<br> | |||
[[Walkthrough:Kingdom Hearts II/Pride Lands|Click here to visit the Pride Lands >>>>]]<br> | |||
[[Walkthrough:Kingdom Hearts II/Twilight Town|Click here to visit Twilight Town >>>>]] | |||
===Second Visit=== | |||
You get a page for the 100 Acre Wood in the Desert Ruins Tower. This is normally the last page, unless you missed the others. | |||
Jafar | |||
Sora = Fire Element (Firaga) | |||
Another prize here is the Wishing Lamp | |||
[[Walkthrough:Kingdom Hearts II/Halloween Town#Second Visit|Click here to visit Halloween Town >>>>]]<br> | |||
[[Walkthrough:Kingdom Hearts II/Pride Lands#Second Visit|Click here to visit the Pride Lands >>>>]]<br> | |||
[[Walkthrough:Kingdom Hearts II/100 Acre Wood#Sixth Visit|Click here to visit 100 Acre Wood >>>>]]<br> | |||
[[Walkthrough:Kingdom Hearts II/Twilight Town#Third Visit|Click here to visit Twilight Town (original only) >>>>]] | |||
===When You Return...=== | |||
{{WKH2TOC}} | |||
[[Category:Kingdom Hearts II walkthrough|{{SUBPAGENAME}}]] | |||
Latest revision as of 00:04, 12 January 2022


First Visit[edit]
An old enemy of ours, a parrot named Iago, takes a break on the streets of Agrabah. He then spots Sora, Donald and Goofy walking around, and appoches them from behind. Sora and Donald then prepare to attack, but Iago tries to claim that he's turned over a new leaf, yet only Goofy believes him at first. Suddenly, the quaret are ambushed by a group of Heartless known as Luna Bandits. You now have control of the party. The battle's connected to a timer, so defeat as many of the Luna Bandits as possible before time runs out.
Sora then wonders where all the Heartless are coming from. Iago is then ambushed, but his clumsy flying manages to send some crates falling... onto some of the Luna Bandits, creating a path to a run-down shop fall of garbage. The trio then run inside, with Iago not far behind. Because of this, Sora and Donald now trust Iago, yet if he wants Aladdin to also forgive him, he has to do it himself. Speaking of which; where is Aladdin, anyway? Iago thinks he's at the Palace, so let's head over there.
Once you arive at the Palace, you'll be reunited with Jasmine, Princess of Agrabah, and a Princess of Heart. She's worried about Aladdin, who's been leaving the Palace every day since Genie and Carpet took off to see the world. She spots Iago behind Goofy's back; thinking him to still be a bad guy, she tells Sora to catch him, then runs off to warn the guards and everyone in the Palace.
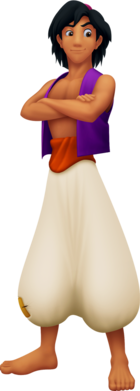
The party then head off back to the town to find Aladdin. They spot Abu running off with a Lamp, being chased by both Aladdin and the Peddler. Aladdin takes the lamp back and returns it to the grumpy Peddler. Sora and his friends explain that Jasmine is worried about him, and Aladdin explains that he goes to the town every day because there is always something going on. Iago is then shown shivering; it's because the Lamp that Abu has stolen is the one to contain Jafar. The party decided to get the lamp to prevent somebody from releasing Jafar. At this point, Aladdin will join the party.
Head back to The Peddler's Shop. The greedy Peddler will offer to trade the lamp for a treasure... fit for a sultan! This could be a problem, and we cannot just take a piece of treasure from the Palace without upseting the Sultan. Iago suggested that there might be a suiable piece of treasure at the Cave of Wonders.
After the cutscene ends, take the exit to the left of the shop, then head towards the back of the Bazzar, where a Giant Door is located. You'll soon enter the Palace Walls, which contains a save point and a Treasure Chest containing a Skill Ring. Take the left exit, and you'll soon reach the Cave of Wonders, though Pete is just a few minutes ahead.
Stone Guardians
Sora = HP+ Donald = Bizzard Goofy = HP+ Aladdin = HP+
50 Heartless
Sora = HP+ Donald = HP+ Goofy = Auto Healing Aladdin = HP+
Lords
Sora = Explosion Donald = HP+ Goofy = Armor Slot+ Aladdin = HP+
Once you beat the Lords, here are the next worlds. If this is completed before Halloween Town, a cutscene with Kairi will play, unlocking Twilight Town.
Click here to visit Halloween Town >>>>
Click here to visit the Pride Lands >>>>
Click here to visit Twilight Town >>>>
Second Visit[edit]
You get a page for the 100 Acre Wood in the Desert Ruins Tower. This is normally the last page, unless you missed the others.
Jafar
Sora = Fire Element (Firaga)
Another prize here is the Wishing Lamp
Click here to visit Halloween Town >>>>
Click here to visit the Pride Lands >>>>
Click here to visit 100 Acre Wood >>>>
Click here to visit Twilight Town (original only) >>>>
When You Return...[edit]
| Kingdom Hearts II |
|---|
| Walkthrough |
| Twilight Town - Hollow Bastion/Radiant Garden (Cavern of Remembrance) - The Land of Dragons - Beast's Castle - Olympus Coliseum - 100 Acre Wood - Disney Castle - Timeless River - Atlantica - Port Royal - Agrabah - Halloween Town - Pride Lands - Space Paranoids - The World That Never Was |
| Other |
| Level Pace - Drive Forms - Cups - Puzzle Pieces - Gummi Missions - Trophies |
