User:TheSilentHero/Werkplaats: Difference between revisions
m (TSH, replaced: {{c|Deep Freeze|Command}} → {{c|Deep Freeze|ability}}) |
|||
| (22 intermediate revisions by 3 users not shown) | |||
| Line 6: | Line 6: | ||
NOTE: I'm not very good at Japanese, so there may be some things that aren't correct. | NOTE: I'm not very good at Japanese, so there may be some things that aren't correct. | ||
== | ==Drop Bonus List== | ||
<div class="tabber"> | <div class="tabber"> | ||
<div class="tabbertab" title="Japanese"> | <div class="tabbertab" title="Japanese"> | ||
{|class="wikitable" width="100%" style="text-align:center" | {|class="wikitable" width="100%" style="text-align:center" | ||
|- style="background: | |+ドロップボーナスリスト | ||
| | |- style="background:salmon" | ||
|width=" | |rowspan="2" width="15%"|'''名前''' | ||
|width=" | |rowspan="2" width="40%"|'''効果''' | ||
|width=" | |colspan="3" width="10%"|'''必要DP''' | ||
| | |rowspan="2" width="35%"|'''選択できるようになる条件''' | ||
| | |- style="background:lightsalmon" | ||
|'''LV1''' | |||
|'''LV2''' | |||
|'''LV3''' | |||
|- | |||
|'''リンクブースト''' | |||
|リンクゲージがたまりやすくなる(P.39) | |||
|30 | |||
|80 | |||
|200 | |||
|Side: ソラのプランクスターズ・パラダイス、 Side:リクのラ・シテ・デ・クローシュ、 Side:リクのシンフォニー・オブ・ソーサリーのいずれかで、挑戦を待つカエルおうじを倒す | |||
|- | |||
|'''フリーフローブースト''' | |||
|フリーフローアタックで与えるダメージ量がアップする(LV1で+20%、 LV2で+30%、 LV3で+40%) | |||
|30 | |||
|80 | |||
|200 | |||
|Side: ソラのシンフォニー オブ ソーサリーで、 スペルカンを倒す | |||
|- | |- | ||
|'''アタックブースト''' | |||
| | |攻撃力がアップする(LV1で+2, LV2で+4, LV3で+6/{{hover|*1|キャンプメニューなどでの表示には反映されない}}) | ||
| | |30 | ||
| | |80 | ||
| | |200 | ||
| | |最初から選択可能 | ||
| | |||
|- | |- | ||
| | |'''マジックブースト''' | ||
| | |魔法力がアップする(LV1で+2, LV2で+4, LV3で+6/{{hover|*1|キャンプメニューなどでの表示には反映されない}}) | ||
|30 | |||
| | |80 | ||
|200 | |||
|最初から選択可能 | |||
|- | |- | ||
| | |'''ガードブースト''' | ||
| | |防御力がアップする(LV1で+1, LV2で+2, LV3で+3/{{hover|*1|キャンプメニューなどでの表示には反映されない}}) | ||
|30 | |||
|80 | |||
|200 | |||
|Side: ソラのザ・グリッドで、 リンズラーとのバトルに勝つ | |||
|- | |- | ||
|'''ブリードブースト''' | |||
| | |スピリットとの触れ合いの効果などが上がり、 相性を良くしやすくなる(P.222, 230~234, 236~237) | ||
| | |10 | ||
| | |40 | ||
| | |100 | ||
| | |Side: リクのラ・シテ・デ・クローシュで、 バレットガゴイルを倒す | ||
|- | |- | ||
|colspan=" | |'''スピリットリレイズ''' | ||
| | |HPがゼロになったスピリットが、 1本につき1回だけ、 自動的に全回復するようになる(別のエリアへ移動すると、 再度回復可能になる) | ||
|colspan="3"|10 | |||
|Side: ソラのトラヴァースタウン(再訪)で、 スペルカンが呼び出した3体のドリームイーターを倒す | |||
|- | |- | ||
|'''(アイテム名やコマンド名)''' | |||
| | |そのアイテムやコマンドを入手する | ||
| | |colspan="3"|(下記参照) | ||
| | |最初から選択可能。表2や表3の候補からひとつが選ばれて表示される。候補はショップレベル(P.56)に応じて増えていく | ||
| | |} | ||
| | {|class="wikitable" width="100%" style="text-align:center" | ||
|rowspan="2"| | |+ソラがドロップしたとき(つぎの操作キャラクターがリクのとき)のコマンドやアイテムの候補{{hover|*|確率はおおよそのもの}} | ||
|- style="background:salmon" | |||
|rowspan="2" width="15%"|'''名前''' | |||
|rowspan="2" width="5%"|'''必要DP''' | |||
|colspan="8" width="80%"|'''Side: ソラのショップレベルごとの選ばれる確率''' | |||
|- style="background:lightsalmon" | |||
|'''LV1'''||'''LV2'''||'''LV3'''||'''LV4'''||'''LV5'''||'''LV6'''||'''LV7'''||'''LV8''' | |||
|- | |||
|[[File:Icon Item KHBBS.png|20x20px]] '''ポーション'''||10||50.0%||33.3%||16.7%||11.2%||8.5%||—||—||— | |||
|- | |||
|[[File:Icon Training Toy KH3D.png|20x20px]] '''バルーン'''||20||50.0%||33.3%||16.7%||11.2%||8.5%||7.9%||6.6%||6.7% | |||
|- | |- | ||
| | |[[File:Icon Reprisal KHBBS.png|20x20px]] '''エアリカバリー'''||30||—||33.3%||16.7%||10.4%||7.5%||6.6%||5.2%||4.9% | ||
| | |||
| | |||
| | |||
|5% | |||
|- | |- | ||
| | |[[File:Icon Training Toy KH3D.png|20x20px]] '''ウォーターバレル'''||20||—||—||16.7%||11.2%||8.5%||7.9%||6.6%||6.7% | ||
| | |||
|- | |- | ||
| | |[[File:Icon Training Toy KH3D.png|20x20px]] '''トレジャーゴーグル'''||30||—||—||16.7%||11.2%||8.5%||7.9%||6.6%||6.7% | ||
| | |||
| | |||
| | |||
|2 | |||
| | |||
| | |||
|- | |- | ||
| | |[[File:Icon Defense KHBBS.png|20x20px]] '''ウェークガード'''||40||—||—||16.7%||11.2%||7.5%||7.2%||5.2%||5.4% | ||
| | |||
| | |||
|2 | |||
| | |||
|- | |- | ||
| | |[[File:Icon Item KHBBS.png|20x20px]] '''ハイポーション'''||20||—||—||—||11.2%||8.5%||7.9%||6.6%||6.7% | ||
| | |||
| | |||
| | |||
|- | |- | ||
| | |[[File:Icon Item KHBBS.png|20x20px]] '''メガポーション'''||30||—||—||—||11.2%||8.5%||7.9%||6.6%||6.7% | ||
| | |- | ||
| | |[[File:Icon Reprisal KHBBS.png|20x20px]] '''リベンジブラスト'''||40||—||—||—||11.2%||8.5%||7.2%||5.9%||5.4% | ||
| | |- | ||
| | |[[File:Icon Attack KHBBS.png|20x20px]] '''ダークブレイク'''||50||—||—||—||—||8.5%||7.9%||5.9%||6.0% | ||
|- | |- | ||
| | |[[File:Icon Attack KHBBS.png|20x20px]] '''タイムストーム'''||50||—||—||—||—||8.5%||7.9%||5.9%||6.0% | ||
| | |||
| | |||
| | |||
| | |||
|- | |- | ||
| | |[[File:Icon Magic KHBBS.png|20x20px]] '''ケアルラ'''||50||—||—||—||—||8.5%||7.9%||5.9%||6.0% | ||
| | |||
| | |||
| | |||
|- | |- | ||
| | |[[File:Icon Defense KHBBS.png|20x20px]] '''スライドカード'''||50||—||—||—||—||—||7.9%||6.6%||6.7% | ||
| | |||
| | |||
| | |||
| | |||
|- | |- | ||
| | |[[File:Icon Attack KHBBS.png|20x20px]] '''マグネスパイラル'''||50||—||—||—||—||—||7.9%||6.6%||6.0% | ||
| | |||
| | |||
| | |||
| | |||
|- | |- | ||
| | |[[File:Icon Magic KHBBS.png|20x20px]] '''ダークファイガ'''||60||—||—||—||—||—||—||6.6%||6.7% | ||
| | |||
| | |||
| | |||
|- | |- | ||
| | |[[File:Icon Movement KHBBS.png|20x20px]] '''ダークロール'''||60||—||—||—||—||—||—||6.6%||6.7% | ||
| | |||
|- | |- | ||
|colspan=" | |[[File:Icon Defense KHBBS.png|20x20px]] '''ダークバリア'''||60||—||—||—||—||—||—||6.6%||6.7% | ||
| | |} | ||
|0.9 | {|class="wikitable" width="100%" style="text-align:center" | ||
|2 | |+リクがドロップしたとき(つぎの操作キャラクターがソラのとき)のコマンドやアイテムの候補{{hover|*|確率はおおよそのもの}} | ||
| | |- style="background:salmon" | ||
| | |rowspan="2" width="15%"|'''名前''' | ||
|rowspan="2" width="5%"|'''必要DP''' | |||
|colspan="8" width="80%"|'''Side: リクのショップレベルごとの選ばれる確率''' | |||
|- style="background:lightsalmon" | |||
|'''LV1'''||'''LV2'''||'''LV3'''||'''LV4'''||'''LV5'''||'''LV6'''||'''LV7'''||'''LV8''' | |||
|- | |||
|[[File:Icon Item KHBBS.png|20x20px]] '''ポーション'''||10||50.0%||33.3%||16.7%||11.2%||9.2%||—||—||— | |||
|- | |||
|[[File:Icon Training Toy KH3D.png|20x20px]] '''バルーン'''||20||50.0%||33.3%||16.7%||11.2%||9.2%||8.6%||8.9%||9.2% | |||
|- | |- | ||
| | |[[File:Icon Reprisal KHBBS.png|20x20px]] '''エアリカバリー'''||30||—||33.3%||16.7%||10.4%||8.6%||7.0%||7.0%||6.4% | ||
| | |||
|- | |- | ||
| | |[[File:Icon Training Toy KH3D.png|20x20px]] '''ウォーターバレル'''||20||—||—||16.7%||11.2%||9.2%||8.6%||8.9%||9.2% | ||
| | |||
| | |||
| | |||
| | |||
| | |||
| | |||
|- | |- | ||
| | |[[File:Icon Training Toy KH3D.png|20x20px]] '''トレジャーゴーグル'''||30||—||—||16.7%||11.2%||9.2%||8.6%||8.9%||9.2% | ||
| | |||
|2. | |||
| | |||
| | |||
|- | |- | ||
| | |[[File:Icon Defense KHBBS.png|20x20px]] '''ウェークガード'''||40||—||—||16.7%||11.2%||8.6%||7.8%||7.0%||7.2% | ||
| | |||
|- | |- | ||
| | |[[File:Icon Item KHBBS.png|20x20px]] '''ハイポーション'''||20||—||—||—||11.2%||9.2%||8.6%||8.9%||9.2% | ||
| | |||
|— | |||
|— | |||
|— | |||
| | |||
| | |||
|- | |- | ||
| | |[[File:Icon Item KHBBS.png|20x20px]] '''メガポーション'''||30||—||—||—||11.2%||9.2%||8.6%||8.9%||9.2% | ||
| | |- | ||
| | |[[File:Icon Reprisal KHBBS.png|20x20px]] '''リベンジレイド'''||40||—||—||—||11.2%||9.2%||7.8%||7.9%||7.2% | ||
| | |||
| | |||
|- | |- | ||
| | |[[File:Icon Attack KHBBS.png|20x20px]] '''タイムストーム'''||50||—||—||—||—||9.2%||8.6%||7.9%||8.3% | ||
| | |||
|2. | |||
| | |||
| | |||
|- | |- | ||
| | |[[File:Icon Magic KHBBS.png|20x20px]] '''ケアルラ'''||50||—||—||—||—||9.2%||8.6%||7.9%||8.3% | ||
| | |||
| | |||
|- | |- | ||
| | |[[File:Icon Defense KHBBS.png|20x20px]] '''スライドカード'''||50||—||—||—||—||—||8.6%||8.9%||8.3% | ||
| | |||
|- | |- | ||
|rowspan="2"|''' | |[[File:Icon Attack KHBBS.png|20x20px]] '''マグネスパイラル'''||50||—||—||—||—||—||8.6%||8.9%||8.3% | ||
| | |} | ||
| | </div><div class="tabbertab" title="English"> | ||
| | {|class="wikitable" width="100%" style="text-align:center" | ||
| | |+Drop Bonus List | ||
| | |- style="background:salmon" | ||
| | |rowspan="2" width="15%"|'''Name''' | ||
|rowspan="2" width="40%"|'''Effect''' | |||
|colspan="3" width="10%"|'''Required DP''' | |||
|rowspan="2" width="35%"|'''Unlock condition''' | |||
|- style="background:lightsalmon" | |||
|'''LV1''' | |||
|'''LV2''' | |||
|'''LV3''' | |||
|- | |- | ||
| | |'''Link Accelerator''' | ||
| | |Increases Link Gauge gain. (P.39) | ||
| | |30 | ||
| | |80 | ||
| | |200 | ||
|Side: Sora - Prankster's Paradise, Side: Riku - La Cité des Cloches, Side: Riku - Symphony of Sorcery, when the Lord Kyroo who waits to challenge you is defeated in any of these places. | |||
|- | |- | ||
| | |'''Flowmotion Turbo''' | ||
| | |Increases damage given by Flowmotion Commands (LV1 +20%, LV2 +30%, LV3 +40%) | ||
|30 | |||
|80 | |||
|200 | |||
|Side: Sora - Symphony of Sorcery, when Spellican is defeated. | |||
|- | |- | ||
| | |'''Attack Gain''' | ||
| | |Increases attack power (LV1 +2, LV2 +4, LV3 +6/{{hover|*1|The increased stat is not shown in the Camp Menu}}) | ||
| | |30 | ||
|1 | |80 | ||
| | |200 | ||
| | |Can be selected from the beginning. | ||
|- | |||
|'''Magic Gain''' | |||
|Increases magic power (LV1 +2, LV2 +4, LV3 +6/{{hover|*1|The increased stat is not shown in the Camp Menu}}) | |||
|30 | |||
|80 | |||
|200 | |||
|Can be selected from the beginning. | |||
|- | |||
|'''Defense Gain''' | |||
|Increases defense power (LV1 +1, LV2 +2, LV3 +3/{{hover|*1|The increased stat is not shown in the Camp Menu}}) | |||
|30 | |||
|80 | |||
|200 | |||
|Side: Sora - The Grid, after winning the battle against Rinzler. | |||
|- | |||
|'''Affinity Gain''' | |||
|Increases effect of interaction with Spirits, and makes it more likely to improve affinity. (P.222, 230~234, 236~237) | |||
|10 | |||
|40 | |||
|100 | |||
|Side: Riku - La Cité des Cloches, defeat Wargoyle. | |||
|- | |- | ||
|colspan=" | |'''Spirit Auto-Life''' | ||
| | |When a Spirit's HP reaches zero, only once will it be fully recovered. (When moving to another area, it is possible to recover again.) | ||
|colspan="3"|10 | |||
|Side: Sora - Traverse Town (Revisit), defeat the 3 Dream Eaters the Spellican summons. | |||
|- | |- | ||
|'''(Item name/Command name)''' | |||
| | |Obtain the item or command. | ||
| | |colspan="3"|(See below) | ||
| | |Can be selected from the beginning. Only one candidate is displayed for selection. Candidates will increase depending on the Shop Level (P.56) | ||
| | |} | ||
| | {|class="wikitable" width="100%" style="text-align:center" | ||
|rowspan=" | |+When Sora has dropped (when the next operating character is Riku) possible commands and items.{{hover|*|Approximate probabilities}} | ||
|- style="background:salmon" | |||
|rowspan="2" width="15%"|'''Name''' | |||
|rowspan="2" width="5%"|'''Required DP''' | |||
|colspan="8" width="80%"|'''Side: Sora - Probability of being selected in each Shop Level''' | |||
|- style="background:lightsalmon" | |||
|'''LV1'''||'''LV2'''||'''LV3'''||'''LV4'''||'''LV5'''||'''LV6'''||'''LV7'''||'''LV8''' | |||
|- | |- | ||
| | |[[File:Icon Item KHBBS.png|20x20px]] '''Potion'''||10||50.0%||33.3%||16.7%||11.2%||8.5%||—||—||— | ||
| | |||
|0. | |||
| | |||
| | |||
|- | |- | ||
| | |[[File:Icon Training Toy KH3D.png|20x20px]] '''Balloon'''||20||50.0%||33.3%||16.7%||11.2%||8.5%||7.9%||6.6%||6.7% | ||
| | |||
|3. | |||
| | |||
|- | |- | ||
| | |[[File:Icon Reprisal KHBBS.png|20x20px]] '''Aerial Recovery'''||30||—||33.3%||16.7%||10.4%||7.5%||6.6%||5.2%||4.9% | ||
| | |||
|- | |- | ||
| | |[[File:Icon Training Toy KH3D.png|20x20px]] '''Water Barrel'''||20||—||—||16.7%||11.2%||8.5%||7.9%||6.6%||6.7% | ||
| | |||
|— | |||
|— | |||
| | |||
| | |||
| | |||
|- | |- | ||
| | |[[File:Icon Training Toy KH3D.png|20x20px]] '''Treasure Goggles'''||30||—||—||16.7%||11.2%||8.5%||7.9%||6.6%||6.7% | ||
|— | |||
|— | |||
| | |||
| | |||
|- | |- | ||
| | |[[File:Icon Defense KHBBS.png|20x20px]] '''Wake-Up Block'''||40||—||—||16.7%||11.2%||7.5%||7.2%||5.2%||5.4% | ||
| | |||
| | |||
| | |||
| | |||
|- | |- | ||
| | |[[File:Icon Item KHBBS.png|20x20px]] '''Hi-Potion'''||20||—||—||—||11.2%||8.5%||7.9%||6.6%||6.7% | ||
| | |||
|2. | |||
| | |||
| | |||
|- | |- | ||
| | |[[File:Icon Item KHBBS.png|20x20px]] '''Mega-Potion'''||30||—||—||—||11.2%||8.5%||7.9%||6.6%||6.7% | ||
| | |||
|- | |- | ||
| | |[[File:Icon Reprisal KHBBS.png|20x20px]] '''Payback Blast'''||40||—||—||—||11.2%||8.5%||7.2%||5.9%||5.4% | ||
| | |||
| | |||
| | |||
|2 | |||
| | |||
| | |||
|- | |- | ||
| | |[[File:Icon Attack KHBBS.png|20x20px]] '''Dark Break'''||50||—||—||—||—||8.5%||7.9%||5.9%||6.0% | ||
| | |||
| | |||
| | |||
| | |||
|- | |- | ||
| | |[[File:Icon Attack KHBBS.png|20x20px]] '''Timestorm'''||50||—||—||—||—||8.5%||7.9%||5.9%||6.0% | ||
| | |- | ||
| | |[[File:Icon Magic KHBBS.png|20x20px]] '''Cura'''||50||—||—||—||—||8.5%||7.9%||5.9%||6.0% | ||
| | |- | ||
| | |[[File:Icon Defense KHBBS.png|20x20px]] '''Sliding Block'''||50||—||—||—||—||—||7.9%||6.6%||6.7% | ||
|- | |- | ||
| | |[[File:Icon Attack KHBBS.png|20x20px]] '''Magnet Spiral'''||50||—||—||—||—||—||7.9%||6.6%||6.0% | ||
| | |||
| | |||
| | |||
| | |||
|- | |- | ||
| | |[[File:Icon Magic KHBBS.png|20x20px]] '''Dark Firaga'''||60||—||—||—||—||—||—||6.6%||6.7% | ||
| | |||
|- | |- | ||
| | |[[File:Icon Movement KHBBS.png|20x20px]] '''Dark Roll'''||60||—||—||—||—||—||—||6.6%||6.7% | ||
| | |||
| | |||
| | |||
| | |||
| | |||
| | |||
|- | |- | ||
| | |[[File:Icon Defense KHBBS.png|20x20px]] '''Dark Barrier'''||60||—||—||—||—||—||—||6.6%||6.7% | ||
| | |} | ||
| | {|class="wikitable" width="100%" style="text-align:center" | ||
| | |+When Riku has dropped (when the next operating character is Sora) possible commands and items.{{hover|*|Approximate probabilities}} | ||
| | |- style="background:salmon" | ||
|rowspan="2" width="15%"|'''Name''' | |||
|rowspan="2" width="5%"|'''Required DP''' | |||
|colspan="8" width="80%"|'''Side: Riku - Probability of being selected in each Shop Level''' | |||
|- style="background:lightsalmon" | |||
|'''LV1'''||'''LV2'''||'''LV3'''||'''LV4'''||'''LV5'''||'''LV6'''||'''LV7'''||'''LV8''' | |||
|- | |- | ||
| | |[[File:Icon Item KHBBS.png|20x20px]] '''Potion'''||10||50.0%||33.3%||16.7%||11.2%||9.2%||—||—||— | ||
| | |||
|- | |- | ||
| | |[[File:Icon Training Toy KH3D.png|20x20px]] '''Balloon'''||20||50.0%||33.3%||16.7%||11.2%||9.2%||8.6%||8.9%||9.2% | ||
| | |||
| | |||
|2 | |||
| | |||
| | |||
|- | |- | ||
| | |[[File:Icon Reprisal KHBBS.png|20x20px]] '''Aerial Recovery'''||30||—||33.3%||16.7%||10.4%||8.6%||7.0%||7.0%||6.4% | ||
| | |||
|- | |- | ||
| | |[[File:Icon Training Toy KH3D.png|20x20px]] '''Water Barrel'''||20||—||—||16.7%||11.2%||9.2%||8.6%||8.9%||9.2% | ||
| | |||
| | |||
| | |||
| | |||
| | |||
| | |||
|- | |- | ||
| | |[[File:Icon Training Toy KH3D.png|20x20px]] '''Treasure Goggles'''||30||—||—||16.7%||11.2%||9.2%||8.6%||8.9%||9.2% | ||
| | |||
| | |||
| | |||
| | |||
|- | |- | ||
| | |[[File:Icon Defense KHBBS.png|20x20px]] '''Wake-Up Block'''||40||—||—||16.7%||11.2%||8.6%||7.8%||7.0%||7.2% | ||
| | |||
|- | |- | ||
| | |[[File:Icon Item KHBBS.png|20x20px]] '''Hi-Potion'''||20||—||—||—||11.2%||9.2%||8.6%||8.9%||9.2% | ||
| | |||
| | |||
| | |||
| | |||
| | |||
| | |||
|- | |- | ||
| | |[[File:Icon Item KHBBS.png|20x20px]] '''Mega-Potion'''||30||—||—||—||11.2%||9.2%||8.6%||8.9%||9.2% | ||
| | |||
| | |||
| | |||
| | |||
|- | |- | ||
| | |[[File:Icon Reprisal KHBBS.png|20x20px]] '''Payback Raid'''||40||—||—||—||11.2%||9.2%||7.8%||7.9%||7.2% | ||
| | |||
|- | |- | ||
| | |[[File:Icon Attack KHBBS.png|20x20px]] '''Timestorm'''||50||—||—||—||—||9.2%||8.6%||7.9%||8.3% | ||
|— | |- | ||
|— | |[[File:Icon Magic KHBBS.png|20x20px]] '''Cura'''||50||—||—||—||—||9.2%||8.6%||7.9%||8.3% | ||
|— | |||
| | |||
| | |||
|- | |- | ||
| | |[[File:Icon Defense KHBBS.png|20x20px]] '''Sliding Block'''||50||—||—||—||—||—||8.6%||8.9%||8.3% | ||
| | |||
|- | |- | ||
|rowspan="2"|''' | |[[File:Icon Attack KHBBS.png|20x20px]] '''Magnet Spiral'''||50||—||—||—||—||—||8.6%||8.9%||8.3% | ||
| | |} | ||
| | </div></div> | ||
| | |||
| | ===Link Gauge (P.39)=== | ||
| | {|class="wikitable" width="100%" style="text-align:center" | ||
| | |- style="background:salmon" | ||
|rowspan="2"|'''1 or both Spirits''' | |||
|rowspan="2"|'''Condition''' | |||
|colspan="4"|'''Amount increased for every level of the "Link Accelerator" Relay Bonus''' | |||
|- style="background:lightsalmon" | |||
|None | |||
|LV1 | |||
|LV2 | |||
|LV3 | |||
|- | |- | ||
| | |1 | ||
| | |Spirit attacks the enemy or receives damage from an enemy's attack | ||
|4.5 | |colspan="4"|Basic value x attack's power magnification value x (10 + current affinity level) (%).<br>For Magic commands, the power magnification value becomes 1/4 of the original.<br>Basic value is 0.5. When the "Link Accelerator" Relay Bonus is under effect, it is increased by 0.1 per level. | ||
|- | |- | ||
| | |1 | ||
| | |While the Spirits ability "Link Critical" is equipped, the operating character and Spirit attack an enemy at the same time. (This percentage is added to the above percentage.) | ||
|10% | |||
|12% | |||
|14% | |||
|16% | |||
|- | |- | ||
| | |1 | ||
| | |Spirit recovers or supports the operating character. | ||
| | |10% | ||
| | |12% | ||
| | |14% | ||
| | |16% | ||
|- | |||
|1 | |||
|Successful use of Link Block | |||
|10% | |||
|12% | |||
|14% | |||
|16% | |||
|- | |||
|1 | |||
|Reviving a Spirit when its HP reaches zero. | |||
|25% | |||
|30% | |||
|35% | |||
|40% | |||
|- | |||
|Both | |||
|The operating character is damaged, while the Support ability "Damage Syphon" is equipped. | |||
|0.5% | |||
|0.6% | |||
|0.7% | |||
|0.8% | |||
|- | |||
|Both | |||
|Using "Break Time" and obtaining the Link Gauge accumulation effect. | |||
|colspan="4"|100% | |||
|- | |- | ||
| | |Both | ||
|colspan=" | |Use an "Elixir" or "Megalixir" | ||
|colspan="4"|100% | |||
|- | |- | ||
|colspan=" | |Both | ||
|Use a "Dream Candy" | |||
|colspan="4"|50% (Increases by 5% for every "Item Boost" Status ability equipped.) | |||
|- | |- | ||
| | |Both | ||
|colspan=" | |When using the "Lucky Dice" Link Attack with Juggle Pup or R & R Seal, roll the effect of restoring the ally. | ||
|colspan="4"|100% | |||
|} | |} | ||
{| | |||
===Affinity (P.222)=== | |||
{|width="90%" | |||
|rowspan="2" width="60%" align=center| | |||
{|class="wikitable" style="text-align:center" | |||
|+Table 1: Parameters related to Affinity | |||
!Name | |||
!Description | |||
|- | |||
|Current Affinity level | |||
|Quality of relationship with Sora and Riku. It affects things like the pace to act in battle or accumulation of the Link Gauge. This value is related to the "Affinity maintain value" below. | |||
|- | |- | ||
|Maximum Affinity level | |||
|Maximum value of current Affinity level. The initial value is determined at the time of breeding (P.226), and rises with the below mentioned "Affinity points" (the limit is 9). | |||
|- | |- | ||
| | |Affinity maintain value | ||
|Value related to the reduction of the current Affinity level. It does not appear on the screen. It goes down when battling for a long time (see figure below), and recovers by petting (P.229). | |||
|- | |- | ||
| | |Affinity point | ||
| | |Value related to the rise of maximum Affinity level. It is shown as a pink gauge. It rises when an ally defeats an enemy and when subjected to petting, when it accumulates to the value in table 2, the maximum Affinity level rises. The amount gained when defeating an enemy is shown in table 3, the amount gained when petting is shown on P.231~234. | ||
|} | |} | ||
| | |align=center| | ||
| | {|class="wikitable" style="text-align:center" | ||
{|class="wikitable" | |+Table 2: The amount of Affinity points needed to reach the next Affinity level | ||
| | !Level | ||
|2 | !Points | ||
!Level | |||
!Points | |||
|- | |||
|2||100 | |||
|6||1200 | |||
|- | |||
|3||200 | |||
|7||1600 | |||
|- | |||
|4||400 | |||
|8||2000 | |||
|- | |- | ||
| | |5||800 | ||
| | |9||— | ||
|} | |} | ||
|- | |- | ||
| | |align=center| | ||
| | {|class="wikitable" style="text-align:center" | ||
| | |+Table 3: The amount of Affinity points gained when defeating an enemy | ||
!Level of Affinity Gain | |||
!Amount of Affinity points gained | |||
|- | |- | ||
| | |None||1 | ||
| | |||
| | |||
|- | |- | ||
| | |1||2 | ||
| | |||
|- | |- | ||
| | |2||2 | ||
| | |||
| | |||
|- | |- | ||
| | |3||3 | ||
| | |||
|} | |} | ||
|} | |} | ||
;Affinity maintain value and how the current Affinity level drops | |||
*(Affinity level 5/5, Affinity maintain value 20/20): Maximum and initial value of the Affinity maintain value becomes [maximum Affinity level x 3 + 5]. | |||
:-Battling for 60 seconds (+10 extra seconds for each level of "Affinity Gain") | |||
*(Affinity level 5/5, Affinity maintain value 19/20): Affinity maintain value drops by 1. When the Spirit's HP drops to zero, the Affinity maintain value becomes zero at once. | |||
:-Affinity maintain value is reduced to zero | |||
*(Affinity level 5/5, Affinity maintain value 0/20): When the Affinity maintain value becomes zero, the current Affinity level is not yet lowered. | |||
:-Battling for 60 seconds (+10 extra seconds for each level of "Affinity Gain") | |||
*(Affinity Level 4/5, Affinity maintain value 0/20): Current Affinity level has a 50% chance of dropping by 1. Whether or not the current Affinity level gets reduced is decided every 60 seconds (+10 extra seconds for each level of "Affinity Gain") | |||
===Petting (P.229~237)=== | |||
====Benefits of petting (P.229)==== | |||
;Benefit 1<nowiki>:</nowiki> Spirit's stats rise | |||
Aside from Paint Guns, petting raises a Spirit's stats. The kind of status that rises is shown in the table below, the amount increased varies greatly depending on the "Affinity Gain" Relay Bonus and Happy value (P.230) (see P.231~237 for details). | |||
{|class="wikitable" width="100%" style="text-align:center" | {|class="wikitable" width="100%" style="text-align:center" | ||
!rowspan="2" colspan="3"|Kind of petting | |||
!colspan="8"|Status that can raise | |||
| | |- | ||
| | |'''Affinity Point''' | ||
|'''Experience Point''' | |||
|'''Link Point''' | |||
|'''Maximum HP''' | |||
|'''Strength''' | |||
|'''Magic''' | |||
|'''Defense''' | |||
|'''Attribute Resistance''' | |||
|- | |||
|colspan="3"|Physical contact||↑||↑||↑||—||—||—||—||— | |||
|- | |||
|rowspan="9"|Training Toy||rowspan="3"|Toy||Balloon||↑↑||↑↑||—||—||—||—||—||— | |||
|- | |- | ||
| | |Water Barrel||—||↑↑||↑↑||—||—||—||—||— | ||
| | |||
| | |||
| | |||
| | |||
| | |||
| | |||
|- | |- | ||
| | |Treasure Goggles||↑||—||—||—||—||—||—||— | ||
| | |||
| | |||
| | |||
|- | |- | ||
|colspan="2 | |colspan="2"|Paint Gun||—||—||—||—||—||—||—||— | ||
| | |||
|- | |- | ||
| | |rowspan="5"|Candy||Confetti Candy||—||—||↑↑||↑||↑||—||—||— | ||
| | |||
| | |||
| | |||
| | |||
| | |||
|- | |- | ||
| | |Ice Dream Cone||—||—||↑↑||↑||—||↑||—||— | ||
| | |||
|- | |- | ||
| | |Shield Cookie||—||—||↑↑||↑||—||—||↑||— | ||
| | |||
| | |||
| | |||
| | |||
| | |||
| | |||
|- | |- | ||
| | |Block-It Chocolate||—||—||↑↑||↑||—||—||—||↑ | ||
| | |||
| | |||
| | |||
| | |||
|- | |- | ||
| | |Royal Cake||—||—||↑↑||↑||↑||↑||↑||↑ | ||
|} | |||
;Benefit 2<nowiki>:</nowiki> Recovers current Affinity level | |||
{|class="wikitable" width="40%" style="text-align:center" align="right" | |||
|+Table 1: Amount of Affinity maintain value restored | |||
!colspan="3"|Type of petting | |||
!Amount recovered | |||
|- | |- | ||
|rowspan=" | |rowspan="2"|Physical contact||colspan="2"|Favorite spot||40~60% of maximum value | ||
|Physical | |||
| | |||
|2 | |||
| | |||
| | |||
|- | |- | ||
| | |colspan="2"|Dislike spot||20~40% of maximum value | ||
|- | |- | ||
| | |rowspan="4"|Training Toy||colspan="2"|Candy||40~60% of maximum value | ||
| | |||
| | |||
| | |||
|- | |- | ||
| | |colspan="2"|Paint Gun||(No change) | ||
|- | |- | ||
| | |rowspan="2"|Toy||Anything but "dislike"||40~60% of maximum value | ||
| | |||
| | |||
| | |||
|- | |- | ||
| | |"Dislike"||20~40% of maximum value | ||
| | |} | ||
| | The Affinity maintain value(P.222) is recovered by petting. Based on the results, the current Affinity level will also be recovered, as seen in table 2. | ||
| | {|class="wikitable" width="100%" style="text-align:center" | ||
|+Table 2: How high the current Affinity level becomes after recovering the Affinity maintain value. (When it becomes lower than before, it will not change) | |||
!Affinity maintain value after recovery | |||
|8~10||11~13||14~16||17~19||20~22||23~25||26~28||29~31||32 | |||
|- | |- | ||
| | !Current Affinity level | ||
| | |1||2||3||4||5||6||7||8||9 | ||
| | |} | ||
|2 | ;Benefit 3<nowiki>:</nowiki> Disposition changes | ||
| | {| class="wikitable" width="40%" style"text-align:center" align="right" | ||
!colspan="3"|Type of petting | |||
!Disposition after change | |||
!Probability | |||
|- | |||
|rowspan="4"|Physical contact||rowspan="2"|When rubbing||Favorite spot||Type II (Yellow)||8% | |||
|- | |||
|Dislike spot||Type IV (Green)||8% | |||
|- | |- | ||
| | |rowspan="2"|When poking||Favorite spot||Type III (Blue)||8% | ||
| | |||
| | |||
| | |||
| | |||
|- | |- | ||
| | |Dislike spot||Type I (Purple)||8% | ||
| | |||
|- | |- | ||
| | |rowspan="5"|Training Toy||rowspan="4"|Candy||Confetti Candy||Type I (Purple)||15% | ||
| | |||
|- | |- | ||
| | |Ice Dream Cone||Type II (Yellow)||10% | ||
| | |||
| | |||
| | |||
|- | |- | ||
| | |Shield Cookie||Type III (Blue||10% | ||
| | |||
|- | |- | ||
| | |Block-it Chocolate||Type IV (Green)||10% | ||
| | |||
| | |||
| | |||
| | |||
|- | |- | ||
| | |colspan="2"|Anything else||colspan="2"|(No change) | ||
| | |} | ||
|2 | When interacting through petting or giving candy, the Spirit can change dispositions. The table contains information on how to change it. (When the forecast is Risky Day, the probability is doubled.) After the disposition has been changed, until you close the Spirit screen, it will not change again. | ||
|4 | |||
|1 | ====Changing the Spirit's mood (P.230)==== | ||
Although not visible on the screen, each Spirit has a "Happy value" and "Happy maintain value". Happy value is the mood of the Spirit. The higher the value, the more likely it is for stats to increase, and increases the amount raised. Happy maintain value is a value related to the increase or decrease of the Happy value. | |||
When the Happy maintain value is 1 or more after petting, the Happy value increases, and Happy maintain value is reduced. When the Happy maintain value is 0 after petting, the Happy value is greatly reduced. | |||
;Features of the Happy value | |||
*The initial value will vary depending on the current Affinity level. | |||
*When the Happy value is 71 or more, music notes and light will surround the Spirit. | |||
*When you close the Spirit screen, the Happy value will go back to the initial value. | |||
*The higher the level of "Affinity Gain", the easier it is to reach the maximum Happy value. | |||
;Features of the Happy maintain value | |||
*The initial value is 100. | |||
*It recovers 20 for every 5 minutes of real time. | |||
{|class="wikitable" style="text-align:center" | |||
!Current Affinity level | |||
|0||1||2||3||4||5||6||7||8||9 | |||
|- | |||
!Initial Happy value | |||
|0||15||15||20||20||30||30||35||35||40 | |||
|} | |||
{|class="wikitable" style="text-align:center" | |||
!colspan="3"| | |||
!colspan="5"|Amount of change of Happy value | |||
!rowspan="3"|Amount of change<br>of Happy maintain value | |||
|- | |||
!colspan="3"|Happy maintain value | |||
!colspan="4"|1 or higher | |||
!0 | |||
|- | |- | ||
!colspan="3"|Level of Affinity Gain | |||
| | !None||1||2||3||(All levels) | ||
|- | |- | ||
|rowspan=" | |rowspan="2"|Petting | ||
| | |colspan="2"|Favorite spot||+12||+15||+18||+24||-20||-9~-3 | ||
| | |||
| | |||
| | |||
| | |||
| | |||
|- | |- | ||
| | |colspan="2"|Dislike spot||+6||+9||+12||+18||-30||-15~-5 | ||
| | |||
| | |||
| | |||
| | |||
|- | |- | ||
| | |rowspan="5"|Training Toy||colspan="2"|Toy||+24||+30||+36||+48||-30||-15~-5 | ||
| | |||
| | |||
| | |||
|- | |- | ||
| | |colspan="2"|Paint Gun||colspan="6"|(No change) | ||
| | |||
|- | |- | ||
| | |rowspan="3"|Candy||Favorite||+30||+36||+48||+54||-20||-9~-3 | ||
| | |||
|- | |- | ||
| | |Ordinary||+24||+30||+36||+48||-30||-15~-5 | ||
| | |||
| | |||
| | |||
| | |||
| | |||
| | |||
|- | |- | ||
| | |Dislike||+6||+9||+12||+18||-40||-21~-7 | ||
| | |} | ||
| | |||
| | ====P.231==== | ||
| | |||
==Link Attacks== | |||
<div class="tabber"> | |||
<div class="tabbertab" title="Japanese"> | |||
{|class="wikitable" width="100%" style="text-align:center" | |||
|- style="background:lightgreen" | |||
|colspan="2" width="25%"|'''名前''' | |||
|width="7%"|'''属性''' | |||
|width="7%"|'''威力倍率''' | |||
|width="7%"|'''リアクション値''' | |||
|width="10%"|'''リンクゲージ<br>消費量''' | |||
|width="44%"|'''特徴''' | |||
|- | |- | ||
| | |rowspan="2"|'''ワンダージャンプ''' | ||
| | |体当たり | ||
|物理 | |||
|0.8 | |||
|4 | |||
|rowspan="2"|毎秒7.8% | |||
|rowspan="2"|ソラを乗せたスピリットが何度も跳ねながら前進し、 体当たりと着地時に広がる衝撃波で攻撃する。進路はスライドパッドで変更可能。 跳ねる回数は最大12回だが、ハナダワンヤンとの発動時は動作が速めで最大16回まで攻撃できる | |||
|- | |- | ||
| | |衝撃波 | ||
| | |物理 | ||
|0. | |0.7 {{hover|(*1)|ワンダニャンとの発動時は「1.0」}} | ||
|1 | |2 | ||
| | |||
| | |||
|- | |- | ||
|colspan="2" style="background:gray"| | |colspan="2" style="background:gray"|発動できるスピリット | ||
|colspan="5" style="text-align:left"| | |colspan="5" style="text-align:left"|キングだニャン, ハナダワンヤン, ワンダニャン | ||
|- | |- | ||
| | |colspan="2"|'''ローリングボール''' | ||
| | |物理 | ||
| | |1.8 | ||
|4 | |||
| | |毎秒6.6% | ||
| | |丸まったまま転がるスピリットの上で玉乗りをはじめ、 ぶつかった敵にダメージを与える。 進路はスライドパッドで変更可能 | ||
| | |- | ||
|colspan="2" style="background:gray"|発動できるスピリット | |||
|colspan="5" style="text-align:left"|タマシープ, ツノケラトプス, デンデンカルゴ, ドリルサイ | |||
|- | |- | ||
| | |rowspan="2"|'''スピニングロデオ''' | ||
| | |体当たり | ||
|0. | |物理 | ||
| | |0.8 {{hover|(*2)|ヤギホーンとの発動時は「1.0」}} | ||
|rowspan="2"|3% | |2 | ||
|毎秒6.6% | |||
|rowspan="2"|スピリットの背に乗って走り、体当たりで攻撃する。 進路はスライドパッドで変更可能。 Aボタンを押すと、前方に跳んで高速回転で突進できる {{hover|(*3)|ヤギサイバーとの発動時はサンダー属性で特殊効果がなく、ヤギホーンとの発動時はファイア属性でバーン効果(100%/5秒) を持つ}} | |||
|- | |- | ||
| | |高速回転 | ||
| | |{{hover|(*3)|ヤギサイバーとの発動時はサンダー属性で特殊効果がなく、ヤギホーンとの発動時はファイア属性でバーン効果(100%/5秒) を持つ}} | ||
|3.0 | |3.0 | ||
|4 | |4 | ||
|5% | |||
|- | |- | ||
|colspan="2" style="background:gray"| | |colspan="2" style="background:gray"|発動できるスピリット | ||
|colspan="5" style="text-align:left"| | |colspan="5" style="text-align:left"|ヤギサイバー, ヤギホーン | ||
|- | |- | ||
|rowspan=" | |rowspan="9"|'''エアライドボンバー''' | ||
| | |飛行 {{hover|(*4)|ガンミフクロウとの発動時はデータ}} | ||
| | |物理 | ||
| | |1.1 | ||
| | |2 | ||
| | |毎秒6.6% | ||
|rowspan=" | |rowspan="9"|スピリットが”ソラ”の肩をつかみながら飛び、ぶつかった敵にダメージを与える。 進路はスライドパッドで変更可能。 Aボタンで正面に突進攻撃をくり出すが、リンクゲージが残り10%以下のときは地面に突進して周囲に光の柱を噴出させる攻撃を行なう | ||
|- | |- | ||
| | |突進 {{hover|(*4)|ガンミフクロウとの発動時はデータ}} | ||
| | |物理 | ||
| | |1.1 | ||
| | |2 | ||
| | |rowspan="2"|10% | ||
|- | |- | ||
| | |光の柱 {{hover|(*4)|ガンミフクロウとの発動時はデータ}} | ||
| | |物理 | ||
| | |3.3 | ||
|4 | |4 | ||
|- | |- | ||
| | |飛行 {{hover|(*5)|コウモリバットとの発動時はデータ}} | ||
| | |物理 | ||
| | |1.3 | ||
| | |2 | ||
| | |毎秒6.6% | ||
|- | |- | ||
| | |突進 {{hover|(*5)|コウモリバットとの発動時はデータ}} | ||
|物理 | |||
| | |||
|1.3 | |1.3 | ||
| | |3 | ||
|rowspan="2"|10% | |||
|rowspan=" | |||
|- | |- | ||
| | |光の柱 {{hover|(*5)|コウモリバットとの発動時はデータ}} | ||
| | |物理 | ||
| | |3.3 | ||
| | |4 | ||
|- | |- | ||
| | |飛行 {{hover|(*6)|タカイーグルかナルバードとの発動時はデータ}} | ||
| | |物理 | ||
|0. | |0.9 | ||
|2 | |2 | ||
| | |毎秒6.6% | ||
|- | |- | ||
| | |突進 {{hover|(*6)|タカイーグルかナルバードとの発動時はデータ}} | ||
| | |物理 | ||
|3. | |1.8 | ||
|3 | |||
|rowspan="2"|10% | |||
|- | |||
|光の柱 {{hover|(*6)|タカイーグルかナルバードとの発動時はデータ}} | |||
|物理 | |||
|3.6 | |||
|4 | |4 | ||
|- | |- | ||
|colspan="2" style="background:gray"| | |colspan="2" style="background:gray"|発動できるスピリット | ||
|colspan="5" style="text-align:left"| | |colspan="5" style="text-align:left"|ガンミフクロウ, コウモリバット, タカイーグル, ナルバード | ||
|- | |- | ||
| | |colspan="2"|'''ハンマースロー''' | ||
| | |物理 | ||
| | |0.9 | ||
|2 | |2 | ||
| | |毎秒9.6% | ||
| | |全身からトゲを突き出したスピリットのシッポを持ち、頭上で振りまわしながら走る。進路はスライドパッドで変更可能 | ||
|- | |- | ||
| | |colspan="2" style="background:gray"|発動できるスピリット | ||
|colspan="5" style="text-align:left"|ハリライオン | |||
| | |||
| | |||
| | |||
|- | |- | ||
| | |rowspan="2"|'''フレムスロー''' | ||
|突進 | |||
|ファイア | |||
|0.9 | |||
| | |||
| | |||
|2 | |2 | ||
| | |毎秒9.6% | ||
| | |rowspan="2"|輪になったスピリットを転がして突進させる。スピリットが転がる方向をスライドパッドで変更できるほか、Aボタンを押すとスピリットが周囲に爆炎を放って攻撃しつつリンク攻撃の発動が終わる | ||
|- | |- | ||
| | |爆炎 | ||
| | |ファイア | ||
|2.7 | |||
|4 | |||
|1.6% | |||
|- | |- | ||
| | |colspan="2" style="background:gray"|発動できるスピリット | ||
|colspan="5" style="text-align:left"|ネクッポイ, ヘビトカゲ | |||
| | |||
|- | |- | ||
| | |rowspan="4"|'''ユニゾンクロス''' | ||
| | |発動中 | ||
| | |— | ||
| | |— | ||
| | |— | ||
|毎秒6.6% | |||
|rowspan="4"|ソラとスピリットがその場で身構える。 Aボタンを押すと、両者が交差するように突進しつつ攻撃するが、リンクゲージが残り10%以下のときは、上空から地面を突いて周囲に衝撃波を放つ攻撃をくり出す | |||
|- | |- | ||
| | |エックス突進 | ||
|物理 | |||
|0.4 | |||
| | |||
|0. | |||
|1 | |1 | ||
| | |10% | ||
|- | |- | ||
| | |急降下突き | ||
| | |物理 | ||
| | |2.3 | ||
| | |3 | ||
| | |rowspan="3"|10% | ||
|- | |- | ||
| | |衝撃波 | ||
| | |物理 {{hover|(*7)|カエルおうじとの発動時はサンダー属性、リュウドラゴンとの発動時はファイア属性}} | ||
|1.1 | |||
|3 | |||
|- | |- | ||
|colspan="2"| | |colspan="2" style="background:gray"|発動できるスピリット | ||
| | |colspan="5" style="text-align:left"|カエルおうじ, カエルシェフ, カエルソルジャー, リュウドラゴン | ||
|- | |- | ||
|rowspan="2"|'''ポイズンダッシュ''' | |||
|発動中 | |||
|なし | |||
|rowspan="2"|''' | |||
| | |||
| | |||
|0 | |0 | ||
|0 | |0 | ||
| | |毎秒9.6% | ||
|rowspan="2"| | |rowspan="2"|スピリットが吐いた泡に包まれ、触れた敵をマグネ効果で引き寄せる。発動中はスライドパッドで前後左右に移動でき、リンクゲージがゼロになるかAボタンを押すと、その約3秒後に泡が破裂して周囲の敵を巻きこんで攻撃しつつ発動が終わる | ||
|- | |- | ||
| | |破裂 | ||
| | |物理 | ||
| | |6.3 | ||
| | |6 | ||
| | |100% | ||
|- | |- | ||
|colspan="2" style="background:gray"| | |colspan="2" style="background:gray"|発動できるスピリット | ||
|colspan="5" style="text-align:left"| | |colspan="5" style="text-align:left"|ドクドクサンショ | ||
|- | |- | ||
|colspan="2"|''' | |colspan="2"|'''ウォータブラスター''' | ||
| | |ウォータ | ||
| | |0.4 | ||
| | |1 | ||
| | |毎秒9.6% | ||
| | |両手に持ったスピリットの口から水を噴出させつづける。発動中は移動できないが、スライドパッドで向きを上下左右に変えられるうえに射程がとても長い。うまく操作すれば攻撃を20回以上当てることも可能 | ||
|- | |- | ||
|colspan="2" style="background:gray"| | |colspan="2" style="background:gray"|発動できるスピリット | ||
|colspan="5" style="text-align:left"| | |colspan="5" style="text-align:left"|ギョライギョ, ホネフィッシュ | ||
|- | |- | ||
| | |rowspan="3"|'''バブルブラスター''' | ||
|発動中 | |||
|— | |— | ||
|— | |— | ||
|— | |— | ||
| | |毎秒6.6% | ||
| | |rowspan="3"|スピリットに乗り、スライドパッドで前後左右に飛びつつAボタンで正面に水の弾を飛ばす。 Aボタンを押しつづけるとその場で連射をはじめ、3発ごとに飛ばす弾は敵を泡に閉じこめることが可能(巨大なボス敵は閉じこめられない)。泡は2秒経過するか攻撃を受けると破裂し、周囲にいる敵もろともダメージを与える | ||
|- | |- | ||
| | |弾 | ||
| | |ウォータ | ||
| | |0.4 | ||
|1 | |||
|rowspan="2"|3% | |||
|- | |- | ||
|破裂 | |||
|ウォータ | |||
|3.0 | |||
|4 | |||
|- | |- | ||
| | |colspan="2" style="background:gray"|発動できるスピリット | ||
| | |colspan="5" style="text-align:left"|タツホース | ||
| | |||
| | |||
|- | |- | ||
| | |rowspan="4"|'''リズミックパッド''' | ||
| | |発動中 | ||
| | |— | ||
| | |— | ||
| | |— | ||
|0% | |||
| | |rowspan="4"|上画面の上下左右に輪が現れ、A、B、X、Y、ボタンのいずれかのマークが中央から「ボタンの配置と同じ方向」に進む。マークが輪と重なったときにそのボタンを押すと(連打でもいい)、ンラとスピリットが広範囲に音波を放つ攻撃が可能。入力に連続で成功していると、5回目からは一度に押すボタンが2個に増えるかわりに攻撃の威力が上がる。入力が遅かったり無関係のボタンを押したりすると、攻撃に矢敗するうえにリンクゲージが多く減ってしまう。攻撃できるのは最大8回まで | ||
|- | |- | ||
| | |失敗 | ||
| | |— | ||
| | |— | ||
| | |— | ||
| | |30% | ||
|- | |- | ||
| | |1個押し成功 | ||
| | |なし | ||
| | |0.6 | ||
|4 | |||
|12.5% | |||
|- | |- | ||
| | |2個押し成功 | ||
| | |なし | ||
| | |2.0 | ||
| | |4 | ||
|12.5% | |||
|- | |- | ||
| | |colspan="2" style="background:gray"|発動できるスピリット | ||
| | |colspan="5" style="text-align:left"|ネコキャット, フルーツキャット | ||
|" | |||
| | |||
|- | |- | ||
| | |rowspan="4"|'''サラブレッドライド''' | ||
|発動中 {{hover|(*8)|イタデンキリンとの発動時のデータ}} | |||
|物理 | |||
|1.3 | |||
| | |2 | ||
|毎秒6.6% | |||
| | |rowspan="4"|スピリットにまたがって走り、ぶつかった敵にダメージを与える。発動中は、スライドパッドで進路を変えたり、Aボタンで突進攻撃を出したりすることが可能。スピリットごとに属性や威力などが異なるほか、エレキユニコーンとハンサムペガサスの突進攻撃には「リンク攻撃の発動直後に自動で1回使う」「攻撃前のスキがとても大きい」といった特徴がある | ||
| | |||
|- | |- | ||
| | |突進 {{hover|(*8)|イタデンキリンとの発動時のデータ}} | ||
| | |物理 | ||
|} | |1.3 | ||
| | |2 | ||
|5% | |||
|- | |- | ||
| | |発動中 {{hover|(*9)|エレキユニコーンかハンサムペガサスとの発動時のデータ}} | ||
|物理 | |||
|0.8 | |||
|2 | |||
|毎秒4.8% | |||
|- | |- | ||
| | |突進 {{hover|(*9)|エレキユニコーンかハンサムペガサスとの発動時のデータ}} | ||
|物理 {{hover|(*10)|エレキユニコーンとの発動時はサンダー属性}} | |||
|3.0 | |||
|4 | |||
|5% | |||
|- | |- | ||
| | |colspan="2" style="background:gray"|発動できるスピリット | ||
|colspan="5" style="text-align:left"|イタデンキリン, エレキユニコーン, ハンサムペガサス | |||
|- | |- | ||
| | |rowspan="2"|'''ジャイアントスイング''' | ||
|スピン | |||
|物理 | |||
|1.0 | |||
|2 | |||
|10% | |||
|rowspan="2"|ソラの両足を持ったスピリットがスピンをくり返し、ソラが構えた武器で攻撃する。発動中スライドパッドで前後左右に移動することが可能。スピン1回転ごとにリンクゲージが減っていき、10回転するかAボタンを押すと、スピリットがソラを敵に向かって投げ飛ばしつつ発動が終わる | |||
|- | |- | ||
| | |投げ飛ばし | ||
|物理 | |||
|4.0 | |||
|4 | |||
|10% | |||
|- | |- | ||
| | |colspan="2" style="background:gray"|発動できるスピリット | ||
|colspan="5" style="text-align:left"|クマダダイサーカス, クマパンダー, マジックラビット, ミミバニー | |||
|- | |- | ||
| | |colspan="2"|'''バトリングライド''' | ||
|ブリザド | |||
|1.2 | |||
|2 | |||
|毎秒6.6% | |||
|地面に張った氷の上をすべるスピリットに乗り、敵た突進してダメージを与える(氷の性質はP.365を参照)。進路はスライドパッドで変更できるが、急には曲がれないので同じ敵に何度もぶつかるのは難しい | |||
|- | |- | ||
| | |colspan="2" style="background:gray"|発動できるスピリット | ||
|colspan="5" style="text-align:left"|アイスペンギン | |||
|- | |- | ||
| | |rowspan="2"|'''ターゲットショット''' | ||
| | |発動中 | ||
| | |物理 | ||
|0.2 | |||
|1 | |||
|毎秒6.6% | |||
|rowspan="2"|スピリットがひたすら弾を連射する。発動中は移動できなくなるが、スライドパッドで左右や斜め上に向きを変えたり、Aボタンで大きめの弾を飛ばしたりすることが可能。大きめの弾が当たった敵には照準のマークが5~9秒間重なり{{hover|(*11)|発動したスピリットがLV10以下なら5秒、LV11~20なら7秒、LV21以上なら9秒}} 、連射中の弾がその敵を追うようになる | |||
|- | |- | ||
| | |大きめの弾 | ||
|物理 | |||
|0.2 | |||
|1 | |||
|1.1% | |||
|- | |- | ||
| | |colspan="2" style="background:gray"|発動できるスピリット | ||
|colspan="5" style="text-align:left"|タイホウカブト, ツノカブト | |||
|- | |- | ||
| | |rowspan="2"|'''トラップショット''' | ||
|発動中 | |||
|物理 | |||
|0.2 | |||
|1 | |||
|毎秒6.6% | |||
|rowspan="2"|「ターゲットショット」(上記参照)とほぼ同じ攻撃だが、Aボタンで飛ばせる弾の効果が「当たった敵を5秒間バインド状態にする」になっている | |||
|- | |- | ||
| | |大きめの弾 | ||
|物理 | |||
|0.2 | |||
|1 | |||
|1.1% | |||
|- | |- | ||
| | |colspan="2" style="background:gray"|発動できるスピリット | ||
|colspan="5" style="text-align:left"|ハサミクワガタ | |||
|- | |- | ||
| | |colspan="2"|'''キュアサン''' | ||
|— | |||
|— | |||
|— | |||
|100% | |||
|フィールドにいる味方全員のHPを全回復してステータス異常を解除する。さらに、「リジェネ」の効果を与え、30秒後までHPが2秒ごとに10ずつ回復するようになる | |||
|- | |- | ||
| | |colspan="2" style="background:gray"|発動できるスピリット | ||
|colspan="5" style="text-align:left"|イイフラワー | |||
|- | |- | ||
| | |rowspan="2"|'''ゴーストバキューム''' | ||
|発動中 | |||
|なし | |||
|0 | |||
|0 | |||
|毎秒9.6% | |||
|rowspan="2"|ソラに抱きかかえられたスピリットが息を吸いつづけ、前方にいる敵を引き寄せて飲みこむ。リンクゲージがゼロになるかAボタンを押すと、飲みこんでいたすべての敵にダメージを与えつつ吐き出し、リンク攻撃の発動が終わる。発動中はスライドパッドで前後左右にゆっくりと步くことが可能 | |||
|- | |- | ||
| | |吐き出し | ||
|ダーク | |||
|4.5 | |||
|4 | |||
|1.6% | |||
|- | |- | ||
| | |colspan="2" style="background:gray"|発動できるスピリット | ||
|colspan="5" style="text-align:left"|オバケゴースト, オバケピエロ | |||
|- | |- | ||
| | |colspan="2"|'''バーサクロデオ''' | ||
|物理 | |||
|2.2 | |||
|4 | |||
|毎秒6.6% | |||
|ソラを乗せたスピリットが足踏みをしたあと走りまわり、衝突した敵たダメージを与える。進路はスライドパッドで変更可能 | |||
|- | |- | ||
| | |colspan="2" style="background:gray"|発動できるスピリット | ||
|colspan="5" style="text-align:left"|ゾウエレファント | |||
|- | |- | ||
| | |colspan="2"|'''ラッキーダイス''' | ||
|— | |||
|— | |||
|— | |||
|100% | |||
|ソラとスピリットがそれぞれダイスを振り、ソラが振ったダイスの絵柄に応じた相手に、スピリットが振ったダイスの絵柄に応じた効果を与える(下記参.照) | |||
|- | |- | ||
| | |colspan="2" style="background:gray"|発動できるスピリット | ||
|colspan="5" style="text-align:left"|アシカジャグラー, バカンスシール | |||
|- | |- | ||
| | |rowspan="3"|'''ファイアブラスター''' | ||
|発動中 | |||
|— | |||
|— | |||
|— | |||
|毎秒6.6% | |||
|rowspan="3"|「バブルブラスター」(->P.341)とほぼ同じ攻撃。属性がちがうほか、弾を飛ばしたときのリンクゲージの消費量が少ない | |||
|- | |- | ||
| | |弾 | ||
| | |ファイア | ||
|0.4 | |||
|1 | |||
|rowspan="2"|1.1% | |||
|- | |- | ||
| | |破裂 | ||
|ファイア | |||
|3.0 | |||
|4 | |||
|- | |- | ||
| | |colspan="2" style="background:gray"|発動できるスピリット | ||
|colspan="5" style="text-align:left"|モエロタツホース | |||
|- | |- | ||
| | |colspan="2"|'''ポイズンレイン''' | ||
|なし | |||
|0 | |||
|0 | |||
|毎秒6.6% | |||
|周囲にいる敵をミニマム、コンフュ、ポイズン、スロウのいずれかの状態にする雨を降らせる(いずれも10秒間持続)。また、そのなかの最大3体の敵に有害な日光を5秒間浴びせ、HPを0.5秒ごとに10ずつ減らす | |||
|- | |- | ||
| | |colspan="2" style="background:gray"|発動できるスピリット | ||
|colspan="5" style="text-align:left"|ワルフラワー | |||
|- | |- | ||
| | |rowspan="2"|'''フレイムライド''' | ||
|体当たり | |||
|物理 | |||
|1.0 | |||
|2 | |||
|毎秒6.6% | |||
|rowspan="2"|ソラを乗せたスピリットが走りつづけ、ぶつかった敵にダメージを与える。Aボタンを押せば、スピリットが走りながら炎の息を1秒ほど吐く攻撃も可能。進路はスライドパッドで変えられるが、炎の息を吐いているあいだは操作できなくなる | |||
|- | |- | ||
| | |炎の息 | ||
|ファイア | |||
|2.0 | |||
|2 | |||
|15% | |||
|- | |- | ||
| | |colspan="2" style="background:gray"|発動できるスピリット | ||
|colspan="5" style="text-align:left"|ボウクンレックス | |||
|- | |- | ||
| | |rowspan="2"|'''アイスライド''' | ||
|体当たり | |||
|物理 | |||
|1.0 | |||
|2 | |||
|毎秒6.6% | |||
|rowspan="2"|「フレイムライド」(上記参照)とほぼ同じ攻撃だが、息による攻撃の属性がちがう | |||
|- | |- | ||
| | |氷の息 | ||
|ブリザド | |||
|2.0 | |||
|2 | |||
|15% | |||
|- | |- | ||
| | |colspan="2" style="background:gray"|発動できるスピリット | ||
|colspan="5" style="text-align:left"|ボンツビワイルド | |||
|- | |- | ||
| | |rowspan="4"|'''リズミックテイル''' | ||
|発動中 | |||
|— | |||
|— | |||
|— | |||
|0% | |||
|rowspan="4"|「リズミックパッド」(->P.341)と同じ攻撃だが、画面中央から流れてくるマークの形がちがう | |||
|- | |- | ||
| | |失敗 | ||
|— | |||
|— | |||
|— | |||
|30% | |||
|- | |- | ||
| | |1個押し成功 | ||
|なし | |||
|0.6 | |||
|4 | |||
|rowspan="2"|12.5% | |||
|- | |- | ||
| | |2個押し成功 | ||
| | |なし | ||
| | |2.0 | ||
|4 | |||
|- | |- | ||
| | |colspan="2" style="background:gray"|発動できるスピリット | ||
|colspan="5" style="text-align:left"|ドラゴンモドキ, ハラグチアヒル | |||
|- | |- | ||
| | |rowspan="2"|'''オーラライド''' | ||
| | |体当たり | ||
| | |物理 | ||
|0.8 | |||
|2 | |||
|毎秒6.6% | |||
|rowspan="2"|スピリットの背に乗って走り、敵にぶつかってダメージを与える。進路はスライドパッドで変更可能。Aボタンを押すとスピリットが足を止め、闘気で生み出した自分の分身(オーラライオンは3体、キバタイガーは1体)が地上を走って敵に突進する | |||
|- | |- | ||
| | |分身攻撃 | ||
|ファイア | |||
|0.9 | |||
|4 | |||
|1.1% | |||
|- | |- | ||
| | |colspan="2" style="background:gray"|発動できるスピリット | ||
|colspan="5" style="text-align:left"|オーラライオン, キバタイガー | |||
|} | |||
{|class="wikitable" width="80%" | |||
!colspan="8"|'''「ラッキーダイス」 で振るダイスの絵柄ごとの効果とそれぞれの効果が発動する確率''' | |||
|- | |- | ||
| | !colspan="2" width="25%"|'''ソラが振るダイス''' | ||
!colspan="6" width="75%"|'''スピリットが振るダイス''' | |||
|- | |- | ||
| | |http://i.imgur.com/A3jXgX3.png | ||
|ソラに対し、右記のコマンドが発動する(コマンドによってはスピリットも巻きこむ) | |||
|http://i.imgur.com/NWK87hg.png | |||
|「ファイガ」と「タイムボム」が発動<br> | |||
{|class="wikitable" | |||
|ソラに発動 | |||
|2.2% | |||
|- | |- | ||
| | |敵に発動 | ||
| | |11.1% | ||
| | |} | ||
| | |http://i.imgur.com/jdcmWzh.png | ||
| | |「ブリザガ」と「フリーズ」が発動<br> | ||
{|class="wikitable" | |||
|ソラに発動 | |||
|2.2% | |||
|- | |- | ||
| | |敵に発動 | ||
|11.1% | |||
|} | |||
|http://i.imgur.com/pvy3E0v.png | |||
|「サンダガ」と「バインド」が発動<br> | |||
{|class="wikitable" | |||
|ソラに発動 | |||
|2.2% | |||
|- | |- | ||
| | |敵に発動 | ||
|11.1% | |||
|} | |||
|- | |- | ||
| | |http://i.imgur.com/yAPEQ6F.png | ||
|敵に対し、右記のコマンドが発動する(コマンドによっては別の敵も巻きこむ) | |||
|http://i.imgur.com/azy6MIL.png | |||
|「ストップ」が発動<br> | |||
{|class="wikitable" | |||
|ソラに発動 | |||
|2.2% | |||
|- | |- | ||
| | |敵に発動 | ||
|11.1% | |||
|} | |} | ||
|http://i.imgur.com/kJVfapw.png | |||
{| | |「コンフュ」が発動<br> | ||
{|class="wikitable" | |||
|ソラに発動 | |||
|2.2% | |||
|- | |- | ||
| | |敵に発動 | ||
|11.1% | |||
|} | |||
|http://i.imgur.com/V1X8EzR.png | |||
|「ラストエリクサー」が発動 {{hover|(*1)|敵に対して発動したときは、敵のHPを1000回復してステータス異常を解除する}}<br> | |||
{|class="wikitable" | |||
|ソラに発動 | |||
|22.4% | |||
|- | |- | ||
| | |敵に発動 | ||
| | |11.1% | ||
|} | |||
| | |||
|} | |} | ||
</div><div class="tabbertab" title=" | </div><div class="tabbertab" title="English"> | ||
{| | {|class="wikitable" width="100%" style="text-align:center" | ||
|- style="background:lightgreen" | |||
|colspan="2" width="25%"|'''Name''' | |||
|width="7%"|'''Attribute''' | |||
|width="7%"|'''Power Magnification''' | |||
|width="7%"|'''Reaction Value''' | |||
|width="10%"|'''Link Gauge Consumption''' | |||
|width="44%"|'''Features''' | |||
|- | |- | ||
| | |rowspan="2"|'''[[Meow Wounce]]''' | ||
|Body blow | |||
|Physical | |||
|0.8 | |||
|4 | |||
|rowspan="2"|7.8% per second | |||
|rowspan="2"|Sora sits atop the Spirit and moves forward while bouncing many times, attacking by hitting with the body and the shockwave that spreads at the time of landing. The course can be changed with the Circle Pad. The number of bounces is up to 12, while the Flowbermeow can bounce up to 16 times, because it is faster in operation | |||
|- | |- | ||
| | |Shockwave | ||
|Physical | |||
|0.7 {{hover|(*1)|1.0 when linking with Meow Wow}} | |||
|2 | |||
|- | |- | ||
| [[ | |colspan="2" style="background:gray"|Spirits that can activate this | ||
|colspan="5" style="text-align:left"|[[Meowjesty]], [[Flowbermeow]], [[Meow Wow]] | |||
|- | |- | ||
| | |colspan="2"|'''[[Roll Call]]''' | ||
| | |Physical | ||
|1.8 | |||
|4 | |||
|6.6% per second | |||
|Start balancing on the curled up Spirit, rolling into enemies to damage them. The course can be changed with the Circle Pad. | |||
|- | |- | ||
| [[ | |colspan="2" style="background:gray"|Spirits that can activate this | ||
|colspan="5" style="text-align:left"|[[Tama Sheep]], [[Cera Terror]], [[Escarglow]], [[Drill Sye]] | |||
|- | |- | ||
| | |rowspan="2"|'''[[Whirling Bronco]]''' | ||
|Body | |||
|Physical | |||
|0.8 {{hover|(*2)|1.0 when linking with Yoggy Ram}} | |||
|2 | |||
|6.6% per second | |||
|rowspan="2"|Ride on the back of the Spirit, while running forward and attacking with the body. The course can be changed with the Circle Pad. When pressing the A button, you can jump forward and perform a high-speed spin. {{hover|(*3)|When linking with a Cyber Yog, the attack is Thunder-elemental and has no special effect. When linking with Yoggy Ram, the attack is Fire-elemental and has a 100% chance of inflicting burn for 5 seconds.}} | |||
|- | |- | ||
| | |High Speed Spin | ||
|{{hover|(*3)|When linking with a Cyber Yog, the attack is Thunder-elemental and has no special effect. When linking with Yoggy Ram, the attack is Fire-elemental and has a 100% chance of inflicting burn for 5 seconds.}} | |||
|3.0 | |||
|4 | |||
|5% | |||
|- | |- | ||
| | |colspan="2" style="background:gray"|Spirits that can activate this | ||
|colspan="5" style="text-align:left"|[[Cyber Yog]], [[Yoggy Ram]] | |||
|- | |- | ||
| '''[[ | |rowspan="9"|'''[[Fly-By Knight]]''' | ||
|Flying {{hover|(*4)|When linking with a Peepsta Hoo}} | |||
|Physical | |||
|1.1 | |||
|2 | |||
|6.6% per second | |||
|rowspan="9"|The Spirit flies around while holding Sora's shoulder, damaging the enemy on hit. The course can be changed with the Circle Pad. Pressing the A button performs a rush attack. When the Link Gauge has 10% or less remaining, the rush attack summons a pillar of light from the ground. | |||
|- | |- | ||
| | |Rush {{hover|(*4)|When linking with a Peepsta Hoo}} | ||
|Physical | |||
|1.1 | |||
|2 | |||
|rowspan="2"|10% | |||
|- | |- | ||
| | |Pillar of Light {{hover|(*4)|When linking with a Peepsta Hoo}} | ||
|Physical | |||
|3.3 | |||
|4 | |||
|- | |- | ||
| | |Flying {{hover|(*5)|When linking with a Komory Bat}} | ||
|Physical | |||
|1.3 | |||
|2 | |||
|6.6% per second | |||
|- | |- | ||
| | |Rush {{hover|(*5)|When linking with a Komory Bat}} | ||
|Physical | |||
|1.3 | |||
|3 | |||
|rowspan="2"|10% | |||
|- | |- | ||
| | |Pillar of Light {{hover|(*5)|When linking with a Komory Bat}} | ||
|Physical | |||
|3.3 | |||
|4 | |||
|- | |- | ||
| | |Flying {{hover|(*6)|When linking with an Eaglider or Halbird}} | ||
|Physical | |||
|0.9 | |||
|2 | |||
|6.6% per second | |||
|- | |- | ||
| | |Rush {{hover|(*6)|When linking with an Eaglider or Halbird}} | ||
|Physical | |||
|1.8 | |||
|2 | |||
|rowspan="2"|10% | |||
|- | |- | ||
| | |Pillar of Light {{hover|(*6)|When linking with an Eaglider or Halbird}} | ||
|Physical | |||
|3.6 | |||
|4 | |||
|- | |- | ||
| | |colspan="2" style="background:gray"|Spirits that can activate this | ||
|colspan="5" style="text-align:left"|[[Peepsta Hoo]], [[Komory Bat]], [[Eaglider]], [[Halbird]] | |||
|- | |- | ||
| '''[[ | |colspan="2"|'''[[Hammer Throw]]''' | ||
|Physical | |||
|0.9 | |||
|2 | |||
|9.6% per second | |||
|Hold the tail of the Spirit that has thorns extending from his entire body and run while swinging the Spirit overhead. The course can be changed with the Circle Pad. | |||
|- | |- | ||
| | |colspan="2" style="background:gray"|Spirits that can activate this | ||
|colspan="5" style="text-align:left"|[[Pricklemane]] | |||
|- | |- | ||
| '''[[ | |rowspan="2"|'''[[Flame Thrower]]''' | ||
| | |Rush | ||
| | |Fire | ||
|0.9 | |||
|2 | |||
|9.6% per second | |||
|rowspan="2"|Make the Spirit roll in a cirlce. You can also change the direction in which the Spirit rolls with the Circle Pad. The Spirit ends the Link Attack by attacking with an explosive flame around it by pressing the A button. | |||
|- | |- | ||
| | |Explosive Flame | ||
|Fire | |||
|2.7 | |||
|4 | |||
|1.6% | |||
|- | |- | ||
| | |colspan="2" style="background:gray"|Spirits that can activate this | ||
|colspan="5" style="text-align:left"|[[Sudo Neku]], [[Hebby Repp]] | |||
|- | |- | ||
| '''[[ | |rowspan="4"|'''[[Decussation]]''' | ||
|During Link Attack | |||
|— | |||
|— | |||
|— | |||
|6.6% per second | |||
|rowspan="4"|Sora and the Spirit stand ready on the spot. When pressing the A button, both attack while crossing each other. When the Link Gauge has 10% or less remaining, the attack changes to a thrust from the sky to the ground, emitting a shockwave. | |||
|- | |- | ||
| | |X-rush | ||
|Physical | |||
|0.4 | |||
|1 | |||
|10% | |||
|- | |- | ||
| | |Dive thrust | ||
| | |Physical | ||
| | |2.3 | ||
|3 | |||
|rowspan="2"|10% | |||
|- | |- | ||
| | |Shockwave | ||
|Physical {{hover|(*7)|Thunder when linking with Lord Kyroo, Fire when linking with Ryu Dragon}} | |||
|1.1 | |||
|3 | |||
|- | |- | ||
| | |colspan="2" style="background:gray"|Spirits that can activate this | ||
|colspan="5" style="text-align:left"|[[Lord Kyroo]], [[Chef Kyroo]], [[Sir Kyroo]], [[Ryu Dragon]] | |||
|- | |- | ||
| '''[[ | |rowspan="2"|'''[[Poison Dash]]''' | ||
|During Link Attack | |||
|None | |||
|0 | |||
|0 | |||
|9.6% per second | |||
|rowspan="2"|The Spirit is wrapped in a bubble, which it spit out, to attract touched enemies with a magnetic effect. During the Link Attack, the Circle Pad can be used to move in all directions. When the A button is pressed or the Link Gauge reaches zero, the final attack is triggered, which causes the bubble to explode after around 3 seconds. | |||
|- | |- | ||
| | |Explosion | ||
|Physical | |||
|6.3 | |||
|6 | |||
|100% | |||
|- | |- | ||
| | |colspan="2" style="background:gray"|Spirits that can activate this | ||
|colspan="5" style="text-align:left"|[[Toximander]] | |||
|- | |- | ||
| '''[[ | |colspan="2"|'''[[Water Blaster]]''' | ||
| | |Water | ||
| ' | |0.4 | ||
|1 | |||
|9.6% per second | |||
|Squirt water from the mouth of the Spirit that you hold in both hands. You can't move during the Link Attack, but the long ranged attack can be guided in all directions with the Circle Pad. If you operate the attack right, you can hit more than 20 times. | |||
|- | |- | ||
| | |colspan="2" style="background:gray"|Spirits that can activate this | ||
|colspan="5" style="text-align:left"|[[Fin Fatale]], [[Fishboné]] | |||
|- | |- | ||
| '''[[ | |rowspan="3"|'''[[Bubble Blaster]]''' | ||
|During Link Attack | |||
|— | |||
|— | |||
|— | |||
|6.6% per second | |||
|rowspan="3"|Take the Spirit, aim with the Circle Pad, and fire a bullet of water with the A button. Standing still and holding A starts a fire of shots, with every 3 shots having a chance of confining an enemy in a bubble (large boss enemies cannot be confined). The bubble bursts when attacked or after 2 seconds, damaging enemies around it. | |||
|- | |- | ||
| | |Bullet | ||
|Water | |||
|0.4 | |||
|1 | |||
|rowspan="2"|3% | |||
|- | |- | ||
| | |Explosion | ||
|Water | |||
|3.0 | |||
|4 | |||
|- | |- | ||
| | |colspan="2" style="background:gray"|Spirits that can activate this | ||
|colspan="5" style="text-align:left"|[[Tatsu Steed]] | |||
|- | |- | ||
| '''[[ | |rowspan="4"|'''[[Paw Groove]]''' | ||
|During Link Attack | |||
|— | |||
|— | |||
|— | |||
|0% | |||
|rowspan="4"|Circles appear on the upper, lower, left, and right sides of the upper screen. Marks of the A, B, X, and Y button advance from the center (to the same direction as the button's placement). When you press the button when the mark overlaps with the circle (even with repeated presses), Sora and the Spirit attack with wide-ranged sound waves. If the input has been successful 5 times in a row, two buttons have to be pressed at once, and the power increases. If the input is too slow or wrong, the Link Gauge decreases a lot, and the attack is unsuccessful. You can attack up to 8 times. | |||
|- | |- | ||
| | |Failure | ||
|— | |||
|— | |||
|— | |||
|30% | |||
|- | |- | ||
| | |Successful Single Press | ||
|None | |||
|0.6 | |||
|4 | |||
|12.5% | |||
|- | |- | ||
| | |Successful Double Press | ||
|None | |||
|2.0 | |||
|4 | |||
|12.5% | |||
|- | |- | ||
| | |colspan="2" style="background:gray"|Spirits that can activate this | ||
|colspan="5" style="text-align:left"|[[Necho Cat]], [[Frootz Cat]] | |||
|- | |- | ||
| '''[[ | |rowspan="4"|'''[[Equestrian Raid]]''' | ||
| | |During Link Attack {{hover|(*8)|When linking with a Thunderaffe}} | ||
| '' | |Physical | ||
|1.3 | |||
|2 | |||
|6.6% per second | |||
|rowspan="4"|Run around on the Spirit's back, damaging enemies on hit. During the Link Attack, the course can be changed with the Circle Pad, and the A button executes a rush attack. Attributes and power differ between Spirits, with the Electricorn and Pegaslick's rush attack characterized as "Using once automatically after initiating Link Attack" and "Has a large opening before attack" | |||
|- | |- | ||
| | |Rush {{hover|(*8)|When linking with a Thunderaffe}} | ||
|Physical | |||
|1.3 | |||
|2 | |||
|5% | |||
|- | |- | ||
| | |During Link Attack {{hover|(*9)|When linking with an Electricorn or Pegaslick}} | ||
|Physical | |||
|0.8 | |||
|2 | |||
|4.8% per second | |||
|- | |- | ||
| | |Rush {{hover|(*9)|When linking with an Electricorn or Pegaslick}} | ||
|Physical {{hover|(*10)|Thunder when linking with an Electricorn}} | |||
|3.0 | |||
|4 | |||
|5% | |||
|- | |- | ||
| | |colspan="2" style="background:gray"|Spirits that can activate this | ||
|colspan="5" style="text-align:left"|[[Thunderaffe]], [[Electricorn]], [[Pegaslick]] | |||
|- | |- | ||
| '''[[ | |rowspan="2"|'''[[Swing Fling]]''' | ||
| | |Spin | ||
|Physical | |||
|1.0 | |||
|2 | |||
|10% | |||
|rowspan="2"|The Spirit spins around holding Sora's feet, while Sora is ready to attack. You can move in all directions with the Circle Pad. The Link Gauge decreases for each rotation. After 10 rotations or when the A button is pressed, the Spirit will fling Sora toward the enemies, ending the Link Attack. | |||
|- | |- | ||
| | |Fling | ||
|Physical | |||
|4.0 | |||
|4 | |||
|10% | |||
|- | |- | ||
| | |colspan="2" style="background:gray"|Spirits that can activate this | ||
|colspan="5" style="text-align:left"|[[Ursa Circus]], [[Kooma Panda]], [[Majik Lapin]], [[Me Me Bunny]] | |||
|- | |- | ||
| '''[[ | |colspan="2"|'''[[Belly Raid]]''' | ||
|Blizzard | |||
|1.2 | |||
|2 | |||
|6.6% per second | |||
|Take a ride on the Spirit's back to glide over the ice that stretches out on the ground, damaging the enemy by rushing into them (see P.365 for the nature of ice). Although the course can be changed with the Circle Pad, it is difficult to hit one enemy multiple times, because you can't turn suddenly. | |||
|- | |- | ||
| | |colspan="2" style="background:gray"|Spirits that can activate this | ||
|colspan="5" style="text-align:left"|[[Iceguin Ace]] | |||
|- | |- | ||
| '''[[ | |rowspan="2"|'''[[Target Shot]]''' | ||
|During Link Attack | |||
|Physical | |||
|0.2 | |||
|1 | |||
|6.6% per second | |||
|rowspan="2"|The Spirit is constantly firing bullets. Although you can't move during the Link Attack, you can change the direction it shoots to the left, right, or diagonally upward, and fire large shots with the A button. When a large bullet hits an enemy, it gets marked for 5~9 seconds {{hover|(*11)|5 seconds if the Spirit's level is below LV10, 7 seconds if it is between LV11-20, and 9 seconds if it is higher than LV21}}, and bullets fired will chase the enemy. | |||
|- | |- | ||
| | |Large shot | ||
|Physical | |||
|0.2 | |||
|1 | |||
|1.1% | |||
|- | |- | ||
| | |colspan="2" style="background:gray"|Spirits that can activate this | ||
|colspan="5" style="text-align:left"|[[Kab Kannon]], [[KO Kabuto]] | |||
|- | |- | ||
| '''[[ | |rowspan="2"|'''[[Trap Shot]]''' | ||
|During Link Attack | |||
|Physical | |||
|0.2 | |||
|1 | |||
|6.6% per second | |||
|rowspan="2"|It is about the same attack as "Target Shot", except the effect of the bullets fired with the A button changes to "inflict the Bind status on hit enemies for 5 seconds". | |||
|- | |- | ||
| | |Large shot | ||
|Physical | |||
|0.2 | |||
|1 | |||
|1.1% | |||
|- | |- | ||
| | |colspan="2" style="background:gray"|Spirits that can activate this | ||
|colspan="5" style="text-align:left"|[[Staggerceps]] | |||
|- | |- | ||
| '''[[ | |colspan="2"|'''[[Cure Sun]]''' | ||
|— | |||
|— | |||
|— | |||
|100% | |||
|Completely recovers HP and cures all status effects of all allies in the field. It also gives the "Regen" effect, which restores 10 HP every 2 seconds for 30 seconds. | |||
|- | |- | ||
| | |colspan="2" style="background:gray"|Spirits that can activate this | ||
|colspan="5" style="text-align:left"|[[Wheeflower]] | |||
|- | |- | ||
| ''' | |rowspan="2"|'''[[Vacuum Ghost]]''' | ||
|During Link Attack | |||
|None | |||
|0 | |||
|0 | |||
|9.6% per second | |||
|rowspan="2"|Sora holds the Spirit, who inhales continuously, attracting and swallowing the enemies in front. When the Link Gauge reaches zero or the A button is pressed, all enemies that were sucked up, receive damage and are spit out, ending the Link Attack. During the Link Attack, you can slowly walk in all directions with the Circle Pad. | |||
|- | |- | ||
| | |Spit out | ||
|Dark | |||
|4.5 | |||
|4 | |||
|1.6% | |||
|- | |- | ||
| | |colspan="2" style="background:gray"|Spirits that can activate this | ||
|colspan="5" style="text-align:left"|[[Ghostabocky]], [[Jestabocky]] | |||
|- | |- | ||
| '''[[ | |colspan="2"|'''[[Berserker Bronco]]''' | ||
|Physical | |||
|2.2 | |||
|4 | |||
|6.6% per second | |||
|Sora sits atop the Spirit, running around, stamping on enemies to damage them. The course can be changed with the Circle Pad. | |||
|- | |- | ||
| | |colspan="2" style="background:gray"|Spirits that can activate this | ||
|colspan="5" style="text-align:left"|[[Zolephant]] | |||
|- | |- | ||
| '''[[ | |colspan="2"|'''[[Lucky Dice]]''' | ||
|— | |||
|— | |||
|— | |||
|100% | |||
|Sora and the Spirit throw a die each. The effect which matches the pattern of the die the Spirit threw is given to the target that matches the pattern of the die Sora threw. (see below) | |||
|- | |- | ||
| | |colspan="2" style="background:gray"|Spirits that can activate this | ||
|colspan="5" style="text-align:left"|[[Juggle Pup]], [[R & R Seal]] | |||
|- | |- | ||
| '''[[ | |rowspan="3"|'''[[Fire Blaster]]''' | ||
|During Link Attack | |||
|— | |||
|— | |||
|— | |||
|6.6% per second | |||
|rowspan="3"|Approximately the same attack as "Bubble Blaster" (->P.341). In addition to the different attributes, firing bullets costs less of the Link Gauge. | |||
|- | |- | ||
| | |Bullet | ||
|Fire | |||
|0.4 | |||
|1 | |||
|rowspan="2"|1.1% | |||
|- | |- | ||
| | |Explosion | ||
| | |Fire | ||
|3.0 | |||
|4 | |||
|- | |- | ||
| | |colspan="2" style="background:gray"|Spirits that can activate this | ||
|colspan="5" style="text-align:left"|[[Tatsu Blaze]] | |||
|- | |- | ||
| | |colspan="2"|'''[[Poison Rain]]''' | ||
|None | |||
|0 | |||
|0 | |||
|6.6% per second | |||
|Let it rain on enemies, inflicting either Mini, Confuse, Poison, or Slow (for 10 seconds). In addition, a maximum of 3 enemies get showered by harmful sunlight for 5 seconds, reducing their HP by 10 for every 0.5 seconds. | |||
|- | |- | ||
| | |colspan="2" style="background:gray"|Spirits that can activate this | ||
|colspan="5" style="text-align:left"|[[Woeflower]] | |||
|- | |- | ||
| | |rowspan="2"|'''[[Flame Raid]]''' | ||
|Body blow | |||
|Physical | |||
|1.0 | |||
|2 | |||
|6.6% per second | |||
|rowspan="2"|Sora sits atop the Spirit, running around and damaging enemies you hit. When pressing the A button, the Spirit attacks with a fire breath that lasts 1 second while running. Although the course can be changed with the Circle Pad, it can't be changed during the fire breath. | |||
|- | |- | ||
| | |Fire breath | ||
| | |Fire | ||
|2.0 | |||
|2 | |||
|15% | |||
|- | |- | ||
| | |colspan="2" style="background:gray"|Spirits that can activate this | ||
|colspan="5" style="text-align:left"|[[Tyranto Rex]] | |||
|- | |- | ||
| [[ | |rowspan="2"|'''[[Ice Raid]]''' | ||
|Body blow | |||
|Physical | |||
|1.0 | |||
|2 | |||
|6.6% per second | |||
|rowspan="2"|Almost the same attack as "Flame Raid" (see above), except the breath has a different attribute. | |||
|- | |- | ||
| | |Ice breath | ||
|Blizzard | |||
|2.0 | |||
|2 | |||
|15% | |||
|- | |- | ||
| [[ | |colspan="2" style="background:gray"|Spirits that can activate this | ||
|colspan="5" style="text-align:left"|[[Skelterwild]] | |||
|- | |||
|rowspan="4"|'''[[Tail Groove]]''' | |||
|During Link Attack | |||
|— | |||
|— | |||
|— | |||
|0% | |||
|rowspan="4"|The attack is the same as "Paw Groove" (->P.341), except the marker flowing from the center of the screen is different. | |||
|- | |- | ||
| | |Failure | ||
|— | |||
|— | |||
|— | |||
|30% | |||
|- | |- | ||
| | |Successful Single Press | ||
| | |None | ||
|0.6 | |||
|4 | |||
|rowspan="2"|12.5% | |||
|- | |- | ||
| | |Successful Double Press | ||
|None | |||
|2.0 | |||
|4 | |||
|- | |- | ||
| [[ | |colspan="2" style="background:gray"|Spirits that can activate this | ||
|colspan="5" style="text-align:left"|[[Drak Quack]], [[Ducky Goose]] | |||
|- | |- | ||
| | |rowspan="2"|'''[[Aura Raid]]''' | ||
| | |Body blow | ||
|Physical | |||
|0.8 | |||
|2 | |||
|6.6% per second | |||
|rowspan="2"|Run around on the Spirit's back, damaging enemies on hit. The course can be changed with the Circle Pad. When you press the A button, the Spirit stops and fires aura avatars toward the enemies (Aura Lion fires 3 avatars, Keeba Tiger fires 1 avatar) | |||
|- | |- | ||
| | |Avatar attack | ||
|Fire | |||
|0.9 | |||
|4 | |||
|1.1% | |||
|- | |- | ||
| [[ | |colspan="2" style="background:gray"|Spirits that can activate this | ||
|colspan="5" style="text-align:left"|[[Aura Lion]], [[Keeba Tiger]] | |||
|} | |} | ||
{|class="wikitable" width="80%" | |||
{| | !colspan="8"|Effect and probability of the patterns of dice thrown during "Lucky Dice" | ||
! | |||
|- | |- | ||
| | !colspan="2" width="25%"|Die Sora throws | ||
!colspan="6" width="75%"|Die the Spirit throws | |||
|- | |- | ||
| | |http://i.imgur.com/A3jXgX3.png | ||
| | |The commands on the right affect Sora (the commands also affect a Spirit) | ||
|' | |http://i.imgur.com/NWK87hg.png | ||
|"Firaga" and "Time Bomb" are triggered.<br> | |||
{|class="wikitable" | |||
|Sora's trigger chance | |||
|2.2% | |||
|- | |- | ||
|' | |Enemy's trigger chance | ||
|11.1% | |||
|} | |||
|http://i.imgur.com/jdcmWzh.png | |||
|"Blizzaga" and "Freeze" are triggered.<br> | |||
{|class="wikitable" | |||
|Sora's trigger chance | |||
|2.2% | |||
|- | |- | ||
|' | |Enemy's trigger chance | ||
|11.1% | |||
|} | |||
|http://i.imgur.com/pvy3E0v.png | |||
|"Thundaga" and "Bind" are triggered.<br> | |||
{|class="wikitable" | |||
|Sora's trigger chance | |||
|2.2% | |||
|- | |- | ||
|' | |Enemy's trigger chance | ||
|11.1% | |||
|} | |||
|- | |- | ||
| | |http://i.imgur.com/yAPEQ6F.png | ||
|The commands on the right affect an enemy (the commands also affect another enemy) | |||
|http://i.imgur.com/azy6MIL.png | |||
|"Stop" is triggered.<br> | |||
{|class="wikitable" | |||
|Sora's trigger chance | |||
|2.2% | |||
|- | |- | ||
|' | |Enemy's trigger chance | ||
|11.1% | |||
|} | |||
|http://i.imgur.com/kJVfapw.png | |||
|"Confuse" is triggered.<br> | |||
{|class="wikitable" | |||
|Sora's trigger chance | |||
|2.2% | |||
|- | |- | ||
|' | |Enemy's trigger chance | ||
|11.1% | |||
|} | |} | ||
|http://i.imgur.com/V1X8EzR.png | |||
{| | |"Megalixir" is triggered. {{hover|(*1)|When triggered for the enemy, recover 1000 HP and cure all status effects from the enemy}}<br> | ||
{|class="wikitable" | |||
|Sora's trigger chance | |||
|22.4% | |||
|- | |- | ||
| ' | |Enemy's trigger chance | ||
|- | |11.1% | ||
| ''' | |} | ||
| | |} | ||
| ''' | </div></div> | ||
===Dual Links=== | |||
<div class="tabber"> | |||
<div class="tabbertab" title="Japanese"> | |||
{|class="wikitable" width="100%" style="text-align:center" | |||
|- style="background:lightgreen" | |||
|colspan="2" width="25%"|'''名前''' | |||
|width="7%"|'''属性''' | |||
|width="7%"|'''威力倍率''' | |||
|width="7%"|'''リアクション値''' | |||
|width="10%"|'''リンクゲージ<br>消費量''' | |||
|width="44%"|'''特徴''' | |||
|- | |- | ||
| ''' | |rowspan="2"|'''ワンダージャンボリー''' | ||
|体当たり | |||
|物理 | |||
|1.2 | |||
|4 | |||
|rowspan="2"|毎秒4.8%+跳ねるたびに5% | |||
|rowspan="2"|巨大化したスピリットの背に乗り、何度も跳ねまわって体当たりと着地時の衝撃波で攻撃する。進路はスライドパッドで変更可能。発動時間は短いものの、動作がとても速いので最大15回まで攻撃できる | |||
|- | |- | ||
| | |衝撃波 | ||
|物理 | |||
|1.0 | |||
|3 | |||
|- | |- | ||
| ''' | |colspan="2"|'''コメット''' | ||
|ファイア | |||
|14.8 | |||
|4 | |||
|100% | |||
|ソラとスピリットが乗った巨大な隕石が地面に落ち、 周囲にいる敵を爆発に巻きこむ | |||
|- | |- | ||
| ''' | |colspan="2"|'''ユニオンラッシュ''' | ||
|なし | |||
|1.1 | |||
|4 | |||
|毎秒4.8%+攻撃が当たるたびに5% | |||
|光に包まれたソラとスピリットが高速で飛ぶ、敵に何度も突進する。進路は変更できないものの、敵がいる方向(敵がいなければ反対方向)へこまめに向きを変えるので、攻撃が当たらずに終わることは少ない | |||
|- | |- | ||
| ''' | |rowspan="3"|'''カオススネーク''' | ||
|光線 | |||
|なし | |||
|0.3 | |||
|1 | |||
|毎秒4.8% | |||
|rowspan="3"|スピリットと一緒に光線を照射する。照射中は移動できなくなるが、スライドパッドで左右や斜め上に向きを変えることは可能。リンクゲージがゼロになるかAボタンを押すと、自分の周囲一帯を無数の弾と爆発で攻撃してリンク攻撃の発動が終わる | |||
|- | |- | ||
| | |弾 | ||
|なし | |||
|0.1 | |||
|1 | |||
|rowspan="2"|30% | |||
|- | |- | ||
| | |爆発 | ||
|なし | |||
|0.7 | |||
|4 | |||
|- | |- | ||
| ''' | |colspan="2"|'''レインボープリズム''' | ||
|なし | |||
|3.6 | |||
|4 | |||
|100% | |||
|ソラとスピリットが光を飛び散らせて大爆発を起こし、周囲の敵た3~4回ずつダメージを与える | |||
|- | |- | ||
| ''' | |colspan="2"|'''トリニティリミット''' | ||
|ホーリー | |||
|14.8 | |||
|4 | |||
|100% | |||
|ソラとスピリットが生み出した巨大な光の玉が爆発し、かなり広い範囲を攻撃 | |||
する | |||
|- | |- | ||
| ''' | |colspan="2"|'''ラグナロク''' | ||
|ホーリー | |||
|0.7 | |||
|4 | |||
|100% | |||
|光に包まれたソラとスピリットが輪になって回転し、無数の弾を飛ばす。弾は周囲に降り注ぎ、それぞれの敵に最大20回当たる | |||
|} | |||
</div><div class="tabbertab" title="English"> | |||
{|class="wikitable" width="100%" style="text-align:center" | |||
|- style="background:lightgreen" | |||
|colspan="2" width="25%"|'''Name''' | |||
|width="7%"|'''Attribute''' | |||
|width="7%"|'''Power Magnification''' | |||
|width="7%"|'''Reaction Value''' | |||
|width="10%"|'''Link Gauge Consumption''' | |||
|width="44%"|'''Features''' | |||
|- | |- | ||
| ''' | |rowspan="2"|'''[[Whomperstomp]]''' | ||
|Body blow | |||
|Physical | |||
|1.2 | |||
|4 | |||
|rowspan="2"|4.8% per second + 5% every time you bounce | |||
|rowspan="2"|Ride on the back of a giant Spirit and bounce many times to attack by hitting with the body and the shockwave at the time of landing. The course can be changed with the Circle Pad. Although the Link Attack's time is short, you can attack up to 15 times because the operation is very fast. | |||
|- | |- | ||
| | |Shockwave | ||
|Physical | |||
|1.0 | |||
|3 | |||
|- | |- | ||
| '''[[ | |colspan="2"|'''[[Comet]]''' | ||
|Fire | |||
|14.8 | |||
|4 | |||
|100% | |||
|Sora and Spirits ride on a huge meteorite that falls on the ground, causing an explosion on enemies around it. | |||
|- | |- | ||
| '''[[ | |colspan="2"|'''[[Unison Rush]]''' | ||
|None | |||
|1.1 | |||
|4 | |||
|4.8% per second + 5% each time the attack hits | |||
|Sora and Spirits are wrapped in light and fly at high speed, repeatedly rushing into the enemy. Although the course cannot be changed, it will go in the direction where the enemy is (if there are no enemies it will go in the opposite direction) Since the direction is changing frequently, it is less likely to end up missing. | |||
|- | |- | ||
| '''[[ | |rowspan="3"|'''[[Chaos Snake]]''' | ||
|Beam | |||
|None | |||
|0.3 | |||
|1 | |||
|4.8% per second | |||
|rowspan="3"|Shoot a beam of light together with the Spirits. Although you can't move while shooting, you can aim left, right, or diagonally upward. When the Link Gauge reaches zero or the A button is pressed, the Link Attack is ended by creating an explosion and firing countless bullets. | |||
|- | |- | ||
| | |Bullet | ||
|None | |||
|0.1 | |||
|1 | |||
|rowspan="2"|30% | |||
|- | |- | ||
| | |Explosion | ||
|None | |||
|0.7 | |||
|4 | |||
|- | |- | ||
| '''[[ | |colspan="2"|'''[[Prism Light]]''' | ||
|None | |||
|3.6 | |||
|4 | |||
|100% | |||
|Sora and Spirits cause an explosion that scatters the light, damaging enemies around 3-4 times. | |||
|- | |- | ||
| '''[[ | |colspan="2"|'''[[Trinity Limit]]''' | ||
|Light | |||
|14.8 | |||
|4 | |||
|100% | |||
|Sora and Spirits create a huge orb of light that explodes, attacking in a wide range. | |||
|- | |- | ||
| '''[[ | |colspan="2"|'''[[Ragnarok]]''' | ||
|Light | |||
|0.7 | |||
|4 | |||
|100% | |||
|Sora and Spirits are wrapped in light and rotate in a circle, firing an unlimited number of bullets. The bullets fly around, hitting each enemy up to 20 times. | |||
|} | |} | ||
</div></div> | |||
==Shop Level== | |||
{|class="wikitable" width="40%" | |||
== | |- | ||
== | |1||colspan="2"|Default | ||
|- | |||
|2||colspan="2"|Clear Traverse Town | |||
|- | |||
|3||Clear 1 of the following||rowspan="3"|La Cité des Cloches<br>The Grid<br>Prankster's Paradise | |||
|- | |||
|4||Clear 2 of the following | |||
|- | |||
| | |5||Clear all 3 of the following | ||
| | |- | ||
| | |6||colspan="2"|Clear Traverse Town (Revisit) | ||
| | |||
|- | |- | ||
| | |7||Clear 1 of the following||rowspan="2"|Country of the Musketeers<br>Symphony of Sorcery | ||
|- | |||
|8||Clear both of the following | |||
|} | |||
==Moogle Shop== | |||
<div class="tabber"> | |||
<div class="tabbertab" title="Moogle Shop"> | |||
<div class="tabber"> | |||
<div class="tabbertab" title="Attack"> | |||
{|border=1 cellpadding=2 cellspacing=0 class="sortable" style="text-align:left; font-size:10px" align="center" | |||
!bgcolor=#c0c0c0 align="center" style="font-size:12px" width="170"|Command | |||
| | !bgcolor=#c0c0c0 align="center" style="font-size:12px" width="50"|Price | ||
!bgcolor=#c0c0c0 align="center" style="font-size:12px" width="50"|Bargain | |||
!bgcolor=#c0c0c0 align="center" style="font-size:12px" width="150"|Shop Level | |||
|- | |||
| [[File:Icon Attack KHBBS.png|x20px]] '''[[Quick Blitz]]''' || 100 || 80 || 1 | |||
|- | |||
| [[File:Icon Attack KHBBS.png|x20px]] '''[[Blizzard Edge]]''' || 400|| 320 || 4 | |||
|- | |||
| [[File:Icon Attack KHBBS.png|x20px]] '''[[Blitz]]''' || 1000 || 800 || 7 | |||
|- | |||
| [[File:Icon Attack KHBBS.png|x20px]] '''[[Spark Dive]]''' || 200 || 160 || 3 | |||
|- | |||
| [[File:Icon Attack KHBBS.png|x20px]] '''[[Sliding Dash]]''' || — || 120 || 1 | |||
|- | |||
| | | [[File:Icon Attack KHBBS.png|x20px]] '''[[Thunder Dash]]''' || — || 480 || 5 | ||
|- | |||
| [[File:Icon Attack KHBBS.png|x20px]] '''[[Sonic Blade]]''' || 2200 || 1760 || 8 | |||
|- | |||
| [[File:Icon Attack KHBBS.png|x20px]] '''[[Strike Raid]]''' || 200 || 160 || 3 | |||
|- | |||
| [[File:Icon Attack KHBBS.png|x20px]] '''[[Circle Raid]]''' || — || 960 || 5 | |||
|- | |||
| [[File:Icon Attack KHBBS.png|x20px]] '''[[Aerial Slam]]''' || 800 || 640 || 6 | |||
| | |||
| | |||
| | |||
| | |||
| | |||
| | |||
|- | |- | ||
| | | [[File:Icon Attack KHBBS.png|x20px]] '''[[Gravity Strike]]''' || 600 || 480 || 5 | ||
|- | |- | ||
| | | [[File:Icon Attack KHBBS.png|x20px]] '''[[Confusion Strike]]''' || 400 || 320 || 4 | ||
|- | |- | ||
| | | [[File:Icon Attack KHBBS.png|x20px]] '''[[Tornado Strike]]''' || 1500 || 1200 || 7 | ||
|- | |- | ||
| | | [[File:Icon Attack KHBBS.png|x20px]] '''[[Prism Windmill]]''' || — || 1200 || 8 | ||
|- | |- | ||
| | | [[File:Icon Attack KHBBS.png|x20px]] '''[[Timestorm]]''' || 800 || 640 || 6 | ||
| | |||
| | |||
| | |||
|- | |- | ||
| | | [[File:Icon Attack KHBBS.png|x20px]] '''[[Icebreaker]]''' || 1000 || 800 || 8 | ||
|- | |- | ||
| | | [[File:Icon Attack KHBBS.png|x20px]] '''[[Magnet Spiral]]''' || — || 1440 || 8 | ||
| | |||
|- | |- | ||
| | | [[File:Icon Attack KHBBS.png|x20px]] '''[[Collision Magnet]]''' || 1000 || 800 || 7 | ||
| | |} | ||
</div><div class="tabbertab" title="Magic"> | |||
{|border=1 cellpadding=2 cellspacing=0 class="sortable" style="text-align:left; font-size:10px" align="center" | |||
!bgcolor=#c0c0c0 align="center" style="font-size:12px" width="170"|Command | |||
!bgcolor=#c0c0c0 align="center" style="font-size:12px" width="50"|Price | |||
!bgcolor=#c0c0c0 align="center" style="font-size:12px" width="50"|Bargain | |||
!bgcolor=#c0c0c0 align="center" style="font-size:12px" width="150"|Shop Level | |||
|- | |- | ||
| | | [[File:Icon Magic KHBBS.png|x20px]] '''[[Fire]]''' || 100 || 80 || 1 | ||
|- | |- | ||
| | | [[File:Icon Magic KHBBS.png|x20px]] '''[[Fira]]''' || 400 || 320 || 5 | ||
| | |||
|- | |- | ||
| | | [[File:Icon Magic KHBBS.png|x20px]] '''[[Firaga]]''' || 1000 || 800 || 7 | ||
|- | |- | ||
| | | [[File:Icon Magic KHBBS.png|x20px]] '''[[Blizzard]]''' || 100 || 80 || 1 | ||
|- | |- | ||
| | | [[File:Icon Magic KHBBS.png|x20px]] '''[[Blizzara]]''' || 400 || 320 || 5 | ||
|- | |- | ||
| | | [[File:Icon Magic KHBBS.png|x20px]] '''[[Blizzaga]]''' || 1000 || 800 || 7 | ||
| | |||
|- | |- | ||
| | | [[File:Icon Magic KHBBS.png|x20px]] '''[[Thunder]]''' || — || 120 || 1 | ||
|- | |- | ||
| | | [[File:Icon Magic KHBBS.png|x20px]] '''[[Thundara]]''' || — || 480 || 5 | ||
| | |||
|- | |- | ||
| | | [[File:Icon Magic KHBBS.png|x20px]] '''[[Thundaga]]''' || — || 1200 || 7 | ||
|- | |- | ||
| | | [[File:Icon Magic KHBBS.png|x20px]] '''[[Cure]]''' || 100 || 80 || 2 | ||
|- | |- | ||
| | | [[File:Icon Magic KHBBS.png|x20px]] '''[[Cura]]''' || 600 || 480 || 6 | ||
|- | |- | ||
| | | [[File:Icon Magic KHBBS.png|x20px]] '''[[Curaga]]''' || 1000 || 800 || 8 | ||
| | |||
|- | |- | ||
| | | [[File:Icon Magic KHBBS.png|x20px]] '''[[Esuna]]''' || 200 || 160 || 4 | ||
| | |||
|- | |- | ||
| | | [[File:Icon Magic KHBBS.png|x20px]] '''[[Zero Gravity]]''' || 200 || 160 || 3 | ||
|- | |||
| [[File:Icon Magic KHBBS.png|x20px]] '''[[Zero Gravira]]''' || 600 || 480 || 6 | |||
|- | |- | ||
| | | [[File:Icon Magic KHBBS.png|x20px]] '''[[Zero Graviga]]''' || 1000 || 800 || 8 | ||
|- | |- | ||
| | | [[File:Icon Magic KHBBS.png|x20px]] '''[[Zero Graviza]]''' || — || 1440 || 8 | ||
| | |||
|- | |- | ||
| | | [[File:Icon Magic KHBBS.png|x20px]] '''{{c|Balloon|Command}}''' || — || 240 || 1 | ||
|- | |- | ||
| | | [[File:Icon Magic KHBBS.png|x20px]] '''[[Balloonra]]''' || — || 720 || 5 | ||
|- | |- | ||
| | | [[File:Icon Magic KHBBS.png|x20px]] '''[[Spark]]''' || 200 || 160 || 3 | ||
|- | |- | ||
| | | [[File:Icon Magic KHBBS.png|x20px]] '''[[Sparkra]]''' || 800 || 640 || 6 | ||
| | |||
|- | |- | ||
| | | [[File:Icon Magic KHBBS.png|x20px]] '''[[Sparkga]]''' || — || 1600 || 8 | ||
| | |||
|- | |- | ||
| | | [[File:Icon Magic KHBBS.png|x20px]] '''[[Time Bomb]]''' || — || 360 || 1 | ||
|- | |- | ||
| | | [[File:Icon Magic KHBBS.png|x20px]] '''[[Confuse]]''' || 200 || 160 || 2 | ||
|- | |- | ||
| | | [[File:Icon Magic KHBBS.png|x20px]] '''[[Bind]]''' || 400 || 320 || 4 | ||
|- | |- | ||
| | | [[File:Icon Magic KHBBS.png|x20px]] '''[[Poison]]''' || 400 || 320 || 3 | ||
|- | |- | ||
| | | [[File:Icon Magic KHBBS.png|x20px]] '''[[Slow]]''' || 200 || 160 || 2 | ||
|- | |- | ||
| | | [[File:Icon Magic KHBBS.png|x20px]] '''[[Sleep]]''' || 100 || 80 || 1 | ||
|- | |- | ||
| | | [[File:Icon Magic KHBBS.png|x20px]] '''[[Sleepra]]''' || 300 || 240 || 5 | ||
|} | |} | ||
</div><div class="tabbertab" title="Item"> | |||
== | {|border=1 cellpadding=2 cellspacing=0 class="sortable" style="text-align:left; font-size:10px" align="center" | ||
!bgcolor=#c0c0c0 align="center" style="font-size:12px" width="170"|Command | |||
! | !bgcolor=#c0c0c0 align="center" style="font-size:12px" width="50"|Price | ||
! | !bgcolor=#c0c0c0 align="center" style="font-size:12px" width="50"|Bargain | ||
! | !bgcolor=#c0c0c0 align="center" style="font-size:12px" width="150"|Shop Level | ||
|- | |- | ||
| | | [[File:Icon Item KHBBS.png|x20px]] '''[[Potion]]''' || 20 || 16 || 1 | ||
|- | |- | ||
| | | [[File:Icon Item KHBBS.png|x20px]] '''[[Hi-Potion]]''' || 40 || 32 || 2 | ||
|- | |- | ||
| | | [[File:Icon Item KHBBS.png|x20px]] '''[[Mega-Potion]]''' || 100 || 80 || 5 | ||
|- | |- | ||
| | | [[File:Icon Item KHBBS.png|x20px]] '''[[Drop-Me-Not]]''' || 40 || 32 || 2 | ||
|- | |- | ||
| | | [[File:Icon Item KHBBS.png|x20px]] '''[[Panacea]]''' || 50 || 40 || 2 | ||
|- | |- | ||
| | | [[File:Icon Item KHBBS.png|x20px]] '''[[Panacea]]''' || 50 || 40 || 2 | ||
|- | |- | ||
| | | [[File:Icon Item KHBBS.png|x20px]] '''[[Elixir]]''' || — || 2400 || 1 | ||
|} | |||
</div><div class="tabbertab" title="Action"> | |||
{|border=1 cellpadding=2 cellspacing=0 class="sortable" style="text-align:left; font-size:10px" align="center" | |||
!bgcolor=#c0c0c0 align="center" style="font-size:12px" width="170"|Command | |||
!bgcolor=#c0c0c0 align="center" style="font-size:12px" width="50"|Price | |||
!bgcolor=#c0c0c0 align="center" style="font-size:12px" width="50"|Bargain | |||
!bgcolor=#c0c0c0 align="center" style="font-size:12px" width="150"|Shop Level | |||
|- | |||
| [[File:Icon Movement KHBBS.png|x20px]] '''[[Sonic Impact]]''' || 300 || 240 || 5 | |||
|- | |||
| [[File:Icon Defense KHBBS.png|x20px]] '''[[Wake-up Block]]''' || 400 || 320 || 6 | |||
|- | |||
| [[File:Icon Defense KHBBS.png|x20px]] '''[[Link Block]]''' || 500 || 400 || 8 | |||
|- | |||
| [[File:Icon Reprisal KHBBS.png|x20px]] '''[[Counter Rush]]''' || 400 || 320 || 6 | |||
|- | |||
| [[File:Icon Reprisal KHBBS.png|x20px]] '''[[Payback Raid]]''' || 400 || 320 || 7 | |||
|- | |||
| [[File:Icon Reprisal KHBBS.png|x20px]] '''[[Payback Blast]]''' || 400 || 320 || 7 | |||
|- | |||
| [[File:Icon Reprisal KHBBS.png|x20px]] '''[[Aerial Recovery]]''' || 400 || 320 || 6 | |||
|- | |||
| [[File:Icon Reprisal KHBBS.png|x20px]] '''[[Sliding Sidewinder]]''' || 400 || 320 || 7 | |||
|- | |- | ||
| | | [[File:Icon Reprisal KHBBS.png|x20px]] '''[[Sliding Crescent]]''' || 400 || 320 || 7 | ||
|} | |} | ||
</div><div class="tabbertab" title="Spirit Items"> | |||
{|border=1 cellpadding=2 cellspacing=0 class="sortable" style="text-align:left; font-size:10px" align="center" | |||
!bgcolor=#c0c0c0 align="center" style="font-size:12px" width="170"|Item | |||
!bgcolor=#c0c0c0 align="center" style="font-size:12px" width="50"|Price | |||
!bgcolor=#c0c0c0 align="center" style="font-size:12px" width="50"|Bargain | |||
!bgcolor=#c0c0c0 align="center" style="font-size:12px" width="150"|Shop Level | |||
|- | |||
| '''[[Fleeting Figment]]''' || 150 || 120 || 4 | |||
|- | |||
| '''[[Fleeting Fancy]]''' || 300 || 240 || 7 | |||
|- | |||
| '''[[Fleeting Fantasy]]''' || — || 800 || 7 | |||
|- | |||
| '''[[Lofty Figment]]''' || 100 || 80 || 3 | |||
|- | |||
| '''[[Lofty Fancy]]''' || 400 || 320 || 8 | |||
|- | |||
| '''[[Rampant Figment]]''' || 50 || 40 || 1 | |||
|- | |||
| '''[[Rampant Fancy]]''' || 200 || 160 || 5 | |||
|- | |||
| '''[[Rampant Fantasy]]''' || — || 400 || 1 | |||
|- | |||
| '''[[Dulcet Figment]]''' || 100 || 80 || 3 | |||
|- | |||
| '''[[Dulcet Fancy]]''' || 400 || 320 || 8 | |||
|- | |||
| '''[[Dulcet Fantasy]]''' || — || 800 || 8 | |||
|- | |||
| '''[[Intrepid Figment]]''' || 50 || 40 || 2 | |||
|- | |||
| '''[[Intrepid Fancy]]''' || 400 || 320 || 8 | |||
|- | |||
| '''[[Intrepid Fantasy]]''' || — || 800 || 8 | |||
|- | |||
| '''[[Savage Fantasy]]''' || 2000 || 1600 || 8 | |||
|- | |||
| '''[[Noble Figment]]''' || 100 || 80 || 3 | |||
|- | |||
| '''[[Noble Fancy]]''' || 200 || 160 || 5 | |||
|- | |||
| '''[[Noble Fantasy]]''' || — || 640 || 3 | |||
|- | |||
| '''[[Grim Figment]]''' || 50 || 40 || 2 | |||
|- | |||
| '''[[Grim Fancy]]''' || 300 || 240 || 7 | |||
|- | |||
| '''[[Grim Fantasy]]''' || 300 || 240 || 7 | |||
|- | |||
| '''[[Vibrant Figment]]''' || 50 || 40 || 1 | |||
|- | |||
| '''[[Vibrant Fancy]]''' || 200 || 160 || 5 | |||
|- | |||
| '''[[Vibrant Fantasy]]''' || — || 400 || 2 | |||
|- | |||
| '''[[Troubling Figment]]''' || 50 || 40 || 1 | |||
|- | |||
| '''[[Troubling Fancy]]''' || 100 || 80 || 3 | |||
|- | |||
| '''[[Troubling Fantasy]]''' || — || 400 || 2 | |||
|- | |||
| '''[[Wondrous Figment]]''' || 150 || 120 || 4 | |||
|- | |||
| '''[[Wondrous Fancy]]''' || 300 || 240 || 7 | |||
|- | |||
| '''[[Wondrous Fantasy]]''' || 400 || 320 || 8 | |||
|- | |||
| '''[[Tama Sheep Recipe]]''' || 50 || 40 || 3 | |||
|- | |||
| '''[[Pricklemane Recipe]]''' || 50 || 40 || 1 | |||
|- | |||
| '''[[Hebby Repp Recipe]]''' || 50 || 40 || 1 | |||
|- | |||
| '''[[Fin Fatale Recipe]]''' || 100 || 80 || 2 | |||
|- | |||
| '''[[Necho Cat Recipe]]''' || 200 || 160 || 4 | |||
|- | |||
| '''[[Iceguin Ace Recipe]]''' || 200 || 160 || 6 | |||
|- | |||
| '''[[Escarglow Recipe]]''' || 100 || 80 || 3 | |||
|- | |||
| '''[[KO Kabuto Recipe]]''' || 200 || 160 || 4 | |||
|- | |||
| '''[[Halbird Recipe]]''' || 300 || 240 || 7 | |||
|- | |||
| '''[[Fishboné Recipe]]''' || 100 || 80 || 5 | |||
|- | |||
| '''[[Tatsu Blaze Recipe]]''' || 100 || 80 || 5 | |||
|- | |||
| '''[[Woeflower Recipe]]''' || 200 || 160 || 3 | |||
|- | |||
| '''[[Me Me Bunny Recipe]]''' || 100 || 80 || 6 | |||
|- | |||
| '''[[Aura Lion Recipe]]''' || 500 || 400 || 8 | |||
|} | |||
</div><div class="tabbertab" title="Training Toys"> | |||
{|border=1 cellpadding=2 cellspacing=0 class="sortable" style="text-align:left; font-size:10px" align="center" | |||
!bgcolor=#c0c0c0 align="center" style="font-size:12px" width="170"|Item | |||
!bgcolor=#c0c0c0 align="center" style="font-size:12px" width="50"|Price | |||
!bgcolor=#c0c0c0 align="center" style="font-size:12px" width="50"|Bargain | |||
!bgcolor=#c0c0c0 align="center" style="font-size:12px" width="150"|Shop Level | |||
|- | |||
| '''[[Confetti Candy]]''' || 30 || 24 || 1 | |||
|- | |||
| '''[[Shield Cookie]]''' || 30 || 24 || 1 | |||
|- | |||
| '''[[Block-it Chocolate]]''' || 30 || 24 || 1 | |||
|- | |||
| '''[[Ice Dream Cone]]''' || 30 || 24 || 1 | |||
|- | |||
| '''[[Confetti Candy 2]]''' || 120 || 96 || 4 | |||
|- | |||
| '''[[Shield Cookie 2]]''' || 120 || 96 || 4 | |||
|- | |||
| '''[[Block-it Chocolate 2]]''' || 120 || 96 || 4 | |||
|- | |||
| '''[[Ice Dream Cone 2]]''' || 120 || 96 || 4 | |||
|- | |||
| '''[[Confetti Candy 3]]''' || — || 192 || 7 | |||
|- | |||
| '''[[Shield Cookie 3]]''' || — || 192 || 7 | |||
|- | |||
| '''[[Block-it Chocolate 3]]''' || — || 192 || 7 | |||
|- | |||
| '''[[Ice Dream Cone 3]]''' || — || 192 || 7 | |||
|- | |||
| '''{{c|Balloon|item}}''' || 80 || 64 || 1 | |||
|- | |||
| '''{{c|Water Barrel|item}}''' || 80 || 64 || 1 | |||
|- | |||
| '''[[Paint Gun: Red]]''' || 10 || 8 || 1 | |||
|- | |||
| '''[[Paint Gun: Blue]]''' || 10 || 8 || 1 | |||
|- | |||
| '''[[Paint Gun: Green]]''' || 10 || 8 || 1 | |||
|- | |||
| '''[[Paint Gun: Yellow]]''' || 10 || 8 || 1 | |||
|- | |||
| '''[[Paint Gun: White]]''' || 10 || 8 || 1 | |||
|- | |||
| '''[[Paint Gun: Black]]''' || 10 || 8 || 1 | |||
|- | |||
| '''[[Paint Gun: Purple]]''' || 10 || 8 || 1 | |||
|- | |||
| '''[[Paint Gun: Sky Blue]]''' || 10 || 8 || 1 | |||
|} | |||
</div></div></div><div class="tabbertab" title="Medal Shop"> | |||
<div class="tabber"> | |||
<div class="tabbertab" title="Attack"> | |||
{|border=1 cellpadding=2 cellspacing=0 class="sortable" style="text-align:left; font-size:10px" align="center" | |||
!bgcolor=#c0c0c0 align="center" style="font-size:12px" width="170"|Command | |||
!bgcolor=#c0c0c0 align="center" style="font-size:12px" width="100"|Medals | |||
!bgcolor=#c0c0c0 align="center" style="font-size:12px" width="150"|Shop Level | |||
|- | |||
| [[File:Icon Attack KHBBS.png|x20px]] '''[[Slot Edge]]''' || 150 || 1 | |||
|- | |||
| [[File:Icon Attack KHBBS.png|x20px]] '''[[Drain Dive]]''' || 120 || 1 | |||
|- | |||
| [[File:Icon Attack KHBBS.png|x20px]] '''[[Fire Windmill]]''' || 250 || 1 | |||
|- | |||
| [[File:Icon Attack KHBBS.png|x20px]] '''[[Limit Storm]]''' || 1000 || 5 | |||
|- | |||
| [[File:Icon Attack KHBBS.png|x20px]] '''[[Sacrifice]]''' || 1000 || 5 | |||
|} | |||
</div><div class="tabbertab" title="Magic"> | |||
{|border=1 cellpadding=2 cellspacing=0 class="sortable" style="text-align:left; font-size:10px" align="center" | |||
!bgcolor=#c0c0c0 align="center" style="font-size:12px" width="170"|Command | |||
!bgcolor=#c0c0c0 align="center" style="font-size:12px" width="100"|Medals | |||
!bgcolor=#c0c0c0 align="center" style="font-size:12px" width="150"|Shop Level | |||
|- | |||
| [[File:Icon Magic KHBBS.png|x20px]] '''[[Firaga Burst]]''' || 2000 || 8 | |||
|- | |||
| [[File:Icon Magic KHBBS.png|x20px]] '''{{c|Deep Freeze|ability}}''' || 1200 || 5 | |||
|- | |||
| [[File:Icon Magic KHBBS.png|x20px]] '''[[Triple Plasma]]''' || 1500 || 8 | |||
|- | |||
| [[File:Icon Magic KHBBS.png|x20px]] '''[[Balloonga]]''' || 1200 || 5 | |||
|- | |||
| [[File:Icon Magic KHBBS.png|x20px]] '''[[Mini]]''' || 200 || 1 | |||
|- | |||
| [[File:Icon Magic KHBBS.png|x20px]] '''[[Stop]]''' || 150 || 1 | |||
|} | |||
</div><div class="tabbertab" title="Item"> | |||
{|border=1 cellpadding=2 cellspacing=0 class="sortable" style="text-align:left; font-size:10px" align="center" | |||
!bgcolor=#c0c0c0 align="center" style="font-size:12px" width="170"|Command | |||
!bgcolor=#c0c0c0 align="center" style="font-size:12px" width="100"|Medals | |||
!bgcolor=#c0c0c0 align="center" style="font-size:12px" width="150"|Shop Level | |||
|- | |||
| [[File:Icon Item KHBBS.png|x20px]] '''[[Drop-Me-Never]]''' || 100 || 5 | |||
|- | |||
| [[File:Icon Item KHBBS.png|x20px]] '''[[Megalixir]]''' || 4000 || 8 | |||
|- | |||
| [[File:Icon Item KHBBS.png|x20px]] '''[[Dream Candy]]''' || 200 || 1 | |||
|} | |||
</div><div class="tabbertab" title="Action"> | |||
{|border=1 cellpadding=2 cellspacing=0 class="sortable" style="text-align:left; font-size:10px" align="center" | |||
!bgcolor=#c0c0c0 align="center" style="font-size:12px" width="170"|Command | |||
!bgcolor=#c0c0c0 align="center" style="font-size:12px" width="100"|Medals | |||
!bgcolor=#c0c0c0 align="center" style="font-size:12px" width="150"|Shop Level | |||
|- | |||
| [[File:Icon Movement KHBBS.png|x20px]] '''[[Dark Roll]]''' || 700 || 8 | |||
|- | |||
| [[File:Icon Defense KHBBS.png|x20px]] '''[[Dark Barrier]]''' || 750 || 8 | |||
|} | |||
</div><div class="tabbertab" title="Spirit Items"> | |||
{|border=1 cellpadding=2 cellspacing=0 class="sortable" style="text-align:left; font-size:10px" align="center" | |||
!bgcolor=#c0c0c0 align="center" style="font-size:12px" width="170"|Item | |||
!bgcolor=#c0c0c0 align="center" style="font-size:12px" width="100"|Medals | |||
!bgcolor=#c0c0c0 align="center" style="font-size:12px" width="150"|Shop Level | |||
|- | |||
|'''[[Thunderaffe Recipe]]''' || 280 || 4 | |||
|- | |||
|'''[[Kooma Panda Recipe]]''' || 80 || 1 | |||
|- | |||
|'''[[Pegaslick Recipe]]''' || 330 || 5 | |||
|- | |||
|'''[[Juggle Pup Recipe]]''' || 180 || 2 | |||
|- | |||
|'''[[Drill Sye Recipe]]''' || 150 || 1 | |||
|- | |||
|'''[[Majik Lapin Recipe]]''' || 400 || 6 | |||
|- | |||
|'''[[Meowjesty Recipe]]''' || 2000 || <ref name="Rush">Available with a Rush Level of 20.</ref> | |||
|- | |||
|'''[[Sudo Neku Recipe]]''' || 2000 || <ref name="Rush"/> | |||
|- | |||
|'''[[Ursa Circus Recipe]]''' || 2000 || <ref name="Rush"/> | |||
|} | |||
</div><div class="tabbertab" title="Training Toys"> | |||
{|border=1 cellpadding=2 cellspacing=0 class="sortable" style="text-align:left; font-size:10px" align="center" | |||
!bgcolor=#c0c0c0 align="center" style="font-size:12px" width="170"|Item | |||
!bgcolor=#c0c0c0 align="center" style="font-size:12px" width="100"|Medals | |||
!bgcolor=#c0c0c0 align="center" style="font-size:12px" width="150"|Shop Level | |||
|- | |||
| '''[[Confetti Candy]]''' || 40 || 1 | |||
|- | |||
| '''[[Shield Cookie]]''' || 40 || 1 | |||
|- | |||
| '''[[Block-it Chocolate]]''' || 40 || 1 | |||
|- | |||
| '''[[Ice Dream Cone]]''' || 40 || 1 | |||
|- | |||
| '''[[Royal Cake]]''' || 300 || 8 | |||
|- | |||
| '''[[Confetti Candy 2]]''' || 100 || 4 | |||
|- | |||
| '''[[Shield Cookie 2]]''' || 100 || 4 | |||
|- | |||
| '''[[Block-it Chocolate 2]]''' || 100 || 4 | |||
|- | |||
| '''[[Ice Dream Cone 2]]''' || 100 || 4 | |||
|- | |||
| '''[[Confetti Candy 3]]''' || 200 || 7 | |||
|- | |||
| '''[[Shield Cookie 3]]''' || 200 || 7 | |||
|- | |||
| '''[[Block-it Chocolate 3]]''' || 200 || 7 | |||
|- | |||
| '''[[Ice Dream Cone 3]]''' || 200 || 7 | |||
|- | |||
| '''{{c|Balloon|item}}''' || 50 || 1 | |||
|- | |||
| '''{{c|Water Barrel|item}}''' || 50 || 1 | |||
|- | |||
| '''[[Paint Gun: Red]]''' || 5 || 1 | |||
|- | |||
| '''[[Paint Gun: Blue]]''' || 5 || 1 | |||
|- | |||
| '''[[Paint Gun: Green]]''' || 5 || 1 | |||
|- | |||
| '''[[Paint Gun: Yellow]]''' || 5 || 1 | |||
|- | |||
| '''[[Paint Gun: White]]''' || 5 || 1 | |||
|- | |||
| '''[[Paint Gun: Black]]''' || 5 || 1 | |||
|- | |||
| '''[[Paint Gun: Purple]]''' || 5 || 1 | |||
|- | |||
| '''[[Paint Gun: Sky Blue]]''' || 5 || 1 | |||
|} | |||
</div></div></div></div> | |||
{{reflist}} | |||
== | ==Flick Rush== | ||
===Rank=== | |||
Points needed | |||
*S: 30+ points | |||
*A: 23-29 points | |||
*B: 16-22 points | |||
*C: 15 or less points | |||
==== | |||
{| class="wikitable" | |||
|Time (???): | |||
|Remaining HP | |||
|Successful Attacks | |||
|Successful Blocks | |||
|- | |||
| | |||
*1:59 or less - 10 points | |||
*2:00 - 2:22 - 9 points | |||
*2:23 - 2:44 - 8 points | |||
*2:45 - 3:07 - 7 points | |||
*3:08 - 3:29 - 6 points | |||
*3:30 - 3:52 - 5 points | |||
*3:53 - 4:14 - 4 points | |||
*4:15 - 4:37 - 3 points | |||
*4:38 - 4:59 - 2 points | |||
*5:00 or longer - 1 point | |||
*Defeated - 0 points | |||
| | |||
*70% or more - 12 points | |||
*60 - 69% - 11 points | |||
| | *50 - 59% - 10 points | ||
*45 - 49% - 9 points | |||
*39 - 44% - 8 points | |||
*34 - 38% - 7 points | |||
*28 - 33% - 6 points | |||
*23 - 27% - 5 points | |||
*17 - 22% - 4 points | |||
*12 - 16% - 3 points | |||
*6 - 11% - 2 points | |||
*1 - 5% - 1 point | |||
*0% - 0 points | |||
| | |||
| | *90% or more - 12 points | ||
*87 - 89% - 11 points | |||
*83 - 86% - 10 points | |||
*80 - 82% - 9 points | |||
*76 - 79% - 8 points | |||
*72 - 75% - 7 points | |||
| | *69 - 71% - 6 points | ||
*65 - 68% - 5 points | |||
| | *61 - 64% - 4 points | ||
*58 - 60% - 3 points | |||
*54 - 57% - 2 points | |||
*53% or less - 1 point | |||
| | |||
*5 or more - 5 points | |||
*4 - 4 points | |||
*3 - 3 points | |||
*2 - 2 points | |||
*1 - 1 point | |||
*0 - 0 points | |||
|} | |||
===Trophies=== | |||
Each round gives points based on the rank. | |||
*S rank - 4 points | |||
*A rank - 3 points | |||
*B rank - 2 points | |||
*C rank - 1 point | |||
Points needed for trophy: | |||
{| class="wikitable" | |||
|Amount of rounds | |||
|Bronze | |||
|Silver | |||
|Gold | |||
|- | |- | ||
| | |1 ||2 ||3 ||4 | ||
|- | |- | ||
| | |2 ||3 ||6 ||8 | ||
|- | |- | ||
| | |3 ||4 ||8 ||12 | ||
|- | |- | ||
| | |4 ||6 ||11 ||16 | ||
|- | |- | ||
| | |5 ||7 ||14 ||20 | ||
|} | |||
===Medals=== | |||
{|class="wikitable" width="60%" style="text-align:center" | |||
|rowspan="2"|Tournament | |||
|rowspan="2"|Round | |||
|colspan="4"|Rank (Victory) | |||
|colspan="2"|Rank (Defeat) | |||
|- | |- | ||
| | |S||A||B||C||B||C | ||
|- | |- | ||
| | |Training Cup | ||
|Round 1||60||40||30||20||10||6 | |||
|- | |- | ||
| | |rowspan="2"|Beginner's Cup | ||
|Round 1||70||50||40||30||13||10 | |||
|- | |- | ||
| | |Round 2||80||60||50||40||16||13 | ||
|- | |- | ||
| | |rowspan="4"|Rainbow Cup | ||
|Round 1||80||60||50||40||16||13 | |||
|- | |- | ||
| | |Round 2||90||70||60||50||20||16 | ||
|- | |- | ||
| | |Round 3||100||80||70||60||23||20 | ||
|- | |- | ||
| | |Round 4||110||90||80||70||26||23 | ||
|- | |- | ||
| | |rowspan="2"|Digital Cup | ||
|Round 1||100||80||70||60||23||20 | |||
|- | |- | ||
| | |Round 2||110||90||80||70||26||23 | ||
|- | |- | ||
| | |rowspan="4"|Tin Pin Cup | ||
|Round 1||110||90||80||70||26||23 | |||
|- | |- | ||
| | |Round 2||120||100||90||80||30||26 | ||
|- | |- | ||
| | |Round 3||130||110||100||90||33||30 | ||
|- | |- | ||
| | |Round 4||140||120||110||100||36||33 | ||
|- | |- | ||
| | |Speed Cup | ||
|Round 1||140||120||110||100||36||33 | |||
|- | |- | ||
| | |rowspan="3"|Yummy Cup | ||
|Round 1||150||130||120||110||40||36 | |||
|- | |- | ||
| | |Round 2||160||140||130||120||43||40 | ||
|- | |- | ||
| | |Round 3||170||160||140||130||46||43 | ||
|- | |- | ||
| | |rowspan="4"|Final Cup | ||
|Round 1||170||150||140||130||46||43 | |||
|- | |- | ||
| | |Round 2||180||160||150||140||50||46 | ||
|- | |- | ||
| | |Round 3||190||170||160||150||53||50 | ||
|- | |- | ||
| | |Round 4||200||180||170||160||56||53 | ||
|- | |- | ||
| | |Horror Cup | ||
|Round 1||220||200||190||180||63||60 | |||
|- | |- | ||
| | |rowspan="5"|Secret Cup | ||
|Round 1||240||220||210||200||70||66 | |||
|- | |- | ||
| | |Round 2||260||240||230||220||76||73 | ||
|- | |- | ||
| | |Round 3||280||260||250||240||83||80 | ||
|- | |- | ||
| | |Round 4||300||280||270||260||90||86 | ||
|- | |- | ||
| | |Round 5||350||330||320||310||106||103 | ||
|} | |} | ||
Streetpass: | |||
=== | {| class="wikitable" width="40%" style="text-align:center" | ||
|rowspan="2"|Flick Rush LV | |||
|colspan="4"|Rank (Victory) | |||
|colspan="2"|Rank (Defeat) | |||
|- | |- | ||
| | |S||A||B||C||B||C | ||
| | |||
| | |||
|- | |- | ||
| | |1~4||80||60||50||40||16||13 | ||
| | |||
| | |||
|- | |- | ||
| | |5~8||100||80||70||60||23||20 | ||
| | |||
| | |||
|- | |- | ||
| | |9~12||140||120||110||100||36||33 | ||
| | |||
| | |||
|- | |- | ||
| | |13~16||180||160||150||140||50||46 | ||
| | |||
| | |||
|- | |- | ||
| | |17~20||220||200||190||180||63||60 | ||
| | |} | ||
| | |||
==Battle Levels== | |||
{|class="wikitable" width="40%" | |||
!World | |||
!Before clear | |||
!After clear | |||
|- | |- | ||
| | |Traverse Town (1)||3||6 | ||
| | |||
| | |||
|- | |- | ||
| | |La Cité des Cloches||8||12 | ||
| | |||
|- | |- | ||
| | |The Grid||14||18 | ||
| | |||
|- | |- | ||
| | |Prankster's Paradise||18||20 | ||
| | |||
|- | |- | ||
| | |Traverse Town (2)||20||24 | ||
| | |||
|- | |- | ||
| | |Country of the Musketeers||26||30 | ||
| | |||
|- | |- | ||
| | |Symphony of Sorcery||34||36 | ||
| | |||
|- | |- | ||
| | |The World That Never Was||38|| | ||
|} | |||
|[[ | |||
|- | ==Dream Eaters== | ||
Dream Eaters that appear in each world (not counting portals and rare Lord Kyroo fight) | |||
|[[ | ===By World=== | ||
<div class="mw-collapsible mw-collapsed"> | |||
====Traverse Town==== | |||
<gallery> | |||
|[[ | Meow Wow (Nightmare) KH3D.png|[[Meow Wow]]<!-- 1st visit only --> | ||
Yoggy Ram (Nightmare) KH3D.png|[[Yoggy Ram]]<!-- 1st--> | |||
Komory Bat (Nightmare) KH3D.png|[[Komory Bat]]<!-- Both visits--> | |||
Pricklemane (Nightmare) KH3D.png|[[Pricklemane]]<!-- 1st--> | |||
|[[ | Hebby Repp (Nightmare) KH3D.png|[[Hebby Repp]]<!-- 1st--> | ||
Kooma Panda (Nightmare) KH3D.png|[[Kooma Panda]]<!--1st--> | |||
Tama Sheep (Nightmare) KH3D.png|[[Tama Sheep]]<!--1st; Sora: normal, Riku: after clear--> | |||
<!-- All following Dream Eaters: 2nd visit only --> | |||
Necho Cat (Nightmare) KH3D.png|[[Necho Cat]] | |||
Wheeflower (Nightmare) KH3D.png|[[Wheeflower]] | |||
Zolephant (Nightmare) KH3D.png|[[Zolephant]] | |||
Woeflower (Nightmare) KH3D.png|[[Woeflower]] | |||
|[[Tama Sheep]] ( | Peepsta Hoo (Nightmare) KH3D.png|[[Peepsta Hoo]] | ||
Iceguin Ace (Nightmare) KH3D.png|[[Iceguin Ace]]<!-- Sora: normal, Riku: after clear--> | |||
Jestabocky (Nightmare) KH3D.png|[[Jestabocky]] | |||
Thunderaffe (Nightmare) KH3D.png|[[Thunderaffe]] | |||
|[[ | Staggerceps (Nightmare) KH3D.png|[[Staggerceps]] | ||
Fishboné (Nightmare) KH3D.png|[[Fishboné]] | |||
Chef Kyroo (Nightmare) KH3D.png|[[Chef Kyroo]] | |||
Tatsu Blaze (Nightmare) KH3D.png|[[Tatsu Blaze]] | |||
|[[ | Drill Sye (Nightmare) KH3D.png|[[Drill Sye]]<br>(Side: Sora only) | ||
Sir Kyroo (Nightmare) KH3D.png|[[Sir Kyroo]]<br>(Side: Sora only) | |||
Juggle Pup (Nightmare) KH3D.png|[[Juggle Pup]]<br>(Side: Sora only)<!-- After clear--> | |||
Cera Terror (Nightmare) KH3D.png|[[Cera Terror]]<br>(Side: Riku only) | |||
|[[ | </gallery> | ||
;Portals | |||
<gallery> | |||
Meow Wow (Nightmare) KH3D.png|[[Meow Wow]]<!--BP, SP--> | |||
|[[ | Meow Wow (Rare) KH3D.png|[[Meow Wow]] (Rare)<!--SP--> | ||
Tama Sheep (Rare) KH3D.png|[[Tama Sheep]] (Rare)<!--SP--> | |||
Yoggy Ram (Nightmare) KH3D.png|[[Yoggy Ram]]<!--BP, SP(2)--> | |||
Komory Bat (Nightmare) KH3D.png|[[Komory Bat]]<!--SP(R)--> | |||
|[[ | Pricklemane (Nightmare) KH3D.png|[[Pricklemane]]<!--BP--> | ||
Hebby Repp (Nightmare) KH3D.png|[[Hebby Repp]]<!--BP--> | |||
Kooma Panda (Nightmare) KH3D.png|[[Kooma Panda]]<!--BP--> | |||
Kooma Panda (Rare) KH3D.png|[[Kooma Panda]] (Rare)<!--SP--> | |||
|[[Komory Bat]] ( | Flowbermeow (Nightmare) KH3D.png|[[Flowbermeow]]<!--SP--> | ||
Peepsta Hoo (Nightmare) KH3D.png|[[Peepsta Hoo]]<!--SP(2)(S)--> | |||
KO Kabuto (Nightmare) KH3D.png|[[KO Kabuto]]<!--?--> | |||
Sir Kyroo (Nightmare) KH3D.png|[[Sir Kyroo]]<!--BP, SP--> | |||
|[[ | Fin Fatale (Nightmare) KH3D.png|[[Fin Fatale]]<!--?--> | ||
Iceguin Ace (Nightmare) KH3D.png|[[Iceguin Ace]]<!--BP, SP(2) | |||
Juggle Pup (Nightmare) KH3D.png|[[Juggle Pup]]<!--?--> | |||
Thunderaffe (Rare) KH3D.png|[[Thunderaffe]] (Rare)<!--SP(2) --> | |||
|[[ | Fishboné (Nightmare) KH3D.png|[[Fishboné]]<!--SP(2)(S)--> | ||
Ducky Goose (Nightmare) KH3D.png|[[Ducky Goose]]<!--?(2)--> | |||
Pegaslick (Nightmare) KH3D.png|[[Pegaslick]] <!--SP(2)--> | |||
Electricorn (Nightmare) KH3D.png|[[Electricorn]]<!--SP(2)--> | |||
|[[ | </gallery> | ||
====La Cité des Cloches==== | |||
<gallery> | |||
|[[ | Yoggy Ram (Nightmare) KH3D.png|[[Yoggy Ram]] | ||
Komory Bat (Nightmare) KH3D.png|[[Komory Bat]] | |||
Pricklemane (Nightmare) KH3D.png|[[Pricklemane]] | |||
Hebby Repp (Nightmare) KH3D.png|[[Hebby Repp]] | |||
|[[ | Kooma Panda (Nightmare) KH3D.png|[[Kooma Panda]] | ||
Toximander (Nightmare) KH3D.png|[[Toximander]] | |||
Necho Cat (Nightmare) KH3D.png|[[Necho Cat]] | |||
Wheeflower (Nightmare) KH3D.png|[[Wheeflower]] | |||
Zolephant (Nightmare) KH3D.png|[[Zolephant]] | |||
Woeflower (Nightmare) KH3D.png|[[Woeflower]] | |||
Drill Sye (Nightmare) KH3D.png|[[Drill Sye]] | |||
Meow Wow (Nightmare) KH3D.png|[[Meow Wow]]<br>(Side: Sora only) | |||
Tama Sheep (Nightmare) KH3D.png|[[Tama Sheep]]<br>(Side: Sora only) | |||
</gallery> | |||
;Portals | |||
<gallery> | |||
Meow Wow (Nightmare) KH3D.png|[[Meow Wow]]<!--BP, SP--> | |||
Meow Wow (Rare) KH3D.png|[[Meow Wow]] (Rare)<!--SP--> | |||
Komory Bat (Nightmare) KH3D.png|[[Komory Bat]]<!--BP(R)--> | |||
Pricklemane (Nightmare) KH3D.png|[[Pricklemane]]<!--SP(R)--> | |||
Necho Cat (Nightmare) KH3D.png|[[Necho Cat]]<!--SP--> | |||
Necho Cat (Rare) KH3D.png|[[Necho Cat]] (Rare)<!--SP--> | |||
Zolephant (Nightmare) KH3D.png|[[Zolephant]]<!--SP(R)--> | |||
Zolephant (Rare) KH3D.png|[[Zolephant]] (Rare)<br>(Side: Sora only)<!--SP--> | |||
Drill Sye (Nightmare) KH3D.png|[[Drill Sye]]<!--BP(R), SP(S)--> | |||
Drill Sye (Rare) KH3D.png|[[Drill Sye]] (Rare)<!--SP--> | |||
Peepsta Hoo (Nightmare) KH3D.png|[[Peepsta Hoo]]<!--BP(R)--> | |||
Escarglow (Nightmare) KH3D.png|[[Escarglow]]<!--?--> | |||
KO Kabuto (Nightmare) KH3D.png|[[KO Kabuto]]<!--BP(R)--> | |||
Halbird (Nightmare) KH3D.png|[[Halbird]]<!--?--> | |||
Tatsu Steed (Nightmare) KH3D.png|[[Tatsu Steed]]<!--?--> | |||
Tatsu Blaze (Nightmare) KH3D.png|[[Tatsu Blaze]]<!--?--> | |||
Ghostabocky (Nightmare) KH3D.png|[[Ghostabocky]]<!--?--> | |||
</gallery> | |||
=== | ====The Grid==== | ||
<gallery> | |||
Meow Wow (Nightmare) KH3D.png|[[Meow Wow]] | |||
Komory Bat (Nightmare) KH3D.png|[[Komory Bat]] | |||
Peepsta Hoo (Nightmare) KH3D.png|[[Peepsta Hoo]] | |||
Escarglow (Nightmare) KH3D.png|[[Escarglow]] | |||
KO Kabuto (Nightmare) KH3D.png|[[KO Kabuto]] | |||
Halbird (Nightmare) KH3D.png|[[Halbird]] | |||
Cyber Yog (Nightmare) KH3D.png|[[Cyber Yog]] | |||
Eaglider (Nightmare) KH3D.png|[[Eaglider]] | |||
Kooma Panda (Nightmare) KH3D.png|[[Kooma Panda]]<br>(Side: Sora only) | |||
| | </gallery> | ||
|[[ | |||
;Portals | |||
<gallery> | |||
|[[ | Meow Wow (Rare) KH3D.png|[[Meow Wow]] (Rare)<!--SP--> | ||
Yoggy Ram (Rare) KH3D.png|[[Yoggy Ram]] (Rare)<!--SP--> | |||
Peepsta Hoo (Nightmare) KH3D.png|[[Peepsta Hoo]]<!--SP--> | |||
Escarglow (Nightmare) KH3D.png|[[Escarglow]]<!--SP--> | |||
KO Kabuto (Nightmare) KH3D.png|[[KO Kabuto]]<!--SP--> | |||
KO Kabuto (Rare) KH3D.png|[[KO Kabuto]] (Rare)<!--SP--> | |||
|[[Komory Bat]] ( | Eaglider (Nightmare) KH3D.png|[[Eaglider]]<!--SP--> | ||
Aura Lion (Nightmare) KH3D.png|[[Aura Lion<!--?--> | |||
</gallery> | |||
| | |||
====Prankster's Paradise==== | |||
<gallery> | |||
Komory Bat (Nightmare) KH3D.png|[[Komory Bat]] | |||
| | Hebby Repp (Nightmare) KH3D.png|[[Hebby Repp]] | ||
Kooma Panda (Nightmare) KH3D.png|[[Kooma Panda]] | |||
| | Fin Fatale (Nightmare) KH3D.png|[[Fin Fatale]] | ||
Tatsu Steed (Nightmare) KH3D.png|[[Tatsu Steed]] | |||
Iceguin Ace (Nightmare) KH3D.png|[[Iceguin Ace]] | |||
|[[Meow Wow]] ( | Juggle Pup (Nightmare) KH3D.png|[[Juggle Pup]] | ||
Jestabocky (Nightmare) KH3D.png|[[Jestabocky]] | |||
| | Meow Wow (Nightmare) KH3D.png|[[Meow Wow]]<br>(Side: Sora only) | ||
Pricklemane (Nightmare) KH3D.png|[[Pricklemane]]<br>(Side: Sora only) | |||
Sir Kyroo (Nightmare) KH3D.png|[[Sir Kyroo]]<br>(Side: Sora only) | |||
</gallery> | |||
|[[ | |||
;Portals | |||
<gallery> | |||
Meow Wow (Nightmare) KH3D.png|[[Meow Wow]]<!--SP(S)--> | |||
Yoggy Ram (Nightmare) KH3D.png|[[Yoggy Ram]]<!--SP(R)--> | |||
Komory Bat (Nightmare) KH3D.png|[[Komory Bat]]<!--SP(S)--> | |||
Kooma Panda (Nightmare) KH3D.png|[[Kooma Panda]]<!--SP--> | |||
Flowbermeow (Nightmare) KH3D.png|[[Flowbermeow]]<!--SP(S)--> | |||
Zolephant (Nightmare) KH3D.png|[[Zolephant]]<!--SP(R)--> | |||
Drill Sye (Nightmare) KH3D.png|[[Drill Sye]]<!--SP(S)--> | |||
Escarglow (Nightmare) KH3D.png|[[Escarglow]]<!--BP--> | |||
KO Kabuto (Nightmare) KH3D.png|[[KO Kabuto]]<!--SP(R)--> | |||
| | Lord Kyroo (Nightmare) KH3D.png|[[Lord Kyroo]]<!--?--> | ||
Tatsu Steed (Nightmare) KH3D.png|[[Tatsu Steed]]<!--SP--> | |||
Iceguin Ace (Nightmare) KH3D.png|[[Iceguin Ace]]<!--SP--> | |||
Iceguin Ace (Rare) KH3D.png|[[Iceguin Ace]] (Rare)<!--SP--> | |||
Juggle Pup (Nightmare) KH3D.png|[[Juggle Pup]]<!--SP(S)--> | |||
Juggle Pup (Rare) KH3D.png|[[Juggle Pup]] (Rare)<!--SP--> | |||
Jestabocky (Nightmare) KH3D.png|[[Jestabocky]]<!--BP--> | |||
Pegaslick (Nightmare) KH3D.png|[[Pegaslick]]<!--?--> | |||
Ryu Dragon (Nightmare) KH3D.png|[[Ryu Dragon]]<!--SP(R)--> | |||
</gallery> | |||
====Country of the Musketeers==== | |||
<gallery> | |||
Toximander (Nightmare) KH3D.png|[[Toximander]] | |||
Halbird (Nightmare) KH3D.png|[[Halbird]] | |||
|[[ | Jestabocky (Nightmare) KH3D.png|[[Jestabocky]] | ||
Thunderaffe (Nightmare) KH3D.png|[[Thunderaffe]] | |||
Staggerceps (Nightmare) KH3D.png|[[Staggerceps]] | |||
|[[ | Fishboné (Nightmare) KH3D.png|[[Fishboné]] | ||
Chef Kyroo (Nightmare) KH3D.png|[[Chef Kyroo]] | |||
Cera Terror (Nightmare) KH3D.png|[[Cera Terror]] | |||
Me Me Bunny (Nightmare) KH3D.png|[[Me Me Bunny]] | |||
Ducky Goose (Nightmare) KH3D.png|[[Ducky Goose]] | |||
Aura Lion (Nightmare) KH3D.png|[[Aura Lion]]<!-- Sora: after clear; Riku: normal --> | |||
|[[ | Kooma Panda (Nightmare) KH3D.png|[[Kooma Panda]]<br>(Side: Sora only) | ||
Zolephant (Nightmare) KH3D.png|[[Zolephant]]<br>(Side: Sora only) | |||
Peepsta Hoo (Nightmare) KH3D.png|[[Peepsta Hoo]]<br>(Side: Sora only) | |||
|[[ | KO Kabuto (Nightmare) KH3D.png|[[KO Kabuto]]<br>(Side: Sora only) | ||
Sir Kyroo (Nightmare) KH3D.png|[[Sir Kyroo]]<br>(Side: Sora only) | |||
Iceguin Ace (Nightmare) KH3D.png|[[Iceguin Ace]]<br>(Side: Sora only) | |||
Tyranto Rex (Nightmare) KH3D.png|[[Tyranto Rex]]<br>(Side: Sora only) | |||
Tatsu Blaze (Nightmare) KH3D.png|[[Tatsu Blaze]]<br>(Side: Riku only) | |||
</gallery> | |||
|[[ | |||
;Portals | |||
| | <gallery> | ||
|[[ | Pricklemane (Nightmare) KH3D.png|[[Pricklemane]]<!--SP(S)--> | ||
Hebby Repp (Nightmare) KH3D.png|[[Hebby Repp]]<!--SP(S)--> | |||
Peepsta Hoo (Nightmare) KH3D.png|[[Peepsta Hoo]]<!--SP--> | |||
|[[ | Halbird (Nightmare) KH3D.png|[[Halbird]]<!--SP(S)--> | ||
Halbird (Rare) KH3D.png|[[Halbird]] (Rare)<!--SP--> | |||
Iceguin Ace (Nightmare) KH3D.png|[[Iceguin Ace]]<!--SP(S)--> | |||
Jestabocky (Nightmare) KH3D.png|[[Jestabocky]]<!--BP--> | |||
Thunderaffe (Nightmare) KH3D.png|[[Thunderaffe]]<!--SP(S)--> | |||
Fishboné (Nightmare) KH3D.png|[[Fishboné]]<!--BP--> | |||
|[[ | Cera Terror (Nightmare) KH3D.png|[[Cera Terror]]<!--BP, SP(R)--> | ||
Me Me Bunny (Nightmare) KH3D.png|[[Me Me Bunny]]<!--SP(S)--> | |||
Me Me Bunny (Rare) KH3D.png|[[Me Me Bunny]] (Rare)<!--SP--> | |||
|[[ | Tyranto Rex (Rare) KH3D.png|[[Tyranto Rex]] (Rare)<!--SP--> | ||
Ducky Goose (Nightmare) KH3D.png|[[Ducky Goose]]<!--SP(R)--> | |||
Ducky Goose (Rare) KH3D.png|[[Ducky Goose]] (Rare)<!--SP--> | |||
Aura Lion (Nightmare) KH3D.png|[[Aura Lion]]<!--SP(R)--> | |||
Aura Lion (Rare) KH3D.png|[[Aura Lion]] (Rare)<!--SP--> | |||
Ghostabocky (Nightmare) KH3D.png|[[Ghostabocky]]<!--BP--> | |||
Ryu Dragon (Nightmare) KH3D.png|[[Ryu Dragon]]<!--SP(S)--> | |||
Majik Lapin (Nightmare) KH3D.png|[[Majik Lapin]]<!--?--> | |||
Skelterwild (Nightmare) KH3D.png|[[Skelterwild]]<!--SP(R)--> | |||
Drak Quack (Nightmare) KH3D.png|[[Drak Quack]]<!--?--> | |||
Keeba Tiger (Nightmare) KH3D.png|[[Keeba Tiger]]<!--?--> | |||
</gallery> | |||
====Symphony of Sorcery==== | |||
<gallery> | |||
Peepsta Hoo (Nightmare) KH3D.png|[[Peepsta Hoo]] | |||
Iceguin Ace (Nightmare) KH3D.png|[[Iceguin Ace]] | |||
Thunderaffe (Nightmare) KH3D.png|[[Thunderaffe]] | |||
Staggerceps (Nightmare) KH3D.png|[[Staggerceps]] | |||
Pegaslick (Nightmare) KH3D.png|[[Pegaslick]] | |||
Ghostabocky (Nightmare) KH3D.png|[[Ghostabocky]] | |||
Electricorn (Nightmare) KH3D.png|[[Electricorn]] | |||
Ryu Dragon (Nightmare) KH3D.png|[[Ryu Dragon]] | |||
Tama Sheep (Nightmare) KH3D.png|[[Tama Sheep]]<br>(Side: Sora only) | |||
Yoggy Ram (Nightmare) KH3D.png|[[Yoggy Ram]]<br>(Side: Sora only) | |||
Escarglow (Nightmare) KH3D.png|[[Escarglow]]<br>(Side: Sora only) | |||
Fin Fatale (Nightmare) KH3D.png|[[Fin Fatale]]<br>(Side: Sora only)<!--After clear--> | |||
Tatsu Steed (Nightmare) KH3D.png|[[Tatsu Steed]]<br>(Side: Sora only)<!--After clear--> | |||
Fishboné (Nightmare) KH3D.png|[[Fishboné]]<br>(Side: Sora only) | |||
Chef Kyroo (Nightmare) KH3D.png|[[Chef Kyroo]]<br>(Side: Sora only) | |||
Kooma Panda (Nightmare) KH3D.png|[[Kooma Panda]]<br>(Side: Riku only) | |||
Necho Cat (Nightmare) KH3D.png|[[Necho Cat]]<br>(Side: Riku only) | |||
Lord Kyroo (Nightmare) KH3D.png|[[Lord Kyroo]]<br>(Side: Riku only) | |||
Woeflower (Nightmare) KH3D.png|[[Woeflower]]<br>(Side: Riku only) | |||
KO Kabuto (Nightmare) KH3D.png|[[KO Kabuto]]<br>(Side: Riku only) | |||
Sir Kyroo (Nightmare) KH3D.png|[[Sir Kyroo]]<br>(Side: Riku only) | |||
Juggle Pup (Nightmare) KH3D.png|[[Juggle Pup]]<br>(Side: Riku only) | |||
</gallery> | |||
;Portals | |||
<gallery> | |||
Wheeflower (Nightmare) KH3D.png|[[Wheeflower]]<!--BP--> | |||
Drill Sye (Nightmare) KH3D.png|[[Drill Sye]]<!--BP(R)--> | |||
Cera Terror (Nightmare) KH3D.png|[[Cera Terror]]<!--BP(R)--> | |||
Ducky Goose (Nightmare) KH3D.png|[[Ducky Goose]]<!--BP(R)--> | |||
Pegaslick (Nightmare) KH3D.png|[[Pegaslick]]<!--SP--> | |||
Pegaslick (Rare) KH3D.png|[[Pegaslick]] (Rare)<!--SP--> | |||
Ghostabocky (Rare) KH3D.png|[[Ghostabocky]] (Rare)<!--SP--> | |||
Ryu Dragon (Nightmare) KH3D.png|[[Ryu Dragon]]<!--SP--> | |||
Ryu Dragon (Rare) KH3D.png|[[Ryu Dragon]] (Rare)<!--SP--> | |||
</gallery> | |||
====The World That Never Was==== | |||
<gallery> | |||
Cera Terror (Nightmare) KH3D.png|[[Cera Terror]] | |||
Majik Lapin (Nightmare) KH3D.png|[[Majik Lapin]] | |||
Skelterwild (Nightmare) KH3D.png|[[Skelterwild]] | |||
Drak Quack (Nightmare) KH3D.png|[[Drak Quack]] | |||
Keeba Tiger (Nightmare) KH3D.png|[[Keeba Tiger]] | |||
Eaglider (Nightmare) KH3D.png|[[Eaglider]]<br>(Side: Sora only) | |||
Halbird (Nightmare) KH3D.png|[[Halbird]]<br>(Side: Riku only) | |||
Thunderaffe (Nightmare) KH3D.png|[[Thunderaffe]]<br>(Side: Riku only) | |||
Pegaslick (Nightmare) KH3D.png|[[Pegaslick]]<br>(Side: Riku only) | |||
Ghostabocky (Nightmare) KH3D.png|[[Ghostabocky]]<br>(Side: Riku only) | |||
Electricorn (Nightmare) KH3D.png|[[Electricorn]]<br>(Side: Riku only) | |||
Ryu Dragon (Nightmare) KH3D.png|[[Ryu Dragon]]<br>(Side: Riku only) | |||
</gallery> | |||
;Portals | |||
<gallery> | |||
Halbird (Rare) KH3D.png|[[Halbird]] (Rare) | |||
Thunderaffe (Rare) KH3D.png|[[Thunderaffe]] (Rare)<br>(Side: Riku only) | |||
Tyranto Rex (Rare) KH3D.png|[[Tyranto Rex]] (Rare) | |||
Aura Lion (Rare) KH3D.png|[[Aura Lion]] (Rare) | |||
Pegaslick (Rare) KH3D.png|[[Pegaslick]] (Rare) | |||
</gallery> | |||
</div> | |||
===By Dream Eater=== | |||
{|class="wikitable" | |||
!Dream Eater | |||
!Worlds | |||
!Worlds (Portals) | |||
!Worlds (Rare) | |||
|- | |||
|[[Meow Wow]]||TT1, LCdC, TG, PP||TT, LCdC, PP||TT, LCdC, TG | |||
|- | |- | ||
|{{nihongo|[[ | |[[Tama Sheep]]||TT1, LCdC (S), SoS (S)||||TT (R) | ||
|- | |||
|[[Yoggy Ram]]||TT1, LCdC, SoS (S)||TT, PP||TG | |||
|- | |||
|[[Komory Bat]]||TT1, LCdC, TG, PP, TT2||TT, LCdC, PP|| | |||
|- | |||
|[[Pricklemane]]||TT1, LCdC, PP (S)||TT, LCdC, CotM|| | |||
|- | |||
|[[Hebby Repp]]||TT1, LCdC, PP||TT, CotM|| | |||
|- | |||
|[[Kooma Panda]]||TT1, LCdC, TG (S), PP, CotM (S), SoS (R)||TT, PP||TT | |||
|- | |||
|[[Flowbermeow]]||||TT, PP (S)|| | |||
|- | |||
|[[Toximander]]||LCdC, CotM|||| | |||
|- | |||
|[[Necho Cat]]||LCdC, TT2, SoS (R)||LCdC||LCdC | |||
|- | |||
|[[Wheeflower]]||LCdC, TT2||SoS|| | |||
|- | |||
|[[Zolephant]]||LCdC, TT2, CotM (S)||LCdC, PP||LCdC (S) | |||
|- | |||
|[[Lord Kyroo]]||SoS (R)||PP|| | |||
|- | |||
|[[Woeflower]]||LCdC, TT2, SoS (R)|||| | |||
|- | |||
|[[Drill Sye]]||LCdC, TT2 (S)||LCdC, PP, SoS||LCdC | |||
|- | |||
|[[Peepsta Hoo]]||TG, TT2, CotM (S), SoS||LCdC, TG, TT2, CotM|| | |||
|- | |||
|[[Escarglow]]||TG, SoS (S)||LCdC, TG, PP|| | |||
|- | |||
|[[KO Kabuto]]||TG, CotM (S), SoS (R)||TT, LCdC, TG, PP||TG | |||
|- | |||
|[[Halbird]]||TG, CotM, TWTNW (R)||LCdC, CotM||CotM, TWTNW | |||
|- | |||
|[[Cyber Yog]]||TG|||| | |||
|- | |||
|[[Eaglider]]||TG, TWTNW (S)||TG|| | |||
|- | |||
|[[Sir Kyroo]]||PP (S), TT2 (S), CotM (S), SoS (R)||TT|| | |||
|- | |||
|[[Fin Fatale]]||PP, SoS (S)*||TT|| | |||
|- | |||
|[[Tatsu Steed]]||PP, SoS (S)*||LCdC, PP|| | |||
|- | |||
|[[Iceguin Ace]]||PP, TT2, CotM (S), SoS||TT, PP, CotM||PP | |||
|- | |||
|[[Juggle Pup]]||PP, TT2 (S)*, SoS (R)||TT, PP||PP | |||
|- | |||
|[[Jestabocky]]||PP, TT2, CotM||PP, CotM|| | |||
|- | |||
|[[Thunderaffe]]||TT2, CotM, SoS, TWTNW (R)||TT2, CotM||TT2, TWTNW (R) | |||
|- | |||
|[[Staggerceps]]||TT2, CotM, SoS|||| | |||
|- | |||
|[[Fishboné]]||TT2, CotM, SoS (S)||TT2, CotM|| | |||
|- | |||
|[[Chef Kyroo]]||TT2, CotM, SoS (S)|||| | |||
|- | |||
|[[Tatsu Blaze]]||TT2, CotM (R)||LCdC|| | |||
|- | |||
|[[Cera Terror]]||TT2 (R), CotM, TWTNW||CotM, SoS|| | |||
|- | |||
|[[Me Me Bunny]]||CotM||CotM||CotM | |||
|- | |||
|[[Tyranto Rex]]||CotM (S)||||CotM, TWTNW | |||
|- | |||
|[[Ducky Goose]]||CotM||TT2, CotM, SoS||CotM | |||
|- | |||
|[[Aura Lion]]||CotM||TG, CotM||CotM, TWTNW | |||
|- | |||
|[[Pegaslick]]||SoS, TWTNW (R)||PP, TT2, SoS||SoS, TWTNW | |||
|- | |||
|[[Ghostabocky]]||SoS, TWTNW (R)||LCdC, CotM||SoS | |||
|- | |||
|[[Electricorn]]||SoS, TWTNW (R)||TT2|| | |||
|- | |||
|[[Ryu Dragon]]||SoS, TWTNW (R)||PP, CotM, SoS||SoS | |||
|- | |||
|[[Majik Lapin]]||TWTNW||CotM|| | |||
|- | |||
|[[Skelterwild]]||TWTNW||CotM|| | |||
|- | |||
|[[Drak Quack]]||TWTNW||CotM|| | |||
|- | |||
|[[Keeba Tiger]]||TWTNW||CotM|| | |||
|- | |||
|colspan="4"|<small>TT1 = Traverse Town (1st visit)<br>TT2 = Traverse Town (2nd visit)<br>(S) = Sora only<br>(R) = Riku only<br>* = Not available before world clear</small> | |||
|} | |||
==Dream Eater Drops== | |||
===Synthesis Materials=== | |||
{{nihongo|Figment|幻想|Gensō|lit. "Illusion"}}<br>{{nihongo|Fancy|空想|Kūsō}}<br>{{nihongo|Fantasy|夢想|Musō|lit. "Dream"}} | |||
{|class="wikitable" | |||
!Image | |||
!Name | |||
!Enemy | |||
|- | |||
|[[File:Fleeting Figment KH3D.png|25px]] | |||
|{{nihongo|[[Fleeting Figment]]|加速する幻想}} | |||
|[[Escarglow]] (12%), [[KO Kabuto]] (6%N), [[Thunderaffe]] (6%N), [[Me Me Bunny]] (6%N), [[Electricorn]] (6%) | |||
|- | |||
|[[File:Fleeting Fancy KH3D.png|25px]] | |||
|{{nihongo|[[Fleeting Fancy]]|加速する空想}} | |||
|[[Thunderaffe]] (12%N/16%R), [[Pegaslick]] (6%N), [[Electricorn]] (12%), [[Majik Lapin]] (12%) | |||
|- | |||
|[[File:Fleeting Fantasy KH3D.png|25px]] | |||
|{{nihongo|[[Fleeting Fantasy]]|加速する夢想}} | |||
|[[Thunderaffe]] (8%R) | |||
|- | |||
|[[File:Lofty Figment KH3D.png|25px]] | |||
|{{nihongo|[[Lofty Figment]]|羽ばたける幻想}} | |||
|[[Wheeflower]] (12%), [[Woeflower]] (6%), [[Eaglider]] (12%), [[Tatsu Steed]] (12%), [[Tatsu Blaze]] (6%) | |||
|- | |||
|[[File:Lofty Fancy KH3D.png|25px]] | |||
|{{nihongo|[[Lofty Fancy]]|羽ばたける空想}} | |||
|[[Halbird]] (12%N/16%R), [[Pegaslick]] (12%N/16%R), [[Ryu Dragon]] (12%N/16%R) | |||
|- | |||
|[[File:Lofty Fantasy KH3D.png|25px]] | |||
|{{nihongo|[[Lofty Fantasy]]|羽ばたける夢想}} | |||
|[[Halbird]] (8%R), [[Pegaslick]] (8%R), [[Ryu Dragon]] (8%R) | |||
|- | |||
|[[File:Rampant Figment KH3D.png|25px]] | |||
|{{nihongo|[[Rampant Figment]]|躍動する幻想}} | |||
|[[Meow Wow]] (12%N/16%R), [[Komory Bat]] (6%), [[Pricklemane]] (6%), [[Flowbermeow]] (12%), [[Wheeflower]] (6%), <!--[[Zolephant]] (12%) CotM Mont St-Michel battle-->[[Drill Sye]] (6%N), [[Iceguin Ace]] (6%N) | |||
|- | |||
|[[File:Rampant Fancy KH3D.png|25px]] | |||
|{{nihongo|[[Rampant Fancy]]|躍動する空想}} | |||
|[[Meow Wow]] (8%R), [[Zolephant]] (8%R), [[Fin Fatale]] (12%), [[Iceguin Ace]] (12%N/16%R), [[Drak Quack]] (6%) | |||
|- | |||
|[[File:Rampant Fantasy KH3D.png|25px]] | |||
|{{nihongo|[[Rampant Fantasy]]|躍動する夢想}} | |||
|[[Iceguin Ace]] (8%R) | |||
|- | |||
|[[File:Dulcet Figment KH3D.png|25px]] | |||
|{{nihongo|[[Dulcet Figment]]|共鳴する幻想}} | |||
|[[Necho Cat]] (12%N/16%R), [[Tatsu Steed]] (6%) | |||
|- | |||
|[[File:Dulcet Fancy KH3D.png|25px]] | |||
|{{nihongo|[[Dulcet Fancy]]|共鳴する空想}} | |||
|[[Necho Cat]] (8%R), [[Ducky Goose]] (12%N/16%R), [[Keeba Tiger]] (12%) | |||
|- | |||
|[[File:Dulcet Fantasy KH3D.png|25px]] | |||
|{{nihongo|[[Dulcet Fantasy]]|共鳴する夢想}} | |||
|[[Ducky Goose]] (8%R), [[Majik Lapin]] (6%) | |||
|- | |||
|[[File:Intrepid Figment KH3D.png|25px]] | |||
|{{nihongo|[[Intrepid Figment]]|猛る幻想}} | |||
|[[Pricklemane]] (12%), [[Hebby Repp]] (12%), [[Kooma Panda]] (6%N), [[Zolephant]] (6%N) | |||
|- | |||
|[[File:Intrepid Fancy KH3D.png|25px]] | |||
|{{nihongo|[[Intrepid Fancy]]|猛る空想}} | |||
|[[Drill Sye]] (8%R), [[Cera Terror]] (6%), [[Me Me Bunny]] (12%N/16%R), [[Aura Lion]] (12%N/16%R) | |||
|- | |||
|[[File:Intrepid Fantasy KH3D.png|25px]] | |||
|{{nihongo|[[Intrepid Fantasy]]|猛る夢想}} | |||
|[[Me Me Bunny]] (8%R), [[Tyranto Rex]] (6%N), [[Aura Lion]] (6%N/8%R), [[Keeba Tiger]] (6%) | |||
|- | |||
|[[File:Noble Figment KH3D.png|25px]] | |||
|{{nihongo|[[Noble Figment]]|直向きな幻想}} | |||
|[[Zolephant]] (12%N/16%R), [[Drill Sye]] (12%N/16%R), [[KO Kabuto]] (12%N/16%R), [[Cyber Yog]] (12%), [[Sir Kyroo]] (6%) | |||
|- | |||
|[[File:Noble Fancy KH3D.png|25px]] | |||
|{{nihongo|[[Noble Fancy]]|直向きな空想}} | |||
|[[Lord Kyroo]] (12%), [[KO Kabuto]] (8%R), [[Sir Kyroo]] (12%), [[Fishboné]] (6%) | |||
|- | |||
|[[File:Noble Fantasy KH3D.png|25px]] | |||
|{{nihongo|[[Noble Fantasy]]|直向きな夢想}} | |||
| | | | ||
|- | |||
|[[File:Grim Figment KH3D.png|25px]] | |||
|{{nihongo|[[Grim Figment]]|冷徹なる幻想}} | |||
|[[Tama Sheep]] (6%N), [[Yoggy Ram]] (12%N/16%R), [[Escarglow]] (6%), [[Cyber Yog]] (6%), [[Fin Fatale]] (6%), [[Staggerceps]] (6%) | |||
|- | |||
|[[File:Grim Fancy KH3D.png|25px]] | |||
|{{nihongo|[[Grim Fancy]]|冷徹なる空想}} | |||
|[[Staggerceps]] (12%), [[Tatsu Blaze]] (12%) | |||
|- | |||
|[[File:Grim Fantasy KH3D.png|25px]] | |||
|{{nihongo|[[Grim Fantasy]]|冷徹なる夢想}} | |||
|[[Cera Terror]] (12%), [[Skelterwild]] (12%) | |||
|- | |||
|[[File:Vibrant Figment KH3D.png|25px]] | |||
|{{nihongo|[[Vibrant Figment]]|情熱の幻想}} | |||
|[[Meow Wow]] (6%N), [[Tama Sheep]] (12%N/16%R), [[Yoggy Ram]] (6%N), [[Kooma Panda]] (12%N/16%R), [[Eaglider]] (6%), [[Juggle Pup]] (6%N) | |||
|- | |||
|[[File:Vibrant Fancy KH3D.png|25px]] | |||
|{{nihongo|[[Vibrant Fancy]]|情熱の空想}} | |||
|[[Tama Sheep]] (8%R), [[Yoggy Ram]] (8%R), [[Kooma Panda]] (8%R), [[Lord Kyroo]] (6%), [[Halbird]] (6%N), [[Juggle Pup]] (12%N/16%R), [[Jestabocky]] (12%) | |||
|- | |||
|[[File:Vibrant Fantasy KH3D.png|25px]] | |||
|{{nihongo|[[Vibrant Fantasy]]|情熱の夢想}} | |||
|[[Juggle Pup]] (8%R) | |||
|- | |||
|[[File:Troubling Figment KH3D.png|25px]] | |||
|{{nihongo|[[Troubling Figment]]|悩める幻想}} | |||
|[[Komory Bat]] (12%), [[Hebby Repp]] (6%), [[Toximander]] (6%), [[Necho Cat]] (6%), [[Peepsta Hoo]] (6%), [[Ghostabocky]] (6%N) | |||
|- | |||
|[[File:Troubling Fancy KH3D.png|25px]] | |||
|{{nihongo|[[Troubling Fancy]]|悩める空想}} | |||
|[[Toximander]] (12%), [[Woeflower]] (12%) | |||
|- | |||
|[[File:Troubling Fantasy KH3D.png|25px]] | |||
|{{nihongo|[[Troubling Fantasy]]|悩める夢想}} | |||
|[[Ghostabocky]] (8%R) | |||
|- | |||
|[[File:Wondrous Figment KH3D.png|25px]] | |||
|{{nihongo|[[Wondrous Figment]]|不思議な幻想}} | |||
|[[Peepsta Hoo]] (12%), [[Jestabocky]] (6%), [[Chef Kyroo]] (6%) | |||
|- | |||
|[[File:Wondrous Fancy KH3D.png|25px]] | |||
|{{nihongo|[[Wondrous Fancy]]|不思議な空想}} | |||
|[[Fishboné]] (12%), [[Chef Kyroo]] (12%), [[Tyranto Rex]] (12%N/16%R), [[Ducky Goose]] (6%) | |||
|- | |||
|[[File:Wondrous Fantasy KH3D.png|25px]] | |||
|{{nihongo|[[Wondrous Fantasy]]|不思議な夢想}} | |||
|[[Ghostabocky]] (12%N/16%R), [[Drak Quack]] (12%) | |||
|- | |||
|[[File:Malleable Fantasy KH3D.png|25px]] | |||
|{{nihongo|[[Malleable Fantasy]]|温柔なる夢想}} | |||
|[[Flowbermeow]] (3%) | |||
|- | |||
|[[File:Prickly Fantasy KH3D.png|25px]] | |||
|{{nihongo|[[Prickly Fantasy]]|先鋭なる夢想}} | |||
| | |||
|- | |||
|[[File:Wild Fantasy KH3D.png|25px]] | |||
|{{nihongo|[[Wild Fantasy]]|暴走の夢想}} | |||
| | |||
|- | |||
|[[File:Epic Fantasy KH3D.png|25px]] | |||
|{{nihongo|[[Epic Fantasy]]|大いなる夢想}} | |||
| | |||
|- | |||
|[[File:Charming Fantasy KH3D.png|25px]] | |||
|{{nihongo|[[Charming Fantasy]]|魅惑の夢想}} | |||
| | |||
|- | |||
|[[File:Brilliant Fantasy KH3D.png|25px]] | |||
|{{nihongo|[[Brilliant Fantasy]]|輝ける夢想}} | |||
| | |||
|- | |||
|[[File:Savage Fantasy KH3D.png|25px]] | |||
|{{nihongo|[[Savage Fantasy]]|凶暴な夢想}} | |||
|[[Tyranto Rex]] (4%R), [[Ryu Dragon]] (3%N), [[Skelterwild]] (3%) | |||
|- | |||
|colspan="3"|<small>..%N = Nightmare drop rate<br>..%R = Rare Nightmare drop rate.</small> | |||
|} | |||
===Items=== | |||
{|class="wikitable" align="center" | |||
!Name | |||
!Enemy | |||
|- | |||
|{{nihongo|[[Potion]]|ポーション}} | |||
|[[Hebby Repp]] (2%), [[Flowbermeow]] (2%), [[Wheeflower]] (2%), [[Escarglow]] (2%), [[Sir Kyroo]] (2%), [[Iceguin Ace]] (2%), [[Chef Kyroo]] (2%) | |||
|- | |||
|{{nihongo|[[Hi-Potion]]|ハイポーション}} | |||
|[[Cera Terror]] (2%), [[Tyranto Rex]] (2%), [[Aura Lion]] (2%), [[Electricorn]] (2%) | |||
|- | |||
|{{nihongo|[[Mega-Potion]]|メガポーション}} | |||
|[[Skelterwild]] (2%) | |||
|- | |||
|{{nihongo|[[Drop-Me-Not]]|モーニングベル}} | |||
|[[Tama Sheep]] (2%), [[Peepsta Hoo]] (2%), [[Me Me Bunny]] (2%), [[Majik Lapin]] (2%) | |||
|- | |||
|{{nihongo|[[Drop-Me-Never]]|モーニングアラーム}} | |||
| | |||
|- | |||
|{{nihongo|[[Panacea]]|オールキュア}} | |||
|[[Komory Bat]] (2%), [[Woeflower]] (2%) | |||
|- | |||
|{{nihongo|[[Elixir]]|エリクサー}} | |||
| | |||
|- | |||
|{{nihongo|[[Megalixir]]|ラストエリクサー}} | |||
| | |||
|- | |||
|{{nihongo|[[Dream Candy]]|ドリームキャンディ}} | |||
| | |||
|- | |||
|{{nihongo|{{c|Balloon|item}}|バルーン}} | |||
|[[Meow Wow]] (1%), <!--[[Kooma Panda]] during trampoline fight in PP as Sora {{fact}}-->[[Necho Cat]] (1%), [[Zolephant]] (1%), [[KO Kabuto]] (1%), [[Cyber Yog]] (1%), [[Fin Fatale]] (1%), [[Tatsu Blaze]] (1%), [[Ghostabocky]] (1%) | |||
|- | |||
|{{nihongo|{{c|Water Barrel|item}}|ウォーターバレル}} | |||
|[[Pricklemane]] (1%), [[Lord Kyroo]] (1%), [[Drill Sye]] (1%), [[Tatsu Steed]] (1%), [[Fishboné]] (1%) | |||
|- | |||
|{{nihongo|{{c|Treasure Goggles|item}}|トレジャーゴーグル}} | |||
|[[Yoggy Ram]] (1%), [[Kooma Panda]] (1%), [[Toximander]] (1%), [[Halbird]] (1%), [[Eaglider]] (1%), [[Juggle Pup]] (1%), [[Jestabocky]] (1%), [[Thunderaffe]] (1%), [[Staggerceps]] (1%), [[Ducky Goose]] (1%), [[Pegaslick]] (1%), [[Ryu Dragon]] (1%), [[Drak Quack]] (1%), [[Keeba Tiger]] (1%) | |||
|- | |||
|{{nihongo|[[Paint Gun: Red]]|ペイントガン・赤}} | |||
| | |||
|- | |||
|{{nihongo|[[Paint Gun: Blue]]|ペイントガン・青}} | |||
| | |||
|- | |||
|{{nihongo|[[Paint Gun: Green]]|ペイントガン・緑}} | |||
| | |||
|- | |||
|{{nihongo|[[Paint Gun: Yellow]]|ペイントガン・黄}} | |||
| | |||
|- | |||
|{{nihongo|[[Paint Gun: White]]|ペイントガン・白}} | |||
| | |||
|- | |||
|{{nihongo|[[Paint Gun: Black]]|ペイントガン・黒}} | |||
| | |||
|- | |||
|{{nihongo|[[Paint Gun: Purple]]|ペイントガン・紫}} | |||
| | |||
|- | |||
|{{nihongo|[[Paint Gun: Sky Blue]]|ペイントガン・水色}} | |||
| | |||
|- | |||
|{{nihongo|[[Confetti Candy]]|コンペイトウ}} | |||
|[[Yoggy Ram]] (3%), [[Kooma Panda]] (3%), [[Drill Sye]] (3%), [[Cyber Yog]] (3%) | |||
|- | |||
|{{nihongo|[[Confetti Candy 2]]|コンペイトウ2}} | |||
|[[Halbird]] (3%), [[Juggle Pup]] (3%), [[Thunderaffe]] (3%), [[Cera Terror]] (3%), [[Aura Lion]] (3%) | |||
|- | |||
|{{nihongo|[[Confetti Candy 3]]|コンペイトウ3}} | |||
|[[Ryu Dragon]] (3%), [[Keeba Tiger]] (3%) | |||
|- | |||
|{{nihongo|[[Shield Cookie]]|ガードクッキー}} | |||
|[[Tama Sheep]] (3%), [[Pricklemane]] (3%), [[Necho Cat]] (3%), [[Zolephant]] (3%), [[Escarglow]] (3%), [[KO Kabuto]] (3%) | |||
|- | |||
|{{nihongo|[[Shield Cookie 2]]|ガードクッキー2}} | |||
|[[Tatsu Steed]] (3%), [[Staggerceps]] (3%), [[Tyranto Rex]] (3%) | |||
|- | |||
|{{nihongo|[[Shield Cookie 3]]|ガードクッキー3}} | |||
|[[Electricorn]] (3%), [[Skelterwild]] (3%) | |||
|- | |||
|{{nihongo|[[Block-it Chocolate]]|レジストチョコ}} | |||
|[[Komory Bat]] (3%), [[Hebby Repp]] (3%), [[Toximander]] (3%), [[Wheeflower]] (3%), [[Eaglider]] (3%) | |||
|- | |||
|{{nihongo|[[Block-it Chocolate 2]]|レジストチョコ2}} | |||
|[[Sir Kyroo]] (3%), [[Fin Fatale]] (3%), [[Fishboné]] (3%), [[Me Me Bunny]] (3%) | |||
|- | |||
|{{nihongo|[[Block-it Chocolate 3]]|レジストチョコ3}} | |||
|[[Lord Kyroo]] (3%), [[Ghostabocky]] (3%), [[Majik Lapin]] (3%) | |||
|- | |||
|{{nihongo|[[Ice Dream Cone]]|マジックアイス}} | |||
|[[Meow Wow]] (3%), [[Flowbermeow]] (3%), [[Woeflower]] (3%), [[Peepsta Hoo]] (3%) | |||
|- | |||
|{{nihongo|[[Ice Dream Cone 2]]|マジックアイス2}} | |||
|[[Iceguin Ace]] (3%), [[Jestabocky]] (3%), [[Chef Kyroo]] (3%), [[Tatsu Blaze]] (3%), [[Ducky Goose]] (3%) | |||
|- | |||
|{{nihongo|[[Ice Dream Cone 3]]|マジックアイス3}} | |||
|[[Pegaslick]] (3%), [[Drak Quack]] (3%) | |||
|- | |||
|{{nihongo|[[Royal Cake]]|スペシャルケーキ}} | |||
| | |||
|} | |||
==Treasure Goggles== | |||
===Affinity Points earned=== | |||
{|class="wikitable" style="text-align:center" | |||
!rowspan="2"|Treasure<br>found||rowspan="2"|Happiness<br>value||colspan="4"|Affinity Gain Drop Bonus Lv | |||
|- | |||
!None||LV 1||LV 2||LV 3 | |||
|-style="background:#FFFFFF" | |||
|rowspan="4"|0~1||100||3~10||4~12||4~13||5~15 | |||
|- | |||
|-style="background:#FFFFFF" | |||
|71~99||2~8||3~10||3~10||4~12 | |||
|- | |||
|-style="background:#FFFFFF" | |||
|1~70||2~6||2~7||2~8||3~9 | |||
|- | |||
|-style="background:#FFFFFF" | |||
|0||1~5||2~6||2~6||2~7 | |||
|-style="background:#FFFFFF" | |||
|rowspan="4"|2~4||100||5~15||6~18||6~19||7~22 | |||
|- | |||
|-style="background:#FFFFFF" | |||
|71~99||4~12||4~14||5~15||6~18 | |||
|- | |||
|-style="background:#FFFFFF" | |||
|1~70||3~9||3~10||3~11||4~13 | |||
|- | |||
|-style="background:#FFFFFF" | |||
|0||2~7||3~9||3~9||3~11 | |||
|-style="background:#FFFFFF" | |||
|rowspan="4"|5||100||7~22||9~27||9~29||11~33 | |||
|- | |||
|-style="background:#FFFFFF" | |||
|71~99||6~18||7~21||7~23||9~27 | |||
|- | |||
|-style="background:#FFFFFF" | |||
|1~70||4~13||5~16||5~17||6~20 | |||
|- | |||
|-style="background:#FFFFFF" | |||
|0||3~11||4~13||4~14||5~16 | |||
|} | |||
;Treasures | |||
The obtained treasure is decided by the category's probability. Within that category, the treasure is chosen randomly from items matching Shop and Affinity level. | |||
{| | |||
|-valign="top" | |||
| | |||
{|class="wikitable" style="text-align:center" | |||
!Item||Shop Level||Affinity Level | |||
|-style="background:#cdcdcd" | |||
|colspan="3"|Dream Pieces [Probability: 20%] | |||
|-style="background:#ffffff" | |||
|Fleeting Figment||3||0 | |||
|-style="background:#ffffff" | |||
|Fleeting Fancy||5||0 | |||
|-style="background:#ffffff" | |||
|Fleeting Fantasy||6||4 | |||
|-style="background:#ffffff" | |||
|Lofty Figment||2||0 | |||
|-style="background:#ffffff" | |||
|Lofty Fancy||7||0 | |||
|-style="background:#ffffff" | |||
|Lofty Fantasy||3||4 | |||
|-style="background:#ffffff" | |||
|Rampant Figment||1||0 | |||
|-style="background:#ffffff" | |||
|Rampant Fancy||4||0 | |||
|-style="background:#ffffff" | |||
|Rampant Fantasy||2||4 | |||
|-style="background:#ffffff" | |||
|Dulcet Figment||2||0 | |||
|-style="background:#ffffff" | |||
|Dulcet Fancy||7||0 | |||
|-style="background:#ffffff" | |||
|Dulcet Fantasy||3||4 | |||
|-style="background:#ffffff" | |||
|Intrepid Figment||1||0 | |||
|-style="background:#ffffff" | |||
|Intrepid Fancy||7||0 | |||
|-style="background:#ffffff" | |||
|Intrepid Fantasy||7||4 | |||
|-style="background:#ffffff" | |||
|Noble Figment||2||0 | |||
|-style="background:#ffffff" | |||
|Noble Fancy||4||0 | |||
|-style="background:#ffffff" | |||
|Noble Fantasy||3||4 | |||
|-style="background:#ffffff" | |||
|Grim Figment||1||0 | |||
|-style="background:#ffffff" | |||
|Grim Fancy||5||0 | |||
|-style="background:#ffffff" | |||
|Grim Fantasy||5||0 | |||
|-style="background:#ffffff" | |||
|Vibrant Figment||1||0 | |||
|-style="background:#ffffff" | |||
|Vibrant Fancy||4||0 | |||
|-style="background:#ffffff" | |||
|Vibrant Fantasy||2||4 | |||
|-style="background:#ffffff" | |||
|Troubling Figment||1||0 | |||
|-style="background:#ffffff" | |||
|Troubling Fancy||2||0 | |||
|-style="background:#ffffff" | |||
|Troubling Fantasy||2||4 | |||
|-style="background:#ffffff" | |||
|Wondrous Figment||3||0 | |||
|-style="background:#ffffff" | |||
|Wondrous Fancy||5||0 | |||
|-style="background:#ffffff" | |||
|Wondrous Fantasy||8||0 | |||
|} | |||
| | |||
{|class="wikitable" style="text-align:center" | |||
!Item||Shop Level||Affinity Level | |||
|-style="background:#cdcdcd" | |||
|colspan="3"|Munny [Probability: 30%] | |||
|-style="background:#ffffff" | |||
|3~300 Munny<ref>More munny the higher the shop level and affinity level.</ref>||1||0 | |||
|-style="background:#cdcdcd" | |||
|colspan="3"|Treats [Probability: 30%] | |||
|-style="background:#ffffff" | |||
|Confetti Candy||1||0 | |||
|-style="background:#ffffff" | |||
|Shield Cookie||1||0 | |||
|-style="background:#ffffff" | |||
|Block-It Chocolate||1||0 | |||
|-style="background:#ffffff" | |||
|Ice Dream Cone||1||0 | |||
|-style="background:#ffffff" | |||
|Royal Cake||1||0 | |||
|-style="background:#ffffff" | |||
|rowspan="2"|Confetti Candy 2||1~4||7 | |||
|-style="background:#ffffff" | |||
|5~8||4 | |||
|-style="background:#ffffff" | |||
|rowspan="2"|Shield Cookie 2||1~4||7 | |||
|-style="background:#ffffff" | |||
|5~8||4 | |||
|-style="background:#ffffff" | |||
|rowspan="2"|Block-It Chocolate 2||1~4||7 | |||
|-style="background:#ffffff" | |||
|5~8||4 | |||
|-style="background:#ffffff" | |||
|rowspan="2"|Ice Dream Cone 2||1~4||7 | |||
|-style="background:#ffffff" | |||
|5~8||4 | |||
|-style="background:#ffffff" | |||
|Confetti Candy 3||5||7 | |||
|-style="background:#ffffff" | |||
|Shield Cookie 3||5||7 | |||
|-style="background:#ffffff" | |||
|Block-It Chocolate 3||5||7 | |||
|-style="background:#ffffff" | |||
|Ice Dream Cone 3||5||7 | |||
|-style="background:#cdcdcd" | |||
|colspan="3"|Paint Gun [Probability: 16%] | |||
|-style="background:#ffffff" | |||
|Paint Gun: Red||1||0 | |||
|-style="background:#ffffff" | |||
|Paint Gun: Blue||1||0 | |||
|-style="background:#ffffff" | |||
|Paint Gun: Green||1||0 | |||
|-style="background:#ffffff" | |||
|Paint Gun: Yellow||1||0 | |||
|-style="background:#ffffff" | |||
|Paint Gun: White||1||0 | |||
|-style="background:#ffffff" | |||
|Paint Gun: Black||1||0 | |||
|-style="background:#ffffff" | |||
|Paint Gun: Purple||1||0 | |||
|-style="background:#ffffff" | |||
|Paint Gun: Sky Blue||1||0 | |||
|-style="background:#cdcdcd" | |||
|colspan="3"|Toy [Probability: 4%] | |||
|-style="background:#ffffff" | |||
|Balloon||1||0 | |||
|-style="background:#ffffff" | |||
|Water Barrel||1||0 | |||
|} | |||
|} | |||
{{reflist}} | |||
==Streetpass Portals== | |||
;Battle rank | |||
{|class="wikitable" | |||
!Average Level||1~5||6~10||11~20||21~30||31~99 | |||
|- | |||
!Rank | |||
|{{Rank|1}}||{{Rank|2}}||{{Rank|3}}||{{Rank|4}}||{{Rank|5}} | |||
|} | |||
;Bonus condition difficulty | |||
{|class="wikitable" | |||
!Bonus condition||Difficulty | |||
|- | |||
|Take damage no more than two times!<br>Achieve victory in 20 seconds or less!||A | |||
|- | |||
|Pull off at least three successful counters!<br>Achieve victory without using {{button|dsx}} commands!||B | |||
|- | |||
|Land at least 10 attacks while linked!<br>Pull off at least three Flowmotion Attacks!<br>Block at least three enemy attacks!||C | |||
|} | |||
;Experience obtained | |||
(Spirit's Level + 3) x (Table 1) x Random number [0.9~1.1] / 3 | |||
{|class="wikitable | |||
|+Table 1 | |||
!rowspan="2"|Battle rating<br>(Table 2)||colspan="3"|Difficulty | |||
|- | |||
!A||B||C | |||
|- | |||
|1||0.5||0.5||0.5 | |||
|- | |||
|2||3||2||1 | |||
|- | |||
|3||6||3||1.5 | |||
|- | |||
|4||8||4||2 | |||
|- | |||
|5||12||6||3 | |||
|} | |||
{|class="wikitable" | |||
|+Table 2 | |||
!rowspan="2"|Strength point||colspan="3"|Difficulty | |||
|- | |||
!A||B||C | |||
|- | |||
|0~9||rowspan="6"|1||rowspan="3"|1||1 | |||
|- | |||
|10~14||2 | |||
|- | |||
|15~19||3 | |||
|- | |||
|20~24||rowspan="2"|2||4 | |||
|- | |||
|25~29||rowspan="7"|5 | |||
|- | |||
|30~39||3 | |||
|- | |||
|40~49||rowspan="2"|2||4 | |||
|- | |||
|50~54||rowspan="4"|5 | |||
|- | |||
|55~69||3 | |||
|- | |||
|70~84||4 | |||
|- | |||
|85+||5 | |||
|} | |||
Strength point: (Own strength + Opponent's strength) x Random [0.2~0.5] | |||
;Rewards (Battle Portal) | |||
*Battle rating 1~2: Paint Gun x10 (Random color, white and black only at Battle rating 2) | |||
*Battle rating 3: Confetti Candy/Shield Cookie/Block-It Chocolate/Ice Dream Cone | |||
{|class="wikitable" style="text-align:center" | |||
!Difficulty||colspan="2"|A||colspan="2"|B||colspan="2"|C | |||
|- | |||
!Battle rating||4||5||4||5||4||5 | |||
|-style="background:#ffffff" | |||
|Fleeting Figment||O||O||O||O||—||— | |||
|-style="background:#ffffff" | |||
|Fleeting Fancy||O||O||—||—||—||— | |||
|-style="background:#ffffff" | |||
|Fleeting Fantasy||—||O||—||—||—||— | |||
|-style="background:#ffffff" | |||
|Lofty Figment||—||—||O||O||—||— | |||
|-style="background:#ffffff" | |||
|Lofty Fancy||O||O||—||—||—||— | |||
|-style="background:#ffffff" | |||
|Lofty Fantasy||—||O||—||O||—||— | |||
|-style="background:#ffffff" | |||
|Rampant Figment||—||—||—||—||O||O | |||
|-style="background:#ffffff" | |||
|Rampant Fancy||O||O||O||O||—||— | |||
|-style="background:#ffffff" | |||
|Rampant Fantasy||—||O||—||O||—||O | |||
|-style="background:#ffffff" | |||
|Dulcet Figment||—||—||O||O||—||— | |||
|-style="background:#ffffff" | |||
|Dulcet Fancy||O||O||—||—||—||— | |||
|-style="background:#ffffff" | |||
|Dulcet Fantasy||—||O||—||O||—||— | |||
|-style="background:#ffffff" | |||
|Malleable Fantasy||—||O||—||O||—||— | |||
|-style="background:#ffffff" | |||
|Prickly Fantasy||—||O||—||—||—||— | |||
|-style="background:#ffffff" | |||
|Epic Fantasy||—||O||—||—||—||— | |||
|-style="background:#ffffff" | |||
|Charming Fantasy||—||O||—||O||—||— | |||
|-style="background:#ffffff" | |||
|Intrepid Figment||—||—||—||—||O||O | |||
|-style="background:#ffffff" | |||
|Intrepid Fancy||O||O||—||—||—||— | |||
|-style="background:#ffffff" | |||
|Intrepid Fantasy||—||O||—||—||—||— | |||
|-style="background:#ffffff" | |||
|Savage Fantasy||—||O||—||—||—||— | |||
|-style="background:#ffffff" | |||
|Noble Figment||—||—||O||O||—||— | |||
|-style="background:#ffffff" | |||
|Noble Fancy||O||O||O||O||—||— | |||
|-style="background:#ffffff" | |||
|Noble Fantasy||—||O||—||O||—||— | |||
|-style="background:#ffffff" | |||
|Grim Figment||—||—||—||—||O||O | |||
|-style="background:#ffffff" | |||
|Grim Fancy||O||O||—||—||—||— | |||
|-style="background:#ffffff" | |||
|Grim Fantasy||O||O||—||—||—||— | |||
|-style="background:#ffffff" | |||
|Vibrant Figment||—||—||—||—||O||O | |||
|-style="background:#ffffff" | |||
|Vibrant Fancy||O||O||O||O||—||— | |||
|-style="background:#ffffff" | |||
|Vibrant Fantasy||—||O||—||O||—||O | |||
|-style="background:#ffffff" | |||
|Troubling Figment||—||—||—||—||O||O | |||
|-style="background:#ffffff" | |||
|Troubling Fancy||—||—||O||O||—||— | |||
|-style="background:#ffffff" | |||
|Troubling Fantasy||—||O||—||O||—||O | |||
|-style="background:#ffffff" | |||
|Wondrous Figment||O||O||O||O||—||— | |||
|-style="background:#ffffff" | |||
|Wondrous Fancy||O||O||—||—||—||— | |||
|-style="background:#ffffff" | |||
|Wondrous Fantasy||O||O||—||—||—||— | |||
|-style="background:#ffffff" | |||
|Confetti Candy||—||—||OO||—||OO||OO | |||
|-style="background:#ffffff" | |||
|Shield Cookie||—||—||OO||—||OO||OO | |||
|-style="background:#ffffff" | |||
|Block-It Chocolate||—||—||OO||—||OO||OO | |||
|-style="background:#ffffff" | |||
|Ice Dream Cone||—||—||OO||—||OO||OO | |||
|-style="background:#ffffff" | |||
|Royal Cake||—||OO||—||OO||—||OO | |||
|-style="background:#ffffff" | |||
|Confetti Candy 2||OO||—||OO||OO||—||— | |||
|-style="background:#ffffff" | |||
|Shield Cookie 2||OO||—||OO||OO||—||— | |||
|-style="background:#ffffff" | |||
|Block-It Chocolate 2||OO||—||OO||OO||—||— | |||
|-style="background:#ffffff" | |||
|Ice Dream Cone 2||OO||—||OO||OO||—||— | |||
|-style="background:#ffffff" | |||
|Confetti Candy 3||OO||OO||—||—||—||— | |||
|-style="background:#ffffff" | |||
|Shield Cookie 3||OO||OO||—||—||—||— | |||
|-style="background:#ffffff" | |||
|Block-It Chocolate 3||OO||OO||—||—||—||— | |||
|-style="background:#ffffff" | |||
|Ice Dream Cone 3||OO||OO||—||—||—||— | |||
|} | |||
;Rewards (Friend Portal) | |||
{|class="wikitable" style="text-align:center" | |||
!Number of people linked||1~2||3~4||5+ | |||
|-style="background:#ffffff" | |||
|Confetti Candy||OO||O||— | |||
|-style="background:#ffffff" | |||
|Shield Cookie||OO||O||— | |||
|-style="background:#ffffff" | |||
|Block-It Chocolate||OO||O||— | |||
|-style="background:#ffffff" | |||
|Ice Dream Cone||OO||O||— | |||
|-style="background:#ffffff" | |||
|Royal Cake||★||★||★ | |||
|-style="background:#ffffff" | |||
|Confetti Candy 2||—||O||O | |||
|-style="background:#ffffff" | |||
|Shield Cookie 2||—||O||O | |||
|-style="background:#ffffff" | |||
|Block-It Chocolate 2||—||O||O | |||
|-style="background:#ffffff" | |||
|Ice Dream Cone 2||—||O||O | |||
|-style="background:#ffffff" | |||
|Confetti Candy 3||—||—||O | |||
|-style="background:#ffffff" | |||
|Shield Cookie 3||—||—||O | |||
|-style="background:#ffffff" | |||
|Block-It Chocolate 3||—||—||O | |||
|-style="background:#ffffff" | |||
|Ice Dream Cone 3||—||—||O | |||
|-style="background:#ffffff" | |||
|Windmill||O||O||O | |||
|-style="background:#ffffff" | |||
|Treasure Goggles||O||O||O | |||
|-style="background:#ffffff" | |||
|Water Barrel||O||O||O | |||
|-style="background:#ffffff" | |||
|Potion||O||O||O | |||
|-style="background:#ffffff" | |||
|Hi-Potion||—||O||O | |||
|-style="background:#ffffff" | |||
|Mega-Potion||—||—||O | |||
|-style="background:#ffffff" | |||
|Drop-Me-Not||O||O||O | |||
|-style="background:#ffffff" | |||
|Drop-Me-Never||—||O||O | |||
|-style="background:#ffffff" | |||
|Pancea||O||O||O | |||
|} | |} | ||
★ = 5x O | |||
{{TheSilentHeroNav}} | {{TheSilentHeroNav}} | ||
Latest revision as of 12:45, 3 September 2022
Ultimania Information (Scans from KH13.com)
Portal Information from here and here. NOTE: This information is still incomplete. If anyone is playing KH3D, please help out by adding the Dream Eaters that appear in portals on either of these pages or talk pages.
NOTE: I'm not very good at Japanese, so there may be some things that aren't correct.
Drop Bonus List
| 名前 | 効果 | 必要DP | 選択できるようになる条件 | ||
| LV1 | LV2 | LV3 | |||
| リンクブースト | リンクゲージがたまりやすくなる(P.39) | 30 | 80 | 200 | Side: ソラのプランクスターズ・パラダイス、 Side:リクのラ・シテ・デ・クローシュ、 Side:リクのシンフォニー・オブ・ソーサリーのいずれかで、挑戦を待つカエルおうじを倒す |
| フリーフローブースト | フリーフローアタックで与えるダメージ量がアップする(LV1で+20%、 LV2で+30%、 LV3で+40%) | 30 | 80 | 200 | Side: ソラのシンフォニー オブ ソーサリーで、 スペルカンを倒す |
| アタックブースト | 攻撃力がアップする(LV1で+2, LV2で+4, LV3で+6/*1) | 30 | 80 | 200 | 最初から選択可能 |
| マジックブースト | 魔法力がアップする(LV1で+2, LV2で+4, LV3で+6/*1) | 30 | 80 | 200 | 最初から選択可能 |
| ガードブースト | 防御力がアップする(LV1で+1, LV2で+2, LV3で+3/*1) | 30 | 80 | 200 | Side: ソラのザ・グリッドで、 リンズラーとのバトルに勝つ |
| ブリードブースト | スピリットとの触れ合いの効果などが上がり、 相性を良くしやすくなる(P.222, 230~234, 236~237) | 10 | 40 | 100 | Side: リクのラ・シテ・デ・クローシュで、 バレットガゴイルを倒す |
| スピリットリレイズ | HPがゼロになったスピリットが、 1本につき1回だけ、 自動的に全回復するようになる(別のエリアへ移動すると、 再度回復可能になる) | 10 | Side: ソラのトラヴァースタウン(再訪)で、 スペルカンが呼び出した3体のドリームイーターを倒す | ||
| (アイテム名やコマンド名) | そのアイテムやコマンドを入手する | (下記参照) | 最初から選択可能。表2や表3の候補からひとつが選ばれて表示される。候補はショップレベル(P.56)に応じて増えていく | ||
| 名前 | 必要DP | Side: ソラのショップレベルごとの選ばれる確率 | |||||||
| LV1 | LV2 | LV3 | LV4 | LV5 | LV6 | LV7 | LV8 | ||
| 10 | 50.0% | 33.3% | 16.7% | 11.2% | 8.5% | — | — | — | |
| 20 | 50.0% | 33.3% | 16.7% | 11.2% | 8.5% | 7.9% | 6.6% | 6.7% | |
| 30 | — | 33.3% | 16.7% | 10.4% | 7.5% | 6.6% | 5.2% | 4.9% | |
| 20 | — | — | 16.7% | 11.2% | 8.5% | 7.9% | 6.6% | 6.7% | |
| 30 | — | — | 16.7% | 11.2% | 8.5% | 7.9% | 6.6% | 6.7% | |
| 40 | — | — | 16.7% | 11.2% | 7.5% | 7.2% | 5.2% | 5.4% | |
| 20 | — | — | — | 11.2% | 8.5% | 7.9% | 6.6% | 6.7% | |
| 30 | — | — | — | 11.2% | 8.5% | 7.9% | 6.6% | 6.7% | |
| 40 | — | — | — | 11.2% | 8.5% | 7.2% | 5.9% | 5.4% | |
| 50 | — | — | — | — | 8.5% | 7.9% | 5.9% | 6.0% | |
| 50 | — | — | — | — | 8.5% | 7.9% | 5.9% | 6.0% | |
| 50 | — | — | — | — | 8.5% | 7.9% | 5.9% | 6.0% | |
| 50 | — | — | — | — | — | 7.9% | 6.6% | 6.7% | |
| 50 | — | — | — | — | — | 7.9% | 6.6% | 6.0% | |
| 60 | — | — | — | — | — | — | 6.6% | 6.7% | |
| 60 | — | — | — | — | — | — | 6.6% | 6.7% | |
| 60 | — | — | — | — | — | — | 6.6% | 6.7% | |
| 名前 | 必要DP | Side: リクのショップレベルごとの選ばれる確率 | |||||||
| LV1 | LV2 | LV3 | LV4 | LV5 | LV6 | LV7 | LV8 | ||
| 10 | 50.0% | 33.3% | 16.7% | 11.2% | 9.2% | — | — | — | |
| 20 | 50.0% | 33.3% | 16.7% | 11.2% | 9.2% | 8.6% | 8.9% | 9.2% | |
| 30 | — | 33.3% | 16.7% | 10.4% | 8.6% | 7.0% | 7.0% | 6.4% | |
| 20 | — | — | 16.7% | 11.2% | 9.2% | 8.6% | 8.9% | 9.2% | |
| 30 | — | — | 16.7% | 11.2% | 9.2% | 8.6% | 8.9% | 9.2% | |
| 40 | — | — | 16.7% | 11.2% | 8.6% | 7.8% | 7.0% | 7.2% | |
| 20 | — | — | — | 11.2% | 9.2% | 8.6% | 8.9% | 9.2% | |
| 30 | — | — | — | 11.2% | 9.2% | 8.6% | 8.9% | 9.2% | |
| 40 | — | — | — | 11.2% | 9.2% | 7.8% | 7.9% | 7.2% | |
| 50 | — | — | — | — | 9.2% | 8.6% | 7.9% | 8.3% | |
| 50 | — | — | — | — | 9.2% | 8.6% | 7.9% | 8.3% | |
| 50 | — | — | — | — | — | 8.6% | 8.9% | 8.3% | |
| 50 | — | — | — | — | — | 8.6% | 8.9% | 8.3% | |
| Name | Effect | Required DP | Unlock condition | ||
| LV1 | LV2 | LV3 | |||
| Link Accelerator | Increases Link Gauge gain. (P.39) | 30 | 80 | 200 | Side: Sora - Prankster's Paradise, Side: Riku - La Cité des Cloches, Side: Riku - Symphony of Sorcery, when the Lord Kyroo who waits to challenge you is defeated in any of these places. |
| Flowmotion Turbo | Increases damage given by Flowmotion Commands (LV1 +20%, LV2 +30%, LV3 +40%) | 30 | 80 | 200 | Side: Sora - Symphony of Sorcery, when Spellican is defeated. |
| Attack Gain | Increases attack power (LV1 +2, LV2 +4, LV3 +6/*1) | 30 | 80 | 200 | Can be selected from the beginning. |
| Magic Gain | Increases magic power (LV1 +2, LV2 +4, LV3 +6/*1) | 30 | 80 | 200 | Can be selected from the beginning. |
| Defense Gain | Increases defense power (LV1 +1, LV2 +2, LV3 +3/*1) | 30 | 80 | 200 | Side: Sora - The Grid, after winning the battle against Rinzler. |
| Affinity Gain | Increases effect of interaction with Spirits, and makes it more likely to improve affinity. (P.222, 230~234, 236~237) | 10 | 40 | 100 | Side: Riku - La Cité des Cloches, defeat Wargoyle. |
| Spirit Auto-Life | When a Spirit's HP reaches zero, only once will it be fully recovered. (When moving to another area, it is possible to recover again.) | 10 | Side: Sora - Traverse Town (Revisit), defeat the 3 Dream Eaters the Spellican summons. | ||
| (Item name/Command name) | Obtain the item or command. | (See below) | Can be selected from the beginning. Only one candidate is displayed for selection. Candidates will increase depending on the Shop Level (P.56) | ||
| Name | Required DP | Side: Sora - Probability of being selected in each Shop Level | |||||||
| LV1 | LV2 | LV3 | LV4 | LV5 | LV6 | LV7 | LV8 | ||
| 10 | 50.0% | 33.3% | 16.7% | 11.2% | 8.5% | — | — | — | |
| 20 | 50.0% | 33.3% | 16.7% | 11.2% | 8.5% | 7.9% | 6.6% | 6.7% | |
| 30 | — | 33.3% | 16.7% | 10.4% | 7.5% | 6.6% | 5.2% | 4.9% | |
| 20 | — | — | 16.7% | 11.2% | 8.5% | 7.9% | 6.6% | 6.7% | |
| 30 | — | — | 16.7% | 11.2% | 8.5% | 7.9% | 6.6% | 6.7% | |
| 40 | — | — | 16.7% | 11.2% | 7.5% | 7.2% | 5.2% | 5.4% | |
| 20 | — | — | — | 11.2% | 8.5% | 7.9% | 6.6% | 6.7% | |
| 30 | — | — | — | 11.2% | 8.5% | 7.9% | 6.6% | 6.7% | |
| 40 | — | — | — | 11.2% | 8.5% | 7.2% | 5.9% | 5.4% | |
| 50 | — | — | — | — | 8.5% | 7.9% | 5.9% | 6.0% | |
| 50 | — | — | — | — | 8.5% | 7.9% | 5.9% | 6.0% | |
| 50 | — | — | — | — | 8.5% | 7.9% | 5.9% | 6.0% | |
| 50 | — | — | — | — | — | 7.9% | 6.6% | 6.7% | |
| 50 | — | — | — | — | — | 7.9% | 6.6% | 6.0% | |
| 60 | — | — | — | — | — | — | 6.6% | 6.7% | |
| 60 | — | — | — | — | — | — | 6.6% | 6.7% | |
| 60 | — | — | — | — | — | — | 6.6% | 6.7% | |
| Name | Required DP | Side: Riku - Probability of being selected in each Shop Level | |||||||
| LV1 | LV2 | LV3 | LV4 | LV5 | LV6 | LV7 | LV8 | ||
| 10 | 50.0% | 33.3% | 16.7% | 11.2% | 9.2% | — | — | — | |
| 20 | 50.0% | 33.3% | 16.7% | 11.2% | 9.2% | 8.6% | 8.9% | 9.2% | |
| 30 | — | 33.3% | 16.7% | 10.4% | 8.6% | 7.0% | 7.0% | 6.4% | |
| 20 | — | — | 16.7% | 11.2% | 9.2% | 8.6% | 8.9% | 9.2% | |
| 30 | — | — | 16.7% | 11.2% | 9.2% | 8.6% | 8.9% | 9.2% | |
| 40 | — | — | 16.7% | 11.2% | 8.6% | 7.8% | 7.0% | 7.2% | |
| 20 | — | — | — | 11.2% | 9.2% | 8.6% | 8.9% | 9.2% | |
| 30 | — | — | — | 11.2% | 9.2% | 8.6% | 8.9% | 9.2% | |
| 40 | — | — | — | 11.2% | 9.2% | 7.8% | 7.9% | 7.2% | |
| 50 | — | — | — | — | 9.2% | 8.6% | 7.9% | 8.3% | |
| 50 | — | — | — | — | 9.2% | 8.6% | 7.9% | 8.3% | |
| 50 | — | — | — | — | — | 8.6% | 8.9% | 8.3% | |
| 50 | — | — | — | — | — | 8.6% | 8.9% | 8.3% | |
Link Gauge (P.39)
| 1 or both Spirits | Condition | Amount increased for every level of the "Link Accelerator" Relay Bonus | |||
| None | LV1 | LV2 | LV3 | ||
| 1 | Spirit attacks the enemy or receives damage from an enemy's attack | Basic value x attack's power magnification value x (10 + current affinity level) (%). For Magic commands, the power magnification value becomes 1/4 of the original. Basic value is 0.5. When the "Link Accelerator" Relay Bonus is under effect, it is increased by 0.1 per level. | |||
| 1 | While the Spirits ability "Link Critical" is equipped, the operating character and Spirit attack an enemy at the same time. (This percentage is added to the above percentage.) | 10% | 12% | 14% | 16% |
| 1 | Spirit recovers or supports the operating character. | 10% | 12% | 14% | 16% |
| 1 | Successful use of Link Block | 10% | 12% | 14% | 16% |
| 1 | Reviving a Spirit when its HP reaches zero. | 25% | 30% | 35% | 40% |
| Both | The operating character is damaged, while the Support ability "Damage Syphon" is equipped. | 0.5% | 0.6% | 0.7% | 0.8% |
| Both | Using "Break Time" and obtaining the Link Gauge accumulation effect. | 100% | |||
| Both | Use an "Elixir" or "Megalixir" | 100% | |||
| Both | Use a "Dream Candy" | 50% (Increases by 5% for every "Item Boost" Status ability equipped.) | |||
| Both | When using the "Lucky Dice" Link Attack with Juggle Pup or R & R Seal, roll the effect of restoring the ally. | 100% | |||
Affinity (P.222)
|
| ||||||||||||||||||||||||||||||
|
- Affinity maintain value and how the current Affinity level drops
- (Affinity level 5/5, Affinity maintain value 20/20): Maximum and initial value of the Affinity maintain value becomes [maximum Affinity level x 3 + 5].
- -Battling for 60 seconds (+10 extra seconds for each level of "Affinity Gain")
- (Affinity level 5/5, Affinity maintain value 19/20): Affinity maintain value drops by 1. When the Spirit's HP drops to zero, the Affinity maintain value becomes zero at once.
- -Affinity maintain value is reduced to zero
- (Affinity level 5/5, Affinity maintain value 0/20): When the Affinity maintain value becomes zero, the current Affinity level is not yet lowered.
- -Battling for 60 seconds (+10 extra seconds for each level of "Affinity Gain")
- (Affinity Level 4/5, Affinity maintain value 0/20): Current Affinity level has a 50% chance of dropping by 1. Whether or not the current Affinity level gets reduced is decided every 60 seconds (+10 extra seconds for each level of "Affinity Gain")
Petting (P.229~237)
Benefits of petting (P.229)
- Benefit 1: Spirit's stats rise
Aside from Paint Guns, petting raises a Spirit's stats. The kind of status that rises is shown in the table below, the amount increased varies greatly depending on the "Affinity Gain" Relay Bonus and Happy value (P.230) (see P.231~237 for details).
| Kind of petting | Status that can raise | |||||||||
|---|---|---|---|---|---|---|---|---|---|---|
| Affinity Point | Experience Point | Link Point | Maximum HP | Strength | Magic | Defense | Attribute Resistance | |||
| Physical contact | ↑ | ↑ | ↑ | — | — | — | — | — | ||
| Training Toy | Toy | Balloon | ↑↑ | ↑↑ | — | — | — | — | — | — |
| Water Barrel | — | ↑↑ | ↑↑ | — | — | — | — | — | ||
| Treasure Goggles | ↑ | — | — | — | — | — | — | — | ||
| Paint Gun | — | — | — | — | — | — | — | — | ||
| Candy | Confetti Candy | — | — | ↑↑ | ↑ | ↑ | — | — | — | |
| Ice Dream Cone | — | — | ↑↑ | ↑ | — | ↑ | — | — | ||
| Shield Cookie | — | — | ↑↑ | ↑ | — | — | ↑ | — | ||
| Block-It Chocolate | — | — | ↑↑ | ↑ | — | — | — | ↑ | ||
| Royal Cake | — | — | ↑↑ | ↑ | ↑ | ↑ | ↑ | ↑ | ||
- Benefit 2: Recovers current Affinity level
| Type of petting | Amount recovered | ||
|---|---|---|---|
| Physical contact | Favorite spot | 40~60% of maximum value | |
| Dislike spot | 20~40% of maximum value | ||
| Training Toy | Candy | 40~60% of maximum value | |
| Paint Gun | (No change) | ||
| Toy | Anything but "dislike" | 40~60% of maximum value | |
| "Dislike" | 20~40% of maximum value | ||
The Affinity maintain value(P.222) is recovered by petting. Based on the results, the current Affinity level will also be recovered, as seen in table 2.
| Affinity maintain value after recovery | 8~10 | 11~13 | 14~16 | 17~19 | 20~22 | 23~25 | 26~28 | 29~31 | 32 |
|---|---|---|---|---|---|---|---|---|---|
| Current Affinity level | 1 | 2 | 3 | 4 | 5 | 6 | 7 | 8 | 9 |
- Benefit 3: Disposition changes
| Type of petting | Disposition after change | Probability | ||
|---|---|---|---|---|
| Physical contact | When rubbing | Favorite spot | Type II (Yellow) | 8% |
| Dislike spot | Type IV (Green) | 8% | ||
| When poking | Favorite spot | Type III (Blue) | 8% | |
| Dislike spot | Type I (Purple) | 8% | ||
| Training Toy | Candy | Confetti Candy | Type I (Purple) | 15% |
| Ice Dream Cone | Type II (Yellow) | 10% | ||
| Shield Cookie | Type III (Blue | 10% | ||
| Block-it Chocolate | Type IV (Green) | 10% | ||
| Anything else | (No change) | |||
When interacting through petting or giving candy, the Spirit can change dispositions. The table contains information on how to change it. (When the forecast is Risky Day, the probability is doubled.) After the disposition has been changed, until you close the Spirit screen, it will not change again.
Changing the Spirit's mood (P.230)
Although not visible on the screen, each Spirit has a "Happy value" and "Happy maintain value". Happy value is the mood of the Spirit. The higher the value, the more likely it is for stats to increase, and increases the amount raised. Happy maintain value is a value related to the increase or decrease of the Happy value.
When the Happy maintain value is 1 or more after petting, the Happy value increases, and Happy maintain value is reduced. When the Happy maintain value is 0 after petting, the Happy value is greatly reduced.
- Features of the Happy value
- The initial value will vary depending on the current Affinity level.
- When the Happy value is 71 or more, music notes and light will surround the Spirit.
- When you close the Spirit screen, the Happy value will go back to the initial value.
- The higher the level of "Affinity Gain", the easier it is to reach the maximum Happy value.
- Features of the Happy maintain value
- The initial value is 100.
- It recovers 20 for every 5 minutes of real time.
| Current Affinity level | 0 | 1 | 2 | 3 | 4 | 5 | 6 | 7 | 8 | 9 |
|---|---|---|---|---|---|---|---|---|---|---|
| Initial Happy value | 0 | 15 | 15 | 20 | 20 | 30 | 30 | 35 | 35 | 40 |
| Amount of change of Happy value | Amount of change of Happy maintain value | |||||||
|---|---|---|---|---|---|---|---|---|
| Happy maintain value | 1 or higher | 0 | ||||||
| Level of Affinity Gain | None | 1 | 2 | 3 | (All levels) | |||
| Petting | Favorite spot | +12 | +15 | +18 | +24 | -20 | -9~-3 | |
| Dislike spot | +6 | +9 | +12 | +18 | -30 | -15~-5 | ||
| Training Toy | Toy | +24 | +30 | +36 | +48 | -30 | -15~-5 | |
| Paint Gun | (No change) | |||||||
| Candy | Favorite | +30 | +36 | +48 | +54 | -20 | -9~-3 | |
| Ordinary | +24 | +30 | +36 | +48 | -30 | -15~-5 | ||
| Dislike | +6 | +9 | +12 | +18 | -40 | -21~-7 | ||
P.231
Link Attacks
| 名前 | 属性 | 威力倍率 | リアクション値 | リンクゲージ 消費量 |
特徴 | |
| ワンダージャンプ | 体当たり | 物理 | 0.8 | 4 | 毎秒7.8% | ソラを乗せたスピリットが何度も跳ねながら前進し、 体当たりと着地時に広がる衝撃波で攻撃する。進路はスライドパッドで変更可能。 跳ねる回数は最大12回だが、ハナダワンヤンとの発動時は動作が速めで最大16回まで攻撃できる |
| 衝撃波 | 物理 | 0.7 (*1) | 2 | |||
| 発動できるスピリット | キングだニャン, ハナダワンヤン, ワンダニャン | |||||
| ローリングボール | 物理 | 1.8 | 4 | 毎秒6.6% | 丸まったまま転がるスピリットの上で玉乗りをはじめ、 ぶつかった敵にダメージを与える。 進路はスライドパッドで変更可能 | |
| 発動できるスピリット | タマシープ, ツノケラトプス, デンデンカルゴ, ドリルサイ | |||||
| スピニングロデオ | 体当たり | 物理 | 0.8 (*2) | 2 | 毎秒6.6% | スピリットの背に乗って走り、体当たりで攻撃する。 進路はスライドパッドで変更可能。 Aボタンを押すと、前方に跳んで高速回転で突進できる (*3) |
| 高速回転 | (*3) | 3.0 | 4 | 5% | ||
| 発動できるスピリット | ヤギサイバー, ヤギホーン | |||||
| エアライドボンバー | 飛行 (*4) | 物理 | 1.1 | 2 | 毎秒6.6% | スピリットが”ソラ”の肩をつかみながら飛び、ぶつかった敵にダメージを与える。 進路はスライドパッドで変更可能。 Aボタンで正面に突進攻撃をくり出すが、リンクゲージが残り10%以下のときは地面に突進して周囲に光の柱を噴出させる攻撃を行なう |
| 突進 (*4) | 物理 | 1.1 | 2 | 10% | ||
| 光の柱 (*4) | 物理 | 3.3 | 4 | |||
| 飛行 (*5) | 物理 | 1.3 | 2 | 毎秒6.6% | ||
| 突進 (*5) | 物理 | 1.3 | 3 | 10% | ||
| 光の柱 (*5) | 物理 | 3.3 | 4 | |||
| 飛行 (*6) | 物理 | 0.9 | 2 | 毎秒6.6% | ||
| 突進 (*6) | 物理 | 1.8 | 3 | 10% | ||
| 光の柱 (*6) | 物理 | 3.6 | 4 | |||
| 発動できるスピリット | ガンミフクロウ, コウモリバット, タカイーグル, ナルバード | |||||
| ハンマースロー | 物理 | 0.9 | 2 | 毎秒9.6% | 全身からトゲを突き出したスピリットのシッポを持ち、頭上で振りまわしながら走る。進路はスライドパッドで変更可能 | |
| 発動できるスピリット | ハリライオン | |||||
| フレムスロー | 突進 | ファイア | 0.9 | 2 | 毎秒9.6% | 輪になったスピリットを転がして突進させる。スピリットが転がる方向をスライドパッドで変更できるほか、Aボタンを押すとスピリットが周囲に爆炎を放って攻撃しつつリンク攻撃の発動が終わる |
| 爆炎 | ファイア | 2.7 | 4 | 1.6% | ||
| 発動できるスピリット | ネクッポイ, ヘビトカゲ | |||||
| ユニゾンクロス | 発動中 | — | — | — | 毎秒6.6% | ソラとスピリットがその場で身構える。 Aボタンを押すと、両者が交差するように突進しつつ攻撃するが、リンクゲージが残り10%以下のときは、上空から地面を突いて周囲に衝撃波を放つ攻撃をくり出す |
| エックス突進 | 物理 | 0.4 | 1 | 10% | ||
| 急降下突き | 物理 | 2.3 | 3 | 10% | ||
| 衝撃波 | 物理 (*7) | 1.1 | 3 | |||
| 発動できるスピリット | カエルおうじ, カエルシェフ, カエルソルジャー, リュウドラゴン | |||||
| ポイズンダッシュ | 発動中 | なし | 0 | 0 | 毎秒9.6% | スピリットが吐いた泡に包まれ、触れた敵をマグネ効果で引き寄せる。発動中はスライドパッドで前後左右に移動でき、リンクゲージがゼロになるかAボタンを押すと、その約3秒後に泡が破裂して周囲の敵を巻きこんで攻撃しつつ発動が終わる |
| 破裂 | 物理 | 6.3 | 6 | 100% | ||
| 発動できるスピリット | ドクドクサンショ | |||||
| ウォータブラスター | ウォータ | 0.4 | 1 | 毎秒9.6% | 両手に持ったスピリットの口から水を噴出させつづける。発動中は移動できないが、スライドパッドで向きを上下左右に変えられるうえに射程がとても長い。うまく操作すれば攻撃を20回以上当てることも可能 | |
| 発動できるスピリット | ギョライギョ, ホネフィッシュ | |||||
| バブルブラスター | 発動中 | — | — | — | 毎秒6.6% | スピリットに乗り、スライドパッドで前後左右に飛びつつAボタンで正面に水の弾を飛ばす。 Aボタンを押しつづけるとその場で連射をはじめ、3発ごとに飛ばす弾は敵を泡に閉じこめることが可能(巨大なボス敵は閉じこめられない)。泡は2秒経過するか攻撃を受けると破裂し、周囲にいる敵もろともダメージを与える |
| 弾 | ウォータ | 0.4 | 1 | 3% | ||
| 破裂 | ウォータ | 3.0 | 4 | |||
| 発動できるスピリット | タツホース | |||||
| リズミックパッド | 発動中 | — | — | — | 0% | 上画面の上下左右に輪が現れ、A、B、X、Y、ボタンのいずれかのマークが中央から「ボタンの配置と同じ方向」に進む。マークが輪と重なったときにそのボタンを押すと(連打でもいい)、ンラとスピリットが広範囲に音波を放つ攻撃が可能。入力に連続で成功していると、5回目からは一度に押すボタンが2個に増えるかわりに攻撃の威力が上がる。入力が遅かったり無関係のボタンを押したりすると、攻撃に矢敗するうえにリンクゲージが多く減ってしまう。攻撃できるのは最大8回まで |
| 失敗 | — | — | — | 30% | ||
| 1個押し成功 | なし | 0.6 | 4 | 12.5% | ||
| 2個押し成功 | なし | 2.0 | 4 | 12.5% | ||
| 発動できるスピリット | ネコキャット, フルーツキャット | |||||
| サラブレッドライド | 発動中 (*8) | 物理 | 1.3 | 2 | 毎秒6.6% | スピリットにまたがって走り、ぶつかった敵にダメージを与える。発動中は、スライドパッドで進路を変えたり、Aボタンで突進攻撃を出したりすることが可能。スピリットごとに属性や威力などが異なるほか、エレキユニコーンとハンサムペガサスの突進攻撃には「リンク攻撃の発動直後に自動で1回使う」「攻撃前のスキがとても大きい」といった特徴がある |
| 突進 (*8) | 物理 | 1.3 | 2 | 5% | ||
| 発動中 (*9) | 物理 | 0.8 | 2 | 毎秒4.8% | ||
| 突進 (*9) | 物理 (*10) | 3.0 | 4 | 5% | ||
| 発動できるスピリット | イタデンキリン, エレキユニコーン, ハンサムペガサス | |||||
| ジャイアントスイング | スピン | 物理 | 1.0 | 2 | 10% | ソラの両足を持ったスピリットがスピンをくり返し、ソラが構えた武器で攻撃する。発動中スライドパッドで前後左右に移動することが可能。スピン1回転ごとにリンクゲージが減っていき、10回転するかAボタンを押すと、スピリットがソラを敵に向かって投げ飛ばしつつ発動が終わる |
| 投げ飛ばし | 物理 | 4.0 | 4 | 10% | ||
| 発動できるスピリット | クマダダイサーカス, クマパンダー, マジックラビット, ミミバニー | |||||
| バトリングライド | ブリザド | 1.2 | 2 | 毎秒6.6% | 地面に張った氷の上をすべるスピリットに乗り、敵た突進してダメージを与える(氷の性質はP.365を参照)。進路はスライドパッドで変更できるが、急には曲がれないので同じ敵に何度もぶつかるのは難しい | |
| 発動できるスピリット | アイスペンギン | |||||
| ターゲットショット | 発動中 | 物理 | 0.2 | 1 | 毎秒6.6% | スピリットがひたすら弾を連射する。発動中は移動できなくなるが、スライドパッドで左右や斜め上に向きを変えたり、Aボタンで大きめの弾を飛ばしたりすることが可能。大きめの弾が当たった敵には照準のマークが5~9秒間重なり(*11) 、連射中の弾がその敵を追うようになる |
| 大きめの弾 | 物理 | 0.2 | 1 | 1.1% | ||
| 発動できるスピリット | タイホウカブト, ツノカブト | |||||
| トラップショット | 発動中 | 物理 | 0.2 | 1 | 毎秒6.6% | 「ターゲットショット」(上記参照)とほぼ同じ攻撃だが、Aボタンで飛ばせる弾の効果が「当たった敵を5秒間バインド状態にする」になっている |
| 大きめの弾 | 物理 | 0.2 | 1 | 1.1% | ||
| 発動できるスピリット | ハサミクワガタ | |||||
| キュアサン | — | — | — | 100% | フィールドにいる味方全員のHPを全回復してステータス異常を解除する。さらに、「リジェネ」の効果を与え、30秒後までHPが2秒ごとに10ずつ回復するようになる | |
| 発動できるスピリット | イイフラワー | |||||
| ゴーストバキューム | 発動中 | なし | 0 | 0 | 毎秒9.6% | ソラに抱きかかえられたスピリットが息を吸いつづけ、前方にいる敵を引き寄せて飲みこむ。リンクゲージがゼロになるかAボタンを押すと、飲みこんでいたすべての敵にダメージを与えつつ吐き出し、リンク攻撃の発動が終わる。発動中はスライドパッドで前後左右にゆっくりと步くことが可能 |
| 吐き出し | ダーク | 4.5 | 4 | 1.6% | ||
| 発動できるスピリット | オバケゴースト, オバケピエロ | |||||
| バーサクロデオ | 物理 | 2.2 | 4 | 毎秒6.6% | ソラを乗せたスピリットが足踏みをしたあと走りまわり、衝突した敵たダメージを与える。進路はスライドパッドで変更可能 | |
| 発動できるスピリット | ゾウエレファント | |||||
| ラッキーダイス | — | — | — | 100% | ソラとスピリットがそれぞれダイスを振り、ソラが振ったダイスの絵柄に応じた相手に、スピリットが振ったダイスの絵柄に応じた効果を与える(下記参.照) | |
| 発動できるスピリット | アシカジャグラー, バカンスシール | |||||
| ファイアブラスター | 発動中 | — | — | — | 毎秒6.6% | 「バブルブラスター」(->P.341)とほぼ同じ攻撃。属性がちがうほか、弾を飛ばしたときのリンクゲージの消費量が少ない |
| 弾 | ファイア | 0.4 | 1 | 1.1% | ||
| 破裂 | ファイア | 3.0 | 4 | |||
| 発動できるスピリット | モエロタツホース | |||||
| ポイズンレイン | なし | 0 | 0 | 毎秒6.6% | 周囲にいる敵をミニマム、コンフュ、ポイズン、スロウのいずれかの状態にする雨を降らせる(いずれも10秒間持続)。また、そのなかの最大3体の敵に有害な日光を5秒間浴びせ、HPを0.5秒ごとに10ずつ減らす | |
| 発動できるスピリット | ワルフラワー | |||||
| フレイムライド | 体当たり | 物理 | 1.0 | 2 | 毎秒6.6% | ソラを乗せたスピリットが走りつづけ、ぶつかった敵にダメージを与える。Aボタンを押せば、スピリットが走りながら炎の息を1秒ほど吐く攻撃も可能。進路はスライドパッドで変えられるが、炎の息を吐いているあいだは操作できなくなる |
| 炎の息 | ファイア | 2.0 | 2 | 15% | ||
| 発動できるスピリット | ボウクンレックス | |||||
| アイスライド | 体当たり | 物理 | 1.0 | 2 | 毎秒6.6% | 「フレイムライド」(上記参照)とほぼ同じ攻撃だが、息による攻撃の属性がちがう |
| 氷の息 | ブリザド | 2.0 | 2 | 15% | ||
| 発動できるスピリット | ボンツビワイルド | |||||
| リズミックテイル | 発動中 | — | — | — | 0% | 「リズミックパッド」(->P.341)と同じ攻撃だが、画面中央から流れてくるマークの形がちがう |
| 失敗 | — | — | — | 30% | ||
| 1個押し成功 | なし | 0.6 | 4 | 12.5% | ||
| 2個押し成功 | なし | 2.0 | 4 | |||
| 発動できるスピリット | ドラゴンモドキ, ハラグチアヒル | |||||
| オーラライド | 体当たり | 物理 | 0.8 | 2 | 毎秒6.6% | スピリットの背に乗って走り、敵にぶつかってダメージを与える。進路はスライドパッドで変更可能。Aボタンを押すとスピリットが足を止め、闘気で生み出した自分の分身(オーラライオンは3体、キバタイガーは1体)が地上を走って敵に突進する |
| 分身攻撃 | ファイア | 0.9 | 4 | 1.1% | ||
| 発動できるスピリット | オーラライオン, キバタイガー | |||||
| 「ラッキーダイス」 で振るダイスの絵柄ごとの効果とそれぞれの効果が発動する確率 | |||||||||||||||||||
|---|---|---|---|---|---|---|---|---|---|---|---|---|---|---|---|---|---|---|---|
| ソラが振るダイス | スピリットが振るダイス | ||||||||||||||||||

|
ソラに対し、右記のコマンドが発動する(コマンドによってはスピリットも巻きこむ) | 
|
「ファイガ」と「タイムボム」が発動
|

|
「ブリザガ」と「フリーズ」が発動
|

|
「サンダガ」と「バインド」が発動
| ||||||||||||

|
敵に対し、右記のコマンドが発動する(コマンドによっては別の敵も巻きこむ) | 
|
「ストップ」が発動
|

|
「コンフュ」が発動
|

|
「ラストエリクサー」が発動 (*1)
| ||||||||||||
| Name | Attribute | Power Magnification | Reaction Value | Link Gauge Consumption | Features | |
| Meow Wounce | Body blow | Physical | 0.8 | 4 | 7.8% per second | Sora sits atop the Spirit and moves forward while bouncing many times, attacking by hitting with the body and the shockwave that spreads at the time of landing. The course can be changed with the Circle Pad. The number of bounces is up to 12, while the Flowbermeow can bounce up to 16 times, because it is faster in operation |
| Shockwave | Physical | 0.7 (*1) | 2 | |||
| Spirits that can activate this | Meowjesty, Flowbermeow, Meow Wow | |||||
| Roll Call | Physical | 1.8 | 4 | 6.6% per second | Start balancing on the curled up Spirit, rolling into enemies to damage them. The course can be changed with the Circle Pad. | |
| Spirits that can activate this | Tama Sheep, Cera Terror, Escarglow, Drill Sye | |||||
| Whirling Bronco | Body | Physical | 0.8 (*2) | 2 | 6.6% per second | Ride on the back of the Spirit, while running forward and attacking with the body. The course can be changed with the Circle Pad. When pressing the A button, you can jump forward and perform a high-speed spin. (*3) |
| High Speed Spin | (*3) | 3.0 | 4 | 5% | ||
| Spirits that can activate this | Cyber Yog, Yoggy Ram | |||||
| Fly-By Knight | Flying (*4) | Physical | 1.1 | 2 | 6.6% per second | The Spirit flies around while holding Sora's shoulder, damaging the enemy on hit. The course can be changed with the Circle Pad. Pressing the A button performs a rush attack. When the Link Gauge has 10% or less remaining, the rush attack summons a pillar of light from the ground. |
| Rush (*4) | Physical | 1.1 | 2 | 10% | ||
| Pillar of Light (*4) | Physical | 3.3 | 4 | |||
| Flying (*5) | Physical | 1.3 | 2 | 6.6% per second | ||
| Rush (*5) | Physical | 1.3 | 3 | 10% | ||
| Pillar of Light (*5) | Physical | 3.3 | 4 | |||
| Flying (*6) | Physical | 0.9 | 2 | 6.6% per second | ||
| Rush (*6) | Physical | 1.8 | 2 | 10% | ||
| Pillar of Light (*6) | Physical | 3.6 | 4 | |||
| Spirits that can activate this | Peepsta Hoo, Komory Bat, Eaglider, Halbird | |||||
| Hammer Throw | Physical | 0.9 | 2 | 9.6% per second | Hold the tail of the Spirit that has thorns extending from his entire body and run while swinging the Spirit overhead. The course can be changed with the Circle Pad. | |
| Spirits that can activate this | Pricklemane | |||||
| Flame Thrower | Rush | Fire | 0.9 | 2 | 9.6% per second | Make the Spirit roll in a cirlce. You can also change the direction in which the Spirit rolls with the Circle Pad. The Spirit ends the Link Attack by attacking with an explosive flame around it by pressing the A button. |
| Explosive Flame | Fire | 2.7 | 4 | 1.6% | ||
| Spirits that can activate this | Sudo Neku, Hebby Repp | |||||
| Decussation | During Link Attack | — | — | — | 6.6% per second | Sora and the Spirit stand ready on the spot. When pressing the A button, both attack while crossing each other. When the Link Gauge has 10% or less remaining, the attack changes to a thrust from the sky to the ground, emitting a shockwave. |
| X-rush | Physical | 0.4 | 1 | 10% | ||
| Dive thrust | Physical | 2.3 | 3 | 10% | ||
| Shockwave | Physical (*7) | 1.1 | 3 | |||
| Spirits that can activate this | Lord Kyroo, Chef Kyroo, Sir Kyroo, Ryu Dragon | |||||
| Poison Dash | During Link Attack | None | 0 | 0 | 9.6% per second | The Spirit is wrapped in a bubble, which it spit out, to attract touched enemies with a magnetic effect. During the Link Attack, the Circle Pad can be used to move in all directions. When the A button is pressed or the Link Gauge reaches zero, the final attack is triggered, which causes the bubble to explode after around 3 seconds. |
| Explosion | Physical | 6.3 | 6 | 100% | ||
| Spirits that can activate this | Toximander | |||||
| Water Blaster | Water | 0.4 | 1 | 9.6% per second | Squirt water from the mouth of the Spirit that you hold in both hands. You can't move during the Link Attack, but the long ranged attack can be guided in all directions with the Circle Pad. If you operate the attack right, you can hit more than 20 times. | |
| Spirits that can activate this | Fin Fatale, Fishboné | |||||
| Bubble Blaster | During Link Attack | — | — | — | 6.6% per second | Take the Spirit, aim with the Circle Pad, and fire a bullet of water with the A button. Standing still and holding A starts a fire of shots, with every 3 shots having a chance of confining an enemy in a bubble (large boss enemies cannot be confined). The bubble bursts when attacked or after 2 seconds, damaging enemies around it. |
| Bullet | Water | 0.4 | 1 | 3% | ||
| Explosion | Water | 3.0 | 4 | |||
| Spirits that can activate this | Tatsu Steed | |||||
| Paw Groove | During Link Attack | — | — | — | 0% | Circles appear on the upper, lower, left, and right sides of the upper screen. Marks of the A, B, X, and Y button advance from the center (to the same direction as the button's placement). When you press the button when the mark overlaps with the circle (even with repeated presses), Sora and the Spirit attack with wide-ranged sound waves. If the input has been successful 5 times in a row, two buttons have to be pressed at once, and the power increases. If the input is too slow or wrong, the Link Gauge decreases a lot, and the attack is unsuccessful. You can attack up to 8 times. |
| Failure | — | — | — | 30% | ||
| Successful Single Press | None | 0.6 | 4 | 12.5% | ||
| Successful Double Press | None | 2.0 | 4 | 12.5% | ||
| Spirits that can activate this | Necho Cat, Frootz Cat | |||||
| Equestrian Raid | During Link Attack (*8) | Physical | 1.3 | 2 | 6.6% per second | Run around on the Spirit's back, damaging enemies on hit. During the Link Attack, the course can be changed with the Circle Pad, and the A button executes a rush attack. Attributes and power differ between Spirits, with the Electricorn and Pegaslick's rush attack characterized as "Using once automatically after initiating Link Attack" and "Has a large opening before attack" |
| Rush (*8) | Physical | 1.3 | 2 | 5% | ||
| During Link Attack (*9) | Physical | 0.8 | 2 | 4.8% per second | ||
| Rush (*9) | Physical (*10) | 3.0 | 4 | 5% | ||
| Spirits that can activate this | Thunderaffe, Electricorn, Pegaslick | |||||
| Swing Fling | Spin | Physical | 1.0 | 2 | 10% | The Spirit spins around holding Sora's feet, while Sora is ready to attack. You can move in all directions with the Circle Pad. The Link Gauge decreases for each rotation. After 10 rotations or when the A button is pressed, the Spirit will fling Sora toward the enemies, ending the Link Attack. |
| Fling | Physical | 4.0 | 4 | 10% | ||
| Spirits that can activate this | Ursa Circus, Kooma Panda, Majik Lapin, Me Me Bunny | |||||
| Belly Raid | Blizzard | 1.2 | 2 | 6.6% per second | Take a ride on the Spirit's back to glide over the ice that stretches out on the ground, damaging the enemy by rushing into them (see P.365 for the nature of ice). Although the course can be changed with the Circle Pad, it is difficult to hit one enemy multiple times, because you can't turn suddenly. | |
| Spirits that can activate this | Iceguin Ace | |||||
| Target Shot | During Link Attack | Physical | 0.2 | 1 | 6.6% per second | The Spirit is constantly firing bullets. Although you can't move during the Link Attack, you can change the direction it shoots to the left, right, or diagonally upward, and fire large shots with the A button. When a large bullet hits an enemy, it gets marked for 5~9 seconds (*11), and bullets fired will chase the enemy. |
| Large shot | Physical | 0.2 | 1 | 1.1% | ||
| Spirits that can activate this | Kab Kannon, KO Kabuto | |||||
| Trap Shot | During Link Attack | Physical | 0.2 | 1 | 6.6% per second | It is about the same attack as "Target Shot", except the effect of the bullets fired with the A button changes to "inflict the Bind status on hit enemies for 5 seconds". |
| Large shot | Physical | 0.2 | 1 | 1.1% | ||
| Spirits that can activate this | Staggerceps | |||||
| Cure Sun | — | — | — | 100% | Completely recovers HP and cures all status effects of all allies in the field. It also gives the "Regen" effect, which restores 10 HP every 2 seconds for 30 seconds. | |
| Spirits that can activate this | Wheeflower | |||||
| Vacuum Ghost | During Link Attack | None | 0 | 0 | 9.6% per second | Sora holds the Spirit, who inhales continuously, attracting and swallowing the enemies in front. When the Link Gauge reaches zero or the A button is pressed, all enemies that were sucked up, receive damage and are spit out, ending the Link Attack. During the Link Attack, you can slowly walk in all directions with the Circle Pad. |
| Spit out | Dark | 4.5 | 4 | 1.6% | ||
| Spirits that can activate this | Ghostabocky, Jestabocky | |||||
| Berserker Bronco | Physical | 2.2 | 4 | 6.6% per second | Sora sits atop the Spirit, running around, stamping on enemies to damage them. The course can be changed with the Circle Pad. | |
| Spirits that can activate this | Zolephant | |||||
| Lucky Dice | — | — | — | 100% | Sora and the Spirit throw a die each. The effect which matches the pattern of the die the Spirit threw is given to the target that matches the pattern of the die Sora threw. (see below) | |
| Spirits that can activate this | Juggle Pup, R & R Seal | |||||
| Fire Blaster | During Link Attack | — | — | — | 6.6% per second | Approximately the same attack as "Bubble Blaster" (->P.341). In addition to the different attributes, firing bullets costs less of the Link Gauge. |
| Bullet | Fire | 0.4 | 1 | 1.1% | ||
| Explosion | Fire | 3.0 | 4 | |||
| Spirits that can activate this | Tatsu Blaze | |||||
| Poison Rain | None | 0 | 0 | 6.6% per second | Let it rain on enemies, inflicting either Mini, Confuse, Poison, or Slow (for 10 seconds). In addition, a maximum of 3 enemies get showered by harmful sunlight for 5 seconds, reducing their HP by 10 for every 0.5 seconds. | |
| Spirits that can activate this | Woeflower | |||||
| Flame Raid | Body blow | Physical | 1.0 | 2 | 6.6% per second | Sora sits atop the Spirit, running around and damaging enemies you hit. When pressing the A button, the Spirit attacks with a fire breath that lasts 1 second while running. Although the course can be changed with the Circle Pad, it can't be changed during the fire breath. |
| Fire breath | Fire | 2.0 | 2 | 15% | ||
| Spirits that can activate this | Tyranto Rex | |||||
| Ice Raid | Body blow | Physical | 1.0 | 2 | 6.6% per second | Almost the same attack as "Flame Raid" (see above), except the breath has a different attribute. |
| Ice breath | Blizzard | 2.0 | 2 | 15% | ||
| Spirits that can activate this | Skelterwild | |||||
| Tail Groove | During Link Attack | — | — | — | 0% | The attack is the same as "Paw Groove" (->P.341), except the marker flowing from the center of the screen is different. |
| Failure | — | — | — | 30% | ||
| Successful Single Press | None | 0.6 | 4 | 12.5% | ||
| Successful Double Press | None | 2.0 | 4 | |||
| Spirits that can activate this | Drak Quack, Ducky Goose | |||||
| Aura Raid | Body blow | Physical | 0.8 | 2 | 6.6% per second | Run around on the Spirit's back, damaging enemies on hit. The course can be changed with the Circle Pad. When you press the A button, the Spirit stops and fires aura avatars toward the enemies (Aura Lion fires 3 avatars, Keeba Tiger fires 1 avatar) |
| Avatar attack | Fire | 0.9 | 4 | 1.1% | ||
| Spirits that can activate this | Aura Lion, Keeba Tiger | |||||
| Effect and probability of the patterns of dice thrown during "Lucky Dice" | |||||||||||||||||||
|---|---|---|---|---|---|---|---|---|---|---|---|---|---|---|---|---|---|---|---|
| Die Sora throws | Die the Spirit throws | ||||||||||||||||||
|
|
The commands on the right affect Sora (the commands also affect a Spirit) |
|
"Firaga" and "Time Bomb" are triggered.
|
|
"Blizzaga" and "Freeze" are triggered.
|
|
"Thundaga" and "Bind" are triggered.
| ||||||||||||
|
|
The commands on the right affect an enemy (the commands also affect another enemy) |
|
"Stop" is triggered.
|
|
"Confuse" is triggered.
|
|
"Megalixir" is triggered. (*1)
| ||||||||||||
Dual Links
| 名前 | 属性 | 威力倍率 | リアクション値 | リンクゲージ 消費量 |
特徴 | |
| ワンダージャンボリー | 体当たり | 物理 | 1.2 | 4 | 毎秒4.8%+跳ねるたびに5% | 巨大化したスピリットの背に乗り、何度も跳ねまわって体当たりと着地時の衝撃波で攻撃する。進路はスライドパッドで変更可能。発動時間は短いものの、動作がとても速いので最大15回まで攻撃できる |
| 衝撃波 | 物理 | 1.0 | 3 | |||
| コメット | ファイア | 14.8 | 4 | 100% | ソラとスピリットが乗った巨大な隕石が地面に落ち、 周囲にいる敵を爆発に巻きこむ | |
| ユニオンラッシュ | なし | 1.1 | 4 | 毎秒4.8%+攻撃が当たるたびに5% | 光に包まれたソラとスピリットが高速で飛ぶ、敵に何度も突進する。進路は変更できないものの、敵がいる方向(敵がいなければ反対方向)へこまめに向きを変えるので、攻撃が当たらずに終わることは少ない | |
| カオススネーク | 光線 | なし | 0.3 | 1 | 毎秒4.8% | スピリットと一緒に光線を照射する。照射中は移動できなくなるが、スライドパッドで左右や斜め上に向きを変えることは可能。リンクゲージがゼロになるかAボタンを押すと、自分の周囲一帯を無数の弾と爆発で攻撃してリンク攻撃の発動が終わる |
| 弾 | なし | 0.1 | 1 | 30% | ||
| 爆発 | なし | 0.7 | 4 | |||
| レインボープリズム | なし | 3.6 | 4 | 100% | ソラとスピリットが光を飛び散らせて大爆発を起こし、周囲の敵た3~4回ずつダメージを与える | |
| トリニティリミット | ホーリー | 14.8 | 4 | 100% | ソラとスピリットが生み出した巨大な光の玉が爆発し、かなり広い範囲を攻撃
する | |
| ラグナロク | ホーリー | 0.7 | 4 | 100% | 光に包まれたソラとスピリットが輪になって回転し、無数の弾を飛ばす。弾は周囲に降り注ぎ、それぞれの敵に最大20回当たる | |
| Name | Attribute | Power Magnification | Reaction Value | Link Gauge Consumption | Features | |
| Whomperstomp | Body blow | Physical | 1.2 | 4 | 4.8% per second + 5% every time you bounce | Ride on the back of a giant Spirit and bounce many times to attack by hitting with the body and the shockwave at the time of landing. The course can be changed with the Circle Pad. Although the Link Attack's time is short, you can attack up to 15 times because the operation is very fast. |
| Shockwave | Physical | 1.0 | 3 | |||
| Comet | Fire | 14.8 | 4 | 100% | Sora and Spirits ride on a huge meteorite that falls on the ground, causing an explosion on enemies around it. | |
| Unison Rush | None | 1.1 | 4 | 4.8% per second + 5% each time the attack hits | Sora and Spirits are wrapped in light and fly at high speed, repeatedly rushing into the enemy. Although the course cannot be changed, it will go in the direction where the enemy is (if there are no enemies it will go in the opposite direction) Since the direction is changing frequently, it is less likely to end up missing. | |
| Chaos Snake | Beam | None | 0.3 | 1 | 4.8% per second | Shoot a beam of light together with the Spirits. Although you can't move while shooting, you can aim left, right, or diagonally upward. When the Link Gauge reaches zero or the A button is pressed, the Link Attack is ended by creating an explosion and firing countless bullets. |
| Bullet | None | 0.1 | 1 | 30% | ||
| Explosion | None | 0.7 | 4 | |||
| Prism Light | None | 3.6 | 4 | 100% | Sora and Spirits cause an explosion that scatters the light, damaging enemies around 3-4 times. | |
| Trinity Limit | Light | 14.8 | 4 | 100% | Sora and Spirits create a huge orb of light that explodes, attacking in a wide range. | |
| Ragnarok | Light | 0.7 | 4 | 100% | Sora and Spirits are wrapped in light and rotate in a circle, firing an unlimited number of bullets. The bullets fly around, hitting each enemy up to 20 times. | |
Shop Level
| 1 | Default | |
| 2 | Clear Traverse Town | |
| 3 | Clear 1 of the following | La Cité des Cloches The Grid Prankster's Paradise |
| 4 | Clear 2 of the following | |
| 5 | Clear all 3 of the following | |
| 6 | Clear Traverse Town (Revisit) | |
| 7 | Clear 1 of the following | Country of the Musketeers Symphony of Sorcery |
| 8 | Clear both of the following | |
Moogle Shop
| Command | Price | Bargain | Shop Level |
|---|---|---|---|
| 100 | 80 | 1 | |
| 400 | 320 | 4 | |
| 1000 | 800 | 7 | |
| 200 | 160 | 3 | |
| — | 120 | 1 | |
| — | 480 | 5 | |
| 2200 | 1760 | 8 | |
| 200 | 160 | 3 | |
| — | 960 | 5 | |
| 800 | 640 | 6 | |
| 600 | 480 | 5 | |
| 400 | 320 | 4 | |
| 1500 | 1200 | 7 | |
| — | 1200 | 8 | |
| 800 | 640 | 6 | |
| 1000 | 800 | 8 | |
| — | 1440 | 8 | |
| 1000 | 800 | 7 |
| Command | Price | Bargain | Shop Level |
|---|---|---|---|
| 100 | 80 | 1 | |
| 400 | 320 | 5 | |
| 1000 | 800 | 7 | |
| 100 | 80 | 1 | |
| 400 | 320 | 5 | |
| 1000 | 800 | 7 | |
| — | 120 | 1 | |
| — | 480 | 5 | |
| — | 1200 | 7 | |
| 100 | 80 | 2 | |
| 600 | 480 | 6 | |
| 1000 | 800 | 8 | |
| 200 | 160 | 4 | |
| 200 | 160 | 3 | |
| 600 | 480 | 6 | |
| 1000 | 800 | 8 | |
| — | 1440 | 8 | |
| — | 240 | 1 | |
| — | 720 | 5 | |
| 200 | 160 | 3 | |
| 800 | 640 | 6 | |
| — | 1600 | 8 | |
| — | 360 | 1 | |
| 200 | 160 | 2 | |
| 400 | 320 | 4 | |
| 400 | 320 | 3 | |
| 200 | 160 | 2 | |
| 100 | 80 | 1 | |
| 300 | 240 | 5 |
| Command | Price | Bargain | Shop Level |
|---|---|---|---|
| 20 | 16 | 1 | |
| 40 | 32 | 2 | |
| 100 | 80 | 5 | |
| 40 | 32 | 2 | |
| 50 | 40 | 2 | |
| 50 | 40 | 2 | |
| — | 2400 | 1 |
| Command | Price | Bargain | Shop Level |
|---|---|---|---|
| 300 | 240 | 5 | |
| 400 | 320 | 6 | |
| 500 | 400 | 8 | |
| 400 | 320 | 6 | |
| 400 | 320 | 7 | |
| 400 | 320 | 7 | |
| 400 | 320 | 6 | |
| 400 | 320 | 7 | |
| 400 | 320 | 7 |
| Item | Price | Bargain | Shop Level |
|---|---|---|---|
| Confetti Candy | 30 | 24 | 1 |
| Shield Cookie | 30 | 24 | 1 |
| Block-it Chocolate | 30 | 24 | 1 |
| Ice Dream Cone | 30 | 24 | 1 |
| Confetti Candy 2 | 120 | 96 | 4 |
| Shield Cookie 2 | 120 | 96 | 4 |
| Block-it Chocolate 2 | 120 | 96 | 4 |
| Ice Dream Cone 2 | 120 | 96 | 4 |
| Confetti Candy 3 | — | 192 | 7 |
| Shield Cookie 3 | — | 192 | 7 |
| Block-it Chocolate 3 | — | 192 | 7 |
| Ice Dream Cone 3 | — | 192 | 7 |
| Balloon | 80 | 64 | 1 |
| Water Barrel | 80 | 64 | 1 |
| Paint Gun: Red | 10 | 8 | 1 |
| Paint Gun: Blue | 10 | 8 | 1 |
| Paint Gun: Green | 10 | 8 | 1 |
| Paint Gun: Yellow | 10 | 8 | 1 |
| Paint Gun: White | 10 | 8 | 1 |
| Paint Gun: Black | 10 | 8 | 1 |
| Paint Gun: Purple | 10 | 8 | 1 |
| Paint Gun: Sky Blue | 10 | 8 | 1 |
| Command | Medals | Shop Level |
|---|---|---|
| 150 | 1 | |
| 120 | 1 | |
| 250 | 1 | |
| 1000 | 5 | |
| 1000 | 5 |
| Command | Medals | Shop Level |
|---|---|---|
| 2000 | 8 | |
| 1200 | 5 | |
| 1500 | 8 | |
| 1200 | 5 | |
| 200 | 1 | |
| 150 | 1 |
| Command | Medals | Shop Level |
|---|---|---|
| 100 | 5 | |
| 4000 | 8 | |
| 200 | 1 |
| Command | Medals | Shop Level |
|---|---|---|
| 700 | 8 | |
| 750 | 8 |
| Item | Medals | Shop Level |
|---|---|---|
| Thunderaffe Recipe | 280 | 4 |
| Kooma Panda Recipe | 80 | 1 |
| Pegaslick Recipe | 330 | 5 |
| Juggle Pup Recipe | 180 | 2 |
| Drill Sye Recipe | 150 | 1 |
| Majik Lapin Recipe | 400 | 6 |
| Meowjesty Recipe | 2000 | [1] |
| Sudo Neku Recipe | 2000 | [1] |
| Ursa Circus Recipe | 2000 | [1] |
| Item | Medals | Shop Level |
|---|---|---|
| Confetti Candy | 40 | 1 |
| Shield Cookie | 40 | 1 |
| Block-it Chocolate | 40 | 1 |
| Ice Dream Cone | 40 | 1 |
| Royal Cake | 300 | 8 |
| Confetti Candy 2 | 100 | 4 |
| Shield Cookie 2 | 100 | 4 |
| Block-it Chocolate 2 | 100 | 4 |
| Ice Dream Cone 2 | 100 | 4 |
| Confetti Candy 3 | 200 | 7 |
| Shield Cookie 3 | 200 | 7 |
| Block-it Chocolate 3 | 200 | 7 |
| Ice Dream Cone 3 | 200 | 7 |
| Balloon | 50 | 1 |
| Water Barrel | 50 | 1 |
| Paint Gun: Red | 5 | 1 |
| Paint Gun: Blue | 5 | 1 |
| Paint Gun: Green | 5 | 1 |
| Paint Gun: Yellow | 5 | 1 |
| Paint Gun: White | 5 | 1 |
| Paint Gun: Black | 5 | 1 |
| Paint Gun: Purple | 5 | 1 |
| Paint Gun: Sky Blue | 5 | 1 |
Flick Rush
Rank
Points needed
- S: 30+ points
- A: 23-29 points
- B: 16-22 points
- C: 15 or less points
| Time (???): | Remaining HP | Successful Attacks | Successful Blocks |
|
|
|
|
Trophies
Each round gives points based on the rank.
- S rank - 4 points
- A rank - 3 points
- B rank - 2 points
- C rank - 1 point
Points needed for trophy:
| Amount of rounds | Bronze | Silver | Gold |
| 1 | 2 | 3 | 4 |
| 2 | 3 | 6 | 8 |
| 3 | 4 | 8 | 12 |
| 4 | 6 | 11 | 16 |
| 5 | 7 | 14 | 20 |
Medals
| Tournament | Round | Rank (Victory) | Rank (Defeat) | ||||
| S | A | B | C | B | C | ||
| Training Cup | Round 1 | 60 | 40 | 30 | 20 | 10 | 6 |
| Beginner's Cup | Round 1 | 70 | 50 | 40 | 30 | 13 | 10 |
| Round 2 | 80 | 60 | 50 | 40 | 16 | 13 | |
| Rainbow Cup | Round 1 | 80 | 60 | 50 | 40 | 16 | 13 |
| Round 2 | 90 | 70 | 60 | 50 | 20 | 16 | |
| Round 3 | 100 | 80 | 70 | 60 | 23 | 20 | |
| Round 4 | 110 | 90 | 80 | 70 | 26 | 23 | |
| Digital Cup | Round 1 | 100 | 80 | 70 | 60 | 23 | 20 |
| Round 2 | 110 | 90 | 80 | 70 | 26 | 23 | |
| Tin Pin Cup | Round 1 | 110 | 90 | 80 | 70 | 26 | 23 |
| Round 2 | 120 | 100 | 90 | 80 | 30 | 26 | |
| Round 3 | 130 | 110 | 100 | 90 | 33 | 30 | |
| Round 4 | 140 | 120 | 110 | 100 | 36 | 33 | |
| Speed Cup | Round 1 | 140 | 120 | 110 | 100 | 36 | 33 |
| Yummy Cup | Round 1 | 150 | 130 | 120 | 110 | 40 | 36 |
| Round 2 | 160 | 140 | 130 | 120 | 43 | 40 | |
| Round 3 | 170 | 160 | 140 | 130 | 46 | 43 | |
| Final Cup | Round 1 | 170 | 150 | 140 | 130 | 46 | 43 |
| Round 2 | 180 | 160 | 150 | 140 | 50 | 46 | |
| Round 3 | 190 | 170 | 160 | 150 | 53 | 50 | |
| Round 4 | 200 | 180 | 170 | 160 | 56 | 53 | |
| Horror Cup | Round 1 | 220 | 200 | 190 | 180 | 63 | 60 |
| Secret Cup | Round 1 | 240 | 220 | 210 | 200 | 70 | 66 |
| Round 2 | 260 | 240 | 230 | 220 | 76 | 73 | |
| Round 3 | 280 | 260 | 250 | 240 | 83 | 80 | |
| Round 4 | 300 | 280 | 270 | 260 | 90 | 86 | |
| Round 5 | 350 | 330 | 320 | 310 | 106 | 103 | |
Streetpass:
| Flick Rush LV | Rank (Victory) | Rank (Defeat) | ||||
| S | A | B | C | B | C | |
| 1~4 | 80 | 60 | 50 | 40 | 16 | 13 |
| 5~8 | 100 | 80 | 70 | 60 | 23 | 20 |
| 9~12 | 140 | 120 | 110 | 100 | 36 | 33 |
| 13~16 | 180 | 160 | 150 | 140 | 50 | 46 |
| 17~20 | 220 | 200 | 190 | 180 | 63 | 60 |
Battle Levels
| World | Before clear | After clear |
|---|---|---|
| Traverse Town (1) | 3 | 6 |
| La Cité des Cloches | 8 | 12 |
| The Grid | 14 | 18 |
| Prankster's Paradise | 18 | 20 |
| Traverse Town (2) | 20 | 24 |
| Country of the Musketeers | 26 | 30 |
| Symphony of Sorcery | 34 | 36 |
| The World That Never Was | 38 |
Dream Eaters
Dream Eaters that appear in each world (not counting portals and rare Lord Kyroo fight)
By World
Traverse Town
Drill Sye
(Side: Sora only)
Sir Kyroo
(Side: Sora only)
Juggle Pup
(Side: Sora only)
Cera Terror
(Side: Riku only)
_KH3D.png)
_KH3D.png)
_KH3D.png)
_KH3D.png)
_KH3D.png)
_KH3D.png)
_KH3D.png)
_KH3D.png)
_KH3D.png)
_KH3D.png)
_KH3D.png)
_KH3D.png)
_KH3D.png)
_KH3D.png)
_KH3D.png)
_KH3D.png)
_KH3D.png)
_KH3D.png)
_KH3D.png)
_KH3D.png)
_KH3D.png)
_KH3D.png)
_KH3D.png)
- Portals
Meow Wow (Rare)
Tama Sheep (Rare)
Kooma Panda (Rare)

Thunderaffe (Rare)
_KH3D.png)
_KH3D.png)
_KH3D.png)
_KH3D.png)
_KH3D.png)
_KH3D.png)
_KH3D.png)
_KH3D.png)
_KH3D.png)
_KH3D.png)
La Cité des Cloches
Meow Wow
(Side: Sora only)
Tama Sheep
(Side: Sora only)
_KH3D.png)
- Portals
_KH3D.png)
_KH3D.png)
_KH3D.png)
_KH3D.png)
_KH3D.png)
_KH3D.png)
_KH3D.png)
The Grid
Kooma Panda
(Side: Sora only)
_KH3D.png)
_KH3D.png)
- Portals
_KH3D.png)
_KH3D.png)
_KH3D.png)
Prankster's Paradise
Meow Wow
(Side: Sora only)
Pricklemane
(Side: Sora only)Sir Kyroo
(Side: Sora only)
- Portals
Iceguin Ace (Rare)
Juggle Pup (Rare)
_KH3D.png)
_KH3D.png)
_KH3D.png)
_KH3D.png)
Country of the Musketeers
Kooma Panda
(Side: Sora only)
Zolephant
(Side: Sora only)
Peepsta Hoo
(Side: Sora only)
KO Kabuto
(Side: Sora only)Sir Kyroo
(Side: Sora only)
Iceguin Ace
(Side: Sora only)
Tyranto Rex
(Side: Sora only)
Tatsu Blaze
(Side: Riku only)
_KH3D.png)
_KH3D.png)
- Portals
Halbird (Rare)
Me Me Bunny (Rare)
Tyranto Rex (Rare)

Ducky Goose (Rare)
Aura Lion (Rare)
_KH3D.png)
_KH3D.png)
_KH3D.png)
_KH3D.png)
_KH3D.png)
_KH3D.png)
_KH3D.png)
_KH3D.png)
_KH3D.png)
Symphony of Sorcery
Tama Sheep
(Side: Sora only)
Yoggy Ram
(Side: Sora only)
Escarglow
(Side: Sora only)
Fin Fatale
(Side: Sora only)
Tatsu Steed
(Side: Sora only)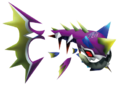
Fishboné
(Side: Sora only)
Chef Kyroo
(Side: Sora only)Kooma Panda
(Side: Riku only)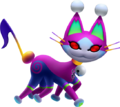
Necho Cat
(Side: Riku only)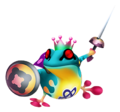
Lord Kyroo
(Side: Riku only)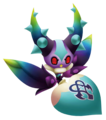
Woeflower
(Side: Riku only)KO Kabuto
(Side: Riku only)Sir Kyroo
(Side: Riku only)Juggle Pup
(Side: Riku only)
- Portals
Pegaslick (Rare)
Ghostabocky (Rare)
Ryu Dragon (Rare)
_KH3D.png)
_KH3D.png)
_KH3D.png)
The World That Never Was
Eaglider
(Side: Sora only)
Halbird
(Side: Riku only)
Thunderaffe
(Side: Riku only)
Pegaslick
(Side: Riku only)
Ghostabocky
(Side: Riku only)
Electricorn
(Side: Riku only)
Ryu Dragon
(Side: Riku only)
- Portals
Halbird (Rare)
Thunderaffe (Rare)
(Side: Riku only)Tyranto Rex (Rare)
Aura Lion (Rare)
Pegaslick (Rare)
By Dream Eater
| Dream Eater | Worlds | Worlds (Portals) | Worlds (Rare) |
|---|---|---|---|
| Meow Wow | TT1, LCdC, TG, PP | TT, LCdC, PP | TT, LCdC, TG |
| Tama Sheep | TT1, LCdC (S), SoS (S) | TT (R) | |
| Yoggy Ram | TT1, LCdC, SoS (S) | TT, PP | TG |
| Komory Bat | TT1, LCdC, TG, PP, TT2 | TT, LCdC, PP | |
| Pricklemane | TT1, LCdC, PP (S) | TT, LCdC, CotM | |
| Hebby Repp | TT1, LCdC, PP | TT, CotM | |
| Kooma Panda | TT1, LCdC, TG (S), PP, CotM (S), SoS (R) | TT, PP | TT |
| Flowbermeow | TT, PP (S) | ||
| Toximander | LCdC, CotM | ||
| Necho Cat | LCdC, TT2, SoS (R) | LCdC | LCdC |
| Wheeflower | LCdC, TT2 | SoS | |
| Zolephant | LCdC, TT2, CotM (S) | LCdC, PP | LCdC (S) |
| Lord Kyroo | SoS (R) | PP | |
| Woeflower | LCdC, TT2, SoS (R) | ||
| Drill Sye | LCdC, TT2 (S) | LCdC, PP, SoS | LCdC |
| Peepsta Hoo | TG, TT2, CotM (S), SoS | LCdC, TG, TT2, CotM | |
| Escarglow | TG, SoS (S) | LCdC, TG, PP | |
| KO Kabuto | TG, CotM (S), SoS (R) | TT, LCdC, TG, PP | TG |
| Halbird | TG, CotM, TWTNW (R) | LCdC, CotM | CotM, TWTNW |
| Cyber Yog | TG | ||
| Eaglider | TG, TWTNW (S) | TG | |
| Sir Kyroo | PP (S), TT2 (S), CotM (S), SoS (R) | TT | |
| Fin Fatale | PP, SoS (S)* | TT | |
| Tatsu Steed | PP, SoS (S)* | LCdC, PP | |
| Iceguin Ace | PP, TT2, CotM (S), SoS | TT, PP, CotM | PP |
| Juggle Pup | PP, TT2 (S)*, SoS (R) | TT, PP | PP |
| Jestabocky | PP, TT2, CotM | PP, CotM | |
| Thunderaffe | TT2, CotM, SoS, TWTNW (R) | TT2, CotM | TT2, TWTNW (R) |
| Staggerceps | TT2, CotM, SoS | ||
| Fishboné | TT2, CotM, SoS (S) | TT2, CotM | |
| Chef Kyroo | TT2, CotM, SoS (S) | ||
| Tatsu Blaze | TT2, CotM (R) | LCdC | |
| Cera Terror | TT2 (R), CotM, TWTNW | CotM, SoS | |
| Me Me Bunny | CotM | CotM | CotM |
| Tyranto Rex | CotM (S) | CotM, TWTNW | |
| Ducky Goose | CotM | TT2, CotM, SoS | CotM |
| Aura Lion | CotM | TG, CotM | CotM, TWTNW |
| Pegaslick | SoS, TWTNW (R) | PP, TT2, SoS | SoS, TWTNW |
| Ghostabocky | SoS, TWTNW (R) | LCdC, CotM | SoS |
| Electricorn | SoS, TWTNW (R) | TT2 | |
| Ryu Dragon | SoS, TWTNW (R) | PP, CotM, SoS | SoS |
| Majik Lapin | TWTNW | CotM | |
| Skelterwild | TWTNW | CotM | |
| Drak Quack | TWTNW | CotM | |
| Keeba Tiger | TWTNW | CotM | |
| TT1 = Traverse Town (1st visit) TT2 = Traverse Town (2nd visit) (S) = Sora only (R) = Riku only * = Not available before world clear | |||
Dream Eater Drops
Synthesis Materials
Figment (幻想 Gensō, lit. "Illusion")
Fancy (空想 Kūsō)
Fantasy (夢想 Musō, lit. "Dream")
Items
Treasure Goggles
Affinity Points earned
| Treasure found |
Happiness value |
Affinity Gain Drop Bonus Lv | |||
|---|---|---|---|---|---|
| None | LV 1 | LV 2 | LV 3 | ||
| 0~1 | 100 | 3~10 | 4~12 | 4~13 | 5~15 |
| 71~99 | 2~8 | 3~10 | 3~10 | 4~12 | |
| 1~70 | 2~6 | 2~7 | 2~8 | 3~9 | |
| 0 | 1~5 | 2~6 | 2~6 | 2~7 | |
| 2~4 | 100 | 5~15 | 6~18 | 6~19 | 7~22 |
| 71~99 | 4~12 | 4~14 | 5~15 | 6~18 | |
| 1~70 | 3~9 | 3~10 | 3~11 | 4~13 | |
| 0 | 2~7 | 3~9 | 3~9 | 3~11 | |
| 5 | 100 | 7~22 | 9~27 | 9~29 | 11~33 |
| 71~99 | 6~18 | 7~21 | 7~23 | 9~27 | |
| 1~70 | 4~13 | 5~16 | 5~17 | 6~20 | |
| 0 | 3~11 | 4~13 | 4~14 | 5~16 | |
- Treasures
The obtained treasure is decided by the category's probability. Within that category, the treasure is chosen randomly from items matching Shop and Affinity level.
|
| |||||||||||||||||||||||||||||||||||||||||||||||||||||||||||||||||||||||||||||||||||||||||||||||||||||||||||||||||||||||||||||||||||||||||||||||||||||||||||||||||||||||||||||||||||||||||||||||
- ^ More munny the higher the shop level and affinity level.
Streetpass Portals
- Battle rank
| Average Level | 1~5 | 6~10 | 11~20 | 21~30 | 31~99 |
|---|---|---|---|---|---|
| Rank | ★★★★★ | ★★★★★ | ★★★★★ | ★★★★★ | ★★★★★ |
- Bonus condition difficulty
| Bonus condition | Difficulty |
|---|---|
| Take damage no more than two times! Achieve victory in 20 seconds or less! |
A |
| Pull off at least three successful counters! Achieve victory without using |
B |
| Land at least 10 attacks while linked! Pull off at least three Flowmotion Attacks! Block at least three enemy attacks! |
C |
- Experience obtained
(Spirit's Level + 3) x (Table 1) x Random number [0.9~1.1] / 3
| Battle rating (Table 2) |
Difficulty | ||
|---|---|---|---|
| A | B | C | |
| 1 | 0.5 | 0.5 | 0.5 |
| 2 | 3 | 2 | 1 |
| 3 | 6 | 3 | 1.5 |
| 4 | 8 | 4 | 2 |
| 5 | 12 | 6 | 3 |
| Strength point | Difficulty | ||
|---|---|---|---|
| A | B | C | |
| 0~9 | 1 | 1 | 1 |
| 10~14 | 2 | ||
| 15~19 | 3 | ||
| 20~24 | 2 | 4 | |
| 25~29 | 5 | ||
| 30~39 | 3 | ||
| 40~49 | 2 | 4 | |
| 50~54 | 5 | ||
| 55~69 | 3 | ||
| 70~84 | 4 | ||
| 85+ | 5 | ||
Strength point: (Own strength + Opponent's strength) x Random [0.2~0.5]
- Rewards (Battle Portal)
- Battle rating 1~2: Paint Gun x10 (Random color, white and black only at Battle rating 2)
- Battle rating 3: Confetti Candy/Shield Cookie/Block-It Chocolate/Ice Dream Cone
| Difficulty | A | B | C | |||
|---|---|---|---|---|---|---|
| Battle rating | 4 | 5 | 4 | 5 | 4 | 5 |
| Fleeting Figment | O | O | O | O | — | — |
| Fleeting Fancy | O | O | — | — | — | — |
| Fleeting Fantasy | — | O | — | — | — | — |
| Lofty Figment | — | — | O | O | — | — |
| Lofty Fancy | O | O | — | — | — | — |
| Lofty Fantasy | — | O | — | O | — | — |
| Rampant Figment | — | — | — | — | O | O |
| Rampant Fancy | O | O | O | O | — | — |
| Rampant Fantasy | — | O | — | O | — | O |
| Dulcet Figment | — | — | O | O | — | — |
| Dulcet Fancy | O | O | — | — | — | — |
| Dulcet Fantasy | — | O | — | O | — | — |
| Malleable Fantasy | — | O | — | O | — | — |
| Prickly Fantasy | — | O | — | — | — | — |
| Epic Fantasy | — | O | — | — | — | — |
| Charming Fantasy | — | O | — | O | — | — |
| Intrepid Figment | — | — | — | — | O | O |
| Intrepid Fancy | O | O | — | — | — | — |
| Intrepid Fantasy | — | O | — | — | — | — |
| Savage Fantasy | — | O | — | — | — | — |
| Noble Figment | — | — | O | O | — | — |
| Noble Fancy | O | O | O | O | — | — |
| Noble Fantasy | — | O | — | O | — | — |
| Grim Figment | — | — | — | — | O | O |
| Grim Fancy | O | O | — | — | — | — |
| Grim Fantasy | O | O | — | — | — | — |
| Vibrant Figment | — | — | — | — | O | O |
| Vibrant Fancy | O | O | O | O | — | — |
| Vibrant Fantasy | — | O | — | O | — | O |
| Troubling Figment | — | — | — | — | O | O |
| Troubling Fancy | — | — | O | O | — | — |
| Troubling Fantasy | — | O | — | O | — | O |
| Wondrous Figment | O | O | O | O | — | — |
| Wondrous Fancy | O | O | — | — | — | — |
| Wondrous Fantasy | O | O | — | — | — | — |
| Confetti Candy | — | — | OO | — | OO | OO |
| Shield Cookie | — | — | OO | — | OO | OO |
| Block-It Chocolate | — | — | OO | — | OO | OO |
| Ice Dream Cone | — | — | OO | — | OO | OO |
| Royal Cake | — | OO | — | OO | — | OO |
| Confetti Candy 2 | OO | — | OO | OO | — | — |
| Shield Cookie 2 | OO | — | OO | OO | — | — |
| Block-It Chocolate 2 | OO | — | OO | OO | — | — |
| Ice Dream Cone 2 | OO | — | OO | OO | — | — |
| Confetti Candy 3 | OO | OO | — | — | — | — |
| Shield Cookie 3 | OO | OO | — | — | — | — |
| Block-It Chocolate 3 | OO | OO | — | — | — | — |
| Ice Dream Cone 3 | OO | OO | — | — | — | — |
- Rewards (Friend Portal)
| Number of people linked | 1~2 | 3~4 | 5+ |
|---|---|---|---|
| Confetti Candy | OO | O | — |
| Shield Cookie | OO | O | — |
| Block-It Chocolate | OO | O | — |
| Ice Dream Cone | OO | O | — |
| Royal Cake | ★ | ★ | ★ |
| Confetti Candy 2 | — | O | O |
| Shield Cookie 2 | — | O | O |
| Block-It Chocolate 2 | — | O | O |
| Ice Dream Cone 2 | — | O | O |
| Confetti Candy 3 | — | — | O |
| Shield Cookie 3 | — | — | O |
| Block-It Chocolate 3 | — | — | O |
| Ice Dream Cone 3 | — | — | O |
| Windmill | O | O | O |
| Treasure Goggles | O | O | O |
| Water Barrel | O | O | O |
| Potion | O | O | O |
| Hi-Potion | — | O | O |
| Mega-Potion | — | — | O |
| Drop-Me-Not | O | O | O |
| Drop-Me-Never | — | O | O |
| Pancea | O | O | O |
★ = 5x O
| My Pages | |
|---|---|
| Userpage - Talk page - Archives - Contributions - Signature - Talk bubbles - Navigation | |
| Projects | |
| Template drafts and recent page drafts | Final Fantasy Brave Exvius page - Game:Sora idea - Manga - Sandbox (Official attack translations) - Tester (Scratch Card) - Zandbak (Attack page) Project χ: InfoMedal - InfoCardKHX - Project χ |
| Translations | Kingdom Hearts - Chain of Memories |
| Ultimania notes | Werkplaats (KH3D Ultimania Notes) - CoM Ultimania Notes - BBS Ultimania Notes - BBS Ability/Command Meld notes |
| Attempt at walkthrough | KH1: Dive to the Heart - Destiny Islands | KH3: Dive to the Heart - Olympus |
| Forgotten/Abandoned projects | HP draft - Strength draft |