| About stats
|
Before making a choice, here's what you need to know about the stats:
- HP is the amount of damage you can take before you die
- MP is the amount of Magic you can use, and the power of magical abilities
- AP is the amount of Abilities you can equip.
- STR is the amount of damage you deal with physical attacks
- DEF is the amount of damage you receive from attacks
- Item slots is how many items you can bring into battle
|
Welcome to the beginning of this walkthrough. This walkthrough will guide you through the first game in the Kingdom Hearts series. This walkthrough is usable for the original Kingdom Hearts, Kingdom Hearts Final Mix, and the HD 1.5 ReMIX version of Kingdom Hearts Final Mix.
Choose your weapon
After the opening movie, you find yourself on a platform with Snow White on it, eerie music in the background, and a mysterious voice asking you if you can walk. Walk to the center of the platform, and three pedestals will appear, each holding a weapon. You're now forced to choose one of the weapons, and give up a second one. The choice you make determines your stats and the order in which you learn your abilities. You'll also get to use the chosen weapon for this tutorial part.
|
|
| Level
|
Abilities (Original)
|
| Choose Dream Sword
|
Choose Dream Rod
|
Choose Dream Shield
|
| 6 |
— |
— |
—
|
| 9 |
Combo Plus |
Scan |
Guard
|
| 12 |
Vortex |
Treasure Magnet |
Scan
|
| 15 |
Scan |
MP Haste |
Lucky Strike
|
| 18 |
Blitz |
Counterattack |
Second Chance
|
| 21 |
Berserk |
Critical Plus |
Counterattack
|
| 24 |
Counterattack |
Guard |
Jackpot
|
| 27 |
Air Combo Plus |
Aerial Sweep |
Treasure Magnet
|
| 30 |
Aerial Sweep |
Treasure Magnet |
—
|
| 33 |
Treasure Magnet |
MP Rage |
Blitz
|
| 36 |
Guard |
Berserk |
MP Rage
|
| 39 |
— |
Lucky Strike |
Treasure Magnet
|
| 42 |
— |
— |
Combo Plus
|
| 45 |
MP Haste |
— |
Vortex
|
| 48 |
Critical Plus |
Second Chance |
Berserk
|
| 50 |
— |
— |
—
|
| 51 |
Second Chance |
MP Rage |
Critical Plus
|
| 54 |
— |
Jackpot |
—
|
| 55 |
— |
— |
—
|
| 57 |
MP Rage |
Vortex |
Air Combo Plus
|
| 60 |
Treasure Magnet |
Air Combo Plus |
Aerial Sweep
|
| 63 |
Jackpot |
Blitz |
MP Haste
|
| 66 |
MP Rage |
Combo Plus |
MP Rage
|
| 69 |
Lucky Strike |
Critical Plus |
Critical Plus
|
| 72 |
Combo Plus |
— |
—
|
| 75 |
Air Combo Plus |
Air Combo Plus |
Combo Plus
|
| 78 |
Critical Plus |
Combo Plus |
Air Combo Plus
|
| 81 |
— |
— |
—
|
| 84 |
Combo Plus |
Combo Plus |
Combo Plus
|
| 87 |
— |
— |
—
|
| 90 |
Critical Plus |
Critical Plus |
Critical Plus
|
| 93 |
— |
— |
—
|
| 96 |
Combo Plus |
Combo Plus |
Combo Plus
|
| 99 |
— |
— |
—
|
| 100 |
— |
— |
—
|
|
| Level
|
Abilities (Final Mix)
|
| Choose Dream Sword
|
Choose Dream Rod
|
Choose Dream Shield
|
| 6 |
Sliding Dash |
Stun Impact |
Slapshot
|
| 9 |
Scan |
Treasure Magnet |
Berserk
|
| 12 |
Slapshot |
Ripple Drive |
Tech Boost
|
| 15 |
Counterattack |
Scan |
Guard
|
| 18 |
Tech Boost |
Hurricane Blast |
Stun Impact
|
| 21 |
Combo Plus |
MP Haste |
Scan
|
| 24 |
Guard |
Air Combo Plus |
Lucky Strike
|
| 27 |
Hurricane Blast |
Tech Boost |
Leaf Bracer
|
| 30 |
— |
— |
Treasure Magnet
|
| 33 |
Blitz |
Guard |
—
|
| 36 |
Treasure Magnet |
Aerial Sweep |
Second Chance
|
| 39 |
Ripple Drive |
Leaf Bracer |
Sliding Dash
|
| 42 |
— |
MP Rage |
Jackpot
|
| 45 |
MP Haste |
Air Combo Plus |
Counterattack
|
| 48 |
Second Chance |
Lucky Strike |
Critical Plus
|
| 50 |
Combo Master |
— |
—
|
| 51 |
Stun Impact |
Sliding Dash |
Hurricane Blast
|
| 54 |
— |
— |
Combo Master
|
| 55 |
— |
Combo Master |
—
|
| 57 |
Vortex |
Counterattack |
Treasure Magnet
|
| 60 |
Aerial Sweep |
Berserk |
Blitz
|
| 63 |
MP Rage |
Jackpot |
Combo Plus
|
| 66 |
Combo Plus |
— |
—
|
| 69 |
Leaf Bracer |
Slapshot |
Ripple Drive
|
| 72 |
Air Combo Plus |
Treasure Magnet |
MP Haste
|
| 75 |
Treasure Magnet |
MP Rage |
Critical Plus
|
| 78 |
Berserk |
Blitz |
Vortex
|
| 81 |
Tech Boost |
Tech Boost |
Tech Boost
|
| 84 |
Critical Plus |
Vortex |
Aerial Sweep
|
| 87 |
MP Rage |
Combo Plus |
Combo Plus
|
| 90 |
Lucky Strike |
Second Chance |
MP Rage
|
| 93 |
Combo Plus |
Combo Plus |
Air Combo Plus
|
| 96 |
Air Combo Plus |
Critical Plus |
Combo Plus
|
| 99 |
Critical Plus |
Combo Plus |
Air Combo Plus
|
| 100 |
Jackpot |
Critical Plus |
MP Rage
|
|
Some popular choices are:
- Choose Dream Shield, give up Dream Sword - This is a very good beginner setup. Choosing the shield gives you defensive abilities quite early, and giving up the sword instead of the rod gives you a little extra AP to equip them.
- Choose Dream Rod, give up Dream Sword - If you want to focus on using Magic, you have to choose the Dream Rod. Those two extra MP are going to make a ton of difference in both the amount of Magic you can use, as well as the power of your spells. The difference between giving up the sword or shield is an extra 2 STR or DEF, which isn't that much, but giving up the shield has you start with just 1 DEF, which is not a lot.
- Choose Dream Sword, give up Dream Shield - The Dream Sword is the least useful of the three. It gives you more STR at the beginning, and gives you more combo moves early on, but none of that really matters at the end. The difference between giving up the rod or shield is 2 AP or 1 DEF, of which 2 AP is the better deal.
Once you've made your choice and confirmed it, the floor will break beneath you and you'll fall to another platform featuring Cinderella.
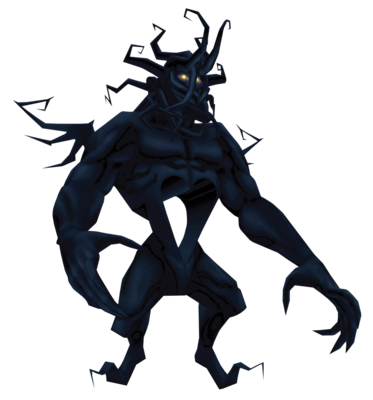
| Shadow
|
|
|
Attacks
|
- Scratch Attack
- Lunge Attack
- Jump Attack
|
| Strategy
|
| Shadows are quite easy to beat. They do have the annoying ability of sinking into the ground, making them invulnerable until they resurface.
|
Learn to fight
| Potion
|
|
|
| Restores 30 HP of one character. Can be equipped.
|
You'll summon the weapon you chose, and learn about HP and MP, and how to attack. And now it's time for your very first battle. Introducing the most basic of Heartless: the  Shadow. A bunch of them appear, but you only need to defeat one for the others to retreat. You'll learn about EXP and prizes, and another Shadow will try to attack you from behind. That might be a problem if it weren't for a very useful tool: Lock-on. Lock-on allows you to target and follow a specific enemy. Use Lock-on to defeat the group of Shadows, and a retreating Shadow will cause you to sink into darkness until you awake on a third platform, featuring three unidentified women, and a semi-transparent door.
Walk up to the door and you'll learn about examining. Examine the door and a treasure chest will appear. Walk up to it and open it to obtain...nothing. A crate now appears, push it and then smash it. Inside you'll find a  Potion. The door frame now becomes solid and a barrel appears. Lift the barrel and the rest of the door will materialize. Now you can open the door.
Making the right choice
| What choice to make
|
| What choice you should make regarding your EXP growth kind of depends on your playstyle. If you're a beginner, or just looking for a quick run-through, "dawn" will be the best option, as it levels you up quicker at lower levels. If you're planning on getting Sora to LV 100, "dusk" is a better option, as the total EXP required is a lot lower. If you're not sure, you can always choose "noon".
|
You find yourself on a wooden structure overlooking a vast ocean with three other characters. Fans of the Final Fantasy series might recognize them as Selphie from Final Fantasy VIII, and Tidus and Wakka from Final Fantasy X. Each will ask you a question, with three possible answers. The answers you give decide the amount of EXP you'll need to level up. There are three possible outcomes: "dawn" will require less EXP in the beginning but more at the end, "dusk" will require more EXP at the beginning but less at the end, and "noon" is kind of balanced between the two. Fortunately, there's no complicated formula for what choices to make. The top answers will result in dawn, the middle answers in noon, and the bottom answers in dusk. After answering all three, you get to confirm your choice. Afterwards, you'll find yourself on another station, featuring Aurora. Walk towards the light, and you'll learn about the Menu screen. However, you can't open it during battle and a bunch of Shadows appear.
After the battle, a Save Point appears. Save Points allow you to save your game (obviously), but standing on one also restores your HP and MP. Stand on the Save Point and a beam of light creates a stairway.
Time to face your dark side
Once you've saved (or not), head up the stairs. In a cutscene you see your shadow grow to the size of a giant. Meet the very first boss battle, the  Darkside Darkside
| Darkside
|
|
|
HP
|
Original
|
Final Mix
|
| 180 |
240
|
| EXP
|
Original
|
Final Mix
|
| 18 |
18
|
| Attacks
|
|
|
| Strategy
|
| The Darkside can only be damaged by hitting its hands or its head.
When it lowers its arm and charges it with energy, it will slam it in the ground, so get out of the way. Once it hits the ground, it will leave its fist on the ground for a little while, giving you the opportunity to attack it. However, a pool of darkness around its fist will spawn Shadows, so be sure to take those out too.
When it lowers itself on its knees, and pushes its chest forward with its arms back, it will fire homing projectiles. With good timing, these projectiles can be deflected, giving you some Tech Points in the progress. During this move, its hands are low enough to attack.
If you get low on HP, you should use the Potion obtained before, or defeat some Shadows and collect the HP prizes they drop. If you keep attacking, it should go down pretty quickly. And if it doesn't, well, you don't actually have to win this fight. If you lose, the story will continue like normal.
|
|
| About Tech Points
|
| Tech Points are bonus EXP obtained during battle. Tech Points can be earned by deflecting attacks with precise timing, or using certain Magic on specific enemies. There's no limit to the amount of Tech Points you can obtain during battle, which makes some fights a good way to grind just by parrying attacks. (More about that in the next part)
|
|
Win or lose, once the battle is over, the Darkside will drown you in darkness. Head on over to the next page to see what happens next.
![]() Shadow. A bunch of them appear, but you only need to defeat one for the others to retreat. You'll learn about EXP and prizes, and another Shadow will try to attack you from behind. That might be a problem if it weren't for a very useful tool: Lock-on. Lock-on allows you to target and follow a specific enemy. Use Lock-on to defeat the group of Shadows, and a retreating Shadow will cause you to sink into darkness until you awake on a third platform, featuring three unidentified women, and a semi-transparent door.
Shadow. A bunch of them appear, but you only need to defeat one for the others to retreat. You'll learn about EXP and prizes, and another Shadow will try to attack you from behind. That might be a problem if it weren't for a very useful tool: Lock-on. Lock-on allows you to target and follow a specific enemy. Use Lock-on to defeat the group of Shadows, and a retreating Shadow will cause you to sink into darkness until you awake on a third platform, featuring three unidentified women, and a semi-transparent door.
![]() Potion. The door frame now becomes solid and a barrel appears. Lift the barrel and the rest of the door will materialize. Now you can open the door.
Potion. The door frame now becomes solid and a barrel appears. Lift the barrel and the rest of the door will materialize. Now you can open the door.
