Game:Arendelle: Difference between revisions
From the Kingdom Hearts Wiki, the Kingdom Hearts encyclopedia
Jump to navigationJump to search
No edit summary |
|||
| (6 intermediate revisions by 2 users not shown) | |||
| Line 7: | Line 7: | ||
===Drops=== | ===Drops=== | ||
{|cellspacing="0" cellpadding="5" border="1" align="center" | {|cellspacing="0" cellpadding="5" border="1" align="center" style="width:200px" | ||
!style=" | !style="{{style|kh3|a}}"|Item | ||
|- | |- | ||
|[[Frost Shard]] | |[[File:Icon Material KHIII.png|20px]] [[Frost Shard]] | ||
|- | |- | ||
|[[Frost Gem]] | |[[File:Icon Material KHIII.png|20px]] [[Frost Gem]] | ||
|- | |- | ||
|[[Betwixt Stone]] | |[[File:Icon Material KHIII.png|20px]] [[Betwixt Stone]] | ||
|- | |- | ||
|[[Betwixt Gem]] | |[[File:Icon Material KHIII.png|20px]] [[Betwixt Gem]] | ||
|- | |- | ||
|[[Twilight Stone]] | |[[File:Icon Material KHIII.png|20px]] [[Twilight Stone]] | ||
|- | |- | ||
|[[Twilight Gem]] | |[[File:Icon Material KHIII.png|20px]] [[Twilight Gem]] | ||
|- | |- | ||
|[[Mythril Stone]] | |[[File:Icon Material KHIII.png|20px]] [[Mythril Stone]] | ||
|- | |- | ||
|[[Mythril Gem]] | |[[File:Icon Material KHIII.png|20px]] [[Mythril Gem]] | ||
|} | |} | ||
===Treasures=== | ===Treasures=== | ||
{|cellspacing="0" cellpadding="5" border="1" align="center" width=" | {|cellspacing="0" cellpadding="5" border="1" align="center" style="width:900px" | ||
!style=" | |-style="{{style|kh3|a}}" | ||
!style=" | !style="width:2%"|# | ||
!style=" | !style="width:33%"|Item | ||
!style=" | !style="width:25%"|Location | ||
!style="width:40%"|Notes | |||
|- | |- | ||
|1||[[Map: The North Mountain]]||Treescape||Next to Moogle Shop. | |1||[[File:Icon Key Item KHIII.png|20px]] [[Map: The North Mountain]]||Treescape||Next to Moogle Shop. | ||
|- | |- | ||
|2||[[Blizzard Choker]]||Treescape||On small hill. | |2||[[File:Icon Armor KHIII.png|20px]] [[Blizzard Choker]]||Treescape||On small hill. | ||
|- | |- | ||
|3||[[Damascus]]||Treescape|| | |3||[[File:Icon Material KHIII.png|20px]] [[Damascus]]||Treescape|| | ||
|- | |- | ||
|4||[[Elixir]]||Gorge|| | |4||[[File:Icon Item KHIII.png|20px]] [[Elixir]]||Gorge|| | ||
|- | |- | ||
|5||[[Guardian's Belt]]||Gorge||Inside cave. | |5||[[File:Icon Armor KHIII.png|20px]] [[Guardian's Belt]]||Gorge||Inside cave. | ||
|- | |- | ||
|6||[[Force Ring]]||Snowfield|| | |6||[[File:Icon Accessory KHIII.png|20px]] [[Force Ring]]||Snowfield|| | ||
|- | |- | ||
|7||[[Mickey's Kitten Catch]]||Snowfield|| | |7||[[File:Icon Key Item KHIII.png|20px]] [[Mickey's Kitten Catch]]||Snowfield|| | ||
|- | |- | ||
|8||[[The Klondike Kid]]||Treescape||Under snow pile. Break with | |8||[[File:Icon Key Item KHIII.png|20px]] [[The Klondike Kid]]||Treescape||Under snow pile. Break with Diving Strike. | ||
|- | |- | ||
|9||[[Orichalcum]]||Snowfield||Under snow pile. Break with | |9||[[File:Icon Material KHIII.png|20px]] [[Orichalcum]]||Snowfield||Under snow pile. Break with Diving Strike. | ||
|- | |- | ||
|10||[[Map: The Labyrinth of Ice]]||Middle Tier|| | |10||[[File:Icon Key Item KHIII.png|20px]] [[Map: The Labyrinth of Ice]]||Middle Tier|| | ||
|- | |- | ||
|11||[[Dark Anklet]]||Upper Tier||Near labyrinth exit. | |11||[[File:Icon Armor KHIII.png|20px]] [[Dark Anklet]]||Upper Tier||Near labyrinth exit. | ||
|- | |- | ||
|12||[[Snowman Rosette]]||Middle Tier|| | |12||[[File:Icon Armor KHIII.png|20px]] [[Snowman Rosette]]||Middle Tier|| | ||
|- | |- | ||
|13||[[Damascus]]||Upper Tier||Near labyrinth exit. | |13||[[File:Icon Material KHIII.png|20px]] [[Damascus]]||Upper Tier||Near labyrinth exit. | ||
|- | |- | ||
|14||[[Barnyard Sports]]||Lower Tier||In room with save point, use Pole Spin on both ice pillars to reach. | |14||[[File:Icon Key Item KHIII.png|20px]] [[Barnyard Sports]]||Lower Tier||In room with save point, use Pole Spin on both ice pillars to reach. | ||
|- | |- | ||
|15||[[Blizzard Cufflink]]||Middle Tier||Jump to the high rail during the Rail Slide segment. | |15||[[File:Icon Accessory KHIII.png|20px]] [[Blizzard Cufflink]]||Middle Tier||Jump to the high rail during the Rail Slide segment. | ||
|- | |- | ||
|16||[[Hi-Potion]]||Valley of Ice|| | |16||[[File:Icon Item KHIII.png|20px]] [[Hi-Potion]]||Valley of Ice|| | ||
|- | |- | ||
|17||[[Refocuser]]||Valley of Ice|| | |17||[[File:Icon Item KHIII.png|20px]] [[Refocuser]]||Valley of Ice|| | ||
|- | |- | ||
|18||[[Hi-Ether]]||Valley of Ice|| | |18||[[File:Icon Item KHIII.png|20px]] [[Hi-Ether]]||Valley of Ice|| | ||
|- | |- | ||
|19||[[Blizzara Choker]]||Valley of Ice|| | |19||[[File:Icon Armor KHIII.png|20px]] [[Blizzara Choker]]||Valley of Ice|| | ||
|- | |- | ||
|20||[[AP Boost]]||Valley of Ice|| | |20||[[File:Icon Tent KHIII.png|20px]] [[AP Boost]]||Valley of Ice|| | ||
|- | |- | ||
|21||[[Mega-Ether]]||Frozen Wall|| | |21||[[File:Icon Item KHIII.png|20px]] [[Mega-Ether]]||Frozen Wall|| | ||
|- | |- | ||
|22||[[Silver Amulet]]||Frozen Wall|| | |22||[[File:Icon Accessory KHIII.png|20px]] [[Silver Amulet]]||Frozen Wall|| | ||
|- | |- | ||
|23||[[Magician's Wand+]]||Frozen Wall|| | |23||[[File:Icon Staff KHIII.png|20px]] [[Magician's Wand+]]||Frozen Wall|| | ||
|- | |- | ||
|24||[[Slayer's Earring]]||Foothills|| | |24||[[File:Icon Accessory KHIII.png|20px]] [[Slayer's Earring]]||Foothills|| | ||
|- | |- | ||
|25||[[Damascus]]||Foothills|| | |25||[[File:Icon Material KHIII.png|20px]] [[Damascus]]||Foothills|| | ||
|} | |} | ||
====Rewards==== | |||
{|cellspacing="0" cellpadding="5" border="1" align="center" style="width:900px" | |||
|-style="{{style|kh3|a}}" | |||
!style="width:35%"|Item | |||
!style="width:25%"|Location | |||
!style="width:40%"|Notes | |||
|- | |||
|[[File:Icon Keyblade KHIII.png|20px]] [[Crystal Snow]]||Foothills||Defeat Sköll. | |||
|- | |||
|[[File:Icon Item KHIII.png|20px]] [[Megalixir]]||Valley of Ice||Assemble Olaf again after completing the world's story. Only obtained once. | |||
|- | |||
|[[File:Icon Tent KHIII.png|20px]] [[Defense Boost]]<br>[[File:Icon Ability KHIII.png|20px]] [[Fusion Rocket]]||Ice Palace||Obtain an A rank in Frozen Slider (1st time). | |||
|- | |||
|[[File:Icon Accessory KHIII.png|20px]] [[Star Medal]]<ref>Has the [[Blizzard Boost]], [[Wizard's Ruse]], or [[Withstand Combo]] ability.</ref>||Ice Palace||Obtain an A rank in Frozen Slider (2nd+ time). | |||
|- | |||
|[[File:Icon Accessory KHIII.png|20px]] [[Junior Medal]]<ref>Has the [[Full MP Blast]] or [[Freeze Protection]] ability.</ref> / [[File:Icon Accessory KHIII.png|20px]] [[Master Medal]]<ref>Has the [[Blizzard Syphon]] ability.</ref>||Ice Palace||Obtain a B rank in Frozen Slider. | |||
|- | |||
|[[File:Icon Material KHIII.png|20px]] [[Wellspring Stone]]||Ice Palace||Obtain a C rank in Frozen Slider. | |||
|- | |||
|[[File:Icon Material KHIII.png|20px]] [[Wellspring Shard]]||Ice Palace||Obtain a D rank in Frozen Slider. | |||
|- | |||
|[[File:Icon Material KHIII.png|20px]] [[Evanescent Crystal]]<br>[[File:Secret Report KHIII.png|20px]] {{n|Secret Report|9}}||Middle Tier||Clear [[Battlegate 9]]. | |||
|} | |||
{{reflist}} | |||
===Bonus Levels=== | |||
{|cellspacing="0" cellpadding="5" border="1" align="center" style="width:900px" | |||
|-style="{{style|kh3|a}}" | |||
!style="width:40%"|Objective | |||
!style="width:35%"|Reward | |||
!style="width:25%"|Location | |||
|- | |||
|Defeat the [[Rock Troll]]||'''Sora''': [[Groundbreaker]]<ref name="crit">In Critical Mode, Sora has this ability by default.</ref>||Gorge | |||
|- | |||
|Defeat the first group of [[Ninja]]s at the Middle Tier||'''Goofy''': Maximum HP +10||Middle Tier | |||
|- | |||
|Defeat the Ninjas at the Lower Tier||'''Sora''': [[Thundara]]||Lower Tier | |||
|- | |||
|Defeat the second group of Ninjas at the Middle Tier||'''Donald''': Maximum HP +10<br>'''Goofy''': [[Hyper Healing]]||Middle Tier | |||
|- | |||
|Defeat the third group of Ninjas at the Middle Tier||'''Sora''': [[Risk Dodge]]<ref name="crit"/><br>'''Goofy''': Item Slots +1||Middle Tier | |||
|- | |||
|Defeat the [[Frost Serpent]]s||'''Sora''': [[Doubleflight]]<br>'''Donald''': [[Blizzard Boost]]||Mountain Ridge | |||
|- | |||
|Defeat the [[Heartless]] at the Valley of Ice||'''Sora''': Accesory Slots +1, [[Air Slide]]<ref name="crit"/>||Valley of Ice | |||
|- | |||
|Defeat [[Marshmallow]]||'''Sora''': [[Blizzara]]||Mountain Ridge | |||
|- | |||
|Defeat [[Sköll]]||'''Sora''': Maximum MP +5, [[Superslide]]<ref name="crit"/>||Foothills | |||
|} | |||
{{reflist}} | |||
===Ingredients=== | ===Ingredients=== | ||
{|cellspacing="0" cellpadding="5" border="1" align="center" width=" | {|cellspacing="0" cellpadding="5" border="1" align="center" style="width:900px" | ||
!style=" | |-style="{{style|kh3|a}}" | ||
!style=" | !style="width:30%"|Ingredient | ||
!style=" | !style="width:30%"|Location | ||
!style=" | !style="width:10%"|Appearance rate | ||
!style="width:30%"|Notes | |||
|- | |- | ||
|Carrot x2||Treescape||100%||In yellow crate. | |Carrot x2||Treescape||100%||In yellow crate. | ||
| Line 127: | Line 181: | ||
|- | |- | ||
|Carrot x2||Foothills||100%||In yellow crate. | |Carrot x2||Foothills||100%||In yellow crate. | ||
|} | |} | ||
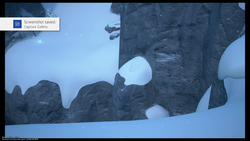
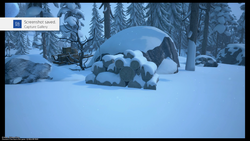
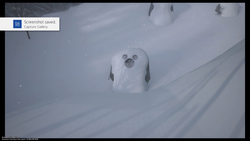
===Lucky Emblems=== | ===Lucky Emblems=== | ||
{|cellspacing="0" cellpadding="5" border="1" align="center" width=" | {|cellspacing="0" cellpadding="5" border="1" align="center" style="width:900px" | ||
!style=" | |-style="{{style|kh3|a}}" | ||
!style=" | !style="width:5%"|# | ||
!style=" | !style="width:25%"|Image | ||
!style=" | !style="width:25%"|Location | ||
!style="width:45%"|Notes | |||
|- | |- | ||
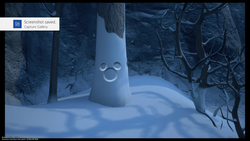
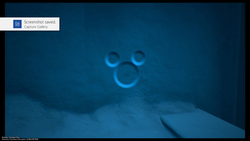
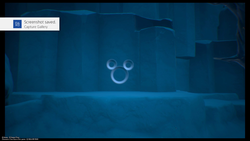
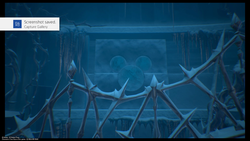
| 1 || [[File:Lucky Emblem (Arendelle) 01 KHIII.png|250px]] || Treescape || Imprint on tree | | 1 || [[File:Lucky Emblem (Arendelle) 01 KHIII.png|250px]] || Treescape || Imprint on tree | ||
| Line 168: | Line 214: | ||
|- | |- | ||
|} | |} | ||
[[Category:Gameplay]] | |||
Latest revision as of 12:20, 15 November 2023
Kingdom Hearts III[edit]
Battle Levels[edit]
- Before completing Monstropolis and Arendelle: 26
- After completing Monstropolis and Arendelle: 30
- After completing The Final World: 38
Drops[edit]
| Item |
|---|
Treasures[edit]
| # | Item | Location | Notes |
|---|---|---|---|
| 1 | Treescape | Next to Moogle Shop. | |
| 2 | Treescape | On small hill. | |
| 3 | Treescape | ||
| 4 | Gorge | ||
| 5 | Gorge | Inside cave. | |
| 6 | Snowfield | ||
| 7 | Snowfield | ||
| 8 | Treescape | Under snow pile. Break with Diving Strike. | |
| 9 | Snowfield | Under snow pile. Break with Diving Strike. | |
| 10 | Middle Tier | ||
| 11 | Upper Tier | Near labyrinth exit. | |
| 12 | Middle Tier | ||
| 13 | Upper Tier | Near labyrinth exit. | |
| 14 | Lower Tier | In room with save point, use Pole Spin on both ice pillars to reach. | |
| 15 | Middle Tier | Jump to the high rail during the Rail Slide segment. | |
| 16 | Valley of Ice | ||
| 17 | Valley of Ice | ||
| 18 | Valley of Ice | ||
| 19 | Valley of Ice | ||
| 20 | Valley of Ice | ||
| 21 | Frozen Wall | ||
| 22 | Frozen Wall | ||
| 23 | Frozen Wall | ||
| 24 | Foothills | ||
| 25 | Foothills |
Rewards[edit]
| Item | Location | Notes |
|---|---|---|
| Foothills | Defeat Sköll. | |
| Valley of Ice | Assemble Olaf again after completing the world's story. Only obtained once. | |
| Ice Palace | Obtain an A rank in Frozen Slider (1st time). | |
| Ice Palace | Obtain an A rank in Frozen Slider (2nd+ time). | |
| Ice Palace | Obtain a B rank in Frozen Slider. | |
| Ice Palace | Obtain a C rank in Frozen Slider. | |
| Ice Palace | Obtain a D rank in Frozen Slider. | |
| Middle Tier | Clear Battlegate 9. |
- ^ Has the Blizzard Boost, Wizard's Ruse, or Withstand Combo ability.
- ^ Has the Full MP Blast or Freeze Protection ability.
- ^ Has the Blizzard Syphon ability.
Bonus Levels[edit]
| Objective | Reward | Location |
|---|---|---|
| Defeat the Rock Troll | Sora: Groundbreaker[1] | Gorge |
| Defeat the first group of Ninjas at the Middle Tier | Goofy: Maximum HP +10 | Middle Tier |
| Defeat the Ninjas at the Lower Tier | Sora: Thundara | Lower Tier |
| Defeat the second group of Ninjas at the Middle Tier | Donald: Maximum HP +10 Goofy: Hyper Healing |
Middle Tier |
| Defeat the third group of Ninjas at the Middle Tier | Sora: Risk Dodge[1] Goofy: Item Slots +1 |
Middle Tier |
| Defeat the Frost Serpents | Sora: Doubleflight Donald: Blizzard Boost |
Mountain Ridge |
| Defeat the Heartless at the Valley of Ice | Sora: Accesory Slots +1, Air Slide[1] | Valley of Ice |
| Defeat Marshmallow | Sora: Blizzara | Mountain Ridge |
| Defeat Sköll | Sora: Maximum MP +5, Superslide[1] | Foothills |
Ingredients[edit]
| Ingredient | Location | Appearance rate | Notes |
|---|---|---|---|
| Carrot x2 | Treescape | 100% | In yellow crate. |
| Black Truffle x2~3 | Treescape | 50% | Mushroom. |
| Carrot x2 | Treescape | 100% | In yellow crate. |
| Gooseberry x2~3 | Treescape | 100% | Berry tree. |
| Raspberry x2~3 | Gorge | 100% | Berry tree. |
| Miller Mushroom x2~3 | Mountain Ridge | 100% | Mushroom. |
| Carrot x2 | Valley of Ice | 100% | In yellow crate. |
| Raspberry x2~3 | Valley of Ice | 100% | Berry tree. |
| Portobello x2~3 | Frozen Wall | 100% | Mushroom. |
| Blackberry x2~3 | Frozen Wall | 100% | Berry tree. |
| Raspberry x2~3 | Frozen Wall | 100% | Berry tree. |
| Morel x2~3 | Snowfield | 100% | Mushroom. |
| Gooseberry x2~3 | Snowfield | 100% | Berry tree. |
| Carrot x2 | Snowfield | 100% | In yellow crate. |
| Cod x2 | Snowfield | 100% | In yellow crate. |
| Cod x2 | Snowfield | 100% | In yellow crate. |
| Blackberry x2~3 | Foothills | 100% | Berry tree. |
| Carrot x2 | Foothills | 100% | In yellow crate. |
