Walkthrough:Kingdom Hearts/Deep Jungle: Difference between revisions
No edit summary |
m (Fixed mistyped syntax in several link tabs, along with some spelling fixes.) Tags: Mobile edit Advanced mobile edit |
||
| (26 intermediate revisions by 11 users not shown) | |||
| Line 1: | Line 1: | ||
<center>[[File:Deep Jungle Logo KH.png|300px|link=]]</center> | <center>[[File:Deep Jungle Logo KH.png|300px|link=]]</center> | ||
Sora | {{Wtext|Sora|c}} takes an interest in visiting the Deep Jungle {{Wtext|Goofy|c}} and {{Wtext|Donald|c}} to land on it. But {{Wtext|Donald|c}} refuses to land as he doesn't expect the King to be present in such a "backwater" location like so. {{Wtext|Sora|c}} then interrupts {{Wtext|Donald|c}}, forcing him to land, but causes the Gummi Ship to crash land on the world. {{Wtext|Sora|c}} wakes up in what appears to be a treehouse... when he is suddenly attacked by a vicious leopard. | ||
{{Template:WKH1SBoss | {{Template:WKH1SBoss | ||
|name=Sabor | |name=Sabor I | ||
|image=Sabor KH.png | |image=Sabor KH.png | ||
|size=200px | |size=200px | ||
|hp=90 | |hp=90 | ||
|strength=12 | |strength=12 | ||
|defense=11 | |defense=11 | ||
|mpr=16 | |mpr=16 | ||
|exp=15 | |exp=15 | ||
|physical=x1.0 | |physical=x1.0 | ||
|fire=x0.49 | |fire=x0.49 | ||
| Line 20: | Line 18: | ||
|gravity=x0.04 | |gravity=x0.04 | ||
|stop=x0.3 | |stop=x0.3 | ||
| | |ko=x0.5 | ||
| | |other=x0.5 | ||
| | |prize=None | ||
|strategy=Sabor | |strategy=Sabor appears from above the {{Wtext|Treehouse|l}} and Sora is left alone to battle her. She doesn't have a wide arsenal to attack you with however she cannot be stopped from attacking without using a full combo. She will generally just slash and swipe at you, and sometimes she will pounce. Dodge her pounces and keep attacking her no matter what. If you need to heal, use a {{Wtext|Potion|i}}. | ||
}} | }} | ||
[[File:Tarzan KH.png|150px|right]] | |||
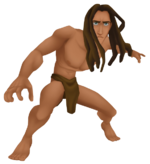
After the battle, {{Wtext|Tarzan|c}} appears and causes {{Wtext|Sabor|e}} to flee. {{Wtext|Sora|c}} asks {{Wtext|Tarzan|c}} where his friends are, and he replies by telling him to go search for his friends. They both exit the {{Wtext|Treehouse|l}} and the logo appears. Meanwhile, {{Wtext|Donald|c}} and {{Wtext|Goofy|c}} are in a different area of the world.{{Wtext|Donald|c}} doesn't seem to care about {{Wtext|Sora|c}}. {{Wtext|Terk|c}} appears out of nowhere, surprising the two. {{Wtext|Terk|c}} runs off dropping a piece of Gummi. {{Wtext|Clayton|c}} appears before them out of the reeds. {{Wtext|Tarzan|c}} will join your party and it'll only be you two until later on. If you can manage, get up the stairs in the {{Wtext|Treehouse|l}}, then keep going up, soon you'll find a hole in the roofing, jump out and make sure you land on the top part, go around counter-clockwise and jump to land on the small platform with the ladder, keep going up until you've reached the top, jump across the hole and open the {{Wtext|Treasure Chest|t}} ahead of you which contains a {{Wtext|Protera Chain|i}}. Then follow {{Wtext|Tarzan|c}} and jump into the trees. | |||
You'll soon find yourself doing a [[Tree Surfing]] mini-game. Your main goal is to reach the end of the slide without falling. You'll then find yourself in the {{Wtext|Camp|l}}. There's a {{Wtext|Blue Trinity|i}} here, but you're unable to activate it as you lack {{Wtext|Donald|c}} and {{Wtext|Goofy|c}} in your party at this point. Go inside the {{Wtext|Tent|l}}, where you'll be introduced to {{Wtext|Jane|c}}, who's surprised that {{Wtext|Sora|c}} can speak her language. | |||
{{Wtext|Clayton|c}} will enter the {{Wtext|Tent|l}}, along with Donald and Goofy behind him. At first, both {{Wtext|Sora|c}} and {{Wtext|Donald|c}} are happy to see each other again, but they suddenly remember their feud in the ship and turn their backs on each other. {{Wtext|Goofy|c}} also reveals that he's found a Gummi piece. Your job now is to find six {{Wtext|slides|i}} for Jane's slideshow. They can be found around the campsite. At this point, {{Wtext|Goofy|c}} and a reluctant {{Wtext|Donald|c}} will rejoin the party. Now you can activate the {{Wtext|Blue Trinity|i}} in the {{Wtext|Camp|i}}. However what you'll want to do first is open the {{Wtext|Red Chest|t}} here. Then exit the {{Wtext|Tent|l}}. | |||
{{WKH1MG | |||
|name=Minigame: Collect the Slides | |||
|strategy=You have to collect the slides for {{Wtext|Jane|c}}'s slideshow. The slides are located all over the camp. One is above the cluster of crates and bags in front of you as you exit, this is {{Wtext|Slide 4|i}}. Another is in the shaded area to the left of the tent, This is {{Wtext|Slide 2|i}}. Another is above the tent, to get here what you need to do is climb the cluster of crates and jump and slash through the air to extend your distance, this is {{Wtext|Slide 1|i}}. Another slide is above the shaded area where {{Wtext|Slide 2|i}} was, jump from the top of the tent and then keep walking ahead until you reach it, this is {{Wtext|Slide 5|i}}. {{Wtext|Slide 3|i}} being the easiest to pick up, is found by the chalkboard to the right of the tent. {{Wtext|Slide 6|i}} is near the chalkboard on a stack of bags. Go back to the {{Wtext|Tent|l}} and talk to {{Wtext|Jane|c}} to continue.}} | |||
{{Wtext|Jane|c}} will showcase the slides, one which seems to look similar to [[Radiant Garden]], as per Sora's claim of it being familiar. The next cutscene will feature {{Wtext|Clayton|c}} claiming {{Wtext|Riku|c}} and {{Wtext|Kairi|c}} are with the gorillas and that {{Wtext|Tarzan|c}} would have to take them there, and he does. After the slides are finished, save and exit. You can fight {{Wtext|Sabor|e}} here and in the {{Wtext|Bamboo Thicket|l}}. | |||
Keep going ahead to the {{Wtext|Cliff|l}}, there are 2 {{Wtext|Red Treasure Chests|t}} on a high ledge here, just keep going up and you should get to them fairly easily. One contains a {{Wtext|Mega-Potion|i}} and the other contains a {{Wtext|Mythril Shard|i}}. Now head back to the {{Wtext|Camp|l}} and use the {{Wtext|Blue Trinity|i}}, it will get you a {{Wtext|Treasure Chest|t}} containing Dalmations 34, 35 and 36. Now go through the exit beside you to get to the {{Wtext|Hippo Lagoon|l}}, here keep jumping across to get a {{Wtext|Treasure Chest|t}} that contains Dalmatians 25, 26 and 27. Climb the branch here to start another cutscene where {{Wtext|Kerchak|c}} is finally met. Climb the closest vine after the cutscene to get to the {{Wtext|Climbing Trees|l}}, go around clockwise until you reach the second exit, there should be a {{Wtext|Blue Trinity|i}} nearby, use it to get a {{Wtext|Treasure Chest|t}} that contains Dalmations 31, 32 and 33. Then go through the exit to the {{Wtext|Treehouse|l}}, a cutscene plays showing {{Wtext|Clayton|c}} attempting to shoot {{Wtext|Terk|c}}. Everyone is furious, but {{Wtext|Tarzan|c}} is disappointed. Head back to the {{Wtext|Climbing Trees|l}} and go to the {{Wtext|Treetop|l}}, there'll be a {{Wtext|Treasure Chest|t}} waiting with a {{Wtext|Mega-Ether|i}} inside. Head into the open tree bark and slide back to the {{Wtext|Camp|l}} and you'll be able to fight {{Wtext|Sabor|e}} again. | |||
Head to the {{Wtext|Tent|l}} for a cutscene, where Jane is furious with Clayton. The hunter tries to explain that there was a snake nearby, and that he saved {{Wtext|Terk|c}}'s life. Nobody believes him. Jane forbids Clayton from going near the gorillas, and the hunter exits the tent. He is now determined to annihilate the gorillas, to the point where his Darkness allows him to summon the Heartless. | |||
Soon, you'll notice that the Heartless are now active and are attacking the gorillas. Save them in the following areas: {{Wtext|Treehouse|l}} which gives you a {{Wtext|Shell-G|i}}, {{Wtext|Cliff|l}} which gives you an {{Wtext|Aeroga-G|i}}, {{Wtext|Bamboo Thicket|l}} which gives you a {{Wtext|Fire-G|i}}, {{Wtext|Climbing Trees|l}} which gives you an {{Wtext|Aeroga-G|i}} and the {{Wtext|Camp|l}} which gives you a {{Wtext|Protect-G|i}}. While on your way back get the chest in the {{Wtext|Vines|l}} that contains Dalmations 28, 29 and 30. Then return to the {{Wtext|Tent|l}}, and speak to {{Wtext|Jane|c}}. Head back out and you'll hear a gunshot from the {{Wtext|Bamboo Thicket|l}}, head there, where a cutscene will play, followed by {{Wtext|Sabor|e}} attacking. Once defeated, return to the {{Wtext|Tent|l}} where you will notice that {{Wtext|Jane|c}} has vanished. | |||
You'll soon find {{Wtext|Jane|c}} in the {{Wtext|Climbing Trees|l}}. Defeat the Heartless, and open the flowers with {{Wtext|Blizzard|w}}, then proceed to attack the big black fruit. {{Wtext|Jane|c}} and {{Wtext|Terk|c}} are now free. Now head towards the area where {{Wtext|Donald|c}} and {{Wtext|Goofy|c}} were found by {{Wtext|Clayton|c}} earlier, head into the next area for a boss battle with {{Wtext|Clayton|b}}. | |||
{{Template:WKH1SBoss | {{Template:WKH1SBoss | ||
|name=Clayton | |name=Clayton | ||
| Line 59: | Line 62: | ||
|ko= | |ko= | ||
|other= | |other= | ||
|prize=Cure | |prize=Cure | ||
| | |strategy=For this phase of the fight, forget the Heartless and keep Clayton as your main target, as defeating him will lead much quicker into the second phase. Dodge his shots and attack whenever possible. If you lose any HP make sure to utilize {{Wtext|Potion|i}}s. Otherwise, it's a fairly easy battle. | ||
| | |||
}} | }} | ||
{{Template:WKH1HBoss | {{Template:WKH1HBoss | ||
|name=Stealth Sneak | |name=Stealth Sneak | ||
| Line 84: | Line 84: | ||
|ko= | |ko= | ||
|other= | |other= | ||
|prize=Mega-Potion, Cure | |prize=Mega-Potion, Cure | ||
| | |strategy=Clayton summons a Heartless to assist him in this fight. It will shoot damaging beams of light from its eyes, which are very hazardous to your HP so make sure to dodge at once. Avoid it when it attempts to swipe itself and counterattack when possible. Once Clayton gets off the Heartless, focus on him as he has far less HP than the Heartless. He will also use {{Wtext|Potions|i}} during this phase, so keep attacking him.}} | ||
| | |||
}} | After defeating {{Wtext|Clayton|c}}, enter the nearby {{Wtext|Waterfall Cavern|l}} and get to the top. There's a {{Wtext|Treasure Chest|t}} up ahead containing a {{Wtext|Mythril Shard|i}}. Another {{Wtext|chest|t}} in a close-by platform that contains a {{Wtext|Shell-G|i}}. Another close to a vine contains an {{Wtext|Orichalcum|i}}, the other ahead of it contains a {{Wtext|Mythril|i}}. Climb the previous vine to get higher up and turn left to get to the Keyhole. | ||
You'll soon find yourself in a cavern with a tree in the middle and with lots of butterflies. Sora will then seal the hidden Keyhole, allowing a {{Wtext|Navi-G Piece|i}} to fall out of it. {{Wtext|Sora|c}} and {{Wtext|Donald|c}} will then forgive each other for their earlier argument, and the party will learn what {{Wtext|Tarzan|c}}'s mysterious word means "Heart". {{Wtext|Terk|c}} then falls in love with {{Wtext|Donald|c}}, who says that if he takes her home, {{Wtext|Daisy|c}} will kill him. | |||
You gain the {{Wtext|Jungle King|w}} Keyblade. You will then return to the Gummi Ship, where the trio decide to return to {{Wtext|Traverse Town|l}} to show the Gummi piece to {{Wtext|Leon|c}}. Sora then says he wants to be pilot, but Donald does not allow him to, causing another argument. | |||
==When you Return== | |||
When you return, land in the {{Wtext|Tent|l}}. Now head to the {{Wtext|Hippos' Lagoon|l}} and jump and glide to two platforms with {{Wtext|chests|t}}, one containing a {{Wtext|Mega-Potion|i}} and the other containing an {{Wtext|Esuna-G|i}}. Now head to the {{Wtext|Treetops|l}} where there is a {{Wtext|Green Trinity|i}} which gives you a {{Wtext|Mythril Shard|i}} and a number of HP orbs. Then head to the {{Wtext|Treehouse|l}} and get to the balcony, then glide onto the hanging boat and open the {{Wtext|chest|t}} to get a {{Wtext|Mythril|i}}. There is a white [[Trinity Mark]] in the Cave of Hearts, the location where the world’s Keyhole was. | |||
{{WKH1TOC}} | |||
{{ | [[Category:Kingdom Hearts walkthrough|{{SUBPAGENAME}}]] | ||
Latest revision as of 08:59, 28 August 2022

Sora takes an interest in visiting the Deep Jungle Goofy and Donald to land on it. But Donald refuses to land as he doesn't expect the King to be present in such a "backwater" location like so. Sora then interrupts Donald, forcing him to land, but causes the Gummi Ship to crash land on the world. Sora wakes up in what appears to be a treehouse... when he is suddenly attacked by a vicious leopard.
| Sabor I | |||||
|---|---|---|---|---|---|
| HP | STR | DEF | MP R | EXP | |
| 90 | 12 | 11 | 16 | 15 | |
| Resistances | Weapon | Fire | Blizzard | Thunder | |
| x1.0 | x0.49 | x0.5 | x1.0 | ||
| Gravity | Stop | KO | Other | ||
| x0.04 | x0.3 | x0.5 | x0.5 | ||
| Rewards | None | ||||
| Sabor appears from above the Treehouse and Sora is left alone to battle her. She doesn't have a wide arsenal to attack you with however she cannot be stopped from attacking without using a full combo. She will generally just slash and swipe at you, and sometimes she will pounce. Dodge her pounces and keep attacking her no matter what. If you need to heal, use a Potion. | |||||
After the battle, Tarzan appears and causes Sabor to flee. Sora asks Tarzan where his friends are, and he replies by telling him to go search for his friends. They both exit the Treehouse and the logo appears. Meanwhile, Donald and Goofy are in a different area of the world.Donald doesn't seem to care about Sora. Terk appears out of nowhere, surprising the two. Terk runs off dropping a piece of Gummi. Clayton appears before them out of the reeds. Tarzan will join your party and it'll only be you two until later on. If you can manage, get up the stairs in the Treehouse, then keep going up, soon you'll find a hole in the roofing, jump out and make sure you land on the top part, go around counter-clockwise and jump to land on the small platform with the ladder, keep going up until you've reached the top, jump across the hole and open the Treasure Chest ahead of you which contains a Protera Chain. Then follow Tarzan and jump into the trees.
You'll soon find yourself doing a Tree Surfing mini-game. Your main goal is to reach the end of the slide without falling. You'll then find yourself in the Camp. There's a Blue Trinity here, but you're unable to activate it as you lack Donald and Goofy in your party at this point. Go inside the Tent, where you'll be introduced to Jane, who's surprised that Sora can speak her language.
Clayton will enter the Tent, along with Donald and Goofy behind him. At first, both Sora and Donald are happy to see each other again, but they suddenly remember their feud in the ship and turn their backs on each other. Goofy also reveals that he's found a Gummi piece. Your job now is to find six slides for Jane's slideshow. They can be found around the campsite. At this point, Goofy and a reluctant Donald will rejoin the party. Now you can activate the Blue Trinity in the Camp. However what you'll want to do first is open the Red Chest here. Then exit the Tent.
| Minigame: Collect the Slides |
|---|
| You have to collect the slides for Jane's slideshow. The slides are located all over the camp. One is above the cluster of crates and bags in front of you as you exit, this is Slide 4. Another is in the shaded area to the left of the tent, This is Slide 2. Another is above the tent, to get here what you need to do is climb the cluster of crates and jump and slash through the air to extend your distance, this is Slide 1. Another slide is above the shaded area where Slide 2 was, jump from the top of the tent and then keep walking ahead until you reach it, this is Slide 5. Slide 3 being the easiest to pick up, is found by the chalkboard to the right of the tent. Slide 6 is near the chalkboard on a stack of bags. Go back to the Tent and talk to Jane to continue. |
Jane will showcase the slides, one which seems to look similar to Radiant Garden, as per Sora's claim of it being familiar. The next cutscene will feature Clayton claiming Riku and Kairi are with the gorillas and that Tarzan would have to take them there, and he does. After the slides are finished, save and exit. You can fight Sabor here and in the Bamboo Thicket.
Keep going ahead to the Cliff, there are 2 Red Treasure Chests on a high ledge here, just keep going up and you should get to them fairly easily. One contains a Mega-Potion and the other contains a Mythril Shard. Now head back to the Camp and use the Blue Trinity, it will get you a Treasure Chest containing Dalmations 34, 35 and 36. Now go through the exit beside you to get to the Hippo Lagoon, here keep jumping across to get a Treasure Chest that contains Dalmatians 25, 26 and 27. Climb the branch here to start another cutscene where Kerchak is finally met. Climb the closest vine after the cutscene to get to the Climbing Trees, go around clockwise until you reach the second exit, there should be a Blue Trinity nearby, use it to get a Treasure Chest that contains Dalmations 31, 32 and 33. Then go through the exit to the Treehouse, a cutscene plays showing Clayton attempting to shoot Terk. Everyone is furious, but Tarzan is disappointed. Head back to the Climbing Trees and go to the Treetop, there'll be a Treasure Chest waiting with a Mega-Ether inside. Head into the open tree bark and slide back to the Camp and you'll be able to fight Sabor again.
Head to the Tent for a cutscene, where Jane is furious with Clayton. The hunter tries to explain that there was a snake nearby, and that he saved Terk's life. Nobody believes him. Jane forbids Clayton from going near the gorillas, and the hunter exits the tent. He is now determined to annihilate the gorillas, to the point where his Darkness allows him to summon the Heartless.
Soon, you'll notice that the Heartless are now active and are attacking the gorillas. Save them in the following areas: Treehouse which gives you a Shell-G, Cliff which gives you an Aeroga-G, Bamboo Thicket which gives you a Fire-G, Climbing Trees which gives you an Aeroga-G and the Camp which gives you a Protect-G. While on your way back get the chest in the Vines that contains Dalmations 28, 29 and 30. Then return to the Tent, and speak to Jane. Head back out and you'll hear a gunshot from the Bamboo Thicket, head there, where a cutscene will play, followed by Sabor attacking. Once defeated, return to the Tent where you will notice that Jane has vanished.
You'll soon find Jane in the Climbing Trees. Defeat the Heartless, and open the flowers with Blizzard, then proceed to attack the big black fruit. Jane and Terk are now free. Now head towards the area where Donald and Goofy were found by Clayton earlier, head into the next area for a boss battle with Clayton.
| Clayton | |||||
|---|---|---|---|---|---|
| HP | STR | DEF | MP R | EXP | |
| 250 | 12 | 11 | 20 | 240 | |
| Resistances | Weapon | Fire | Blizzard | Thunder | |
| x1.0 | x0.49 | x0.5 | x1.0 | ||
| Gravity | Stop | KO | Other | ||
| x0.04 | x0 | ||||
| Rewards | Cure | ||||
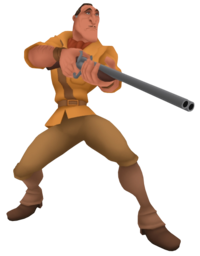
| For this phase of the fight, forget the Heartless and keep Clayton as your main target, as defeating him will lead much quicker into the second phase. Dodge his shots and attack whenever possible. If you lose any HP make sure to utilize Potions. Otherwise, it's a fairly easy battle. | |||||
| Stealth Sneak | |||||
|---|---|---|---|---|---|
| HP | STR | DEF | MP R | EXP | |
| 750 | 12 | 11 | 20 | 30 | |
| Resistances | Weapon | Fire | Blizzard | Thunder | |
| x1.0 | x0.49 | x0.5 | x1.0 | ||
| Gravity | Stop | KO | Other | ||
| x0.04 | x0 | ||||
| Rewards | Mega-Potion, Cure | ||||
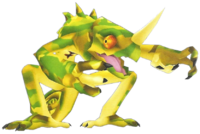
| Clayton summons a Heartless to assist him in this fight. It will shoot damaging beams of light from its eyes, which are very hazardous to your HP so make sure to dodge at once. Avoid it when it attempts to swipe itself and counterattack when possible. Once Clayton gets off the Heartless, focus on him as he has far less HP than the Heartless. He will also use Potions during this phase, so keep attacking him. | |||||
After defeating Clayton, enter the nearby Waterfall Cavern and get to the top. There's a Treasure Chest up ahead containing a Mythril Shard. Another chest in a close-by platform that contains a Shell-G. Another close to a vine contains an Orichalcum, the other ahead of it contains a Mythril. Climb the previous vine to get higher up and turn left to get to the Keyhole.
You'll soon find yourself in a cavern with a tree in the middle and with lots of butterflies. Sora will then seal the hidden Keyhole, allowing a Navi-G Piece to fall out of it. Sora and Donald will then forgive each other for their earlier argument, and the party will learn what Tarzan's mysterious word means "Heart". Terk then falls in love with Donald, who says that if he takes her home, Daisy will kill him.
You gain the Jungle King Keyblade. You will then return to the Gummi Ship, where the trio decide to return to Traverse Town to show the Gummi piece to Leon. Sora then says he wants to be pilot, but Donald does not allow him to, causing another argument.
When you Return[edit]
When you return, land in the Tent. Now head to the Hippos' Lagoon and jump and glide to two platforms with chests, one containing a Mega-Potion and the other containing an Esuna-G. Now head to the Treetops where there is a Green Trinity which gives you a Mythril Shard and a number of HP orbs. Then head to the Treehouse and get to the balcony, then glide onto the hanging boat and open the chest to get a Mythril. There is a white Trinity Mark in the Cave of Hearts, the location where the world’s Keyhole was.
| Kingdom Hearts |
|---|
| Walkthrough |
| Dive to the Heart - Destiny Islands - Traverse Town - Wonderland - Olympus Coliseum - Deep Jungle - 100 Acre Wood - Agrabah - Monstro - Atlantica - Halloween Town - Neverland - Hollow Bastion - End of the World |
| Other |
| 99 Puppies - Trinity Marks - Gummi Missions - Trophies |


