Walkthrough:Kingdom Hearts/Agrabah: Difference between revisions
No edit summary |
m (Text replacement - "Category:Kingdom Hearts walkthrough" to "{{SUBPAGENAME}}") |
||
| (29 intermediate revisions by 7 users not shown) | |||
| Line 1: | Line 1: | ||
==<center> | ==<center>[[File:Agrabah Logo KH.png|300px|link=Agrabah]]</center>== | ||
<center>[[File: | {|class="wikitable" width="100%" | ||
|-bgcolor="#c5920b" | |||
|width="10%" style="text-align:center;"|<font color="white">'''Item''' | |||
|width="10%" style="text-align:center;"|<font color="white">'''Amount''' | |||
|width="30%" style="text-align:center;"|<font color="white">'''Obtained''' | |||
|width="10%" style="text-align:center;"|<font color="white">'''Item''' | |||
|width="10%" style="text-align:center;"|<font color="white">'''Amount''' | |||
|width="30%" style="text-align:center;"|<font color="white">'''Obtained''' | |||
|-bgcolor="#f2ba25" | |||
|[[File:WPuppies.png|12px]]Dalmatians 37, 38, 39 | |||
|1 | |||
|Aladdin's House | |||
|[[File:WPuppies.png|12px]]Dalmatians 46, 47, 48 | |||
|1 | |||
|Palace Gates | |||
|-bgcolor="#f2ba25" | |||
|[[File:WPuppies.png|12px]]Dalmatians 49, 50, 51 | |||
|1 | |||
|Cave: Entrance | |||
|[[File:WPuppies.png|12px]]Dalmatians 52, 53, 54 | |||
|1 | |||
|Treasure Room | |||
|-bgcolor="#f2ba25" | |||
|[[File:WItem.png|12px]]Mythril Shard | |||
|3 | |||
|Cave: Hall, Treasure Room (Red Trinity, Chest) | |||
|[[File:WItem.png|12px]]Defense Up | |||
|1 | |||
|Treasure Room | |||
|-bgcolor="#f2ba25" | |||
|[[File:WItem.png|12px]]Mythril | |||
|2 | |||
|Main Street, Relic Chamber | |||
|[[File:WItem.png|12px]]Defense Up | |||
|1 | |||
|Treasure Room | |||
|-bgcolor="#f2ba25" | |||
|[[File:WItem.png|12px]]Torn Page | |||
|1 | |||
|Dark Chamber | |||
|[[File:WItem.png|12px]]Ansem's Report 1 | |||
|1 | |||
|Lava Room (Defeat Jafar) | |||
|-bgcolor="#f2ba25" | |||
|[[File:WItem.png|12px]]Power Up | |||
|1 | |||
|Storage (Green Trinity) | |||
|[[File:WArmorAccessory.png|12px]]Fira Ring | |||
|1 | |||
|Bazaar | |||
|-bgcolor="#f2ba25" | |||
|[[File:WArmorAccessory.png|12px]]Thundara Ring | |||
|1 | |||
|Relic Chamber | |||
|[[File:WArmorAccessory.png|12px]]Protega Chain | |||
|1 | |||
|Dark Chamber | |||
|-bgcolor="#f2ba25" | |||
|[[File:WArmorAccessory.png|12px]]Ray of Light | |||
|1 | |||
|Plaza, Main Street, Alley, Palace Gates (Defeat Pot Centipede) | |||
|[[File:WPotion.png|12px]]Cottage | |||
|3 | |||
|Plaza, Bottomless Hall, Dark Chamber | |||
|-bgcolor="#f2ba25" | |||
|[[File:WPotion.png|12px]]Mega-Potion | |||
|4 | |||
|Storage, Plaza, Alley, Bottomless Hall | |||
|[[File:WPotion.png|12px]]Mega-Ether | |||
|4 | |||
|Plaza, Main Street, Bazaar, Cave: Entrance | |||
|-bgcolor="#f2ba25" | |||
|[[FIle:WPotion.png|12px]]Elixir | |||
|2 | |||
|Bottomless Hall, Cave: Hall | |||
|[[File:WPotion.png|12px]]Megalixir | |||
|1 | |||
|Aladdin's House | |||
|-bgcolor="#f2ba25" | |||
|[[File:WGummi.png|12px]]Shell-G | |||
|3 | |||
|Bazaar, Treasure Room, Main Street | |||
|[[File:WGummi.png|12px]]Aeroga-G | |||
|1 | |||
|Palace Gates | |||
|-bgcolor="#f2ba25" | |||
|[[File:WGummi.png|12px]]Thundaga-G | |||
|1 | |||
|Relic Chamber | |||
|[[File:WGummi.png|12px]]Thundara-G | |||
|1 | |||
|Hidden Room | |||
|-bgcolor="#f2ba25" | |||
|[[File:WGummi.png|12px]]Thunder-G | |||
|1 | |||
|Silent Chamber | |||
|[[File:WGummi.png|12px]]Dispel-G | |||
|1 | |||
|Dark Chamber | |||
|-bgcolor="#f2ba25" | |||
|[[File:WGummi.png|12px]]Comet-G | |||
|1 | |||
|Cave: Entrance | |||
|[[File:WGummi.png|12px]]Meteor-G | |||
|1 | |||
|Hidden Room | |||
|-bgcolor="#f2ba25" | |||
|[[File:WWeapon.png|12px]]Three Wishes | |||
|1 | |||
|Talk to Aladdin after defeating Jafar | |||
| | |||
| | |||
| | |||
|} | |||
Once you land on the World, a cutscene will play, showing {{Wtext|Jafar|c}} and {{Wtext|Maleficent|c}} discussing the Keyhole of the World. {{Wtext|Iago|c}} flies down and informs them that the princess is nowhere to be found, but {{Wtext|Jafar|c}} could care less about the princess and more so of the Keyhole. However, {{Wtext|Maleficent|c}} reminds Jafar of her importance and so he commands {{Wtext|Heartless|e}} to find {{Wtext|Jasmine|c}}, who is hiding behind one of the stalls. You'll be back in control now, where {{Wtext|Heartless|e}} are already attacking you, so take care of them. Head into the small door that leads to the {{Wtext|Storage|l}} and break the barrel to open a {{Wtext|chest|t}} containing a {{Wtext|Mega-Potion|i}}. Exit back to the {{Wtext|Plaza|l}} and there will be a {{Wtext|chest|t}} to your right containing another {{Wtext|Mega-Potion|i}}. Go all the way to the left, jump up and open the {{Wtext|chest|t}} there, it'll have a {{Wtext|Mega-Ether|i}}. Jump down and head to the {{Wtext|Main Street|l}}. Take the steps to the right and climb the pole to {{Wtext|Aladdin's House|l}}, where there will be a chest on the steps containing Dalmatians 38, 37 and 39. Next, help the {{Wtext|Carpet|c}} out. After the {{Wtext|Carpet|c}} flies off, go to the moveable stack of drawers and move it and interact with the Keyhole, it'll unlock one of the doors across {{Wtext|Agrabah|l}}. There is also another {{Wtext|chest|t}} that contains a {{Wtext|Megalixir|i}}. Now head down through the front exit into the {{Wtext|Plaza|l}} and head to the {{Wtext|Alley|l}}. | |||
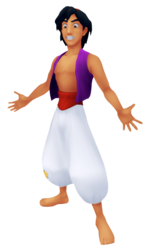
[[File:Aladdin KH.png|right|150px|link=Aladdin]] | |||
Now you'll be introduced to {{Wtext|Jasmine|c}}, she'll tell you about what happened prior to your arrival in this World but {{Wtext|Jafar|c}} ends this conversation prematurely and {{Wtext|Jasmine|c}} runs away with {{Wtext|Jafar|c}} leaving you to battle a number of Heartless. After you've defeated them all, climb up the stack of boxes and open the {{Wtext|chest|t}} to get a {{Wtext|Mega-Potion|i}}, also use the Keyhole to the right. Head to the {{Wtext|Main Street|l}} through the new exit and jump along the awnings and get to the {{Wtext|chest|t}} on a lower platform, you'll get {{Wtext|Mega-Ether|i}}. Head to the {{Wtext|Plaza|l}} and exit to the {{Wtext|Desert|l}}, where the {{Wtext|Carpet|c}} will be waiting to take you further. | |||
You'll find a man, {{Wtext|Aladdin|c}}, trapped in the sand. Clear out the {{Wtext|Heartless|e}} and {{Wtext|Aladdin|c}} will call for the {{Wtext|Genie|c}} to help the party take care of the Heartless. Then you'll be formally introduced to the {{Wtext|Genie|c}} in a cutscene. After the cutscene you now have the choice to add {{Wtext|Aladdin|c}} into your party. You'll be back at the {{Wtext|Plaza|l}} so climb back up the stack of boxes and jump between the awnings to the exit leading to the {{Wtext|Alley|l}}. Jump across to the exit leading to the {{Wtext|Main Street|l}} and then from there, jump across the awnings to the {{Wtext|Bazaar|l}} exit. In this area, there's a {{Wtext|Blue Trinity|i}} on the lower floor, as well as a Keyhole and some {{Wtext|chests|t}}, one of which will give you a {{Wtext|Shell-G|i}} and another which will give you a {{Wtext|Fira Ring|a}}. Head back to the {{Wtext|Main Street|1}} and go through the new exit to the {{Wtext|Palace Gates|l}}. Drop down and to the other side, where there will be a {{Wtext|chest|t}} with a {{Wtext|Protera Chain|a}} inside. After all this scavenging, head to {{Wtext|Aladdin's House|l}} for a cutscene, then head back to the {{Wtext|Palace Gates|l}} again for another cutscene... and a boss. | |||
<br clear=all/> | <br clear=all/> | ||
{{Template:WKH1HBoss | {{Template:WKH1HBoss | ||
| Line 17: | Line 127: | ||
|image=Pot Centipede KH.png | |image=Pot Centipede KH.png | ||
|size=200px | |size=200px | ||
|hp= | |hp=500 | ||
|strength= | |strength=18 | ||
|defense= | |defense=15 | ||
|status= | |status= | ||
|mpr= | |mpr=25 | ||
|exp= | |exp=250 | ||
|physical= | |physical=x1.0 | ||
|fire= | |fire=x0.49 | ||
|blizzard= | |blizzard=x0.5 | ||
|thunder= | |thunder=x1.0 | ||
|gravity= | |gravity=x0.04 | ||
|stop= | |stop=x0.3 | ||
|ko= | |ko=x0.5 | ||
|other= | |other=x0.5 | ||
|prize={{Wtext|Ray of Light|i}} | |||
|prize= | |strategy=The Pot Centipede's main attacks will be to call upon more {{Wtext|Pot Spiders|e}}, as well as using its antennae to attack you. Dodge its antennae while striking its head and get out of the way while it moves to other spots as it is quite damaging during this phase. Use {{Wtext|Cure|w}} to heal yourself and keep striking it with the Keyblade.}} | ||
| | |||
|strategy= | |||
}} | |||
After defeating the Pot Centipede, head back towards the Cave of Wonders | After defeating the {{Wtext|Pot Centipede|b}}, head back towards the {{Wtext|Cave of Wonders|l}} through the {{Wtext|Plaza|l}} where you'll find yourself in another boss battle as the {{Wtext|Cave of Wonders Guardian|b}} emerges. | ||
{{Template:WKH1SBoss | {{Template:WKH1SBoss | ||
|name=Cave of Wonders | |name=Cave of Wonders Guardian | ||
|image=Cave of Wonders KH.png | |image=Cave of Wonders Guardian KH.png | ||
|size=200px | |size=200px | ||
|hp= | |hp=380 | ||
|strength= | |strength=18 | ||
|defense= | |defense=15 | ||
|status= | |status= | ||
|mpr= | |mpr=26 | ||
|exp= | |exp=400 | ||
|physical= | |physical=x1.0 | ||
|fire= | |fire=x0.49 | ||
|blizzard= | |blizzard=x0.5 | ||
|thunder= | |thunder=x1.0 | ||
|gravity= | |gravity=x0.04 | ||
|stop= | |stop=x0.3 | ||
| | |ko=x0.5 | ||
| | |other=x0.5 | ||
|prize=N/A | |||
|strategy= | |strategy=You won't be able to get to the eyes yet as you'll have to wait for it to burrow into the ground. Once the Guardian lands, attack its eyes and cast {{Wtext|Aero|w}} to keep away the projectiles it shoots or guard against them. {{Wtext|Donald|c}}, {{Wtext|Aladdin|c}} and {{Wtext|Goofy|c}} will harbor the Heartless away from you as you take out its HP. Use {{Wtext|Cure|w}} as needed.}} | ||
}} | |||
As soon as the battle is over, head into the {{Wtext|Cave of Wonders|l}}. Head down the stairs to the right to get into the {{Wtext|Relic Chamber|l}} and go across to the {{Wtext|red chest|t}} ahead and open it to get a {{Wtext|Thundara Ring|a}}. There is another chest on the other end of the room that contains a {{Wtext|Mythril|i}}. Head through the right exit to get to the {{Wtext|Silent Chamber|l}}. Touch the jewel on the statue to open a hidden door in the same room. However, you can't reach it yet, so instead swim up the waterfall and use the {{Wtext|Blue Trinity|i}} to get a {{Wtext|Blue Chest|t}}. Open it and you'll obtain a {{Wtext|Thunder-G|i}}. Now travel straight ahead to the {{Wtext|Hidden Room|l}}, where there's a closed door, a platform with a statue and a pillar. Attack the pillar to lower it down. A cutscene will begin, where the {{Wtext|Genie|c}} grants {{Wtext|Jafar|c}}'s first wish to show the Keyhole of this world. Head back to the {{Wtext|Silent Chamber|l}} and climb up the stairs to the {{Wtext|Cave: Hall|l}}. Drop to the right to land in a completely different chamber, the {{Wtext|Dark Chamber|l}}. Climb up the stairs and go across the platform to the {{Wtext|chest|t}} to get a {{Wtext|Torn Page|i}}, now go across to the platform where there's a Save Point. Jump across to the other platform and open the {{Wtext|chest|t}} there to get a {{Wtext|Cottage|i}}. Head back to the platform with a Save Point and go up to the {{Wtext|Cave: Hall|l}}. | |||
Now continue until you see the platform with three heads shooting out water streams, jump onto the top and open the {{Wtext|chest|t}} to get an {{Wtext|Elixir|i}}. Head over to the other platform ahead beside the door to get a {{Wtext|Mythril Shard|i}}. Now head into the {{Wtext|Bottomless Hall|l}} through the nearest exit. Clear the area of Heartless and go to the upper platform. Open the {{Wtext|chest|t}} to get a {{Wtext|Cottage|i}}, then head into the {{Wtext|Treasure Room|l}}. Use the {{Wtext|Red Trinity|i}} in this room to get a lot of Munny and a {{Wtext|Mythril Shard|i}}. Climb the statue with the fireplace within and open the {{Wtext|chest|t}} to get a {{Wtext|Defense Up|i}}. Jump to the other dune of gold with a {{Wtext|chest|t}} on top and open it to get a {{Wtext|Mythril Shard|i}}. Jump across to the ledge and then to the other with a {{Wtext|chest|t}} on top and open it to obtain a {{Wtext|Shell-G|i}}. Now put {{Wtext|Aladdin|c}} into your party and call upon one of the statues to propel you to a {{Wtext|chest|t}} which contains Dalmatians 52, 53 and 54. Now head into the {{Wtext|Lamp Chamber|l}} for a cutscene and a boss battle. | |||
< | {{Wtext|Sora|c}} encounters {{Wtext|Maleficent|c}} for the first time, but she leaves as soon as he questions her. {{Wtext|Jafar|c}} reveals that {{Wtext|Jasmine|c}} is a [[Princesses of Heart|<font color="pink">Princess of Heart</font>]]. {{Wtext|Jafar|b}} will seal off the Keyhole and the exit to ensue the boss battle, with a reluctant {{Wtext|Genie|c}} as his aide. | ||
{{-}} | |||
{{tab|o}} | |||
{{tab|Jafar}} | |||
{{Template:WKH1SBoss | {{Template:WKH1SBoss | ||
|name=Jafar | |name=Jafar | ||
|image=Jafar KH.png | |image=Jafar KH.png | ||
|size=200px | |size=200px | ||
|hp= | |hp=500 | ||
|strength= | |strength=18 | ||
|defense= | |defense=15 | ||
|mpr=27 | |||
|mpr= | |exp=600 | ||
|exp= | |physical=x1.0 | ||
|physical= | |fire=x0.49 | ||
|fire= | |blizzard=x0.5 | ||
|blizzard= | |thunder=x1.0 | ||
|thunder= | |gravity=x0.04 | ||
|gravity= | |stop=x0.3 | ||
|stop= | |ko=x0.5 | ||
| | |other=x0.5 | ||
|prize= | |prize={{Wtext|Blizzara|w}} | ||
| | |strategy=Jafar will use a lot of powerful magic. Some attacks include making his staff act as a torch and run at you with it, and another where he will fire a ray of heat energy at you. You can easily memorize what he'll use if you listen to what he says beforehand. Many of these can be dodged and it is wise to keep attacking and not use magic at all. Use {{Wtext|Cure|w}} to heal. | ||
|strategy=Jafar | |||
}} | }} | ||
| | {{tab|c}} | ||
{{tab|Genie}} | |||
{{Template:WKH1SBoss | {{Template:WKH1SBoss | ||
|name=Genie | |name=Genie | ||
| Line 95: | Line 202: | ||
|size=200px | |size=200px | ||
|hp=N/A | |hp=N/A | ||
|strength= | |strength=18 | ||
|defense= | |defense=15 | ||
|status= | |status= | ||
|mpr= | |mpr=N/A | ||
|exp= | |exp=N/A | ||
|physical= | |physical=x0.0 | ||
|fire= | |fire=x0.0 | ||
|blizzard= | |blizzard=x0.0 | ||
|thunder= | |thunder=x0.0 | ||
|gravity= | |gravity=x0.0 | ||
|stop= | |stop=x0.0 | ||
| | |ko=x0.0 | ||
| | |other=x0.0 | ||
|prize=*Attack hits Sora: (1) HP Ball x6 | |||
|strategy= | *Attack hits Donald/Goofy/Aladdin: (1) MP Ball x2 | ||
}} | *Attack hits water: (2) MP Ball x6 | ||
*Attack hits ground: (5) Munny x5 | |||
*Genie applauds: (1) HP Ball x5, (2) MP Ball x5, (1) Munny x5 | |||
*Genie becomes overjoyed: (1) HP Ball x5, (2) MP Ball x11, (1) Munny x5, (5) Munny x5 | |||
|strategy=Although he is not an actual enemy in this battle, he will attempt to attack you. Fortunately, he will give you leeway to quickly leave before being able to actually hit you. He will sometimes give rewards for certain things that happen within the battle.}} | |||
{{tab|c}} | |||
{{-}} | |||
You will be sent back to the entrance of the {{Wtext|Lamp Chamber|l}}, so walk over to {{Wtext|Jasmine|c}} to start another cutscene. | |||
{{Wtext|Jafar|b}} appears and tells {{Wtext|Genie|c}} to turn ''him'' into a genie, resulting in another boss fight. Drop down into the {{Wtext|Lava Chamber|l}}. | |||
{{-}} | |||
{{tab|o}} | |||
{{tab|Jafar (Genie)}} | |||
{{Template:WKH1SBoss | {{Template:WKH1SBoss | ||
|name=Genie Jafar | |name=Genie Jafar | ||
|image=Genie | |image=Jafar (Genie) KH.png | ||
|size=200px | |size=200px | ||
|hp= | |hp=750 | ||
|strength= | |strength=18 | ||
|defense= | |defense=15 | ||
|mpr=29 | |||
|mpr= | |exp=730 | ||
|exp= | |physical=x1.0 | ||
|physical= | |fire=x0.0 | ||
|fire= | |blizzard=x0.5 | ||
|blizzard= | |thunder=x0.0 | ||
|thunder= | |gravity=x0.04 | ||
|gravity= | |stop=x0.3 | ||
|stop= | |ko=x0.5 | ||
| | |other=x0.5 | ||
|prize= | |prize={{Wtext|Fira|w}}, {{Wtext|Ansem's Report 1|i}} | ||
| | |strategy={{Wtext|Jafar|b}} has gotten larger in size and his attacks are more powerful. However his defense is rather weak, considering the lamp is held by {{Wtext|Iago|e}}. He will throw molten balls of magma at you which you can easily dodge, block, or just get hit by. Use {{Wtext|Cure|w}} and {{Wtext|Potions|i}} to heal. | ||
|strategy=Jafar | |||
}} | }} | ||
| | {{tab|c}} | ||
{{tab|Iago}} | |||
{{Template:WKH1SBoss | {{Template:WKH1SBoss | ||
|name=Iago | |name=Iago | ||
|image=Iago KH.png | |image=Iago KH.png | ||
|size=200px | |size=200px | ||
|hp= | |hp=750 | ||
|strength= | |strength=18 | ||
|defense= | |defense=15 | ||
|status= | |status= | ||
|mpr= | |mpr=29 | ||
|exp= | |exp=730 | ||
|physical= | |physical=x1.0 | ||
|fire= | |fire=x0.0 | ||
|blizzard= | |blizzard=x0.5 | ||
|thunder= | |thunder=x0.0 | ||
|gravity= | |gravity=x0.04 | ||
|stop= | |stop=x0.3 | ||
| | |ko=x0.5 | ||
|prize= | |other=x0.5 | ||
| | |prize={{Wtext|Fira|w}}, {{Wtext|Ansem's Report 1|i}} | ||
|strategy= | |strategy={{Wtext|Iago|e}} is a very vulnerable target, but he will be able to avoid you by flying higher up in the air. Attack him whenever possible. | ||
}} | }} | ||
{{tab|c}} | |||
{{-}} | |||
[[File:Jasmine KH.png|left|75px|Jasmine]] | |||
Once {{Wtext|Jafar|b}} is done for he'll be sealed in his lamp. However {{Wtext|Jasmine|c}} overlooking all this will be captured by an unknown presence. {{Wtext|Aladdin|c}} calls out for {{Wtext|Jasmine|c}} but no response, {{Wtext|Sora|c}} locks the Keyhole but this causes the {{Wtext|Cave of Wonders|l}} to start collapsing. They all head off on the {{Wtext|Carpet|c}}. Now you must go through a carpet-run where you have to dodge falling rocks, lava spurts, stalagmites and stalactites. HP Orbs and MP Orbs can be collected to bring back lost HP and MP. | |||
In the final cutscene {{Wtext|Aladdin|c}} wishes for {{Wtext|Genie|c}}'s freedom and in which {{Wtext|Genie|c}} becomes a summon for your party. In the next cutscene, {{Wtext|Maleficent|c}} grants {{Wtext|Riku|c}} the ability to find {{Wtext|Kairi|c}} with the help of {{Wtext|Captain Hook|c}} but {{Wtext|Riku|c}} is a bit skeptical of why they're doing all this for him. | |||
Back in {{Wtext|Agrabah|l}}, {{Wtext|Aladdin|c}} gives you the {{Wtext|Three Wishes|w}} Keyblade. You also learn {{Wtext|Trinity Climb|i}}. From here, you can either go to [[Walkthrough:Kingdom_Hearts/Monstro|Monstro]], [[Walkthrough:Kingdom_Hearts/Halloween Town|Halloween Town]] or [[Walkthrough:Kingdom_Hearts/Atlantica|Atlantica]], it's up to you.<br clear=all/> | |||
===<center> | ===<center>Optional Boss</center>=== | ||
This boss can be fought after defeating [[Behemoth]] | This boss can be fought after defeating the [[Behemoth]] in {{Wtext|Hollow Bastion|l}} and sealing the Final Keyhole. You need to talk to the {{Wtext|Carpet|c}} to reach it. | ||
{{Template:WKH1HBoss | {{Template:WKH1HBoss | ||
| Line 174: | Line 291: | ||
|image=Kurt Zisa KH.png | |image=Kurt Zisa KH.png | ||
|size=200px | |size=200px | ||
|hp= | |hp=1,500 | ||
|strength= | |strength=42 | ||
|defense= | |defense=34 | ||
|status= | |status= | ||
|mpr= | |mpr=64 | ||
|exp= | |exp=20,000 | ||
|physical= | |physical=x1.0 | ||
|fire= | |fire=x0.49 | ||
|blizzard= | |blizzard=x0.5 | ||
|thunder= | |thunder=x1.0 | ||
|gravity= | |gravity=x0.02 | ||
|stop= | |stop=x0.0 | ||
| | |ko=x0.5 | ||
| | |other=x0.5 | ||
|prize=N/A | |||
|strategy=A superboss found in the desert outside of Agrabah. It can summon a barrier that protects it from harm. Keep hitting the barrier to remove it so you can damage Kurt Zisa. It also flies around the battlefield, making it difficult to hit it with physical attacks. | |strategy=A superboss found in the desert outside of Agrabah. It can summon a barrier that protects it from harm. Keep hitting the barrier to remove it so you can damage Kurt Zisa. It also flies around the battlefield, making it difficult to hit it with physical attacks.}} | ||
}} | |||
{{WKH1TOC}} | |||
[[Category:Kingdom Hearts walkthrough|{{SUBPAGENAME}}]] | |||
Latest revision as of 13:30, 10 February 2021

| Item | Amount | Obtained | Item | Amount | Obtained |
| 1 | Aladdin's House | 1 | Palace Gates | ||
| 1 | Cave: Entrance | 1 | Treasure Room | ||
| 3 | Cave: Hall, Treasure Room (Red Trinity, Chest) | 1 | Treasure Room | ||
| 2 | Main Street, Relic Chamber | 1 | Treasure Room | ||
| 1 | Dark Chamber | 1 | Lava Room (Defeat Jafar) | ||
| 1 | Storage (Green Trinity) | 1 | Bazaar | ||
| 1 | Relic Chamber | 1 | Dark Chamber | ||
| 1 | Plaza, Main Street, Alley, Palace Gates (Defeat Pot Centipede) | 3 | Plaza, Bottomless Hall, Dark Chamber | ||
| 4 | Storage, Plaza, Alley, Bottomless Hall | 4 | Plaza, Main Street, Bazaar, Cave: Entrance | ||
| 2 | Bottomless Hall, Cave: Hall | 1 | Aladdin's House | ||
| 3 | Bazaar, Treasure Room, Main Street | 1 | Palace Gates | ||
| 1 | Relic Chamber | 1 | Hidden Room | ||
| 1 | Silent Chamber | 1 | Dark Chamber | ||
| 1 | Cave: Entrance | 1 | Hidden Room | ||
| 1 | Talk to Aladdin after defeating Jafar |
Once you land on the World, a cutscene will play, showing Jafar and Maleficent discussing the Keyhole of the World. Iago flies down and informs them that the princess is nowhere to be found, but Jafar could care less about the princess and more so of the Keyhole. However, Maleficent reminds Jafar of her importance and so he commands Heartless to find Jasmine, who is hiding behind one of the stalls. You'll be back in control now, where Heartless are already attacking you, so take care of them. Head into the small door that leads to the Storage and break the barrel to open a chest containing a Mega-Potion. Exit back to the Plaza and there will be a chest to your right containing another Mega-Potion. Go all the way to the left, jump up and open the chest there, it'll have a Mega-Ether. Jump down and head to the Main Street. Take the steps to the right and climb the pole to Aladdin's House, where there will be a chest on the steps containing Dalmatians 38, 37 and 39. Next, help the Carpet out. After the Carpet flies off, go to the moveable stack of drawers and move it and interact with the Keyhole, it'll unlock one of the doors across Agrabah. There is also another chest that contains a Megalixir. Now head down through the front exit into the Plaza and head to the Alley.
Now you'll be introduced to Jasmine, she'll tell you about what happened prior to your arrival in this World but Jafar ends this conversation prematurely and Jasmine runs away with Jafar leaving you to battle a number of Heartless. After you've defeated them all, climb up the stack of boxes and open the chest to get a Mega-Potion, also use the Keyhole to the right. Head to the Main Street through the new exit and jump along the awnings and get to the chest on a lower platform, you'll get Mega-Ether. Head to the Plaza and exit to the Desert, where the Carpet will be waiting to take you further.
You'll find a man, Aladdin, trapped in the sand. Clear out the Heartless and Aladdin will call for the Genie to help the party take care of the Heartless. Then you'll be formally introduced to the Genie in a cutscene. After the cutscene you now have the choice to add Aladdin into your party. You'll be back at the Plaza so climb back up the stack of boxes and jump between the awnings to the exit leading to the Alley. Jump across to the exit leading to the Main Street and then from there, jump across the awnings to the Bazaar exit. In this area, there's a Blue Trinity on the lower floor, as well as a Keyhole and some chests, one of which will give you a Shell-G and another which will give you a Fira Ring. Head back to the Main Street and go through the new exit to the Palace Gates. Drop down and to the other side, where there will be a chest with a Protera Chain inside. After all this scavenging, head to Aladdin's House for a cutscene, then head back to the Palace Gates again for another cutscene... and a boss.
| Pot Centipede | |||||
|---|---|---|---|---|---|
 |
HP | STR | DEF | MP R | EXP |
| 500 | 18 | 15 | 25 | 250 | |
| Resistances | Weapon | Fire | Blizzard | Thunder | |
| x1.0 | x0.49 | x0.5 | x1.0 | ||
| Gravity | Stop | KO | Other | ||
| x0.04 | x0.3 | x0.5 | x0.5 | ||
| Rewards | Ray of Light | ||||
| The Pot Centipede's main attacks will be to call upon more Pot Spiders, as well as using its antennae to attack you. Dodge its antennae while striking its head and get out of the way while it moves to other spots as it is quite damaging during this phase. Use Cure to heal yourself and keep striking it with the Keyblade. | |||||
After defeating the Pot Centipede, head back towards the Cave of Wonders through the Plaza where you'll find yourself in another boss battle as the Cave of Wonders Guardian emerges.
| Cave of Wonders Guardian | |||||
|---|---|---|---|---|---|
 |
HP | STR | DEF | MP R | EXP |
| 380 | 18 | 15 | 26 | 400 | |
| Resistances | Weapon | Fire | Blizzard | Thunder | |
| x1.0 | x0.49 | x0.5 | x1.0 | ||
| Gravity | Stop | KO | Other | ||
| x0.04 | x0.3 | x0.5 | x0.5 | ||
| Rewards | N/A | ||||
| You won't be able to get to the eyes yet as you'll have to wait for it to burrow into the ground. Once the Guardian lands, attack its eyes and cast Aero to keep away the projectiles it shoots or guard against them. Donald, Aladdin and Goofy will harbor the Heartless away from you as you take out its HP. Use Cure as needed. | |||||
As soon as the battle is over, head into the Cave of Wonders. Head down the stairs to the right to get into the Relic Chamber and go across to the red chest ahead and open it to get a Thundara Ring. There is another chest on the other end of the room that contains a Mythril. Head through the right exit to get to the Silent Chamber. Touch the jewel on the statue to open a hidden door in the same room. However, you can't reach it yet, so instead swim up the waterfall and use the Blue Trinity to get a Blue Chest. Open it and you'll obtain a Thunder-G. Now travel straight ahead to the Hidden Room, where there's a closed door, a platform with a statue and a pillar. Attack the pillar to lower it down. A cutscene will begin, where the Genie grants Jafar's first wish to show the Keyhole of this world. Head back to the Silent Chamber and climb up the stairs to the Cave: Hall. Drop to the right to land in a completely different chamber, the Dark Chamber. Climb up the stairs and go across the platform to the chest to get a Torn Page, now go across to the platform where there's a Save Point. Jump across to the other platform and open the chest there to get a Cottage. Head back to the platform with a Save Point and go up to the Cave: Hall.
Now continue until you see the platform with three heads shooting out water streams, jump onto the top and open the chest to get an Elixir. Head over to the other platform ahead beside the door to get a Mythril Shard. Now head into the Bottomless Hall through the nearest exit. Clear the area of Heartless and go to the upper platform. Open the chest to get a Cottage, then head into the Treasure Room. Use the Red Trinity in this room to get a lot of Munny and a Mythril Shard. Climb the statue with the fireplace within and open the chest to get a Defense Up. Jump to the other dune of gold with a chest on top and open it to get a Mythril Shard. Jump across to the ledge and then to the other with a chest on top and open it to obtain a Shell-G. Now put Aladdin into your party and call upon one of the statues to propel you to a chest which contains Dalmatians 52, 53 and 54. Now head into the Lamp Chamber for a cutscene and a boss battle.
Sora encounters Maleficent for the first time, but she leaves as soon as he questions her. Jafar reveals that Jasmine is a Princess of Heart. Jafar will seal off the Keyhole and the exit to ensue the boss battle, with a reluctant Genie as his aide.
| Jafar | |||||
|---|---|---|---|---|---|
 |
HP | STR | DEF | MP R | EXP |
| 500 | 18 | 15 | 27 | 600 | |
| Resistances | Weapon | Fire | Blizzard | Thunder | |
| x1.0 | x0.49 | x0.5 | x1.0 | ||
| Gravity | Stop | KO | Other | ||
| x0.04 | x0.3 | x0.5 | x0.5 | ||
| Rewards | Blizzara | ||||
| Jafar will use a lot of powerful magic. Some attacks include making his staff act as a torch and run at you with it, and another where he will fire a ray of heat energy at you. You can easily memorize what he'll use if you listen to what he says beforehand. Many of these can be dodged and it is wise to keep attacking and not use magic at all. Use Cure to heal. | |||||
| Genie | |||||
|---|---|---|---|---|---|
 |
HP | STR | DEF | MP R | EXP |
| N/A | 18 | 15 | N/A | N/A | |
| Resistances | Weapon | Fire | Blizzard | Thunder | |
| x0.0 | x0.0 | x0.0 | x0.0 | ||
| Gravity | Stop | KO | Other | ||
| x0.0 | x0.0 | x0.0 | x0.0 | ||
| Rewards | *Attack hits Sora: (1) HP Ball x6
| ||||
| Although he is not an actual enemy in this battle, he will attempt to attack you. Fortunately, he will give you leeway to quickly leave before being able to actually hit you. He will sometimes give rewards for certain things that happen within the battle. | |||||
You will be sent back to the entrance of the Lamp Chamber, so walk over to Jasmine to start another cutscene. Jafar appears and tells Genie to turn him into a genie, resulting in another boss fight. Drop down into the Lava Chamber.
| Genie Jafar | |||||
|---|---|---|---|---|---|
_KH.png) |
HP | STR | DEF | MP R | EXP |
| 750 | 18 | 15 | 29 | 730 | |
| Resistances | Weapon | Fire | Blizzard | Thunder | |
| x1.0 | x0.0 | x0.5 | x0.0 | ||
| Gravity | Stop | KO | Other | ||
| x0.04 | x0.3 | x0.5 | x0.5 | ||
| Rewards | Fira, Ansem's Report 1 | ||||
| Jafar has gotten larger in size and his attacks are more powerful. However his defense is rather weak, considering the lamp is held by Iago. He will throw molten balls of magma at you which you can easily dodge, block, or just get hit by. Use Cure and Potions to heal. | |||||
| Iago | |||||
|---|---|---|---|---|---|
 |
HP | STR | DEF | MP R | EXP |
| 750 | 18 | 15 | 29 | 730 | |
| Resistances | Weapon | Fire | Blizzard | Thunder | |
| x1.0 | x0.0 | x0.5 | x0.0 | ||
| Gravity | Stop | KO | Other | ||
| x0.04 | x0.3 | x0.5 | x0.5 | ||
| Rewards | Fira, Ansem's Report 1 | ||||
| Iago is a very vulnerable target, but he will be able to avoid you by flying higher up in the air. Attack him whenever possible. | |||||

Once Jafar is done for he'll be sealed in his lamp. However Jasmine overlooking all this will be captured by an unknown presence. Aladdin calls out for Jasmine but no response, Sora locks the Keyhole but this causes the Cave of Wonders to start collapsing. They all head off on the Carpet. Now you must go through a carpet-run where you have to dodge falling rocks, lava spurts, stalagmites and stalactites. HP Orbs and MP Orbs can be collected to bring back lost HP and MP.
In the final cutscene Aladdin wishes for Genie's freedom and in which Genie becomes a summon for your party. In the next cutscene, Maleficent grants Riku the ability to find Kairi with the help of Captain Hook but Riku is a bit skeptical of why they're doing all this for him.
Back in Agrabah, Aladdin gives you the Three Wishes Keyblade. You also learn Trinity Climb. From here, you can either go to Monstro, Halloween Town or Atlantica, it's up to you.
Optional Boss [edit]
This boss can be fought after defeating the Behemoth in Hollow Bastion and sealing the Final Keyhole. You need to talk to the Carpet to reach it.
| Kurt Zisa | |||||
|---|---|---|---|---|---|
 |
HP | STR | DEF | MP R | EXP |
| 1,500 | 42 | 34 | 64 | 20,000 | |
| Resistances | Weapon | Fire | Blizzard | Thunder | |
| x1.0 | x0.49 | x0.5 | x1.0 | ||
| Gravity | Stop | KO | Other | ||
| x0.02 | x0.0 | x0.5 | x0.5 | ||
| Rewards | N/A | ||||
| A superboss found in the desert outside of Agrabah. It can summon a barrier that protects it from harm. Keep hitting the barrier to remove it so you can damage Kurt Zisa. It also flies around the battlefield, making it difficult to hit it with physical attacks. | |||||
| Kingdom Hearts |
|---|
| Walkthrough |
| Dive to the Heart - Destiny Islands - Traverse Town - Wonderland - Olympus Coliseum - Deep Jungle - 100 Acre Wood - Agrabah - Monstro - Atlantica - Halloween Town - Neverland - Hollow Bastion - End of the World |
| Other |
| 99 Puppies - Trinity Marks - Gummi Missions - Trophies |