Walkthrough:Kingdom Hearts/Halloween Town: Difference between revisions
mNo edit summary |
No edit summary |
||
| Line 1: | Line 1: | ||
==<center>[[File:Halloween Town Logo KH.png|300px|link=Halloween Town]]</center>== | ==<center>[[File:Halloween Town Logo KH.png|300px|link=Halloween Town]]</center>== | ||
Upon entering this world, you'll notice that {{Wtext|Sora|c}}, {{Wtext|Donald|c}} and {{Wtext|Goofy|c}} look different. {{Wtext|Sora|c}} is now a vampire in a uniquely designed outfit with a pumpkin-hat covering his right eye, {{Wtext|Donald|c}} is a mummy with some parts unveiled to reveal nothing, and {{Wtext|Goofy|c}} is a Frankenstein-like being with | Upon entering this world, you'll notice that {{Wtext|Sora|c}}, {{Wtext|Donald|c}} and {{Wtext|Goofy|c}} look different. {{Wtext|Sora|c}} is now a vampire in a uniquely designed outfit with a pumpkin-hat covering his right eye, {{Wtext|Donald|c}} is a mummy with some parts unveiled to reveal nothing, and {{Wtext|Goofy|c}} is a Frankenstein-like being with a screw protruding into his head and wearing stitched up clothing. {{Wtext|Donald|c}} changed their appearances to blend in with the other people in this world. | ||
[[File:Sora HT KH.png|left|60px]] | |||
[[File:Donald HT KH.png|left|60px]] | |||
[[File:Goofy HT KH.png|left|60px]] | |||
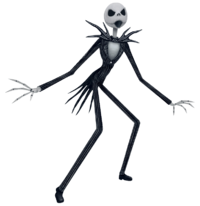
[[File:Jack Skellington KH.png|right|200px|Jack Skellington]] | [[File:Jack Skellington KH.png|right|200px|Jack Skellington]] | ||
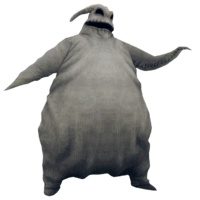
Once you enter {{Wtext|Guillotine Square|l}}, | Once you enter {{Wtext|Guillotine Square|l}}, a puff of black smoke will appear ahead from a chimney, and a dozen {{Wtext|Search Ghosts|e}} are surrounding the square. However {{Wtext|Sora|c}} and his party are ready to attack, the Heartless aren't attacking... strange. Head to the right a bit for a cutscene, {{Wtext|The Mayor|c}} introduces {{Wtext|Jack Skellington|c}} to the party with the Heartless acting as entertainment. {{Wtext|Jack|c}} heads to the {{Wtext|Research Lab|l}} to consult the Doctor, {{Wtext|Doctor Finklestein|c}} that is. But now head to the right and enter the gates to a house, underneath the stairs there is a {{Wtext|chest|c}} with Dalmatians 67, 68 and 69. Go out and keep going right and ignore the door, head across the opening and jump to grab onto a ledge, then go into the open room and open the {{Wtext|chest|t}} to the right to get a {{Wtext|Power Up|i}}. Now head back to the door and go into the {{Wtext|Research Lab|l}}. {{Wtext|Jack|c}} wants to make a Heart with the help of the {{Wtext|Doctor|c}}, however they require a number of components to get it right, they have the container however it's locked and {{Wtext|Sora|c}} is thinking of offering help, and unlocks the Heart for them, however even with all the components the experiment fails. Then the {{Wtext|Doctor|c}} concludes that {{Wtext|Sally|c}} has the component they need for memory. Now you need to find her, she's in the {{Wtext|Graveyard|l}} but first we need to get a few treasures. Interact with the bookshelf on the left to get a {{Wtext|Torn Page|i}}. Then head out to the {{Wtext|Lab Entryway|l}} where {{Wtext|The Mayor|c}} will warn you that there is a major crisis, that the Heartless are out of control and {{Wtext|Jack|c}} assumes that maybe the experiment triggered something. Head out to {{Wtext|Guillotine Square|l}}. The Heartless are now attacking, head to the left and then left once more and go up the stairs to the {{Wtext|Graveyard|l}}. Take care of the Heartless here to allow {{Wtext|Sally|c}} some space, after they're all gone {{Wtext|Zero|c}} will appear from under his grave, {{Wtext|Jack|c}} will ask him if he's seen {{Wtext|Sally|c}} anywhere and he'll run into her behind a statue. {{Wtext|Jack|c}} then tells her that they need her memory and she holds up a bouquet of dying {{Wtext|Forget-Me-Not|i}}s, she gives them to you and says she has a bad feeling about this. Exit the area and watch the cutscene where 3 rotten kids, {{Wtext|Lock|c}}, {{Wtext|Shock|c}} and {{Wtext|Barrel|c}} converse about what they've just heard, {{Wtext|Jack|c}}'s plan, however they come to the plan of telling {{Wtext|Oogie Boogie|c}}. Once you're back at {{Wtext|Guillotine Square|l}}, head back to the {{Wtext|Research Lab|l}} and talk to the {{Wtext|Doctor|c}} for a cutscene. The {{Wtext|Doctor|c}} will tell you to talk to {{Wtext|The Mayor|c}} on where to get "surprise". In the next cutscene {{Wtext|Oogie|c}} plans on stealing the Heart and using it to control the Heartless. Now when you're back in control head back to the {{Wtext|Graveyard|l}} and interact with the slightly open coffin to get to the {{Wtext|Boneyard|l}}, head forward and talk to {{Wtext|The Mayor|c}} and he'll tell you what to do. If you get one right, a small tune will play and if you get all three right an explosion will occur off-screen. Head to the blown-up pumpkin and open the {{Wtext|chest|t}} within to get the {{Wtext|Jack-in-the-Box|i}}. Now head back to the {{Wtext|Research Lab|l}} and talk to the {{Wtext|Doctor|c}}, once he's added the component in and about to try it {{Wtext|Barrel|c}} gets in the way of him and makes him drop it with {{Wtext|Lock|c}} catching it and the three of them run off with it. Head out to {{Wtext|Guillotine Square|l}} and {{Wtext|Jack|c}} will call {{Wtext|Zero|c}} to go after them. Head to the {{Wtext|Graveyard|l}} and you'll see them escape across {{Wtext|Moonlight Hill|l}} in a bathtub. Head into the coffin to the {{Wtext|Boneyard|l}} and then go around to the second exit to {{Wtext|Moonlight Hill|l}}. At the base of the hill there's a small lever, examine it to uncurl the hill and get to the {{Wtext|Bridge|l}}. Now here there are three of {{Wtext|chests|t}} and an exit to {{Wtext|Guillotine Square|l}}. The {{Wtext|chest|t}} on the left on a ledge contains Dalmatians 40, 41 and 42. The one underneath the bridge contains a {{Wtext|Dispel-G|i}}. And lastly, the one on the right of the bridge on another ledge contains a {{Wtext|Defense Up|i}}. Now head to the gates to {{Wtext|Oogie's Manor|l}} where the bathtub is headed to. | ||
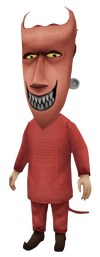
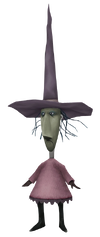
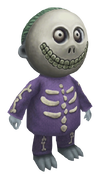
Upon reaching the {{Wtext|Evil Playroom|l}}, a battle with {{Wtext|Lock, Shock and Barrel|b}} will begin. They don't have too much health, but they are small and agile, and this can make hitting them difficult. Lock-on and fight them one at a time to dispatch of them quickly. | Upon reaching the {{Wtext|Evil Playroom|l}}, a battle with {{Wtext|Lock, Shock and Barrel|b}} will begin. They don't have too much health, but they are small and agile, and this can make hitting them difficult. Lock-on and fight them one at a time to dispatch of them quickly. | ||
Revision as of 19:05, 26 December 2011
Upon entering this world, you'll notice that Sora, Donald and Goofy look different. Sora is now a vampire in a uniquely designed outfit with a pumpkin-hat covering his right eye, Donald is a mummy with some parts unveiled to reveal nothing, and Goofy is a Frankenstein-like being with a screw protruding into his head and wearing stitched up clothing. Donald changed their appearances to blend in with the other people in this world.
Once you enter Guillotine Square, a puff of black smoke will appear ahead from a chimney, and a dozen Search Ghosts are surrounding the square. However Sora and his party are ready to attack, the Heartless aren't attacking... strange. Head to the right a bit for a cutscene, The Mayor introduces Jack Skellington to the party with the Heartless acting as entertainment. Jack heads to the Research Lab to consult the Doctor, Doctor Finklestein that is. But now head to the right and enter the gates to a house, underneath the stairs there is a chest with Dalmatians 67, 68 and 69. Go out and keep going right and ignore the door, head across the opening and jump to grab onto a ledge, then go into the open room and open the chest to the right to get a Power Up. Now head back to the door and go into the Research Lab. Jack wants to make a Heart with the help of the Doctor, however they require a number of components to get it right, they have the container however it's locked and Sora is thinking of offering help, and unlocks the Heart for them, however even with all the components the experiment fails. Then the Doctor concludes that Sally has the component they need for memory. Now you need to find her, she's in the Graveyard but first we need to get a few treasures. Interact with the bookshelf on the left to get a Torn Page. Then head out to the Lab Entryway where The Mayor will warn you that there is a major crisis, that the Heartless are out of control and Jack assumes that maybe the experiment triggered something. Head out to Guillotine Square. The Heartless are now attacking, head to the left and then left once more and go up the stairs to the Graveyard. Take care of the Heartless here to allow Sally some space, after they're all gone Zero will appear from under his grave, Jack will ask him if he's seen Sally anywhere and he'll run into her behind a statue. Jack then tells her that they need her memory and she holds up a bouquet of dying Forget-Me-Nots, she gives them to you and says she has a bad feeling about this. Exit the area and watch the cutscene where 3 rotten kids, Lock, Shock and Barrel converse about what they've just heard, Jack's plan, however they come to the plan of telling Oogie Boogie. Once you're back at Guillotine Square, head back to the Research Lab and talk to the Doctor for a cutscene. The Doctor will tell you to talk to The Mayor on where to get "surprise". In the next cutscene Oogie plans on stealing the Heart and using it to control the Heartless. Now when you're back in control head back to the Graveyard and interact with the slightly open coffin to get to the Boneyard, head forward and talk to The Mayor and he'll tell you what to do. If you get one right, a small tune will play and if you get all three right an explosion will occur off-screen. Head to the blown-up pumpkin and open the chest within to get the Jack-in-the-Box. Now head back to the Research Lab and talk to the Doctor, once he's added the component in and about to try it Barrel gets in the way of him and makes him drop it with Lock catching it and the three of them run off with it. Head out to Guillotine Square and Jack will call Zero to go after them. Head to the Graveyard and you'll see them escape across Moonlight Hill in a bathtub. Head into the coffin to the Boneyard and then go around to the second exit to Moonlight Hill. At the base of the hill there's a small lever, examine it to uncurl the hill and get to the Bridge. Now here there are three of chests and an exit to Guillotine Square. The chest on the left on a ledge contains Dalmatians 40, 41 and 42. The one underneath the bridge contains a Dispel-G. And lastly, the one on the right of the bridge on another ledge contains a Defense Up. Now head to the gates to Oogie's Manor where the bathtub is headed to.
Upon reaching the Evil Playroom, a battle with Lock, Shock and Barrel will begin. They don't have too much health, but they are small and agile, and this can make hitting them difficult. Lock-on and fight them one at a time to dispatch of them quickly.
<tabber> Boss: Lock=
| Lock | |||||
|---|---|---|---|---|---|
| HP | STR | DEF | MP R | EXP | |
| 150 | 24 | 20 | 36 | 180 | |
| Resistances | Weapon | Fire | Blizzard | Thunder | |
| x1.0 | x0.49 | x0.5 | x1.0 | ||
| Gravity | Stop | KO | Other | ||
| x0.4 | x0.3 | x0.5 | x0.5 | ||
| Rewards | HP Ball x5 | ||||
|-| Boss: Shock=
| Shock | |||||
|---|---|---|---|---|---|
| HP | STR | DEF | MP R | EXP | |
| 120 | 24 | 20 | 36 | 120 | |
| Resistances | Weapon | Fire | Blizzard | Thunder | |
| x1.0 | x0.49 | x0.5 | x1.0 | ||
| Gravity | Stop | KO | Other | ||
| x0.4 | x0.3 | x0.5 | x0.5 | ||
| Rewards | MP Balls x5 | ||||
|-| Boss: Barrel=
| Barrel | |||||
|---|---|---|---|---|---|
| HP | STR | DEF | MP R | EXP | |
| 180 | 24 | 20 | 36 | 240 | |
| Resistances | Weapon | Fire | Blizzard | Thunder | |
| x1.0 | x0.49 | x0.5 | x1.0 | ||
| Gravity | Stop | KO | Other | ||
| x0.4 | x0.3 | x0.5 | x0.5 | ||
| Rewards | N/A | ||||
</tabber> After defeating Lock, Shock and Barrel, a save point (type A) will be present; save and heal. After that, attack a nearby lever to activate the green door below. This is your last chance to activate the Trinity Charge, so activate it before entering the green door. After that, enter the Torture Chamber, and fight Oogie Boogie.
| Oogie Boogie | |||||
|---|---|---|---|---|---|
| HP | STR | DEF | MP R | EXP | |
| 450 | 24 | 20 | 38 | 2,500 | |
| Resistances | Weapon | Fire | Blizzard | Thunder | |
| x1.5 | X0.25 | X0.25 | X0.5 | ||
| Gravity | Stop | KO | Other | ||
| X0.2 | X0.0 | ||||
| Rewards | Holy Circlet, Ansem's Report 7 | ||||
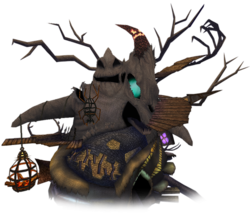
| The battle with Oogie Boogie is less about fighting and more about logic and timing. Avoid his attacks on the spinner, and jump onto the button at the right time to leave him vulnerable to attack. Repeat this tactic and Oogie should fall. | |||||
After defeating Oogie Boogie, you'll find yourself on the remains of the brige to the manor, which Oogie has now taken control of. If you want to leave the battle for later, you may use it to exit the area. Also, should you have already dropped down, there is a hidden exit in the river.
| Oogie's Manor | |||||
|---|---|---|---|---|---|
| HP | STR | DEF | MP R | EXP | |
| 90 | 24 | 20 | 40 | 2,500 | |
| Resistances | Weapon | Fire | Blizzard | Thunder | |
| x1.0 | x0.49 | x0.5 | x0.0 | ||
| Gravity | Stop | KO | Other | ||
| x0.0 | x0.0 | x0.0 | x0.0 | ||
| Rewards | Gravity | ||||
| Defeating the Manor can be tricky simply because of the structure of the manor; several of the Shadow Globs are hard to reach and can require some precision jumping to get to. The large amounts of Gargoyle Heartless can also create problems, so try to stop them when possible. After destroying all the globs, the battle ends. | |||||
After defeating Oogie, a cutscene will show that the world's Keyhole was underneath the Manor all along. Sora then seals it, ending the story for the world.
When you return...
If you want to get a 100% in the game, you'll need to return to Halloween Town later to access the remaining treasures as well as a Trinity Detect (which is unlocked after your first battle with Riku in Hollow Bastion) Any treasure from the Manor that was not collected will be found in the Graveyard, in a hidden area that cannot be accessed during the main trip. As mentioned before, if you're playing the original Kingdom Hearts the Trinity Charge is now gone since the Manor was destroyed, preventing you from getting a 100% completion.
| Kingdom Hearts |
|---|
| Walkthrough |
| Dive to the Heart - Destiny Islands - Traverse Town - Wonderland - Olympus Coliseum - Deep Jungle - 100 Acre Wood - Agrabah - Monstro - Atlantica - Halloween Town - Neverland - Hollow Bastion - End of the World |
| Other |
| 99 Puppies - Trinity Marks - Gummi Missions - Trophies |


