Walkthrough:Kingdom Hearts/Destiny Islands: Difference between revisions
No edit summary |
No edit summary |
||
| (48 intermediate revisions by 10 users not shown) | |||
| Line 1: | Line 1: | ||
<center>[[File:Destiny Islands Logo KH.png|300px|link=Destiny Islands]]</center> | |||
<center>[[File: | {|class="wikitable" width="100%" | ||
|-bgcolor="#1b90cd" | |||
|width="10%" style="text-align:center;"|'''Item''' | |||
|width="10%" style="text-align:center;"|'''Amount''' | |||
|width="30%" style="text-align:center;"|'''Obtained''' | |||
|width="10%" style="text-align:center;"|'''Item''' | |||
|width="10%" style="text-align:center;"|'''Amount''' | |||
|width="30%" style="text-align:center;"|'''Obtained''' | |||
|-bgcolor="#bd7a20" | |||
|[[File:WItem.png|12px]]Mushroom | |||
|<center>2<br>1</center> | |||
|Cove<br>Secret Place | |||
|[[File:WItem.png|12px]]Log | |||
|<center>2</center> | |||
|Seashore | |||
|-bgcolor="#bd7a20" | |||
|[[File:WItem.png|12px]]Cloth | |||
|<center>1</center> | |||
|Seashore | |||
|[[File:WItem.png|12px]]Rope | |||
|<center>1</center> | |||
|Seashore | |||
|-bgcolor="#bd7a20" | |||
|[[File:WItem.png|12px]]Empty Bottle | |||
|<center>1</center> | |||
|Cove (Kairi) | |||
|[[File:WItem.png|12px]]Drinking Water | |||
|<center>1</center> | |||
|Seashore | |||
|-bgcolor="#bd7a20" | |||
|[[File:WItem.png|12px]]Seagull Egg | |||
|<center>1</center> | |||
|Seashore | |||
|[[File:WItem.png|12px]]Coconut | |||
|<center>2</center> | |||
|Seashore | |||
|-bgcolor="#bd7a20" | |||
|[[File:WItem.png|12px]]Fish | |||
|<center>3</center> | |||
|Seashore | |||
|[[File:WPotion.png|12px]]Potion | |||
|<center>1</center> | |||
|Seashore (Kairi) | |||
|-bgcolor="#bd7a20" | |||
|[[File:WPotion.png|12px]]Hi-Potion | |||
|<center>1</center> | |||
|Cove (Kairi) | |||
|[[File:WArmorAccessory.png|12px]]Protect Chain | |||
|<center>1</center> | |||
|Cove | |||
|-bgcolor="#bd7a20" | |||
|[[File:WWeapon.png|12px]]Kingdom Key | |||
|<center>1</center> | |||
|Seashore | |||
| | |||
| | |||
| | |||
|} | |||
{{ | When you first begin the game on {{Wtext|Destiny Islands|l}}, {{Wtext|Sora|c}} wakes up on the beach, where he and {{Wtext|Kairi|c}} talk. {{Wtext|Sora|c}} tells {{Wtext|Kairi|c}} about the [[Walkthrough:Kingdom Hearts/Dive to the Heart|dream]] he had, after which you are introduced to {{Wtext|Riku|c}}, {{Wtext|Sora|c}}'s rival and friend. Speak to {{Wtext|Kairi|c}} (who's by the doorway located on the other end of the area) once gameplay resumes, and she will tell you to get the following items:<br> | ||
| | *Two {{Wtext|Logs|i}} | ||
| | *One {{Wtext|Cloth|i}} | ||
| | *One {{Wtext|Rope|i}} | ||
| | All of these can be obtained in this section of the island. One of the {{Wtext|logs|i}} can be obtained from the shore underneath the bridge. You can get the second {{Wtext|log|i}} from the island across; use the bridge to get to it. You can find the {{Wtext|Rope|i}} on the platform on the west end of this side of the island. Lastly, the {{Wtext|cloth|i}} can be obtained from the tree-house in the middle of this side of the island. | ||
| | |||
| | |||
| | |||
| | |||
| | |||
| | |||
*Two {{Wtext| | |||
* | |||
*{{Wtext| | |||
Once you have collected each of the items on {{Wtext|Kairi|c}}'s list (or even while in the process of collecting them), try your luck battling {{Wtext|Tidus|b}}, {{Wtext|Selphie|b}}, or {{Wtext|Wakka|b}} to gain some early experience, or attempt defeating all three at once to receive a {{Wtext|Potion|i}}. | |||
{{-}} | |||
{{Template: | {{tab|o}} | ||
{{tab|Selphie}} | |||
{{Template:WKH1SBoss | |||
|name=Selphie | |name=Selphie | ||
|image=Selphie KH.png | |image=Selphie KH.png | ||
| Line 60: | Line 83: | ||
|gravity=? | |gravity=? | ||
|stop=? | |stop=? | ||
|prize=1 EXP | |prize=1 EXP | ||
| | |strategy=Selphie is the weakest character you can battle on the Destiny Islands in terms of HP, but she is slightly more skilled at dodging attacks than Tidus or Wakka. All of her attacks have a longer-than-average range, but you can easily avoid them with a simple run (note that careful timing from one of your own attacks will deflect Selphie's, earning you one tech point each time this occurs). All you must do to win this battle is attack Selphie whenever it is safe to do so.}} | ||
| | {{tab|c}} | ||
| | {{tab|Wakka}} | ||
{{Template:WKH1SBoss | |||
{{Template: | |||
|name=Wakka | |name=Wakka | ||
|image=Wakka KH.png | |image=Wakka KH.png | ||
|size=150px | |size=150px | ||
|hp= | |hp=75 | ||
|strength= | |strength=5 | ||
|defense= | |defense=5 | ||
|status= | |status= | ||
|physical=x1.0 | |physical=x1.0 | ||
| Line 80: | Line 101: | ||
|gravity=? | |gravity=? | ||
|stop=? | |stop=? | ||
|prize=1 EXP | |prize=1 EXP | ||
| | |strategy=Wakka has more HP than his companions Tidus and Selphie, but he is just as easy to defeat. His primary source of offense is the blitzball he carries, which he will throw at you from afar to deal damage (note that you can strike the ball as it flies towards you and send it flying back at Wakka to stun him; you earn one tech point each time this occurs). Wakka also will perform a spinning melee attack whenever you are at close range, but a simple run can avoid it. His strongest attack occurs whenever he shouts "Take this!", after which he leaps into the air and throws the blitzball at you with greater force (successfully deflecting this attack yields two tech points). Simply continue attacking Wakka and deflecting his attacks to obtain victory.}} | ||
| | {{tab|c}} | ||
| | {{tab|Tidus}} | ||
{{Template:WKH1SBoss | |||
{{Template: | |||
|name=Tidus | |name=Tidus | ||
|image=Tidus KH.png | |image=Tidus KH.png | ||
| Line 100: | Line 119: | ||
|gravity=? | |gravity=? | ||
|stop=? | |stop=? | ||
|prize=2 EXP | |prize=2 EXP | ||
| | |strategy=In comparison to Wakka and Selphie, Tidus is a fairly average opponent, having the second highest amount of HP in the trio. Deflect his attacks with your own to earn two tech points, and land combos whenever possible while running around to avoid his. Tidus will fall once he has been hit enough times.}} | ||
|strategy= | {{tab|c}}{{tab|c}} | ||
{{-}} | |||
On the 3-on-1 battle, you should go for Selphie first. Not only because she's the weakest of the three, her special attack will most likely be annoying when around since you can't focus on the others. After you defeat her, move on to Tidus. Tidus may be the most powerful of the trio, but his close-range attack will get in the way when you're trying to chase and beat up Wakka. Wakka's throws will most likely miss you when you're doing combo on someone anyway. After defeating Tidus, defeat Wakka using the same strategy as above. | |||
The other opponent you can face before returning to {{Wtext|Kairi|c}} is {{Wtext|Riku|b}} himself, who yields a {{Wtext|Potion|i}} each time he is defeated (you can repeat the duel as many times as you like to obtain a grand total of 99 {{Wtext|Potions|i}}). | |||
{{Template:WKH1SBoss | |||
|name=Riku | |||
|image=Riku (Battle) KH.png | |||
|size=100px | |||
|hp=90 HP | |||
|strength=5 | |||
|defense=5 | |||
|status=Immune to Everything. | |||
|physical=x1.0 | |||
|fire=x0 | |||
|blizzard=x0 | |||
|thunder=x0 | |||
|gravity=x0.0 | |||
|stop=x0 | |||
|prize=5 EXP, Potion | |||
|strategy=Riku is by far the strongest opponent you can fight at this stage of the game. He will leap high into the air to avoid Sora's attacks, often countering with his own. Avoid attacking when Riku raises his sword in front of him defensively, or he will perform a powerful downward strike once he lowers his guard. You may occasionally knock Riku onto his back after landing a successful combo; be sure to dodge the devastating kick attack he uses to get back onto his feet. While you can defeat Riku simply by striking him whenever it is safe to do so, realize that if you fall off the island at any point during the battle, you lose, regardless of your HP.}} | |||
Once you've returned to {{Wtext|Kairi|c}} after having collected all the items she asked for and had enough practice duels against friends, speak to her to receive a {{Wtext|Hi-Potion|i}}. Decide to "call it a day" to begin a short cutscene depicting a conversation between {{Wtext|Sora|c}}, {{Wtext|Kairi|c}}, and {{Wtext|Riku|c}} about the possibility of other worlds existing away from their own. Another cutscene then shows another world called {{Wtext|Disney Castle|l}}, where {{Wtext|Donald Duck|c}} discovers {{Wtext|Pluto|c}} with mysterious letter in his mouth. {{Wtext|Donald|c}} rushes off to find {{Wtext|Goofy|c}}, whom he wakes up from a nap to discuss a serious problem. As the two friends discover {{Wtext|Queen Minnie|c}} and {{Wtext|Princess Daisy|c}} standing nearby, gameplay resumes on the Destiny Islands. | |||
Head through the doorway where {{Wtext|Kairi|c}} previously stood to find {{Wtext|Riku|c}}, who asks you to decide on a name for the raft that he, {{Wtext|Sora|c}}, and {{Wtext|Kairi|c}} wish to build. He suggests the name "Highwind," but you are allowed to select anything you wish (the default name of {{Wtext|Sora|c}}'s choosing is "Excalibur"). After you select your name, {{Wtext|Riku|c}} challenges you to a race, after which {{Wtext|Kairi|c}} arrives to be the judge. After she explains the rules to you, the race begins. | |||
{{WKH1MG | |||
|name=Minigame: Race with Riku | |||
|strategy=Racing with {{Wtext|Riku|c}} is easier than it looks if you know which path to take. There are 3 paths you can take after the wooden bridge when heading towards the star "checkpoint", and 2 paths after you hit the checkpoint and return to {{Wtext|Kairi|c}}. Here's a recommendation of the paths you should choose to easily win the race: | |||
Run across the wooden platforms and then jump once you get to the faulty platform and land on the last wood platform. If you outrun {{Wtext|Riku|c}} when jumping at the faulty platform, {{Wtext|Riku|c}} may fall when he tries to step on the platform, greatly slowing him down. Then you have to climb the viewpoint and slide across the zipline and jump over the mossy rocks and hit the star. Then hop over each of the trees to reach the viewpoint, run across the wood platforms to reach Kairi and you've won. | |||
If you win the race, you receive a {{Wtext|Pretty Stone|i}}. You can repeat this minigame as many times as you like; it may be wise to stock up on {{Wtext|Pretty Stones|i}} since they can be sold later on for some extra Munny, which may prove useful for the early portions of the game.}} | |||
Regardless of the race's outcome, you must speak to {{Wtext|Kairi|c}} yet again (find her standing on the raft at the other end of the {{Wtext|Cove|l}}). It turns out there are more items that must be collected before she, {{Wtext|Sora|c}}, and {{Wtext|Riku|c}} can set sail for other worlds the next day. These items are as follows: | |||
*One {{Wtext|Seagull Egg|i}} | |||
*Three {{Wtext|Mushrooms|i}} | |||
*Two {{Wtext|Coconuts|i}} | |||
*Three {{Wtext|Fish|i}} | |||
*{{Wtext|Drinking Water|i}} | |||
Again, all of these items can be obtained on the island. The {{Wtext|fish|i}} can be found swimming in the water in the {{Wtext|Seashore|l}}. The {{Wtext|coconuts|i}} can be obtained by hitting the fat palm trees (you're looking for green coconuts, so any brown ones that fall will not be collected). The {{Wtext|seagull egg|i}} is located at the top of one of the palm trees near the bridge by the door to the Seaside Shack. The {{Wtext|mushrooms|i}} are scattered around the island. One is behind the rock in an alcove in the {{Wtext|Cove|l}}. The second is near a post that is also located in the {{Wtext|Cove|l}}. | |||
The final mushroom is in the {{Wtext|Secret Place|l}}, but once you obtain it, a cutscene plays showing {{Wtext|Sora|c}} finishing the Paopu Fruit drawing he started when he was four. When {{Wtext|Sora|c}} stands, he finds a mysterious cloaked figure standing behind him who speaks of the world being "tied to the darkness" and how it is "soon to be completely eclipsed." The figure insults {{Wtext|Sora|c}}'s intelligence, vanishing as gameplay resumes. Exit the {{Wtext|Secret Place|l}} and collect the {{Wtext|Drinking Water|i}} by walking under the waterfall to the left. Now that you have collected all the items, seize the opportunity to duel {{Wtext|Tidus|c}}, {{Wtext|Selphie|c}}, and {{Wtext|Wakka|c}} or race {{Wtext|Riku|c}} again and locate the hidden {{Wtext|Treasure Chest|t}} in the {{Wtext|Cove|l}}, which is located near the wooden tower. Pick up one of the nearby wooden crates and throw it against the wall with a hole in it. Climb up into the hole and open the chest to receive a {{Wtext|Protect Chain|a}}. Finally, return to {{Wtext|Kairi|c}}, speak to her to obtain another {{Wtext|Hi-Potion|i}}. | |||
Once this is complete, return to {{Wtext|Kairi|c}} and choose to "go home" to begin a cutscene in which {{Wtext|Sora|c}} listens to {{Wtext|Kairi|c}} speak of how {{Wtext|Riku|c}} has changed and how much she can't wait to set sail. Soon after, another cutscene shows the text of the letter {{Wtext|Donald|c}} previously discovered. {{Wtext|Donald|c}} and {{Wtext|Goofy|c}} leave {{Wtext|Disney Castle|l}} along with {{Wtext|Jiminy Cricket|c}} after speaking with {{Wtext|Minnie|c}} and {{Wtext|Daisy|c}}, determined to find the one possessing the "key" as {{Wtext|King Mickey|c}} had directed in his letter. {{Wtext|Sora|c}} is then seen in his room on {{Wtext|Destiny Islands|l}}, and he suddenly notices a strange storm off in the distance. {{Wtext|Sora|c}} leaves to investigate, and just when he discovers {{Wtext|Riku|c}} and {{Wtext|Kairi|c}}'s boats, mysterious black creatures with glowing yellow eyes spawn nearby. | |||
These enemies, called Heartless (the variants spawning in each area are specifically known as {{Wtext|Shadow|e}}s), are immune to physical damage from {{Wtext|Sora|c}}'s wooden sword, so ignore them and run to the bent Paopu tree, where you will find {{Wtext|Riku|c}}. After another cutscene, {{Wtext|Riku|c}} vanishes into the darkness and {{Wtext|Sora|c}} gains a mysterious new weapon known as the Keyblade. You can now attack the Shadows to your heart's content. The Heartless will continue to appear no matter where you go, so this is an excellent opportunity to gain some much-needed experience. Make your way into the {{Wtext|Secret Place|l}}, where you will find {{Wtext|Kairi|c}} and the door inside will open, propelling both of you out of the cave and directly into a battle against another {{Wtext|Darkside|b}}. | |||
{{Template:WKH1HBoss | {{Template:WKH1HBoss | ||
|name=Darkside | |name=Darkside | ||
|image=Darkside KH.png | |image=Darkside KH.png | ||
|size= | |size=200px | ||
|hp=300 HP | |hp=300 HP | ||
|strength=6 | |strength=6 | ||
|defense=6 | |defense=6 | ||
| | |mpr=0 | ||
|exp=60 | |||
|physical=x1.0 | |physical=x1.0 | ||
|fire=x0.49 | |fire=x0.49 | ||
| Line 125: | Line 186: | ||
|gravity=x0.04 | |gravity=x0.04 | ||
|stop=x0 | |stop=x0 | ||
| | |ko=x0.5 | ||
| | |other=x0.5 | ||
| | |prize=N/A | ||
|strategy=Once you enter battle, keep attacking the Darkside's hands. The boss will instantly use its projectile attack, so be sure to avoid the energy beams it fires as they home in on your location. The only other attack in the Darkside's arsenal is a powerful downward punch that spawns a pool of darkness, but also fortunately leaves its fist wide open for attack. While you don't necessarily have to worry about your HP during this battle, you can always use a {{Wtext|Potion|i}} if it drops to critical status. Simply continue attacking the Darkside, and it will go down in no time.}} | |strategy=Once you enter battle, keep attacking the Darkside's hands. The boss will instantly use its projectile attack, so be sure to avoid the energy beams it fires as they home in on your location. The only other attack in the Darkside's arsenal is a powerful downward punch that spawns a pool of darkness, but also fortunately leaves its fist wide open for attack. While you don't necessarily have to worry about your HP during this battle, you can always use a {{Wtext|Potion|i}} if it drops to critical status. Simply continue attacking the Darkside, and it will go down in no time.}} | ||
After the {{Wtext|Darkside|b}} is defeated, both {{Wtext|Sora|c}} and the {{Wtext|Darkside|b}} will be sucked in by a vortex of darkness. {{Wtext|Sora|c}} will then wake up on [[Walkthrough: Kingdom Hearts/Traverse Town|a place he has never seen before]]. | |||
{{WKH1TOC}} | |||
[[Category:Kingdom Hearts walkthrough|{{SUBPAGENAME}}]] | |||
Latest revision as of 18:38, 6 January 2022
When you first begin the game on Destiny Islands, Sora wakes up on the beach, where he and Kairi talk. Sora tells Kairi about the dream he had, after which you are introduced to Riku, Sora's rival and friend. Speak to Kairi (who's by the doorway located on the other end of the area) once gameplay resumes, and she will tell you to get the following items:
All of these can be obtained in this section of the island. One of the logs can be obtained from the shore underneath the bridge. You can get the second log from the island across; use the bridge to get to it. You can find the Rope on the platform on the west end of this side of the island. Lastly, the cloth can be obtained from the tree-house in the middle of this side of the island.
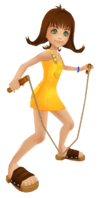
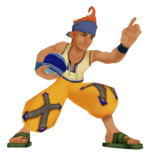
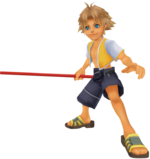
Once you have collected each of the items on Kairi's list (or even while in the process of collecting them), try your luck battling Tidus, Selphie, or Wakka to gain some early experience, or attempt defeating all three at once to receive a Potion.
| Selphie | |||||
|---|---|---|---|---|---|
| HP | STR | DEF | MP R | EXP | |
| 45 | 5 | 5 | |||
| Resistances | Weapon | Fire | Blizzard | Thunder | |
| x1.0 | ? | ? | ? | ||
| Gravity | Stop | KO | Other | ||
| ? | ? | ||||
| Rewards | 1 EXP | ||||
| Selphie is the weakest character you can battle on the Destiny Islands in terms of HP, but she is slightly more skilled at dodging attacks than Tidus or Wakka. All of her attacks have a longer-than-average range, but you can easily avoid them with a simple run (note that careful timing from one of your own attacks will deflect Selphie's, earning you one tech point each time this occurs). All you must do to win this battle is attack Selphie whenever it is safe to do so. | |||||
| Wakka | |||||
|---|---|---|---|---|---|
| HP | STR | DEF | MP R | EXP | |
| 75 | 5 | 5 | |||
| Resistances | Weapon | Fire | Blizzard | Thunder | |
| x1.0 | ? | ? | ? | ||
| Gravity | Stop | KO | Other | ||
| ? | ? | ||||
| Rewards | 1 EXP | ||||
| Wakka has more HP than his companions Tidus and Selphie, but he is just as easy to defeat. His primary source of offense is the blitzball he carries, which he will throw at you from afar to deal damage (note that you can strike the ball as it flies towards you and send it flying back at Wakka to stun him; you earn one tech point each time this occurs). Wakka also will perform a spinning melee attack whenever you are at close range, but a simple run can avoid it. His strongest attack occurs whenever he shouts "Take this!", after which he leaps into the air and throws the blitzball at you with greater force (successfully deflecting this attack yields two tech points). Simply continue attacking Wakka and deflecting his attacks to obtain victory. | |||||
| Tidus | |||||
|---|---|---|---|---|---|
| HP | STR | DEF | MP R | EXP | |
| 60 | 5 | 5 | |||
| Resistances | Weapon | Fire | Blizzard | Thunder | |
| x1.0 | ? | ? | ? | ||
| Gravity | Stop | KO | Other | ||
| ? | ? | ||||
| Rewards | 2 EXP | ||||
| In comparison to Wakka and Selphie, Tidus is a fairly average opponent, having the second highest amount of HP in the trio. Deflect his attacks with your own to earn two tech points, and land combos whenever possible while running around to avoid his. Tidus will fall once he has been hit enough times. | |||||
On the 3-on-1 battle, you should go for Selphie first. Not only because she's the weakest of the three, her special attack will most likely be annoying when around since you can't focus on the others. After you defeat her, move on to Tidus. Tidus may be the most powerful of the trio, but his close-range attack will get in the way when you're trying to chase and beat up Wakka. Wakka's throws will most likely miss you when you're doing combo on someone anyway. After defeating Tidus, defeat Wakka using the same strategy as above.
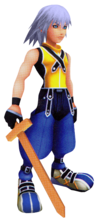
The other opponent you can face before returning to Kairi is Riku himself, who yields a Potion each time he is defeated (you can repeat the duel as many times as you like to obtain a grand total of 99 Potions).
| Riku | |||||
|---|---|---|---|---|---|
| HP | STR | DEF | MP R | EXP | |
| 90 HP | 5 | 5 | |||
| Resistances | Weapon | Fire | Blizzard | Thunder | |
| x1.0 | x0 | x0 | x0 | ||
| Gravity | Stop | KO | Other | ||
| x0.0 | x0 | ||||
| Rewards | 5 EXP, Potion | ||||
| Riku is by far the strongest opponent you can fight at this stage of the game. He will leap high into the air to avoid Sora's attacks, often countering with his own. Avoid attacking when Riku raises his sword in front of him defensively, or he will perform a powerful downward strike once he lowers his guard. You may occasionally knock Riku onto his back after landing a successful combo; be sure to dodge the devastating kick attack he uses to get back onto his feet. While you can defeat Riku simply by striking him whenever it is safe to do so, realize that if you fall off the island at any point during the battle, you lose, regardless of your HP. | |||||
Once you've returned to Kairi after having collected all the items she asked for and had enough practice duels against friends, speak to her to receive a Hi-Potion. Decide to "call it a day" to begin a short cutscene depicting a conversation between Sora, Kairi, and Riku about the possibility of other worlds existing away from their own. Another cutscene then shows another world called Disney Castle, where Donald Duck discovers Pluto with mysterious letter in his mouth. Donald rushes off to find Goofy, whom he wakes up from a nap to discuss a serious problem. As the two friends discover Queen Minnie and Princess Daisy standing nearby, gameplay resumes on the Destiny Islands.
Head through the doorway where Kairi previously stood to find Riku, who asks you to decide on a name for the raft that he, Sora, and Kairi wish to build. He suggests the name "Highwind," but you are allowed to select anything you wish (the default name of Sora's choosing is "Excalibur"). After you select your name, Riku challenges you to a race, after which Kairi arrives to be the judge. After she explains the rules to you, the race begins.
| Minigame: Race with Riku |
|---|
| Racing with Riku is easier than it looks if you know which path to take. There are 3 paths you can take after the wooden bridge when heading towards the star "checkpoint", and 2 paths after you hit the checkpoint and return to Kairi. Here's a recommendation of the paths you should choose to easily win the race:
Run across the wooden platforms and then jump once you get to the faulty platform and land on the last wood platform. If you outrun Riku when jumping at the faulty platform, Riku may fall when he tries to step on the platform, greatly slowing him down. Then you have to climb the viewpoint and slide across the zipline and jump over the mossy rocks and hit the star. Then hop over each of the trees to reach the viewpoint, run across the wood platforms to reach Kairi and you've won. If you win the race, you receive a Pretty Stone. You can repeat this minigame as many times as you like; it may be wise to stock up on Pretty Stones since they can be sold later on for some extra Munny, which may prove useful for the early portions of the game. |
Regardless of the race's outcome, you must speak to Kairi yet again (find her standing on the raft at the other end of the Cove). It turns out there are more items that must be collected before she, Sora, and Riku can set sail for other worlds the next day. These items are as follows:
- One Seagull Egg
- Three Mushrooms
- Two Coconuts
- Three Fish
- Drinking Water
Again, all of these items can be obtained on the island. The fish can be found swimming in the water in the Seashore. The coconuts can be obtained by hitting the fat palm trees (you're looking for green coconuts, so any brown ones that fall will not be collected). The seagull egg is located at the top of one of the palm trees near the bridge by the door to the Seaside Shack. The mushrooms are scattered around the island. One is behind the rock in an alcove in the Cove. The second is near a post that is also located in the Cove.
The final mushroom is in the Secret Place, but once you obtain it, a cutscene plays showing Sora finishing the Paopu Fruit drawing he started when he was four. When Sora stands, he finds a mysterious cloaked figure standing behind him who speaks of the world being "tied to the darkness" and how it is "soon to be completely eclipsed." The figure insults Sora's intelligence, vanishing as gameplay resumes. Exit the Secret Place and collect the Drinking Water by walking under the waterfall to the left. Now that you have collected all the items, seize the opportunity to duel Tidus, Selphie, and Wakka or race Riku again and locate the hidden Treasure Chest in the Cove, which is located near the wooden tower. Pick up one of the nearby wooden crates and throw it against the wall with a hole in it. Climb up into the hole and open the chest to receive a Protect Chain. Finally, return to Kairi, speak to her to obtain another Hi-Potion.
Once this is complete, return to Kairi and choose to "go home" to begin a cutscene in which Sora listens to Kairi speak of how Riku has changed and how much she can't wait to set sail. Soon after, another cutscene shows the text of the letter Donald previously discovered. Donald and Goofy leave Disney Castle along with Jiminy Cricket after speaking with Minnie and Daisy, determined to find the one possessing the "key" as King Mickey had directed in his letter. Sora is then seen in his room on Destiny Islands, and he suddenly notices a strange storm off in the distance. Sora leaves to investigate, and just when he discovers Riku and Kairi's boats, mysterious black creatures with glowing yellow eyes spawn nearby.
These enemies, called Heartless (the variants spawning in each area are specifically known as Shadows), are immune to physical damage from Sora's wooden sword, so ignore them and run to the bent Paopu tree, where you will find Riku. After another cutscene, Riku vanishes into the darkness and Sora gains a mysterious new weapon known as the Keyblade. You can now attack the Shadows to your heart's content. The Heartless will continue to appear no matter where you go, so this is an excellent opportunity to gain some much-needed experience. Make your way into the Secret Place, where you will find Kairi and the door inside will open, propelling both of you out of the cave and directly into a battle against another Darkside.
| Darkside | |||||
|---|---|---|---|---|---|
| HP | STR | DEF | MP R | EXP | |
| 300 HP | 6 | 6 | 0 | 60 | |
| Resistances | Weapon | Fire | Blizzard | Thunder | |
| x1.0 | x0.49 | x0.5 | x1.0 | ||
| Gravity | Stop | KO | Other | ||
| x0.04 | x0 | x0.5 | x0.5 | ||
| Rewards | N/A | ||||
| Once you enter battle, keep attacking the Darkside's hands. The boss will instantly use its projectile attack, so be sure to avoid the energy beams it fires as they home in on your location. The only other attack in the Darkside's arsenal is a powerful downward punch that spawns a pool of darkness, but also fortunately leaves its fist wide open for attack. While you don't necessarily have to worry about your HP during this battle, you can always use a Potion if it drops to critical status. Simply continue attacking the Darkside, and it will go down in no time. | |||||
After the Darkside is defeated, both Sora and the Darkside will be sucked in by a vortex of darkness. Sora will then wake up on a place he has never seen before.
| Kingdom Hearts |
|---|
| Walkthrough |
| Dive to the Heart - Destiny Islands - Traverse Town - Wonderland - Olympus Coliseum - Deep Jungle - 100 Acre Wood - Agrabah - Monstro - Atlantica - Halloween Town - Neverland - Hollow Bastion - End of the World |
| Other |
| 99 Puppies - Trinity Marks - Gummi Missions - Trophies |
