Game:San Fransokyo: Difference between revisions
From the Kingdom Hearts Wiki, the Kingdom Hearts encyclopedia
Jump to navigationJump to search
(describing these is dummy difficult) |
No edit summary |
||
| (3 intermediate revisions by 2 users not shown) | |||
| Line 1: | Line 1: | ||
{{suite}} | {{suite}} | ||
==''Kingdom Hearts III''== | ==''Kingdom Hearts III''== | ||
===Battle Levels=== | ===Battle Levels=== | ||
*After completing The Final World: | *Before completing The Final World: 38 | ||
*After completing The Final World: 42 | |||
===Drops=== | ===Drops=== | ||
{|cellspacing="0" cellpadding="5" border="1" align="center" | {|cellspacing="0" cellpadding="5" border="1" align="center" style="width:200px" | ||
!style=" | !style="{{style|kh3|a}}"|Item<!-- | ||
Possible, need confirming: | |||
|- | |- | ||
| | |[[File:Icon Material KHIII.png|20px]] [[Mythril Gem]]--> | ||
|- | |||
|[[File:Icon Material KHIII.png|20px]] [[Mythril Crystal]]<!-- | |||
Possible, need confirming: | |||
|- | |||
|[[File:Icon Material KHIII.png|20px]] [[Soothing Stone]]--> | |||
|} | |} | ||
===Treasures=== | ===Treasures=== | ||
{|cellspacing="0" cellpadding="5" border="1" align="center" width=" | {|cellspacing="0" cellpadding="5" border="1" align="center" style="width:900px" | ||
!style=" | |-style="{{style|kh3|a}}" | ||
!style=" | !style="width:2%"|# | ||
!style=" | !style="width:33%"|Item | ||
!style=" | !style="width:25%"|Location | ||
!style="width:40%"|Notes | |||
|- | |||
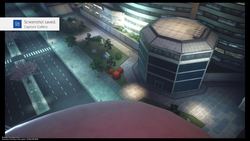
| 1 || [[File:Icon Armor KHIII.png|20px]] [[Aegis Chain]] || Central District || Under heli-pad on top of non-lit circular building on west side | |||
|- | |||
| 2 || [[File:Icon Accessory KHIII.png|20px]] [[Skill Ring+]] || South District || Inbetween structures on top of slightly-dome shaped building | |||
|- | |||
| 3 || [[File:Icon Key Item KHIII.png|20px]] [[Map:The City]] || South District || Near building with blue neon lights running up the corners | |||
|- | |||
| 4 || [[File:Icon Item KHIII.png|20px]] [[Hi-Refocuser]] || South District || Below the start of west roadway | |||
|- | |||
| 5 || [[File:Icon Tent KHIII.png|20px]] [[AP Boost]] || North District || North-most hub of shops | |||
|- | |||
| 6 || [[File:Icon Material KHIII.png|20px]] [[Electrum]] || North District || Near the road on stylized awning of pyramid-topped building | |||
|- | |||
| 7 || [[File:Icon Accessory KHIII.png|20px]] [[Phantom Ring]] || South District || Near vending machine near end of zig-zag pattern of trees | |||
|- | |||
| 8 || [[File:Icon Tent KHIII.png|20px]] [[AP Boost]] || Central District || On roof of right-side building off of western-most road | |||
|- | |||
| 9 || [[File:Icon Item KHIII.png|20px]] [[Mega-Ether]] || Central District || On ledge up royal blue horizontal-striped building | |||
|- | |||
| 10 || [[File:Icon Material KHIII.png|20px]] [[Adamantite]] || North District || On terrace near roadway tunnel | |||
|- | |||
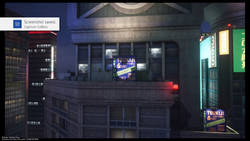
| 11 || [[File:Icon Item KHIII.png|20px]] [[Mega-Potion]] || South District || Top of tower with hexagonal ads, below a small radio tower | |||
|- | |||
| 12 || [[File:Icon Armor KHIII.png|20px]] [[Thundaga Trinket]] || South District || Top of tower with hexagonal ads, below a small radio tower | |||
|- | |||
| 13 || [[File:Icon Item KHIII.png|20px]] [[Elixir]] || North District || Next to vending machine on right side of western-most road | |||
|- | |||
| 14 || [[File:Icon Armor KHIII.png|20px]] [[Storm Fan]] || North District || On top of building in market district off of western-most road | |||
|- | |||
| 15 || [[File:Icon Tent KHIII.png|20px]] [[AP Boost]] || North District || On rooftop of a cluster of buildings west of tunnel | |||
|- | |||
| 16 || [[File:Icon Tent KHIII.png|20px]] [[Magic Boost]] || Central District || Second floor outside of building on main west-east road | |||
|- | |||
| 17 || [[File:Icon Item KHIII.png|20px]] [[Hi-Ether]] || Central District || On ledge of building on left side of western elevated road | |||
|- | |||
| 18 || [[File:Icon Item KHIII.png|20px]] [[Mega-Ether]] || South District || Top of tower with hexagonal ads, below a small radio tower | |||
|- | |||
| 19 || [[File:Icon Staff KHIII.png|20px]] [[Nirvana+]] || Central District || Top of pyramid-topped building | |||
|- | |||
| 20 || [[File:Icon Tent KHIII.png|20px]] [[AP Boost]] || South District || Under building with lantern arch | |||
|- | |||
| 21 || [[File:Icon Material KHIII.png|20px]] [[Damascus]] || South District || In corner of building near zig-zag pattern of trees | |||
|- | |- | ||
| | | 22 || [[File:Icon Material KHIII.png|20px]] [[Adamantite]] || North District || Behind ad-wall next to save point | ||
|- | |- | ||
| | | 23 || [[File:Icon Armor KHIII.png|20px]] [[Divine Bandanna]] || Central District || Inbetween vending machines below royal blue horizontal-striped building | ||
|- | |- | ||
| | | 24 || [[File:Icon Item KHIII.png|20px]] [[Hi-Refocuser]] || Central District || On ledge behind ad board on royal blue horizontal-striped building | ||
|- | |- | ||
| | | 25 || [[File:Icon Accessory KHIII.png|20px]] [[Star Charm]] || Central District || On ledge of structure next to lower runway (running north-south) | ||
|- | |- | ||
| | | 26 || [[File:Icon Material KHIII.png|20px]] [[Electrum]] || Central District || Inbetween two buildings on west side cluster located north of main east-west street | ||
|- | |- | ||
| | | 27 || [[File:Icon Armor KHIII.png|20px]] [[Buster Band]] || South District || On structure below lantern arch | ||
|- | |- | ||
| | | 28 || [[File:Icon Tent KHIII.png|20px]] [[Magic Boost]] || North District || Above tunnel arch on north side | ||
|- | |- | ||
| | | 29 || [[File:Icon Tent KHIII.png|20px]] [[Strength Boost]] || North District || In alleyway in north-most hub of shops | ||
|- | |- | ||
| | | 30 || [[File:Icon Armor KHIII.png|20px]] [[Midnight Anklet]] || Central District || Under heli-pad on top of non-lit circular building on west side | ||
|- | |- | ||
| | | 31 || [[File:Icon Item KHIII.png|20px]] [[Mega-Potion]] || South District || Behind red billboard at top of south-most building | ||
|- | |- | ||
| | | 32 || [[File:Icon Material KHIII.png|20px]] [[Damascus]] || North District || In alleyway in north-most hub of shops | ||
|- | |- | ||
| | | 33 || [[File:Icon Tent KHIII.png|20px]] [[AP Boost]] || North District || Ledge on top of building with light blue neon lights running up | ||
|- | |- | ||
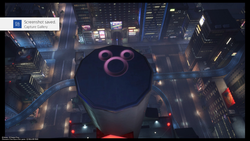
| | | 34 || [[File:Icon Key Item KHIII.png|20px]] [[Mickey's Mechanical Man]] || Central District || Red circle on top of western building | ||
|- | |- | ||
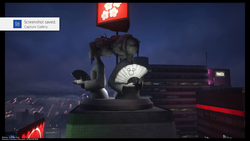
| | | 35 || [[File:Icon Key Item KHIII.png|20px]] [[How to Play Baseball]] || South District || Base of prominent red radio tower | ||
|- | |||
| 36 || [[File:Icon Key Item KHIII.png|20px]] [[Mickey Steps Out]] || South District || Requires Diving Stike onto ad column from north side of rounded-square shaped building in southeast | |||
|} | |||
====Rewards==== | |||
{|cellspacing="0" cellpadding="5" border="1" align="center" style="width:900px" | |||
|-style="{{style|kh3|a}}" | |||
!style="width:35%"|Item | |||
!style="width:25%"|Location | |||
!style="width:40%"|Notes | |||
|- | |- | ||
| | |[[File:Icon Key Item KHIII.png|20px]] [[AR Device]]<br>[[File:Icon Ability KHIII.png|20px]] [[Focus Syphon]]||Hiro's Garage||Meet Big Hero 6. | ||
|- | |- | ||
| | |[[File:Icon Key Item KHIII.png|20px]] [['Ohana Heartbinder]]||The City||Complete Course A of Flash Tracer. | ||
|- | |- | ||
| | |[[File:Icon Armor KHIII.png|20px]] [[Hero's Glove]]||The City||Rescue Go Go, Wasabi, Honey Lemon, and Fred from the Darkubes. | ||
|- | |- | ||
| | |[[File:Icon Keyblade KHIII.png|20px]] [[Nano Gear]]||The City||Defeat Dark Baymax. | ||
|- | |- | ||
| | |[[File:Icon Ability KHIII.png|20px]] [[Attraction Enhancer]]<br>[[File:Icon Tent KHIII.png|20px]] [[Strength Boost]]||The City||Obtain an A rank in Course A of Flash Tracer (1st time). | ||
|- | |- | ||
| | |[[File:Icon Accessory KHIII.png|20px]] [[Star Medal]]<ref>Has the [[Second Chance]], [[Thunder Boost]], or [[Damage Syphon]] ability.</ref>||The City||Obtain an A rank in Course A of Flash Tracer (2nd+ time). | ||
|- | |- | ||
| | |[[File:Icon Accessory KHIII.png|20px]] [[Master Medal]]<ref>Has the [[Thunder Syphon]] or [[Stun Protection]] ability.</ref>||The City||Obtain a B rank in Course A of Flash Tracer. | ||
|- | |- | ||
| | |[[File:Icon Material KHIII.png|20px]] [[Wellspring Stone]]||The City||Obtain a C rank in Course A of Flash Tracer. | ||
|- | |- | ||
| | |[[File:Icon Material KHIII.png|20px]] [[Wellspring Shard]]||The City||Obtain a D rank in Course A of Flash Tracer. | ||
|- | |- | ||
| | |[[File:Icon Ability KHIII.png|20px]] [[Grand Magic Extender]]<br>[[File:Icon Tent KHIII.png|20px]] [[Magic Boost]]||The City||Obtain an A rank in Course B of Flash Tracer (1st time). | ||
|- | |- | ||
| | |[[File:Icon Accessory KHIII.png|20px]] [[Star Medal]]<ref>Has the [[Aero Boost]], [[Item Boost]], or [[Dark Syphon]] ability.</ref>||The City||Obtain an A rank in Course B of Flash Tracer (2nd+ time). | ||
|- | |- | ||
| | |[[File:Icon Accessory KHIII.png|20px]] [[Master Medal]]<ref>Has the [[Fire Syphon]] or [[Aero Syphon]] ability.</ref>||The City||Obtain a B rank in Course B of Flash Tracer. | ||
|- | |- | ||
| | |[[File:Icon Material KHIII.png|20px]] [[Wellspring Stone]]||The City||Obtain a C rank in Course B of Flash Tracer. | ||
|- | |- | ||
| | |[[File:Icon Material KHIII.png|20px]] [[Wellspring Shard]]||The City||Obtain a D rank in Course B of Flash Tracer. | ||
|- | |- | ||
| | |[[File:Icon Accessory KHIII.png|20px]] [[Yin-Yang Cufflink]]<br>[[File:Secret Report KHIII.png|20px]] {{n|Secret Report|11}}||North District||Clear [[Battlegate 11]]. | ||
|- | |- | ||
| | |[[File:Icon Accessory KHIII.png|20px]] [[Blizzard Cufflink]]<br>[[File:Secret Report KHIII.png|20px]] {{n|Secret Report|12}}||Central District||Clear [[Battlegate 12]]. | ||
|} | |||
{{reflist}} | |||
===Bonus Levels=== | |||
{|cellspacing="0" cellpadding="5" border="1" align="center" style="width:900px" | |||
|-style="{{style|kh3|a}}" | |||
!style="width:40%"|Objective | |||
!style="width:35%"|Reward | |||
!style="width:25%"|Location | |||
|- | |- | ||
| | |Defeat the [[Metal Troll]]||'''Donald''': [[Hyper Healing]]<br>'''Goofy''': Armor Slots +1||Bridge | ||
|- | |- | ||
| | |Defeat the [[Heartless]] at the South District||'''Donald''': Maximum HP +10<br>'''Goofy''': [[Damage Control]]||South District | ||
|- | |- | ||
| | |Defeat the [[Catastrochorus]]||'''Sora''': [[Firaga]]||Central District | ||
|- | |- | ||
| | |Rescue [[Go Go]], [[Wasabi]], [[Honey Lemon]], and [[Fred]] from the [[Darkubes]]||'''Sora''': [[Superslide]]<ref name="crit">In Critical Mode, Sora has this ability by default.</ref>||The City | ||
|- | |- | ||
| | |Defeat the Darkubes||'''Sora''': Armor Slots +1<br>'''Goofy''': [[Withstand Combo]]||South District | ||
|- | |- | ||
| | |Defeat [[Dark Baymax]]||'''Sora''': Maximum HP +10, [[Aerora]]||The City | ||
|} | |} | ||
{{reflist}} | |||
===Ingredients=== | ===Ingredients=== | ||
{|cellspacing="0" cellpadding="5" border="1" align="center" width=" | {|cellspacing="0" cellpadding="5" border="1" align="center" style="width:900px" | ||
!style=" | |-style="{{style|kh3|a}}" | ||
!style=" | !style="width:30%"|Ingredient | ||
!style=" | !style="width:30%"|Location | ||
!style=" | !style="width:10%"|Appearance rate | ||
!style="width:30%"|Notes | |||
|- | |||
|Eggplant x2 / Garlic x2||South District||100%||In carton. | |||
|- | |||
|Onion x2 / Eggplant x2||South District||100%||In carton. | |||
|- | |||
|Sea Bass x2 / Rice x2||South District||100%||In food box. | |||
|- | |||
|Quail x2 / Cheese x2||South District||100%||In food box. | |||
|- | |||
|Butter x2 / Olive Oil x2||South District||100%||In food box. | |||
|- | |||
|Zucchini x2 / Tomato x2||South District||100%||In carton. | |||
|- | |||
|Olive Oil x2 / Rice x2||South District||100%||In food box. | |||
|- | |||
|Zucchini x2 / Garlic x2||South District||100%||In carton. | |||
|- | |||
|Quail x2 / Rice x2||Central District||100%||In food box. | |||
|- | |- | ||
|Butter x2 / Olive Oil x2||North District||100%||In food box. | |||
|- | |||
|Tomato x2 / Eggplant x2||North District||100%||In carton. | |||
|- | |||
|Eggplant x2 / Garlic x2||North District||100%||In carton. | |||
|- | |||
|Olive Oil x2 / Rice x2||North District||100%||In food box. | |||
|- | |||
|Zucchini x2 / Garlic x2||North District||100%||In carton. | |||
|- | |||
|Zucchini x2 / Tomato x2||North District||100%||In carton. | |||
|- | |||
|Quail x2 / Cheese x2||North District||100%||In food box. | |||
|} | |} | ||
===Lucky Emblems=== | ===Lucky Emblems=== | ||
{|cellspacing="0" cellpadding="5" border="1" align="center" width=" | {|cellspacing="0" cellpadding="5" border="1" align="center" style="width:900px" | ||
!style=" | |-style="{{style|kh3|a}}" | ||
!style=" | !style="width:5%"|# | ||
!style=" | !style="width:25%"|Image | ||
!style=" | !style="width:25%"|Location | ||
!style="width:45%"|Notes | |||
|- | |- | ||
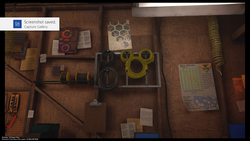
| 1 || [[File:Lucky Emblem (San Fransokyo) 01 KHIII.png|250px]] || Hiro's Garage || Made of wires | | 1 || [[File:Lucky Emblem (San Fransokyo) 01 KHIII.png|250px]] || Hiro's Garage || Made of wires | ||
| Line 134: | Line 233: | ||
|- | |- | ||
|} | |} | ||
[[Category:Gameplay]] | |||
Latest revision as of 12:13, 15 November 2023
Kingdom Hearts III[edit]
Battle Levels[edit]
- Before completing The Final World: 38
- After completing The Final World: 42
Drops[edit]
| Item |
|---|
Treasures[edit]
| # | Item | Location | Notes |
|---|---|---|---|
| 1 | Central District | Under heli-pad on top of non-lit circular building on west side | |
| 2 | South District | Inbetween structures on top of slightly-dome shaped building | |
| 3 | South District | Near building with blue neon lights running up the corners | |
| 4 | South District | Below the start of west roadway | |
| 5 | North District | North-most hub of shops | |
| 6 | North District | Near the road on stylized awning of pyramid-topped building | |
| 7 | South District | Near vending machine near end of zig-zag pattern of trees | |
| 8 | Central District | On roof of right-side building off of western-most road | |
| 9 | Central District | On ledge up royal blue horizontal-striped building | |
| 10 | North District | On terrace near roadway tunnel | |
| 11 | South District | Top of tower with hexagonal ads, below a small radio tower | |
| 12 | South District | Top of tower with hexagonal ads, below a small radio tower | |
| 13 | North District | Next to vending machine on right side of western-most road | |
| 14 | North District | On top of building in market district off of western-most road | |
| 15 | North District | On rooftop of a cluster of buildings west of tunnel | |
| 16 | Central District | Second floor outside of building on main west-east road | |
| 17 | Central District | On ledge of building on left side of western elevated road | |
| 18 | South District | Top of tower with hexagonal ads, below a small radio tower | |
| 19 | Central District | Top of pyramid-topped building | |
| 20 | South District | Under building with lantern arch | |
| 21 | South District | In corner of building near zig-zag pattern of trees | |
| 22 | North District | Behind ad-wall next to save point | |
| 23 | Central District | Inbetween vending machines below royal blue horizontal-striped building | |
| 24 | Central District | On ledge behind ad board on royal blue horizontal-striped building | |
| 25 | Central District | On ledge of structure next to lower runway (running north-south) | |
| 26 | Central District | Inbetween two buildings on west side cluster located north of main east-west street | |
| 27 | South District | On structure below lantern arch | |
| 28 | North District | Above tunnel arch on north side | |
| 29 | North District | In alleyway in north-most hub of shops | |
| 30 | Central District | Under heli-pad on top of non-lit circular building on west side | |
| 31 | South District | Behind red billboard at top of south-most building | |
| 32 | North District | In alleyway in north-most hub of shops | |
| 33 | North District | Ledge on top of building with light blue neon lights running up | |
| 34 | Central District | Red circle on top of western building | |
| 35 | South District | Base of prominent red radio tower | |
| 36 | South District | Requires Diving Stike onto ad column from north side of rounded-square shaped building in southeast |
Rewards[edit]
| Item | Location | Notes |
|---|---|---|
| Hiro's Garage | Meet Big Hero 6. | |
| The City | Complete Course A of Flash Tracer. | |
| The City | Rescue Go Go, Wasabi, Honey Lemon, and Fred from the Darkubes. | |
| The City | Defeat Dark Baymax. | |
| The City | Obtain an A rank in Course A of Flash Tracer (1st time). | |
| The City | Obtain an A rank in Course A of Flash Tracer (2nd+ time). | |
| The City | Obtain a B rank in Course A of Flash Tracer. | |
| The City | Obtain a C rank in Course A of Flash Tracer. | |
| The City | Obtain a D rank in Course A of Flash Tracer. | |
| The City | Obtain an A rank in Course B of Flash Tracer (1st time). | |
| The City | Obtain an A rank in Course B of Flash Tracer (2nd+ time). | |
| The City | Obtain a B rank in Course B of Flash Tracer. | |
| The City | Obtain a C rank in Course B of Flash Tracer. | |
| The City | Obtain a D rank in Course B of Flash Tracer. | |
| North District | Clear Battlegate 11. | |
| Central District | Clear Battlegate 12. |
- ^ Has the Second Chance, Thunder Boost, or Damage Syphon ability.
- ^ Has the Thunder Syphon or Stun Protection ability.
- ^ Has the Aero Boost, Item Boost, or Dark Syphon ability.
- ^ Has the Fire Syphon or Aero Syphon ability.
Bonus Levels[edit]
| Objective | Reward | Location |
|---|---|---|
| Defeat the Metal Troll | Donald: Hyper Healing Goofy: Armor Slots +1 |
Bridge |
| Defeat the Heartless at the South District | Donald: Maximum HP +10 Goofy: Damage Control |
South District |
| Defeat the Catastrochorus | Sora: Firaga | Central District |
| Rescue Go Go, Wasabi, Honey Lemon, and Fred from the Darkubes | Sora: Superslide[1] | The City |
| Defeat the Darkubes | Sora: Armor Slots +1 Goofy: Withstand Combo |
South District |
| Defeat Dark Baymax | Sora: Maximum HP +10, Aerora | The City |
- ^ In Critical Mode, Sora has this ability by default.
Ingredients[edit]
| Ingredient | Location | Appearance rate | Notes |
|---|---|---|---|
| Eggplant x2 / Garlic x2 | South District | 100% | In carton. |
| Onion x2 / Eggplant x2 | South District | 100% | In carton. |
| Sea Bass x2 / Rice x2 | South District | 100% | In food box. |
| Quail x2 / Cheese x2 | South District | 100% | In food box. |
| Butter x2 / Olive Oil x2 | South District | 100% | In food box. |
| Zucchini x2 / Tomato x2 | South District | 100% | In carton. |
| Olive Oil x2 / Rice x2 | South District | 100% | In food box. |
| Zucchini x2 / Garlic x2 | South District | 100% | In carton. |
| Quail x2 / Rice x2 | Central District | 100% | In food box. |
| Butter x2 / Olive Oil x2 | North District | 100% | In food box. |
| Tomato x2 / Eggplant x2 | North District | 100% | In carton. |
| Eggplant x2 / Garlic x2 | North District | 100% | In carton. |
| Olive Oil x2 / Rice x2 | North District | 100% | In food box. |
| Zucchini x2 / Garlic x2 | North District | 100% | In carton. |
| Zucchini x2 / Tomato x2 | North District | 100% | In carton. |
| Quail x2 / Cheese x2 | North District | 100% | In food box. |
