Puzzle: Difference between revisions
| (35 intermediate revisions by 18 users not shown) | |||
| Line 1: | Line 1: | ||
{{Game|FM2 | {{Game|FM2|FA}} | ||
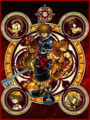
[[File:Puzzle Pieces KHIIFM.png|thumb|200px|A puzzle piece, represented by a crown.]] | |||
[[File:Puzzle | '''Puzzle''' is a sidequest minigame that was added to ''[[Kingdom Hearts II Final Mix]]''. As the name implies, the minigame consists of simple {{w|jigsaw puzzle}}s of six different pieces of artwork that can be assembled from pieces found throughout the game. Successfully completing one of the puzzles by finding all of its pieces and correctly assembling them will result in a reward for Sora. | ||
As [[Sora]] and his party travel throughout the various [[world]]s, they come across puzzle pieces, represented by silver crowns. There are 144 puzzle pieces in all, and each piece will fit into one of the six puzzles. The first four puzzles consist of twelve pieces while the last two puzzles are larger and consist of forty-eight pieces apiece. The puzzles and their pieces can be accessed through [[Jiminy's Journal]]; pieces will not automatically go into the correct spot in the correct puzzle, but must be selected, moved with the left analog stick, and occasionally rotated with the right until they are in the right place. | |||
[[File:Puzzle KHIIFM.png|left|thumb|200px|The Puzzle solving screen, found in [[Jiminy's Journal]].]] | |||
However, some pieces Sora may be unable to get because he lacks the proper abilities. Along with the [[Mushroom XIII]] sidequest minigame which was intended to make players level up [[Wisdom Form]], the Puzzle minigame encourages the player to level up the other [[Drive Form]]s to the highest level. Many of the puzzle pieces require Sora to know [[High Jump]] from [[Valor Form]], [[Aerial Dodge]] from [[Master Form]], and [[Glide]] from [[Final Form]]. Note that some of these may be obtained with the creative use of other forms' abilities (e.g. using [[Master Form]]'s [[Aerial Dodge]] and an attack to reach the puzzle piece at [[Halloween Town]]'s Curly Hill). | |||
The puzzle sidequest is the model for the [[Sticker Album]] quest from ''[[Kingdom Hearts Birth by Sleep]]''. Collectible stickers appear in the field with the same crown-like appearance as the puzzle pieces, and collecting all the stickers and placing them in the album unlocks rewards, just as completing the puzzles do. | |||
{{-}} | |||
==Puzzles and Rewards== | ==Puzzles and Rewards== | ||
;The following Puzzles contain twelve pieces each: | |||
<gallery> | <gallery> | ||
File:Awakening (Puzzle).png|{{nihongo|'''Awakening'''|目覚め|Mezame}}: | File:Awakening (Puzzle).png|{{nihongo|'''Awakening'''|目覚め|Mezame}}:<br>[[AP Boost]] | ||
File:Heart (Puzzle).png|{{nihongo|'''Heart'''|ハ一ト|Hāto}}:<br>[[Serenity Crystal]] | File:Heart (Puzzle).png|{{nihongo|'''Heart'''|ハ一ト|Hāto}}:<br>[[Serenity Crystal]] | ||
File: | File:Duality (Puzzle).png|{{nihongo|'''Duality'''|表裏|Hyouri|lit. "Two Sides"}}:<br>[[Rare Document]] | ||
File: | File:Frontier (Puzzle).png|{{nihongo|'''Frontier'''|EDGE|}}:<br>[[Manifest Illusion]] | ||
</gallery> | </gallery> | ||
'''The following Puzzles contain forty-eight pieces each:''' | '''The following Puzzles contain forty-eight pieces each:''' | ||
<gallery> | <gallery> | ||
File: | File:Daylight (Puzzle).png|{{nihongo|'''Daylight'''|夜明け|Yoake|lit. "Dawn"}}:<br>[[Executive's Ring]] | ||
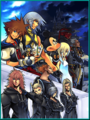
File: | File:Sunset (Puzzle).png|{{nihongo|'''Sunset'''|夕暮れ|Yūgure|lit. "Dusk"}}:<br>[[Grand Ribbon]] | ||
</gallery> | </gallery> | ||
{{-}} | {{-}} | ||
==List of pieces by puzzle== | ==List of pieces by puzzle== | ||
All pieces are arranged and numbered from left to right, row by row. | |||
{{tab|o|1000px}} | |||
{{tab|Awakening}} | |||
{| border="1" cellpadding="4" cellspacing="0" | |||
|-style="{{style|kh2|a}}" | |||
!style="width:10%"|Piece | |||
!style="; width:30%"|Location | |||
!style="; width:60%"|Notes | |||
|- | |- | ||
! | !#1 | ||
|[[Merlin's House]] | |||
| | |||
|Above the bed. | |Above the bed. | ||
|- | |- | ||
!#2 | |||
| | |[[Marketplace]] | ||
|On a ledge near a shophouse. Accessible from the entrance of the world | |On a ledge near a shophouse. Accessible from the entrance of the world. | ||
|- | |- | ||
!#3 | |||
| | |[[Borough]] | ||
|On a wall section near the Bailey. | |On a wall section near the Bailey. | ||
|- | |- | ||
!#4 | |||
| | |[[Undercroft]] | ||
|Top left, back. Accessible by climbing a big pile of furniture. | |Top left, back. Accessible by climbing a big pile of furniture. | ||
|- | |- | ||
!#5 | |||
| | |[[Tower: Wardrobe]] | ||
| | |Acquired after Sora obtains his new clothes from the Fairies. Piece #5 is a mandatory puzzle piece: a cutscene will be played upon leaving the room. | ||
|- | |- | ||
!#6 | |||
| | |[[The Beast's Room]] | ||
| | | | ||
|- | |- | ||
!#7 | |||
| | |[[Underground Passage]] | ||
|At highest point. | |At highest point. | ||
|- | |- | ||
!#8 | |||
| | |[[Ridge]] | ||
|Accessible by riding the air currents and jumping. | |Accessible by riding the air currents and jumping. | ||
|- | |- | ||
!#9 | |||
| | |[[Underground Passage]] | ||
|From the entrance, go straight and turn right. | |From the entrance, go straight and turn right. | ||
|- | |- | ||
!#10 | |||
| | |[[Undercroft]] | ||
|Atop a small pile of furniture. | |Atop a small pile of furniture. | ||
|- | |- | ||
!#11 | |||
| | |[[Ridge]] | ||
|Hidden behind a pile of | |Hidden behind a pile of fireworks. | ||
|- | |- | ||
!#12 | |||
| | |[[Village]] | ||
|On a haystack behind a house. | |On a haystack behind a house. | ||
|} | |} | ||
{{tab|c}} | |||
{{tab|Heart}} | |||
{| border="1" cellpadding=" | {| border="1" cellpadding="4" cellspacing="0" | ||
|-style="{{style|kh2|a}}" | |||
!style=" | !style="width:10%"|Piece | ||
!style=" | !style="width:30%"|Location | ||
!style=" | !style="width:60%"|Notes | ||
|- | |- | ||
!#1 | |||
| | |{{c|Courtyard|dc}} | ||
|Above | |Above the trumpet player bonsai cutting. | ||
|- | |- | ||
!#2 | |||
| | |{{c|Courtyard|dc}} | ||
|On top of the entrance. | |On top of the entrance. | ||
|- | |- | ||
!#3 | |||
| | |[[Cave of the Dead: Entrance]] | ||
| | | | ||
|- | |- | ||
!#4 | |||
| | |[[Underworld Caverns: Atrium]] | ||
|At the entrance. | |At the entrance. | ||
|- | |- | ||
!#5 | |||
| | |[[Isla de Muerta: Powder Store]] | ||
|Found in the cave behind the crates of | |Found in the cave behind the crates of gunpowder. | ||
|- | |- | ||
!#6 | |||
| | |[[Marketplace]] | ||
|On top of Mog's Moogle Shop. Accessible by High Jump (at least LV2). Alternatively, LV1 High Jump and Reflect can be used. | |On top of Mog's Moogle Shop. Accessible by High Jump (at least LV2). Alternatively, LV1 High Jump and Reflect can be used. | ||
|- | |- | ||
!#7 | |||
| | |[[Rampart]] | ||
|At the opposite end of the Rampart from the save point. | |At the opposite end of the Rampart from the save point. | ||
|- | |- | ||
!#8 | |||
| | |{{c|Waterway|tr}} | ||
|Left end. | |Left end. | ||
|- | |- | ||
!#9 | |||
| | |[[Underworld Caverns: Entrance]] | ||
| | | | ||
|- | |- | ||
!#10 | |||
| | |[[Encampment]] | ||
|Near the pole on the left side of the pedestal near | |Near the pole on the left side of the pedestal near Shang's tent. | ||
|- | |- | ||
!#11 | |||
| | |[[Village]] | ||
|On a rooftop. | |On a low rooftop. High Jump is required. | ||
|- | |- | ||
!#12 | |||
| | |[[The West Wing]] | ||
|By the staircase | |By the staircase. | ||
|} | |}{{tab|c}} | ||
{{tab|Duality}} | |||
{| border="1" cellpadding=" | {| border="1" cellpadding="4" cellspacing="0" | ||
|-style="{{style|kh2|a}}" | |||
!style=" | !style="width:10%"|Piece | ||
!style=" | !style="width:30%"|Location | ||
!style=" | !style="width:60%"|Notes | ||
|- | |- | ||
!#1 | |||
| | |[[Undersea Courtyard]] | ||
|Under the ledge to the left of the save point. | |Under the ledge to the left of the save point. | ||
|- | |- | ||
!#2 | |||
| | |[[Hinterlands]] | ||
|Behind the Christmas Town tree. | |Behind the Christmas Town tree. | ||
|- | |- | ||
!#3 | |||
| | |[[Gummi Hangar]] | ||
|Above the archway. | |Above the archway. Requires LV3 High Jump or Aerial Dodge. | ||
|- | |- | ||
!#4 | |||
| | |[[Isla de Muerta: Powder Store]] | ||
|Hidden behind one of the crates of | |Hidden behind one of the crates of gunpowder. | ||
|- | |- | ||
!#5 | |||
|Agrabah | |{{c|Agrabah|ag}} | ||
|Above a stand near the entrance to the Palace Gates. | |Above a stand near the entrance to the Palace Gates. | ||
|- | |- | ||
!#6 | |||
| | |[[Underworld Caverns: The Lost Road]] | ||
|By the exit towards the Atrium. Instead of going straight in, stray off a little to the right. | |By the exit towards the Atrium. Instead of going straight in, stray off a little to the right. | ||
|- | |- | ||
!#7 | |||
| | |[[Bailey]] | ||
|On the stairs to the Restoration Site. | |On the stairs to the Restoration Site. | ||
|- | |- | ||
!#8 | |||
| | |[[Halloween Town Square]] | ||
|Stand on the metal grate | |Stand on the metal grate to be hit by a jet of green water. This will propel Sora high enough to get the puzzle piece. | ||
|- | |- | ||
!#9 | |||
| | |[[Pier]] | ||
|Above the tree upon entering. | |Above the tree upon entering. Requires LV2 High Jump. | ||
|- | |- | ||
!#10 | |||
| | |[[The Lock]] | ||
|At the back of the lock. | |At the back of the lock. | ||
|- | |- | ||
!#12 | |||
| | |{{c|Town|pr}} | ||
|Near the first set of exploding crates of gunpowder upon entry. | |Near the first set of exploding crates of gunpowder upon entry. | ||
|- | |- | ||
!#12 | |||
| | |{{c|Courtyard|dc}} | ||
|Near the bonsai cutting | |Near the trombone player bonsai cutting is a tall hedge. Jump from the top of the hedge to get puzzle piece. | ||
|} | |}{{tab|c}} | ||
{{tab|Frontier}} | |||
{| border="1" cellpadding=" | {| border="1" cellpadding="4" cellspacing="0" | ||
|-style="{{style|kh2|a}}" | |||
!style=" | !style="width:10%"|Piece | ||
!style=" | !style="width:30%"|Location | ||
!style=" | !style="width:60%"|Notes | ||
|- | |- | ||
!#1 | |||
| | |[[Station Plaza]] | ||
|To the right of the doors to the station in the northeast corner. | |To the right of the doors to the station in the northeast corner. | ||
|- | |- | ||
!#2 | |||
| | |[[Santa's House]] | ||
|On top of the dresser. | |On top of the dresser. | ||
|- | |- | ||
!#3 | |||
|Agrabah | |{{c|Agrabah|ag}} | ||
|Behind a stall near exit to the Bazaar. | |Behind a stall near exit to the Bazaar. Destroy the stand. | ||
|- | |- | ||
!#4 | |||
| | |[[Postern]] | ||
|Above the doorway to the Corridors. | |Above the doorway to the Corridors. Requires LV2 High Jump and LV1 Aerial Dodge. Alternatively, LV1 High Jump can be used, but hit {{button|c}} to descend slowly. | ||
|- | |- | ||
!#5 | |||
| | |[[Market Street: Tram Common]] | ||
|On top of the northernmost building's rooftop. | |On top of the northernmost building's rooftop. | ||
|- | |- | ||
!#6 | |||
| | |[[Pier]] | ||
|On the | |On the pier next to the river. | ||
|- | |- | ||
!#7 | |||
| | |{{c|Town|pr}} | ||
|Above exploding gunpowder crates. | |Above exploding gunpowder crates. Requires LV2 High Jump. | ||
|- | |- | ||
!#8 | |||
| | |{{c|Mountain Trail|ld}} | ||
|Above a giant boulder after the entering. | |Above a giant boulder after the entering. Requires LV2 High Jump and LV1 Aerial Dodge. Alternatively, Reflera and Wisdom Form can be used, but hit {{button|c}} to descend slowly. | ||
|- | |- | ||
!#9 | |||
| | |[[Bazaar]] | ||
|Go through the middle entrance to the Bazaar and there will be a stand with a puzzle piece behind it. Destroy the stand to get it. | |Go through the middle entrance to the Bazaar and there will be a stand with a puzzle piece behind it. Destroy the stand to get it. | ||
|- | |- | ||
!#10 | |||
| | |[[The Cave of Wonders: Valley of Stone]] | ||
|Inside the first chamber and on top of a lone pillar. | |Inside the first chamber and on top of a lone pillar. | ||
|- | |- | ||
!#11 | |||
| | |[[Triton's Throne]] | ||
|On one side of his throne. | |On one side of his throne. | ||
|- | |- | ||
!#12 | |||
| | |[[Triton's Throne]] | ||
|On one side of his throne. | |On one side of his throne. | ||
|} | |} | ||
{{tab|c}}{{tab|Daylight}} | |||
{| border="1" cellpadding="4" cellspacing="0" | |||
|-style="{{style|kh2|a}}" | |||
!style="width:10%"|Piece | |||
!style="width:30%"|Location | |||
!style="width:60%"|Notes | |||
|- | |- | ||
! | !#1 | ||
|[[Wastelands]] | |||
| | |||
|First puzzle piece on trail. | |First puzzle piece on trail. | ||
|- | |- | ||
!#2 | |||
| | |[[Wildebeest Valley]] | ||
|Left from the entrance behind a rock column. | |Left from the entrance behind a rock column. | ||
|- | |- | ||
!#3 | |||
| | |[[Wastelands]] | ||
|Second puzzle piece on trail. | |Second puzzle piece on trail. | ||
|- | |- | ||
!#4 | |||
| | |[[Oasis]] | ||
|Dash off of the waterfall basin and then jump to get piece | |Dash off of the waterfall basin and then jump to get piece. | ||
|- | |- | ||
!#5 | |||
| | |[[Postern]] | ||
|On the steps going down and around the central area. | |On the steps going down and around the central area. | ||
|- | |- | ||
!#6 | |||
| | |[[The Cave of Wonders: Treasure Room]] | ||
| | |Hidden behind a pile of treasure to the left of the entrance. | ||
|- | |- | ||
!#7 | |||
| | |[[Pooh Bear's House]] | ||
|Above | |Above Pooh's house. Requires LV2 High Jump. | ||
|- | |- | ||
!#8 | |||
| | |[[Village]] | ||
|Above the awning above the Moogle Shop. | |Above the awning above the Moogle Shop. Requires LV2 High Jump and LV2 Aerial Dodge. | ||
|- | |- | ||
!#9 | |||
| | |[[Throne Room]] | ||
|Left side of the room. | |Left side of the room. Requires LV2 High Jump and Aerial Dodge. | ||
|- | |- | ||
!#10 | |||
| | |[[The Cave of Wonders: Chasm of Challenges]] | ||
|In | |In midair while falling down to the next level. | ||
|- | |- | ||
!#11 | |||
| | |[[The Cave of Wonders: Chasm of Challenges]] | ||
|In | |In midair while falling down to the next level. | ||
|- | |- | ||
!#12 | |||
| | |[[Yuletide Hill]] | ||
|Behind the Halloween Town tree. | |Behind the Halloween Town tree. | ||
|- | |- | ||
!#13 | |||
| | |[[Kanga's House]] | ||
|On top of cardboard boxes. | |On top of cardboard boxes. | ||
|- | |- | ||
!#14 | |||
| | |[[Starry Hill]] | ||
| | |Requires LV2 High Jump and LV2 Aerial Dodge. | ||
|- | |- | ||
!#15 | |||
| | |[[Throne Room]] | ||
|Right side of the room. | |Right side of the room. Requires LV3 Glide. | ||
|- | |- | ||
!#16 | |||
| | |[[Colonnade]] | ||
| | |Requires LV2 High Jump, Aerial Dodge and attack. | ||
|- | |- | ||
!#17 | |||
| | |[[Naught's Skyway]] | ||
| | |Requires LV3 Glide. Alternatively, LV3 High Jump, LV3 Aerial Dodge, and LV1 Glide can be used after jumping from the highest point. | ||
|- | |- | ||
!#18 | |||
| | |[[The King's Den]] | ||
|Jump off | |Jump off the small rock. | ||
|- | |- | ||
!#19 | |||
| | |[[Rabbit's House]] | ||
| | |In the cabbage patch. | ||
|- | |- | ||
!#20 | |||
| | |[[The Spooky Cave]] | ||
|Across from first treasure chest. | |Across from first treasure chest. | ||
|- | |- | ||
!#21 | |||
| | |[[Santa's House]] | ||
|On the counter top. | |On the counter top. | ||
|- | |- | ||
!#22 | |||
| | |[[Mansion: Foyer]] | ||
| | |Requires LV2 Glide. | ||
|- | |- | ||
!#23 | |||
| | |[[Mansion: Computer Room]] | ||
| | |After traveling to the Other Twilight Town. | ||
|- | |- | ||
!#24 | |||
| | |[[Heartless Manufactory]] | ||
| | | | ||
|- | |- | ||
!#25 | |||
| | |[[Cave of the Dead: Passage]] | ||
|Use skateboard or Glide to reach it. | |Use skateboard or Glide to reach it. | ||
|- | |- | ||
!#26 | |||
| | |[[Piglet's House]] | ||
|On a tree stump. | |On a tree stump. | ||
|- | |- | ||
!#27 | |||
| | |[[Market Street: Tram Common]] | ||
|Ride the tram to reach it on the Synthesis shop roof. | |Ride the tram to reach it on the Synthesis shop roof. | ||
|- | |- | ||
!#28 | |||
| | |[[Market Street: Station Heights]] | ||
| | |Requires LV2 Glide and LV2 Aerial Dodge. | ||
|- | |- | ||
!#29 | |||
| | |[[The Cave of Wonders: Entrance]] | ||
|Behind tiger head. | |Behind tiger head. | ||
|- | |- | ||
!#30 | |||
| | |[[Elephant Graveyard]] | ||
|Dash off of the big ledge in the middle. | |Dash off of the big ledge in the middle. | ||
|- | |- | ||
!#31 | |||
| | |[[Mansion: Pod Room]] | ||
| | | | ||
|- | |- | ||
!#32 | |||
| | |[[Mansion: Foyer]] | ||
| | | | ||
|- | |- | ||
!#33 | |||
| | |[[Ship Graveyard: Seadrift Keep]] | ||
|In the wreckage that has a hole through it. | |In the wreckage that has a hole through it. | ||
|- | |- | ||
!#34 | |||
| | |[[Underworld Caverns: Entrance]] | ||
| | |Requires Aerial Dodge to get piece hidden behind the pillar. | ||
|- | |- | ||
!#35 | |||
| | |[[Sandswept Ruins]] | ||
|Underneath the second arch. | |Underneath the second arch. | ||
|- | |- | ||
!#36 | |||
| | |[[The Black Pearl: Captain's Stateroom]] | ||
| | | | ||
|- | |- | ||
!#37 | |||
| | |[[The Cave of Wonders: Chasm of Challenges]] | ||
|Fall on it to get it. | |Fall on it to get it. | ||
|- | |- | ||
!#38 | |||
| | |[[Canyon]] | ||
|On the top ledge in area with the computer. | |On the top ledge in area with the computer. | ||
|- | |- | ||
!#39 | |||
| | |[[The Black Pearl]] | ||
| | |Requires LV2 Aerial Dodge to reach it. | ||
|- | |- | ||
!#40 | |||
| | |[[Underworld Caverns: The Lost Road]] | ||
| | |Requires LV2 High Jump and Aerial Dodge. On the second column. | ||
|- | |- | ||
!#41 | |||
| | |[[Sandswept Ruins]] | ||
|On broken bridge to the tower. | |On broken bridge to the tower. | ||
|- | |- | ||
!#42 | |||
| | |[[Elephant Graveyard]] | ||
|In the small alcove. | |In the small alcove. | ||
|- | |- | ||
!#43 | |||
| | |[[The West Hall]] | ||
| | |In front of the statue's face. Requires LV2 High Jump and Aerial Dodge. | ||
|- | |- | ||
!#44 | |||
| | |[[Toy Factory: Shipping and Receiving]] | ||
|Above entrance. | |Above entrance. | ||
|- | |- | ||
!#45 | |||
| | |[[The Black Pearl]] | ||
|On the stern. | |On the stern. | ||
|- | |- | ||
!#46 | |||
| | |[[Underworld Caverns: The Lost Road]] | ||
| | |On the first column. Requires LV2 High Jump and Aerial Dodge. | ||
|- | |- | ||
!#47 | |||
| | |[[Jungle]] | ||
|Jump off the ledge. | |Jump off the ledge. | ||
|- | |- | ||
!#48 | |||
| | |[[Wildebeest Valley]] | ||
|Under the tree near the entrance to the Wastelands. | |Under the tree near the entrance to the Wastelands. | ||
|} | |}{{tab|c}} | ||
{{tab|Sunset}} | |||
{| border="1" cellpadding="4" cellspacing="0" | |||
|-style="{{style|kh2|a}}" | |||
!style="width:10%"|Piece | |||
!style="width:30%"|Location | |||
!style="width:60%"|Notes | |||
|- | |- | ||
! | !#1 | ||
|[[Cavern of Remembrance: Mineshaft]] | |||
|In the area with yellow colored orbs. Requires LV3 Aerial Dodge. | |||
| | |||
|In the area with yellow colored orbs. | |||
|- | |- | ||
!#2 | |||
| | |[[Sunset Hill]] | ||
|Jump off the top of the hill. | |Jump off the top of the hill. | ||
|- | |- | ||
!#3 | |||
| | |[[Solar Sailer Simulation]] | ||
| | | | ||
|- | |- | ||
!#4 | |||
| | |[[Borough]] | ||
| | |Atop the building across from Merlin's House. Requires LV3 High Jump. Alternatively, LV1 High Jump, Wisdom Form, and Reflect can be used. | ||
|- | |- | ||
!#5 | |||
| | |[[Ship Graveyard: The Interceptor's Hold]] | ||
| | | | ||
|- | |- | ||
!#6 | |||
| | |[[Cavern of Remembrance: Depths]] | ||
| | |On a ledge under the door to the Mineshaft. Requires Aerial Dodge. | ||
|- | |- | ||
!#7 | |||
| | |[[Sunset Terrace]] | ||
|On top of lone building near the track. | |On top of lone building near the track. | ||
|- | |- | ||
!#8 | |||
| | |[[Sunset Terrace]] | ||
|At the top waterfall. | |At the top waterfall. Requires LV2 High Jump and LV2 Aerial Dodge. | ||
|- | |- | ||
!#9 | |||
| | |[[Cavern of Remembrance: Depths]] | ||
| | |On the column in the middle of the room. Requires High Jump. | ||
|- | |- | ||
!#10 | |||
| | |[[The Old Mansion]] | ||
| | |Atop column. Requires Glide and LV2 Aerial Dodge. | ||
|- | |- | ||
!#11 | |||
| | |[[Ruin and Creation's Passage]] | ||
| | |Above the entrance. Requires LV3 Glide. | ||
|- | |- | ||
!#12 | |||
| | |[[Bailey]] | ||
| | |Requires LV3 Aerial Dodge. Alternatively, LV2 Aerial Dodge and Reflect can be used. | ||
|- | |- | ||
!#13 | |||
| | |[[Sunset Hill]] | ||
|On bench next to the mini clock tower. | |On bench next to the mini clock tower. | ||
|- | |- | ||
!#14 | |||
| | |[[Cavern of Remembrance: Mining Area]] | ||
|On the top of the middle mining drill near an air vent. | |On the top of the middle mining drill near an air vent. | ||
|- | |- | ||
!#15 | |||
| | |{{c|The Tower|twt}} | ||
| | |Requires High Jump. Jump off of the staircase leading up to the tower. | ||
|- | |- | ||
!#16 | |||
| | |[[Cavern of Remembrance: Mining Area]] | ||
| | |Requires LV2 High Jump and LV2 Aerial Dodge to jump on to platform. Then use the air vent to reach a higher moving platform. | ||
|- | |- | ||
!#17 | |||
| | |[[Ruin and Creation's Passage]] | ||
| | |Above the second to last platform. Requires Glide. | ||
|- | |- | ||
!#18 | |||
| | |[[Sandswept Ruins]] | ||
|Under the first arch. | |Under the first arch. | ||
|- | |- | ||
!#19 | |||
| | |[[Cavern of Remembrance: Mining Area]] | ||
| | |Under the ledge with the treasure chest containing the Map. Requires Glide or LV3 Aerial Dodge. | ||
|- | |- | ||
!#20 | |||
| | |[[Twilight's View]] | ||
| | |Requires LV2 Glide. Alternatively, LV3 High Jump and LV3 Aerial Dodge can be used. | ||
|- | |- | ||
!#21 | |||
| | |[[Curly Hill]] | ||
| | |Requires LV2 Glide. | ||
|- | |- | ||
!#22 | |||
| | |[[Tower: Wardrobe]] | ||
| | | | ||
|- | |- | ||
!#23 | |||
| | |[[Cave of Wonders: Treasure Room]] | ||
| | |Atop the pile of gold to the right of the entrance. Requires LV3 High Jump. | ||
|- | |- | ||
!#24 | |||
| | |[[Mansion: The White Room]] | ||
| | | | ||
|- | |- | ||
!#25 | |||
| | |[[Toy Factory: Shipping and Receiving]] | ||
| | |Requires LV2 Aerial Dodge or skateboard. | ||
|- | |- | ||
!#26 | |||
| | |[[Crooked Ascension]] | ||
| | | | ||
|- | |- | ||
!#27 | |||
| | |[[Cavern of Remembrance: Mining Area]] | ||
|On the top of the highest mining drill. | |On the top of the highest mining drill. | ||
|- | |- | ||
!#28 | |||
| | |{{c|Bridge|bc}} | ||
| | | | ||
|- | |- | ||
!#29 | |||
| | |[[Pride Rock]] | ||
|Jump off the side of Pride Rock. | |Jump off the side of Pride Rock. | ||
|- | |- | ||
!#30 | |||
| | |[[Cavern of Remembrance: Mineshaft]] | ||
| | |In the area with blue orbs. Requires LV1 Quick Run and LV2 Aerial Dodge. | ||
|- | |- | ||
!#31 | |||
| | |[[Tunnelway]] | ||
|By waterfall | |By the waterfall. | ||
|- | |- | ||
!#32 | |||
| | |[[Cavern of Remembrance: Mineshaft]] | ||
| | |In the area with white orbs. Requires LV3 Glide. | ||
|- | |- | ||
!#33 | |||
| | |[[Ship Graveyard: Seadrift Keep]] | ||
|Attack anchor to get behind it. | |Attack anchor to get behind it. | ||
|- | |- | ||
!#34 | |||
| | |[[Proof of Existence]] | ||
| | | | ||
|- | |- | ||
!#35 | |||
| | |[[Memory's Skyscraper]] | ||
| | | | ||
|- | |- | ||
!#36 | |||
| | |[[Cavern of Remembrance: Mineshaft]] | ||
| | |In the area with white orbs. Requires LV3 Glide. | ||
|- | |- | ||
!#37 | |||
| | |{{c|Entrance Hall|bc}} | ||
| | |Requires Glide and Aerial Dodge. | ||
|- | |- | ||
!#38 | |||
| | |[[Underground Concourse]] | ||
| | | | ||
|- | |- | ||
!#39 | |||
| | |[[Ship Graveyard: Seadrift Row]] | ||
|In the broken crow's nest. | |In the broken crow's nest. | ||
|- | |- | ||
!#40 | |||
| | |[[Cavern of Remembrance: Mineshaft]] | ||
| | |First piece in the area with white orbs. Requires LV3 Glide. | ||
|- | |- | ||
!#41 | |||
| | |[[Bazaar]] | ||
| | |Requires LV2 High Jump. Jump off one of the booths. | ||
|- | |- | ||
!#42 | |||
| | |[[Harbor]] | ||
| | |Requires LV3 Aerial Dodge and LV2 Glide. | ||
|- | |- | ||
!#43 | |||
| | |[[Encampment]] | ||
| | |Requires LV2 Glide. | ||
|- | |- | ||
!#44 | |||
| | |[[Canyon]] | ||
| | |Requires LV2 Glide. Alternatively, use the skateboard and jump and mash {{button|x}} repeatedly on the highest point on the other side of the canyon. | ||
|- | |- | ||
!#45 | |||
| | |[[Underground Concourse]] | ||
|Above the pit area. | |Above the pit area. | ||
|- | |- | ||
!#46 | |||
| | |[[Central Computer Core]] | ||
|On the other side of entrance. | |On the other side of entrance. | ||
|- | |- | ||
!#47 | |||
| | |{{c|Corridors|rg}} | ||
| | |Requires LV2 High Jump. Alternatively, LV1 High Jump and Reflect can be used. | ||
|- | |- | ||
!#48 | |||
| | |[[Ansem's Study]] | ||
|Behind the closed door that leads to the Heartless Manufactory | |Behind the closed door that leads to the Heartless Manufactory. | ||
|} | |} | ||
{{tab|c}}{{tab|c}} | |||
{{ | |||
==See also== | ==See also== | ||
*[[Sticker Album]] | *[[Sticker Album]] | ||
[[fr:Puzzle]] | [[fr:Puzzle]] | ||
[[Category:Game elements]] | [[Category:Game elements]] | ||
[[Category:Jiminy's Journal]] | [[Category:Jiminy's Journal]] | ||
[[Category:Kingdom Hearts II Final Mix]] | [[Category:Kingdom Hearts II Final Mix]] | ||
Latest revision as of 18:54, 1 March 2024

Puzzle is a sidequest minigame that was added to Kingdom Hearts II Final Mix. As the name implies, the minigame consists of simple jigsaw puzzles of six different pieces of artwork that can be assembled from pieces found throughout the game. Successfully completing one of the puzzles by finding all of its pieces and correctly assembling them will result in a reward for Sora.
As Sora and his party travel throughout the various worlds, they come across puzzle pieces, represented by silver crowns. There are 144 puzzle pieces in all, and each piece will fit into one of the six puzzles. The first four puzzles consist of twelve pieces while the last two puzzles are larger and consist of forty-eight pieces apiece. The puzzles and their pieces can be accessed through Jiminy's Journal; pieces will not automatically go into the correct spot in the correct puzzle, but must be selected, moved with the left analog stick, and occasionally rotated with the right until they are in the right place.

However, some pieces Sora may be unable to get because he lacks the proper abilities. Along with the Mushroom XIII sidequest minigame which was intended to make players level up Wisdom Form, the Puzzle minigame encourages the player to level up the other Drive Forms to the highest level. Many of the puzzle pieces require Sora to know High Jump from Valor Form, Aerial Dodge from Master Form, and Glide from Final Form. Note that some of these may be obtained with the creative use of other forms' abilities (e.g. using Master Form's Aerial Dodge and an attack to reach the puzzle piece at Halloween Town's Curly Hill).
The puzzle sidequest is the model for the Sticker Album quest from Kingdom Hearts Birth by Sleep. Collectible stickers appear in the field with the same crown-like appearance as the puzzle pieces, and collecting all the stickers and placing them in the album unlocks rewards, just as completing the puzzles do.
Puzzles and Rewards[edit]
- The following Puzzles contain twelve pieces each
Awakening (目覚め Mezame):
AP Boost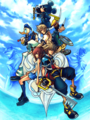
Heart (ハ一ト Hāto):
Serenity Crystal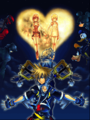
Duality (表裏 Hyouri, lit. "Two Sides"):
Rare Document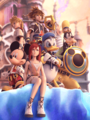
Frontier (EDGE):
Manifest Illusion
.png)
.png)
.png)
.png)
The following Puzzles contain forty-eight pieces each:
Daylight (夜明け Yoake, lit. "Dawn"):
Executive's Ring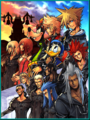
Sunset (夕暮れ Yūgure, lit. "Dusk"):
Grand Ribbon
.png)
.png)
List of pieces by puzzle[edit]
All pieces are arranged and numbered from left to right, row by row.
| Piece | Location | Notes |
|---|---|---|
| #1 | Merlin's House | Above the bed. |
| #2 | Marketplace | On a ledge near a shophouse. Accessible from the entrance of the world. |
| #3 | Borough | On a wall section near the Bailey. |
| #4 | Undercroft | Top left, back. Accessible by climbing a big pile of furniture. |
| #5 | Tower: Wardrobe | Acquired after Sora obtains his new clothes from the Fairies. Piece #5 is a mandatory puzzle piece: a cutscene will be played upon leaving the room. |
| #6 | The Beast's Room | |
| #7 | Underground Passage | At highest point. |
| #8 | Ridge | Accessible by riding the air currents and jumping. |
| #9 | Underground Passage | From the entrance, go straight and turn right. |
| #10 | Undercroft | Atop a small pile of furniture. |
| #11 | Ridge | Hidden behind a pile of fireworks. |
| #12 | Village | On a haystack behind a house. |
| Piece | Location | Notes |
|---|---|---|
| #1 | Courtyard | Above the trumpet player bonsai cutting. |
| #2 | Courtyard | On top of the entrance. |
| #3 | Cave of the Dead: Entrance | |
| #4 | Underworld Caverns: Atrium | At the entrance. |
| #5 | Isla de Muerta: Powder Store | Found in the cave behind the crates of gunpowder. |
| #6 | Marketplace | On top of Mog's Moogle Shop. Accessible by High Jump (at least LV2). Alternatively, LV1 High Jump and Reflect can be used. |
| #7 | Rampart | At the opposite end of the Rampart from the save point. |
| #8 | Waterway | Left end. |
| #9 | Underworld Caverns: Entrance | |
| #10 | Encampment | Near the pole on the left side of the pedestal near Shang's tent. |
| #11 | Village | On a low rooftop. High Jump is required. |
| #12 | The West Wing | By the staircase. |
| Piece | Location | Notes |
|---|---|---|
| #1 | Undersea Courtyard | Under the ledge to the left of the save point. |
| #2 | Hinterlands | Behind the Christmas Town tree. |
| #3 | Gummi Hangar | Above the archway. Requires LV3 High Jump or Aerial Dodge. |
| #4 | Isla de Muerta: Powder Store | Hidden behind one of the crates of gunpowder. |
| #5 | Agrabah | Above a stand near the entrance to the Palace Gates. |
| #6 | Underworld Caverns: The Lost Road | By the exit towards the Atrium. Instead of going straight in, stray off a little to the right. |
| #7 | Bailey | On the stairs to the Restoration Site. |
| #8 | Halloween Town Square | Stand on the metal grate to be hit by a jet of green water. This will propel Sora high enough to get the puzzle piece. |
| #9 | Pier | Above the tree upon entering. Requires LV2 High Jump. |
| #10 | The Lock | At the back of the lock. |
| #12 | Town | Near the first set of exploding crates of gunpowder upon entry. |
| #12 | Courtyard | Near the trombone player bonsai cutting is a tall hedge. Jump from the top of the hedge to get puzzle piece. |
| Piece | Location | Notes |
|---|---|---|
| #1 | Station Plaza | To the right of the doors to the station in the northeast corner. |
| #2 | Santa's House | On top of the dresser. |
| #3 | Agrabah | Behind a stall near exit to the Bazaar. Destroy the stand. |
| #4 | Postern | Above the doorway to the Corridors. Requires LV2 High Jump and LV1 Aerial Dodge. Alternatively, LV1 High Jump can be used, but hit |
| #5 | Market Street: Tram Common | On top of the northernmost building's rooftop. |
| #6 | Pier | On the pier next to the river. |
| #7 | Town | Above exploding gunpowder crates. Requires LV2 High Jump. |
| #8 | Mountain Trail | Above a giant boulder after the entering. Requires LV2 High Jump and LV1 Aerial Dodge. Alternatively, Reflera and Wisdom Form can be used, but hit |
| #9 | Bazaar | Go through the middle entrance to the Bazaar and there will be a stand with a puzzle piece behind it. Destroy the stand to get it. |
| #10 | The Cave of Wonders: Valley of Stone | Inside the first chamber and on top of a lone pillar. |
| #11 | Triton's Throne | On one side of his throne. |
| #12 | Triton's Throne | On one side of his throne. |
| Piece | Location | Notes |
|---|---|---|
| #1 | Wastelands | First puzzle piece on trail. |
| #2 | Wildebeest Valley | Left from the entrance behind a rock column. |
| #3 | Wastelands | Second puzzle piece on trail. |
| #4 | Oasis | Dash off of the waterfall basin and then jump to get piece. |
| #5 | Postern | On the steps going down and around the central area. |
| #6 | The Cave of Wonders: Treasure Room | Hidden behind a pile of treasure to the left of the entrance. |
| #7 | Pooh Bear's House | Above Pooh's house. Requires LV2 High Jump. |
| #8 | Village | Above the awning above the Moogle Shop. Requires LV2 High Jump and LV2 Aerial Dodge. |
| #9 | Throne Room | Left side of the room. Requires LV2 High Jump and Aerial Dodge. |
| #10 | The Cave of Wonders: Chasm of Challenges | In midair while falling down to the next level. |
| #11 | The Cave of Wonders: Chasm of Challenges | In midair while falling down to the next level. |
| #12 | Yuletide Hill | Behind the Halloween Town tree. |
| #13 | Kanga's House | On top of cardboard boxes. |
| #14 | Starry Hill | Requires LV2 High Jump and LV2 Aerial Dodge. |
| #15 | Throne Room | Right side of the room. Requires LV3 Glide. |
| #16 | Colonnade | Requires LV2 High Jump, Aerial Dodge and attack. |
| #17 | Naught's Skyway | Requires LV3 Glide. Alternatively, LV3 High Jump, LV3 Aerial Dodge, and LV1 Glide can be used after jumping from the highest point. |
| #18 | The King's Den | Jump off the small rock. |
| #19 | Rabbit's House | In the cabbage patch. |
| #20 | The Spooky Cave | Across from first treasure chest. |
| #21 | Santa's House | On the counter top. |
| #22 | Mansion: Foyer | Requires LV2 Glide. |
| #23 | Mansion: Computer Room | After traveling to the Other Twilight Town. |
| #24 | Heartless Manufactory | |
| #25 | Cave of the Dead: Passage | Use skateboard or Glide to reach it. |
| #26 | Piglet's House | On a tree stump. |
| #27 | Market Street: Tram Common | Ride the tram to reach it on the Synthesis shop roof. |
| #28 | Market Street: Station Heights | Requires LV2 Glide and LV2 Aerial Dodge. |
| #29 | The Cave of Wonders: Entrance | Behind tiger head. |
| #30 | Elephant Graveyard | Dash off of the big ledge in the middle. |
| #31 | Mansion: Pod Room | |
| #32 | Mansion: Foyer | |
| #33 | Ship Graveyard: Seadrift Keep | In the wreckage that has a hole through it. |
| #34 | Underworld Caverns: Entrance | Requires Aerial Dodge to get piece hidden behind the pillar. |
| #35 | Sandswept Ruins | Underneath the second arch. |
| #36 | The Black Pearl: Captain's Stateroom | |
| #37 | The Cave of Wonders: Chasm of Challenges | Fall on it to get it. |
| #38 | Canyon | On the top ledge in area with the computer. |
| #39 | The Black Pearl | Requires LV2 Aerial Dodge to reach it. |
| #40 | Underworld Caverns: The Lost Road | Requires LV2 High Jump and Aerial Dodge. On the second column. |
| #41 | Sandswept Ruins | On broken bridge to the tower. |
| #42 | Elephant Graveyard | In the small alcove. |
| #43 | The West Hall | In front of the statue's face. Requires LV2 High Jump and Aerial Dodge. |
| #44 | Toy Factory: Shipping and Receiving | Above entrance. |
| #45 | The Black Pearl | On the stern. |
| #46 | Underworld Caverns: The Lost Road | On the first column. Requires LV2 High Jump and Aerial Dodge. |
| #47 | Jungle | Jump off the ledge. |
| #48 | Wildebeest Valley | Under the tree near the entrance to the Wastelands. |
| Piece | Location | Notes |
|---|---|---|
| #1 | Cavern of Remembrance: Mineshaft | In the area with yellow colored orbs. Requires LV3 Aerial Dodge. |
| #2 | Sunset Hill | Jump off the top of the hill. |
| #3 | Solar Sailer Simulation | |
| #4 | Borough | Atop the building across from Merlin's House. Requires LV3 High Jump. Alternatively, LV1 High Jump, Wisdom Form, and Reflect can be used. |
| #5 | Ship Graveyard: The Interceptor's Hold | |
| #6 | Cavern of Remembrance: Depths | On a ledge under the door to the Mineshaft. Requires Aerial Dodge. |
| #7 | Sunset Terrace | On top of lone building near the track. |
| #8 | Sunset Terrace | At the top waterfall. Requires LV2 High Jump and LV2 Aerial Dodge. |
| #9 | Cavern of Remembrance: Depths | On the column in the middle of the room. Requires High Jump. |
| #10 | The Old Mansion | Atop column. Requires Glide and LV2 Aerial Dodge. |
| #11 | Ruin and Creation's Passage | Above the entrance. Requires LV3 Glide. |
| #12 | Bailey | Requires LV3 Aerial Dodge. Alternatively, LV2 Aerial Dodge and Reflect can be used. |
| #13 | Sunset Hill | On bench next to the mini clock tower. |
| #14 | Cavern of Remembrance: Mining Area | On the top of the middle mining drill near an air vent. |
| #15 | The Tower | Requires High Jump. Jump off of the staircase leading up to the tower. |
| #16 | Cavern of Remembrance: Mining Area | Requires LV2 High Jump and LV2 Aerial Dodge to jump on to platform. Then use the air vent to reach a higher moving platform. |
| #17 | Ruin and Creation's Passage | Above the second to last platform. Requires Glide. |
| #18 | Sandswept Ruins | Under the first arch. |
| #19 | Cavern of Remembrance: Mining Area | Under the ledge with the treasure chest containing the Map. Requires Glide or LV3 Aerial Dodge. |
| #20 | Twilight's View | Requires LV2 Glide. Alternatively, LV3 High Jump and LV3 Aerial Dodge can be used. |
| #21 | Curly Hill | Requires LV2 Glide. |
| #22 | Tower: Wardrobe | |
| #23 | Cave of Wonders: Treasure Room | Atop the pile of gold to the right of the entrance. Requires LV3 High Jump. |
| #24 | Mansion: The White Room | |
| #25 | Toy Factory: Shipping and Receiving | Requires LV2 Aerial Dodge or skateboard. |
| #26 | Crooked Ascension | |
| #27 | Cavern of Remembrance: Mining Area | On the top of the highest mining drill. |
| #28 | Bridge | |
| #29 | Pride Rock | Jump off the side of Pride Rock. |
| #30 | Cavern of Remembrance: Mineshaft | In the area with blue orbs. Requires LV1 Quick Run and LV2 Aerial Dodge. |
| #31 | Tunnelway | By the waterfall. |
| #32 | Cavern of Remembrance: Mineshaft | In the area with white orbs. Requires LV3 Glide. |
| #33 | Ship Graveyard: Seadrift Keep | Attack anchor to get behind it. |
| #34 | Proof of Existence | |
| #35 | Memory's Skyscraper | |
| #36 | Cavern of Remembrance: Mineshaft | In the area with white orbs. Requires LV3 Glide. |
| #37 | Entrance Hall | Requires Glide and Aerial Dodge. |
| #38 | Underground Concourse | |
| #39 | Ship Graveyard: Seadrift Row | In the broken crow's nest. |
| #40 | Cavern of Remembrance: Mineshaft | First piece in the area with white orbs. Requires LV3 Glide. |
| #41 | Bazaar | Requires LV2 High Jump. Jump off one of the booths. |
| #42 | Harbor | Requires LV3 Aerial Dodge and LV2 Glide. |
| #43 | Encampment | Requires LV2 Glide. |
| #44 | Canyon | Requires LV2 Glide. Alternatively, use the skateboard and jump and mash |
| #45 | Underground Concourse | Above the pit area. |
| #46 | Central Computer Core | On the other side of entrance. |
| #47 | Corridors | Requires LV2 High Jump. Alternatively, LV1 High Jump and Reflect can be used. |
| #48 | Ansem's Study | Behind the closed door that leads to the Heartless Manufactory. |