Game:Monstropolis: Difference between revisions
From the Kingdom Hearts Wiki, the Kingdom Hearts encyclopedia
Jump to navigationJump to search
m (Text replacement - "$" to "$1 Category:Gameplay") |
No edit summary |
||
| (3 intermediate revisions by the same user not shown) | |||
| Line 7: | Line 7: | ||
===Drops=== | ===Drops=== | ||
{|cellspacing="0" cellpadding="5" border="1" align="center" | {|cellspacing="0" cellpadding="5" border="1" align="center" style="width:200px" | ||
!style=" | !style="{{style|kh3|a}}"|Item | ||
|- | |- | ||
|[[Blazing Shard]] | |[[File:Icon Material KHIII.png|20px]] [[Blazing Shard]] | ||
|- | |- | ||
|[[Blazing Stone]] | |[[File:Icon Material KHIII.png|20px]] [[Blazing Stone]] | ||
|- | |- | ||
|[[Lightning Shard]] | |[[File:Icon Material KHIII.png|20px]] [[Lightning Shard]] | ||
|- | |- | ||
|[[Lightning Stone]] | |[[File:Icon Material KHIII.png|20px]] [[Lightning Stone]] | ||
|- | |- | ||
|[[Lightning Gem]] | |[[File:Icon Material KHIII.png|20px]] [[Lightning Gem]] | ||
|- | |- | ||
|[[Mythril Stone]] | |[[File:Icon Material KHIII.png|20px]] [[Mythril Stone]] | ||
|- | |- | ||
|[[Mythril Gem]] | |[[File:Icon Material KHIII.png|20px]] [[Mythril Gem]] | ||
|- | |- | ||
|[[Soothing Shard]] | |[[File:Icon Material KHIII.png|20px]] [[Soothing Shard]] | ||
|- | |- | ||
|[[Soothing Stone]] | |[[File:Icon Material KHIII.png|20px]] [[Soothing Stone]] | ||
|- | |- | ||
|[[Soothing Gem]] | |[[File:Icon Material KHIII.png|20px]] [[Soothing Gem]] | ||
|- | |- | ||
|[[Wellspring Shard]] | |[[File:Icon Material KHIII.png|20px]] [[Wellspring Shard]] | ||
|- | |- | ||
|[[Wellspring Stone]] | |[[File:Icon Material KHIII.png|20px]] [[Wellspring Stone]] | ||
|- | |- | ||
|[[Wellspring Gem]] | |[[File:Icon Material KHIII.png|20px]] [[Wellspring Gem]] | ||
|} | |} | ||
===Treasures=== | ===Treasures=== | ||
{|cellspacing="0" cellpadding="5" border="1" align="center" width=" | {|cellspacing="0" cellpadding="5" border="1" align="center" style="width:900px" | ||
!style=" | |-style="{{style|kh3|a}}" | ||
!style=" | !style="width:2%"|# | ||
!style=" | !style="width:33%"|Item | ||
!style=" | !style="width:25%"|Location | ||
!style="width:40%"|Notes | |||
|- | |- | ||
|1||[[Map: Monsters, Inc.]]||Lobby & Offices||Near save point. | |1||[[File:Icon Key Item KHIII.png|20px]] [[Map: Monsters, Inc.]]||Lobby & Offices||Near save point. | ||
|- | |- | ||
|2||[[Hi-Potion]]||Lobby & Offices||Left end of hallway. | |2||[[File:Icon Item KHIII.png|20px]] [[Hi-Potion]]||Lobby & Offices||Left end of hallway. | ||
|- | |- | ||
|3||[[Technician's Ring+]]||Lobby & Offices||Inside office. | |3||[[File:Icon Accessory KHIII.png|20px]] [[Technician's Ring+]]||Lobby & Offices||Inside office. | ||
|- | |- | ||
|4||[[Refocuser]]||Laugh Floor||Against the back wall. | |4||[[File:Icon Item KHIII.png|20px]] [[Refocuser]]||Laugh Floor||Against the back wall. | ||
|- | |- | ||
|5||[[Fencer's Earring]]||Upper Level||Enter from door at Lower Level. | |5||[[File:Icon Accessory KHIII.png|20px]] [[Fencer's Earring]]||Upper Level||Enter from door at Lower Level. | ||
|- | |- | ||
|6||[[Star Shield+]]||Lower Level||On high ledge. | |6||[[File:Icon Shield KHIII.png|20px]] [[Star Shield+]]||Lower Level||On high ledge. | ||
|- | |- | ||
|7||[[Hi-Potion]]||Service Area||Near save point. | |7||[[File:Icon Item KHIII.png|20px]] [[Hi-Potion]]||Service Area||Near save point. | ||
|- | |- | ||
|8||[[Thunder Cufflink]]||Upper Level / Service Area||Inside elevator. Available after clearing the world. | |8||[[File:Icon Accessory KHIII.png|20px]] [[Thunder Cufflink]]||Upper Level / Service Area||Inside elevator. Available after clearing the world. | ||
|- | |- | ||
|9||[[Map: The Factory]]||Basement|| | |9||[[File:Icon Key Item KHIII.png|20px]] [[Map: The Factory]]||Basement|| | ||
|- | |- | ||
|10||[[How | |10||[[File:Icon Key Item KHIII.png|20px]] [[How to Play Golf]]||Ground Floor||Closed-off area reachable from Second Floor corridor. | ||
|- | |- | ||
|11||[[Damascus]]||Ground Floor||Behind some boxes near end of conveyor belt. | |11||[[File:Icon Material KHIII.png|20px]] [[Damascus]]||Ground Floor||Behind some boxes near end of conveyor belt. | ||
|- | |- | ||
|12||[[Umbrella Rosette]]||Ground Floor||On ledge near save point. | |12||[[File:Icon Armor KHIII.png|20px]] [[Umbrella Rosette]]||Ground Floor||On ledge near save point. | ||
|- | |- | ||
|13||[[Hi-Potion]]||Second Floor||Behind some boxes, next to conveyor belt. | |13||[[File:Icon Item KHIII.png|20px]] [[Hi-Potion]]||Second Floor||Behind some boxes, next to conveyor belt. | ||
|- | |- | ||
|14||[[Valor Ring]]||Second Floor||On ledge, near Accessway entrance. | |14||[[File:Icon Accessory KHIII.png|20px]] [[Valor Ring]]||Second Floor||On ledge, near Accessway entrance. | ||
|- | |- | ||
|15||[[Firefighter Rosette]]||Accessway||Near save point. | |15||[[File:Icon Armor KHIII.png|20px]] [[Firefighter Rosette]]||Accessway||Near save point. | ||
|- | |- | ||
|16||[[Fira Bangle]]||Accessway|| | |16||[[File:Icon Armor KHIII.png|20px]] [[Fira Bangle]]||Accessway|| | ||
|- | |- | ||
|17||[[Damascus]]||Accessway||Near Tank Yard entrance. | |17||[[File:Icon Material KHIII.png|20px]] [[Damascus]]||Accessway||Near Tank Yard entrance. | ||
|- | |- | ||
|18||[[Ether]]||Tank Yard|| | |18||[[File:Icon Item KHIII.png|20px]] [[Ether]]||Tank Yard|| | ||
|- | |- | ||
|19||[[Mickey's Circus]]||Tank Yard||Requires Diving Strike. | |19||[[File:Icon Key Item KHIII.png|20px]] [[Mickey's Circus]]||Tank Yard||Requires Diving Strike. | ||
|- | |- | ||
|20||[[Mega-Ether]]||Door Vault Passage||Underneath stairs. | |20||[[File:Icon Item KHIII.png|20px]] [[Mega-Ether]]||Door Vault Passage||Underneath stairs. | ||
|- | |- | ||
|21||[[Megalixir]]||Door Vault Passage||Available after clearing the world. | |21||[[File:Icon Item KHIII.png|20px]] [[Megalixir]]||Door Vault Passage||Available after clearing the world. | ||
|- | |- | ||
|22||[[Hi-Refocuser]]||Accessway|| | |22||[[File:Icon Item KHIII.png|20px]] [[Hi-Refocuser]]||Accessway|| | ||
|} | |} | ||
==== | ====Rewards==== | ||
{|cellspacing="0" cellpadding="5" border="1" align="center" width=" | {|cellspacing="0" cellpadding="5" border="1" align="center" style="width:900px" | ||
!style=" | |-style="{{style|kh3|a}}" | ||
!style=" | !style="width:35%"|Item | ||
!style=" | !style="width:25%"|Location | ||
!style=" | !style="width:40%"|Notes | ||
|- | |||
|[[File:Icon Accessory KHIII.png|20px]] [[Laughter Pin]]||Second Floor||Defeat the Unversed to fill Boo's Laugh Gauge. | |||
|- | |||
|[[File:Icon Key Item KHIII.png|20px]] [[Pride Heartbinder]]||Tank Yard||Defeat the enemies in the burning area. | |||
|- | |||
|[[File:Icon Keyblade KHIII.png|20px]] [[Happy Gear]]||Service Area||Defeat the Lump of Horror. | |||
|- | |||
|[[File:Icon Material KHIII.png|20px]] [[Illusory Crystal]]<br>[[File:Secret Report KHIII.png|20px]] {{n|Secret Report|8}}||Tank Yard||Clear [[Battlegate 8]]. | |||
|} | |||
===Bonus Levels=== | |||
{|cellspacing="0" cellpadding="5" border="1" align="center" style="width:900px" | |||
|-style="{{style|kh3|a}}" | |||
!style="width:40%"|Objective | |||
!style="width:35%"|Reward | |||
!style="width:25%"|Location | |||
|- | |||
|Defeat the [[Unversed]] at the Lobby & Offices||'''Sora''': [[Counter Impact]]<ref name="crit">In Critical Mode, Sora has this ability by default.</ref>||Lobby & Offices | |||
|- | |||
|Defeat the Unversed at the Laugh Floor||'''Goofy''': [[Share Prizes]]||Laugh Floor | |||
|- | |||
|Defeat the [[Heartless]] at the Upper Level to fill Boo's Laugh Gauge||'''Sora''': [[Fira]]||Upper Level | |||
|- | |||
|Defeat the Heartless in the electrified area||'''Donald''': Armor Slots +1, [[Thunder Boost]]||Second Floor | |||
|- | |||
|Defeat the Unversed at the Second Floor to fill Boo's Laugh Gauge||'''Sora''': [[Combo Master]]<ref name="crit"/>||Second Floor | |||
|- | |||
|Defeat the enemies in the burning area of the Accessway||'''Sora''': [[Watera]]||Accessway | |||
|- | |||
|Defeat the enemies in the burning area of the Tank Yard||'''Sora''': Item Slots +1||Tank Yard | |||
|- | |||
|Defeat the Unversed at the Tank Yard||'''Sora''': [[Triple Rush]]||Tank Yard | |||
|- | |||
|Defeat the [[Lump of Horror]]||'''Sora''': Maximum HP +10, [[Cura]]||Service Area | |||
|} | |||
===Ingredients=== | |||
{|cellspacing="0" cellpadding="5" border="1" align="center" style="width:900px" | |||
|-style="{{style|kh3|a}}" | |||
!style="width:30%"|Ingredient | |||
!style="width:30%"|Location | |||
!style="width:10%"|Appearance rate | |||
!style="width:30%"|Notes | |||
|- | |- | ||
|Lemon x2 / Orange x2||Lobby & Offices||100%||Vending machine. | |Lemon x2 / Orange x2||Lobby & Offices||100%||Vending machine. | ||
| Line 128: | Line 172: | ||
===Lucky Emblems=== | ===Lucky Emblems=== | ||
{|cellspacing="0" cellpadding="5" border="1" align="center" width=" | {|cellspacing="0" cellpadding="5" border="1" align="center" style="width:900px" | ||
!style=" | |-style="{{style|kh3|a}}" | ||
!style=" | !style="width:5%"|# | ||
!style=" | !style="width:25%"|Image | ||
!style=" | !style="width:25%"|Location | ||
!style="width:45%"|Notes | |||
|- | |- | ||
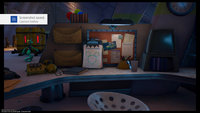
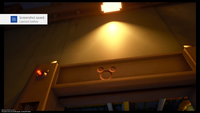
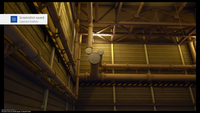
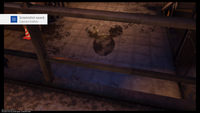
|1||[[File:Lucky Emblem (Monstropolis) 01 KHIII.png|200px]]||Laugh Floor||Drawing on clipboard at one of the far desks. | |1||[[File:Lucky Emblem (Monstropolis) 01 KHIII.png|200px]]||Laugh Floor||Drawing on clipboard at one of the far desks. | ||
Latest revision as of 18:21, 13 November 2023
Kingdom Hearts III[edit]
Battle Levels[edit]
- Before completing Monstropolis and Arendelle: 24
- After completing Monstropolis and Arendelle: 28
- After completing The Final World: 36
Drops[edit]
| Item |
|---|
Treasures[edit]
| # | Item | Location | Notes |
|---|---|---|---|
| 1 | Lobby & Offices | Near save point. | |
| 2 | Lobby & Offices | Left end of hallway. | |
| 3 | Lobby & Offices | Inside office. | |
| 4 | Laugh Floor | Against the back wall. | |
| 5 | Upper Level | Enter from door at Lower Level. | |
| 6 | Lower Level | On high ledge. | |
| 7 | Service Area | Near save point. | |
| 8 | Upper Level / Service Area | Inside elevator. Available after clearing the world. | |
| 9 | Basement | ||
| 10 | Ground Floor | Closed-off area reachable from Second Floor corridor. | |
| 11 | Ground Floor | Behind some boxes near end of conveyor belt. | |
| 12 | Ground Floor | On ledge near save point. | |
| 13 | Second Floor | Behind some boxes, next to conveyor belt. | |
| 14 | Second Floor | On ledge, near Accessway entrance. | |
| 15 | Accessway | Near save point. | |
| 16 | Accessway | ||
| 17 | Accessway | Near Tank Yard entrance. | |
| 18 | Tank Yard | ||
| 19 | Tank Yard | Requires Diving Strike. | |
| 20 | Door Vault Passage | Underneath stairs. | |
| 21 | Door Vault Passage | Available after clearing the world. | |
| 22 | Accessway |
Rewards[edit]
| Item | Location | Notes |
|---|---|---|
| Second Floor | Defeat the Unversed to fill Boo's Laugh Gauge. | |
| Tank Yard | Defeat the enemies in the burning area. | |
| Service Area | Defeat the Lump of Horror. | |
| Tank Yard | Clear Battlegate 8. |
Bonus Levels[edit]
| Objective | Reward | Location |
|---|---|---|
| Defeat the Unversed at the Lobby & Offices | Sora: Counter Impact[1] | Lobby & Offices |
| Defeat the Unversed at the Laugh Floor | Goofy: Share Prizes | Laugh Floor |
| Defeat the Heartless at the Upper Level to fill Boo's Laugh Gauge | Sora: Fira | Upper Level |
| Defeat the Heartless in the electrified area | Donald: Armor Slots +1, Thunder Boost | Second Floor |
| Defeat the Unversed at the Second Floor to fill Boo's Laugh Gauge | Sora: Combo Master[1] | Second Floor |
| Defeat the enemies in the burning area of the Accessway | Sora: Watera | Accessway |
| Defeat the enemies in the burning area of the Tank Yard | Sora: Item Slots +1 | Tank Yard |
| Defeat the Unversed at the Tank Yard | Sora: Triple Rush | Tank Yard |
| Defeat the Lump of Horror | Sora: Maximum HP +10, Cura | Service Area |
Ingredients[edit]
| Ingredient | Location | Appearance rate | Notes |
|---|---|---|---|
| Lemon x2 / Orange x2 | Lobby & Offices | 100% | Vending machine. |
| Dill x2 / Saffron x2 | Lobby & Offices | 100% | Vending machine. |
| Rice x2 | Lobby & Offices | 100% | Food box. |
| Filet Mignon x2 | Laugh Floor | 100% | Food box; furthest desk. |
| Lemon x2 / Orange x2 | Lower Level | 100% | Vending machine. |
| Tomato x2 / Dill x2 | Lower Level | 100% | Vending machine. |
| Beef x2 | Lower Level | 100% | Food box. |
| Pear x2 | Lower Level | 100% | Vending machine. |
| Olive Oil x2 | Lower Level | 100% | Vending machine. |
| Cheese x2 | Ground Floor | 100% | Food box; closed-off area reachable from Second Floor corridor. |
| Onion x2 | Second Floor | 100% | Food box. |
| Olive Oil x2 | Accessway | 100% | Vending machine. |
| Mussel x2 | Accessway | 100% | Food box. |
| Orange x2 / Pear x2 | Tank Yard | 100% | Vending machine. |
| Celery x2 / Saffron x2 | Tank Yard | 100% | Vending machine. |
