Walkthrough:Kingdom Hearts/Atlantica: Difference between revisions
No edit summary |
No edit summary |
||
| Line 44: | Line 44: | ||
|other=x0.5 | |other=x0.5 | ||
|difficulty=★★★☆☆ | |difficulty=★★★☆☆ | ||
|prize=[[Hi-Potion|<font color="white">Hi-Potion (100%)</font>]], [[Ether|<font color="white">Ether (80%)</font>]], [[Mega Potion|<font color="white">Mega Potion</font>]] | |prize=[[Hi-Potion|<font color="white">Hi-Potion (100%)</font>]], [[Ether|<font color="white">Ether (80%)</font>]], [[Mega Potion|<font color="white">Mega Potion (30%)</font>]] | ||
|emblem=Somebody Emblem.png | |emblem=Somebody Emblem.png | ||
|strategy= | |strategy= | ||
| Line 66: | Line 66: | ||
|thunder=x0.0 | |thunder=x0.0 | ||
|gravity=x0.0 | |gravity=x0.0 | ||
|stop= | |stop=x0.0 | ||
|ko= | |ko=x0.5 | ||
|other= | |other=x0.5 | ||
|difficulty=★★☆☆☆ | |difficulty=★★☆☆☆ | ||
|prize=[[Mermaid Kick|<font color="white">Mermaid Kick</font>]] | |prize=[[Mermaid Kick|<font color="white">Mermaid Kick</font>]] | ||
| Line 75: | Line 75: | ||
After defeating her, she'll disapear into what appears to be a portal. You'll then learn Mermaid Kick, which is needed to reach {{Wtext|Ursula|b}} for the second battle with her | After defeating her, she'll disapear into what appears to be a portal. You'll then learn Mermaid Kick, which is needed to reach {{Wtext|Ursula|b}} for the second battle with her | ||
{{Template:WKH1SBoss | {{Template:WKH1SBoss | ||
| Line 81: | Line 80: | ||
|image=Gigant Ursula KH.png | |image=Gigant Ursula KH.png | ||
|size=200px | |size=200px | ||
|hp= | |hp=900 | ||
|strength= | |strength=22 | ||
|defense= | |defense=19 | ||
|status= | |status= | ||
|mpr= | |mpr=36 | ||
|exp= | |exp=1,500 | ||
|physical= | |physical=x1.0 | ||
|fire= | |fire=x0.49 | ||
|blizzard= | |blizzard=x0.5 | ||
|thunder= | |thunder=x1.0 | ||
|gravity= | |gravity=x0.04 | ||
|stop= | |stop=x0.3 | ||
|ko= | |ko=x0.5 | ||
|other= | |other=x0.5 | ||
|difficulty=★★★☆☆ | |difficulty=★★★☆☆ | ||
|prize=[[|<font color="white"></font>]] | |prize=[[Thunder|<font color="white">Thunder Upgrade</font>]], [[Ansem's Report|<font color="white">Ansem's Report 3</font>]] | ||
|emblem=Somebody Emblem.png | |emblem=Somebody Emblem.png | ||
|strategy= | |strategy= | ||
| Line 103: | Line 102: | ||
After defeating {{Wtext|Ursula|b}}, you'll be taken back to the palace, where {{Wtext|King Triton|c}} will tell you that the world's Keyhole is in Ariel's Groto. Head to the Groto (don't worry about the Heartless now, since they won't attack the party now), and then {{Wtext|Ariel|c}} will use the trident to reveal the Keyhole, ending Atlantica's story. | After defeating {{Wtext|Ursula|b}}, you'll be taken back to the palace, where {{Wtext|King Triton|c}} will tell you that the world's Keyhole is in Ariel's Groto. Head to the Groto (don't worry about the Heartless now, since they won't attack the party now), and then {{Wtext|Ariel|c}} will use the trident to reveal the Keyhole, ending Atlantica's story. | ||
If you want to get a 100% completion, you will need to return to Atlantica to perform | If you want to get a 100% completion, you will need to return to Atlantica to perform [[Trinity|<font color="gray">Trinity Detect</font>]], which can be found in '''Triton's Palace'''. | ||
Revision as of 07:10, 6 December 2011
Atlantica
Just before you enter this world, a brief scene will show Sora being concerned about entering this world, since they will drown if they enter it. Donald then tells him that his magic can allow them to survive.
Upon landing, you'll see that Sora now has a blue dolphin tail, Donald now has octopus legs and Goofy has become a sea turtle.
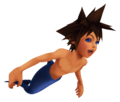
Sora's Merman Form
- Donald AT KH.png
Donald's Squid Form
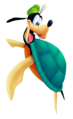
Goofy's Turtle Form


You'll then be introduce to Ariel, Flounder and Sebastian, who will teach you how to swim. You mostly have to follow Flounder around. Soon, a bunch of Heartless will appear, and your new friends will hide in a clam. After defeating the Heartless, attack the clam to let your friends out, revealing a save point (type 2). Ariel will then join the party.
Follow the trident marks on the wall to advance with the story. You'll also notice that the Heartless are very different than the ones encountered in other worlds, though the Search Ghosts can also be found in Halloween Town. Once you reach the palace, three Screwdivers will follow the party, but King Triton will vaporize them. He refuses to tell the party about the Keyhole, and will forbid Ariel from leaving the palace. She swims off. You can find her at her Groto.
In the Groto, the music will change, and you'll notice a trident head-shaped hole on the wall. Now you must follow the dolphin that swims around the area back to the Undersea Valley. Once you reach that area, grab onto it (make sure there are no Heartless around) and it will take you to the Sunken Ship. Inside of the ship, you'll find a treasure chest containing a Crystal Trident. However, just before you open it, a shark will smash the ship, creating a hole big enough for the party to go through. He'll appear randomly at the Sunken Ship area, so be on your guard when you decided to travel the area. Now you must return to the Groto. The easiest way is to use a shortcut found near the ship, and use the rapid water sprout to push a treasure chest out of the way.
During the cutscene, King Triton will show up and destroy the Crystal Trident, causing Ariel to swim off crying. He'll also exile the party out of his world. However, the save point at the Tranquil Grotto will not allow you to leave. Meanwhile, Ursula is trying to trick Ariel into helping her take King Triton's trident. Once you reach the palace, you'll notice that King Triton is wounded, and that Ursula has made off with his trident. Ariel is determined to get it back, and will then rejoin the party.
Head back to the Sunken Ship, and you must now fight the shark.
| Glut | |||||
|---|---|---|---|---|---|
| HP | STR | DEF | MP R | EXP | |
| 200 | 22 | 19 | 32 | 100 | |
| Resistances | Weapon | Fire | Blizzard | Thunder | |
| x1.0 | x0.49 | x0.5 | x1.0 | ||
| Gravity | Stop | KO | Other | ||
| x0.04 | x0.3 | x0.5 | x0.5 | ||
| Rewards | Hi-Potion (100%), Ether (80%), Mega Potion (30%) | ||||
Once he is defeated, Sebastian will open a hidden tunnel leading to the Den of Tides. There is a save point at the Cavern Nook, so you'll be able to save and heal. At the end of the tunnel, you'll encounter Ursula.
| Ursula | |||||
|---|---|---|---|---|---|
 |
HP | STR | DEF | MP R | EXP |
| 450 | 22 | 19 | 1 | 1,000 | |
| Resistances | Weapon | Fire | Blizzard | Thunder | |
| x1.0 | x0.0 | x0.0 | x0.0 | ||
| Gravity | Stop | KO | Other | ||
| x0.0 | x0.0 | x0.5 | x0.5 | ||
| Rewards | Mermaid Kick | ||||
After defeating her, she'll disapear into what appears to be a portal. You'll then learn Mermaid Kick, which is needed to reach Ursula for the second battle with her
| Giant Ursula | |||||
|---|---|---|---|---|---|
| HP | STR | DEF | MP R | EXP | |
| 900 | 22 | 19 | 36 | 1,500 | |
| Resistances | Weapon | Fire | Blizzard | Thunder | |
| x1.0 | x0.49 | x0.5 | x1.0 | ||
| Gravity | Stop | KO | Other | ||
| x0.04 | x0.3 | x0.5 | x0.5 | ||
| Rewards | Thunder Upgrade, Ansem's Report 3 | ||||
After defeating Ursula, you'll be taken back to the palace, where King Triton will tell you that the world's Keyhole is in Ariel's Groto. Head to the Groto (don't worry about the Heartless now, since they won't attack the party now), and then Ariel will use the trident to reveal the Keyhole, ending Atlantica's story.
If you want to get a 100% completion, you will need to return to Atlantica to perform Trinity Detect, which can be found in Triton's Palace.