Walkthrough:Kingdom Hearts/Hollow Bastion

First Visit
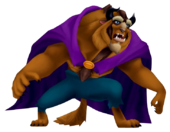
Once you land Sora will feel a warmth inside, as if he's been to this place, Donald makes it out that Sora's hungry, but Sora blasts out that he's serious, then a roar is heard. Once you're in control, save and freeze the two bubbles with Blizzard and jump on them to the chest to get a Dispel-G. Jump down and open the chest above the water to get Dalmatians 91, 92 and 93. Head over to the 3rd bubble and get in it and you'll find a chest underwater with a Dispel-G inside it. Now head back to the same bubble but this time freeze it with magic and jump onto the platform to the left and open the chest there to get a Blizzaga Ring. Then glide ahead to the platform with an arch for a cutscene. The Beast is there and claims he simply believed to find Belle and that his world fell into Darkness once she was taken. Riku avoids The Beast's hit and attacks him back and The Beast falls to the ground when Sora appears to stop Riku. Soon Riku takes the Keyblade from Sora, and calls him the "delivery boy". And throws the Wooden Sword at him. Donald and Goofy leave Sora to follow Riku as he holds the Key. Sora and The Beast join together to get their loved ones. Now that you have a weak weapon, you must rely on The Beast and items. Glide to the chest just behind this platform to get a Megalixir. Now jump to the two moving platforms and head to the Castle Gates.
Now from here, head right and the gates will open to another section of this area. Examine the switch near the wall to cause a hanging platform to move. Then examine the other to go down to the Base Level. Jump into the bubble on the left to go to the other half of this area and jump onto the platform, then backwards to get to a chest, open it to get a Mythril. Jump to the ice switch and "Release", it will cause a platform to extend out of the wall. Turn around for a chest, open it to get a Tornado-G. Glide from the left side onto the other platform and use the other ice switch and "Release". You'll have both platforms extended and can easily get across. If you spot a chest on a platform to the right, open it to get a Tornado-G then head back to the 2 extended platforms and go through the exit to the Waterway. Inside you'll find a wall with iron bars, "Call" and The Beast will clear the way. Head in and open the chest to get an Esuna-G. Head back to the Base Level and jump into the bubble on the right to get back to the Waterway.
In this room there is a Save Point with a chest to its left, open it to get a Firaga Ring, then "Call" to clear the way. Now from here head into the bubble on the left to go further in. "Call" to get into the Dungeon, there are two chests here both containing Float-G. There is also a Blue Trinity here, but now head back and go left.
Here interact with the first button on your left, then head to the button on the gate and interact with it to lock you into a small area, from here go into the new area and use the button there, it will move another wall over, then head through to where it was and interact with the button on the floor and it will move a wall revealing a bubble, jump into it to get to the next area. The button here will take you higher, use it and then go ahead to the last button to move a number of gears which eventually opens the door into the castle. Head back through the bubble and then use the buttons in reverse and head all the way back to the Castle Gates and head through the great door.
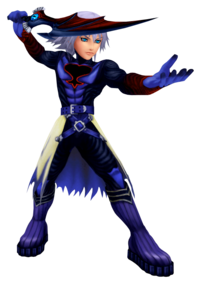
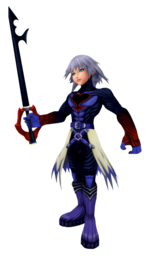
Once inside a cutscene will play showing all the Princesses of Heart in stasis with Maleficent calling to the Princesses to reveal the Keyhole. In the Entrance Hall, Sora and The Beast enter but The Beast feels Belle and turns around to find her, however she soon turns to a Shadow and he jumps at it closing the doors behind him. Riku, Donald and Goofy appear, where Riku turns into his dark mode and casts a fireball onto Sora, Goofy appears out of nowhere and guards him. Donald soon follows, the Keyblade disappears from Riku's hand and goes into Sora's. Riku calls onto his Soul Eater and a boss battle begins.
| Riku I | |||||
|---|---|---|---|---|---|
| HP | STR | DEF | MP R | EXP | |
| 500 | 31 | 24 | 45 | 2000 | |
| Resistances | Weapon | Fire | Blizzard | Thunder | |
| x1.0 | x0 | x0 | x0 | ||
| Gravity | Stop | KO | Other | ||
| x0 | x0 | x0.5 | x0.5 | ||
| Rewards | Trinity Detect | ||||
| When the battle starts block his initial attack to get 4 Tech EXP then counterattack to get a quick combo on him, Cure after you've taken a few hits as his strength is very high for a boss. Keep attacking him and dodging and blocking him and you'll finish him in no time. | |||||
After the battle, Riku will flee, and The Beast will come back from behind the door and rejoin the party. Now head straight and examine the door with the Heartless emblem on it, there are four sockets and you need to find the pieces that fit into those four. From here head to the right side and jump onto a small ledge, then jump further up to reach the top of the platform, since the room is so small, you just need to jump to the left. Get there and open the chest on that platform to get a Power Up. Now head out and go to the right to the Library, from here go straight and to the left to find a red book, the Khama Vol.8, then head to the right and place it on the shelf with the rest of the Khama books. From here go left to the column and turn the turntable until you get the chest, open it to get an Elixir. From here go up the stairs and use both turntables to get a Mythril and a Mega-Potion. Then get the green book, the Mava Vol.6 and use the Green Trinity to get the Azal Vol.3. Climb on top of the bookshelves and glide to the red chest near the exit and open it to get a Dispel-G. Now from here head along the bookshelves to the other turntable. Spin it around to get an AP Up. Jump down to the A shelf and place the yellow book there. The shelf will move revealing another area of the library, pick up the blue book, the Salegg Vol. 6 and place the Mava Vol.6 on the right space making 3 green and 3 blue and 2 pink. Turn around and place the Salegg Vol.6 on the shelf with the blue books. The shelf will move revealing the staircase once more, however turn left and get the Nahara Vol.5 from the shelf ahead and go up the stairs and place it on the N shelf. It will move revealing a shelf with purple books and a green one, this is the Mava Vol.3, head back down to the M shelf and place it there to reveal a desk with a purple book, the Hafet Vol.4, go and place it on the H shelf to reveal a hidden exit. Then grab the Theon Vol.6 from the desk near the save point and place it on the shelf near the doors to reveal a red button. Press the button to unlock the doors to the upper level of the Entrance Hall.
As soon as you exit, break the vases beside the statue on the right to make the fountain work again and drop an Emblem Piece. Then cast Fire on all the candles to dissipate the flame over another Emblem Piece. Use the Red Trinity near the statue to push it down and allow it to break leaving another Emblem Piece. Cast Thunder on a small stone that will cause the platforms with lightning bolts on them to move up and down, allowing you to traverse between up and down. Then go to the statue at the far end and push it onto a platform to reveal a red chest with an Emblem Piece within. And that's all 4 emblem pieces. Traverse around the room getting every piece then go into the Lift Stop.
Now a cutscene, Riku runs into the Castle Chapel and a man wearing a brown cloak with a hood talks to Riku telling him that the heart that is strong and true will win the Keyblade. He is then persuaded to open his heart to Darkness when in reality, he is letting himself be possessed by the strange man.
Once in the Lift Stop, examine the switch to the left so it takes you higher, then examine the one on the right to get onto the platform. Here, target the platform the chest is on and use Gravity to lower it. Now open it to get an Orichalcum. Head back and make the switch take you lower, use the other switch and head through to the Waterway. Here go to the left to find two platforms, one that leads back to the Lift Stop and another that leads back to the Dungeon. Use Lift Stop one and examine the switch to get some MP Orbs and a Mythril. Go back down and into the Dungeon and use the Blue Trinity for a Mega-Ether, Mega-Potion and a Cottage. Head back to the Lift Stop and head through the exit beside the switch to the Castle Gates, head around to the left then jump and glide to the copper platform, then use Gravity on the higher platform to get the chest and open it to get Dalmatians 94, 95 and 96. Then from here use the switch closest to the copper platform to get a hanging platform moving across from one end to the other, jump on it and when you reach the edge, jump and glide to the lone column with a chest on it, open it to get an Orichalcum. Then glide to the other end and open the chest to get a Holy-G. Head back to the other end of the Castle Gates and go higher up with the switch opposite the stained glass windows. You'll be at the Great Crest now, from here head left and interact with the switch to get onto the great platform to get across the crest. At the middle of the crest, Heartless will invade the platform stopping the platform for you to battle. Then a switch will appear in the middle of the platform allowing you to proceed across the crest. Examine it and then at the end you will drop off. There will be a Blue Trinity and a chest, the chest contains a Dispel-G and the Trinity will give you a Megalixir and 2 Cottages. From here, head down the stairs to the left and into the Lift Stop.
Interact with the switch nearby to go a level above, go back out to the Great Crest. To the left there is a hidden chest, open it to get an Orichalcum. Use the switch to the left to get to the High Tower. Cast Gravity on the floating platform and open the chest to get a Thundaga Ring. Interact with the switch to the far left to lower one of the great platforms and head into the Lift Stop near where you came. Head across this area to the other exit for the High Tower, clear out the Heartless. Cast Gravity on the floating platform to get Dalmatians 97, 98 and 99. Then examine the switch to lower the other great platform so you can get onto it, from here drop down the side and glide until you get onto a ledge underneath the great platforms, head through the exit to a floating platform with a chest containing a Float-G. From here drop down to the Great Crest and make your way back up to the left side of the High Tower. As soon as you get back to the great platforms, use the switch to make one of them go even higher, climb up it and go to the right to get a Megalixir from a chest. Then head left to the switch and examine it and it will turn the redirect mechanism anticlockwise, now head back down to the switch for the great platform and turn left and go inside the exit to the Lift Stop, go ahead to the Castle Chapel for a cutscene.
In the cutscene, Riku, now possessed, will appear beside Maleficent to see that the Keyhole to Darkness has emerged. He calls onto the Keyblade of People's Hearts and they hear that The Beast is nearby. Maleficent heads to go take care of the party while Riku is put to guard the princesses.
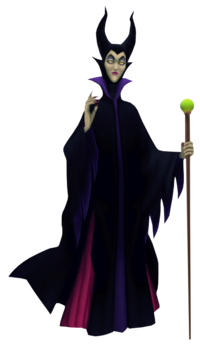
Head straight to start a cutscene. She mocks your courage to defeat her, and so she starts a boss battle.
| Maleficent | |||||
|---|---|---|---|---|---|
| HP | STR | DEF | MP R | EXP | |
| 900 | 27 | 21 | 42 | 6000 | |
| Resistances | Weapon | Fire | Blizzard | Thunder | |
| x1.0 | x0.49 | x0.5 | x1.0 | ||
| Gravity | Stop | KO | Other | ||
| x0.02 | x0.2 | x0.5 | x0.5 | ||
| Rewards | Cheer (Donald) Ansem's Report 5 | ||||
| Attack her platform to make it drop so she isn't invincible, cast Aero after this is done and keep attacking her. After she revives her platform, heal and take care of it once more, she may call for cosmos meteors, so keep to the far end of the room once that happens. She will also call to Defenders and Darkballs to attack you, take them out so they don't cause any extra harm. Use Mega-Potions and Cure to heal, Aero to defend. | |||||
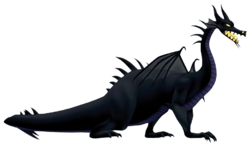
After defeating Maleficent, she will disappear into a portal of Darkness into another area. Save and head through the portal. Once you enter the next room, Riku will stab Maleficent with his Keyblade, allowing her to unlock the true Darkness in her heart. As from this, she transforms into a colossal dragon.
| Dragon Maleficent | |||||
|---|---|---|---|---|---|
| HP | STR | DEF | MP R | EXP | |
| 1,200 | 31 | 24 | 48 | 6,000 | |
| Resistances | Weapon | Fire | Blizzard | Thunder | |
| x1.0 | x0.49 | x0.5 | x1.0 | ||
| Gravity | Stop | KO | Other | ||
| x0.4 | x0.3 | x0.5 | x0.5 | ||
| Rewards | Fireglow | ||||
| At the start of the battle, summon Tinker Bell so she can periodically heal you, then cast Aero. Keep attacking her head, she will almost always shoot fire to set the ground alight, stay close to her head as that area won't be on fire. She may also call to green fireballs, you can deflect these back for 119 Tech EXP. She can also spin around and cause shock-waves that will deplete your HP. If you keep stuck to using Aero for most of the battle you should be able to take her down. | |||||
After defeating Dragon Maleficent, the thorns surrounding this area will dissipate in fire, and her cloak will be left flat on the ground. Riku then rubs his foot in the cloak and disappears. Head through the portal back to the Castle Chapel. A new hidden route is opened beside the Save Point. Make sure to keep your party at high levels, otherwise this will be a tough end. Head to straight ahead to the Grand Hall, the doors will open revealing the Princesses inside their chambers, head straight and up the stairs.
Sora and Donald reach the upper ground but Goofy is knocked out as he attempts to enter as a force-field is present. Sora spies Kairi and runs up to her and picks her up, shaking her trying to wake her up. But it's no use as she's not got a heart. Sora then reacts to Kairi's heart, which is inside him. Riku then reveals himself to be Ansem, Seeker of Darkness. While Donald runs to attack Ansem, he throws him out of the force-field, effectively knocking him out. He then raises his Keyblade to release Kairi's heart from within Sora. And now a boss battle ensues.
| Riku II | |||||
|---|---|---|---|---|---|
| HP | STR | DEF | MP R | EXP | |
| 900 | 31 | 24 | 49 | 8500 | |
| Resistances | Weapon | Fire | Blizzard | Thunder | |
| x1.0 | x0 | x0 | x0 | ||
| Gravity | Stop | KO | Other | ||
| x0 | x0 | x0.5 | x0.5 | ||
| Rewards | Ragnarok | ||||
| You'll be fighting this battle alone, during this fight, you must equip 3 Hi-Potions, 2 Ethers and 1 Elixir. Cast Aero and start eating away at his orange bar. Once it has gone to yellow, he will say "Welcome Oblivion!" and cast wheels of dark energy at you, you can dodge or deflect these, deflecting them earns you 34 Tech EXP. Once you have taken away his yellow bar and a little of his green bar he will start using Dark Aura which is his most powerful attack. During the phase where he does multiple slashes, glide around for a while then when he lands and causes beams of light to erupt from the ground, dodge roll away from them. He will continuously attempt to slash at you, you must dodge roll away and attack in time before he can counterattack. Using Ars Arcanum is helpful as it stifles his ability to counterattack. | |||||
After this battle, Riku will disappear into Darkness, and Donald and Goofy will enter the room. Sora will then attempt to seal the Keyhole, but while it is incomplete, he cannot. Sora then spots the Keyblade that Riku was using and the stabs himself with it, despite the protests of his friends. This releases his heart along with Kairi's. The Keyhole will then be completed leaking out Darkness across all worlds, and the Hearts belonging to the other Princesses will return to their bodies.
Kairi's Heart returns to her body, and she wakes up but spots a fading Sora and she runs up to him to catch him. Sadly, Sora fades away before she could catch him. Ansem then appears, and attempts to put an end to Kairi, Donald and Goofy, but Riku suddenly gains control of his body and tells the trio to run, in which they do, before Ansem takes control of it again. A lone Shadow will then appear and you'll gain control of it.
Now you must head to the Entrance Hall however you go lower and lower and lower. If you go to the Base Level, the switch will automatically take you to the Castle Gates, from there head to the Entrance Hall.
Soon, a cutscene involving Kairi, Donald and Goofy will be shown. Donald spots the Shadow and will then hit it on the head with his Staff. Kairi, however, suspects the Shadow to be Sora. Suddenly, more Shadows will appear to attack the trio. Kairi will then embrace the friendly Shadow, restoring it to its true form: Sora.
With Sora restored, the four will then leave Hollow Bastion. The Beast, however, refuses to leave, since Belle is still inside. The party will be automatically taken back to Traverse Town.
Second Visit
After heading here from Traverse Town, once you land Sora, Donald, Goofy and The Beast will be in the Rising Falls. Sora will ask where Belle is and to which The Beast replies to as being inside the castle however she along with the rest of the princesses save for Kairi for some reason. The Beast also offers to help you as a party member once more. Now head all the way over to the platform with the arch, and use the White Trinity to get a chest, open it to get a Firaga-G. Head to the Entrance Hall and from there to the Lift Stop. From there head all the way up to the Castle Chapel. Once inside, talk to both groups of Princesses and then head to the Grand Hall, go up the stairs and to the right there is a chest containing a Flare-G. Now head onto the ledge close by that leads further up to the chamber that would've held Kairi and open the chest there to get Oblivion, the Keyblade that signifies Riku. Now jump down from the left side, if facing the Keyhole, and get the chest containing Dalmatians 61, 62 and 63. Then head into the Keyhole, into the Dark Depths, and be ready for a boss battle.
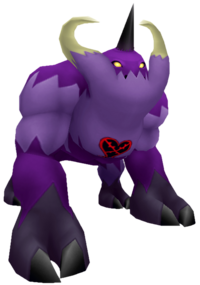
| Behemoth | |||||
|---|---|---|---|---|---|
| HP | STR | DEF | MP R | EXP | |
| 1,600 | 35 | 27 | 57 | 450 | |
| Resistances | Weapon | Fire | Blizzard | Thunder | |
| x1.0 | x0.0 | x0.0 | x0.0 | ||
| Gravity | Stop | KO | Other | ||
| x0.3 | x0.30 | x0.5 | x0.5 | ||
| Rewards | Omega Arts | ||||
| Cast Aero at the start and jump onto its back and keep attacking its horn. After you keep attacking its horn it will be stunned for a while, allowing a few quick combos but once it regains consciousness you must dodge at once as it will call a dangerously powerful bolt of dark energy, casting Aero again would be suggested. Use this method over and over and it will lead you to victory. Use Cure and Hi-Potions to heal. | |||||
Once you defeat the Behemoth, the whole Traverse Town gang come to congratulate you on defeating the Darkness of their childhood home, however once the Keyhole is locked the Heartless will disappear, the Worlds will return and the walls will reappear blocking every World far apart. Once this conversation is over, Sora reenters the Dark Depths to lock the Final Keyhole. Once done, all Darkness is keept in stasis. Later the Princesses of Heart converse with you and tell you there is a very strong, dark presence nearby and it is where Ansem may have went. Then they offer you an upgrade for Fire. Once the cutscene is over, head down to the Library. Talk to Aerith to get the rest of the Ansem's Report that you may have missed. Then talk to her a few times to get an upgrade for Cure. Then go up the stairs for a cutscene. The Beast climbs up to talk to Belle and they embrace. Talk to Belle to gain the Divine Rose. Now get to a Save Point and head to the new World.
| Kingdom Hearts |
|---|
| Walkthrough |
| Dive to the Heart - Destiny Islands - Traverse Town - Wonderland - Olympus Coliseum - Deep Jungle - 100 Acre Wood - Agrabah - Monstro - Atlantica - Halloween Town - Neverland - Hollow Bastion - End of the World |
| Other |
| 99 Puppies - Trinity Marks - Gummi Missions - Trophies |
