Game:Xemnas
| Unknown | |||||||
|---|---|---|---|---|---|---|---|
|
| |||||||
| Japanese | 謎の男 | ||||||
| Rōmaji | Nazo no Otoko | ||||||
| Translation | Enigmatic Man
| ||||||
| Type | Organization XIII | ||||||
| Game | Kingdom Hearts Final Mix | ||||||
| |||||||
| |||||||

| Unknown
|
|---|
| Kingdom Hearts |
| A mysterious figure who appeared in Hollow Bastion. |
| HP | STR | DEF | MP rec | EXP | |||
| Before rescue | N/A | N/A | N/A | N/A | N/A | ||
| After rescue | 1500 | 46 | 46 | 70 | 12000 | ||
| Weapon | Fire | Blizzard | Thunder | ||||
| x1.0 | x0 | x0 | x0 | ||||
| Percentage | Stop | Stun | Other | ||||
| x0.01 | x0 | x0.5 | x0.5 | ||||
| Rewards | |||||||
| EXP Necklace, Ansem's Report 13 | |||||||
| World(s) | |||||||
| Hollow Bastion | |||||||
| Xemnas | ||||||||||||
|---|---|---|---|---|---|---|---|---|---|---|---|---|
|
| ||||||||||||
| Japanese | ゼムナス | |||||||||||
| Rōmaji | Zemunasu
| |||||||||||
| Type | Organization XIII | |||||||||||
| Games | Kingdom Hearts II Kingdom Hearts 3D: Dream Drop Distance Kingdom Hearts III | |||||||||||
| ||||||||||||

_KHII.png)

| Enemy Card | ||||
|---|---|---|---|---|
.png)
| ||||
| Ability | Duration | Cost | ||
| Quick Barrier | 3 reloads | 65 CP | ||
| Description | ||||
| When receiving consecutive attacks, guards beyond the second strike. Resistant to fire, ice, lightning, and special attacks. | ||||
| Location | HP | Strength | Defense | EXP | ||
| The World That Never Was | 1500 | 45 | 26 | 0 | ||
| Physical | Fire | Blizzard | ||||
| ×1.0 | ×0.5 | ×0.5 | ||||
| Thunder | Dark | Neutral | ||||
| ×0.5 | ×0.5 | ×0.5
| ||||
| Rewards | ||||||
| First Sora: Max MP +10 Secret Ansem Report 13 | ||||||
| World(s) | ||||||
| The World That Never Was | ||||||
| Location | HP | Strength | Defense | EXP | ||
| The World That Never Was | 1500 | 45 | 26 | 0 | ||
| Physical | Fire | Blizzard | ||||
| ×1.0 | ×0.5 | ×0.5 | ||||
| Thunder | Dark | Neutral | ||||
| ×0.5 | ×0.5 | ×1.0
| ||||
| Rewards | ||||||
| First Sora: Max HP +5, Max MP +10 Secret Ansem Report 13 Second Sora: Drive gauge +1 Riku: Max HP +25 | ||||||
| World(s) | ||||||
| The World That Never Was | ||||||
| Location | Level | HP | EXP | Strength | Magic | Defense |
| Reaction Durability | Reality Durability | |||||
| The World That Never Was | 38 | 2080 | 0 | 60 | 59 | 29 |
| 40 | 2167 | 0 | 63 | 62 | 30 | |
| Reality Shifts disabled | ||||||
| Resistances | Fire | Blizzard | Thunder | Water | Dark | Light |
| x1.0 | x1.0 | x1.0 | x1.0 | x1.0 | x1.0 | |
| Status Effects | Stun | Mini | Sleep | Blind | Stop | Freeze |
| x0 | x0 | x0 | x0 | x0 | x0 | |
| Confuse | Poison | Magnet | Slow | Ignite | Bind | |
| x0 | x0 | x0 | x0 | x0 | x0 | |
| Zero Gravity | Time Bomb | Zantetsuken | ||||
| x0 | x0 | x0 | ||||
| Rewards | ||||||
| Maximum HP +20 | ||||||
| Worlds | ||||||
| The World That Never Was | ||||||
| Location | HP | Strength | Defense | EXP | |||||||
| Keyblade Graveyard | 1800 | 59 | 30 | 0 | |||||||
| Physical | Fire | Blizzard | Thunder | Water | |||||||
| ×1.0 | ×0.8 | ×0.8 | ×0 | ×0.8 | |||||||
| Aero | Dark | Neutral | Rapid-fire | ||||||||
| ×0.8 | ×0.8 | ×0.5 | ×0.5 | ||||||||
| Freeze | Electrify | Stun | Hunny | ||||||||
| ✕ | ✕ | ✕ | ✕ | ||||||||
| Reaction Endurance |
Revenge Value |
Attraction Magnification |
Damage Limit | ||||||||
| 0 | 7 | ×0.5 | 24
| ||||||||
| Rewards | |||||||||||
| Sora: Max HP +10[1] | |||||||||||
| World(s) | |||||||||||
| Keyblade Graveyard | |||||||||||
| Xemnas (Dragon Form) | |||||||
|---|---|---|---|---|---|---|---|
|
| |||||||
| Japanese | ゼムナス(ドラゴン) | ||||||
| Translation | Xemnas (Dragon)
| ||||||
| Type | Organization XIII | ||||||
| Game | Kingdom Hearts II | ||||||
| |||||||
_1st_Fight_KHII.png)
| Cylinder | ||
|---|---|---|
|
| ||
| Japanese | ユ=ット | |
| Translation | Unit
| |
| Type | Organization XIII | |
| Game | Kingdom Hearts II | |
_Cylinder_KHII.png)
| Location | HP | Strength | Defense | EXP | ||
| The World That Never Was | 20 | 45 | 26 | 0 | ||
| Physical | Fire | Blizzard | ||||
| — | — | — | ||||
| Thunder | Dark | Neutral | ||||
| — | — | — | ||||
| World(s) | ||||||
| The World That Never Was | ||||||
| Location | HP | Strength | Defense | EXP | ||
| The World That Never Was | 16 | 45 | 26 | 0 | ||
| Physical | Fire | Blizzard | ||||
| — | — | — | ||||
| Thunder | Dark | Neutral | ||||
| — | — | — | ||||
| World(s) | ||||||
| The World That Never Was | ||||||
| Bomb Bell B | ||
|---|---|---|
|
| ||
| Japanese | フローティングマインB | |
| Rōmaji | Furōtingu Main B | |
| Translation | Floating Mine B
| |
| Type | Gummi Nobody | |
| Game | Kingdom Hearts II | |

| Location | HP | Strength | Defense | EXP | ||
| The World That Never Was | 100 | 45 | 26 | 80 | ||
| Physical | Fire | Blizzard | ||||
| ×1.0 | ×1.0 | ×1.0 | ||||
| Thunder | Dark | Neutral | ||||
| ×1.0 | ×1.0 | ×1.0 | ||||
| World(s) | ||||||
| The World That Never Was | ||||||
| Location | HP | Strength | Defense | EXP | ||
| The World That Never Was | 50 | 45 | 26 | 60 | ||
| Physical | Fire | Blizzard | ||||
| ×1.0 | ×1.0 | ×1.0 | ||||
| Thunder | Dark | Neutral | ||||
| ×1.0 | ×1.0 | ×1.0 | ||||
| World(s) | ||||||
| The World That Never Was | ||||||
| Energy Core | ||
|---|---|---|
|
| ||
| Japanese | エネルギーコア
| |
| Type | Organization XIII | |
| Game | Kingdom Hearts II | |
_Energy_Core_KHII.png)
| Location | HP | Strength | Defense | EXP | ||
| The World That Never Was | 1000 | 45 | 26 | 0 | ||
| Physical | Fire | Blizzard | ||||
| ×1.0 | ×0.5 | ×0.5 | ||||
| Thunder | Dark | Neutral | ||||
| ×0.5 | ×0.5 | ×0.5 | ||||
| World(s) | ||||||
| The World That Never Was | ||||||
| Xemnas (Armored Controller) | ||
|---|---|---|
|
| ||
| Japanese | ゼムナス(鎧) | |
| Rōmaji | Zemunasu (Yoroi) | |
| Translation | Xemnas (Armor)
| |
| Type | Organization XIII | |
| Game | Kingdom Hearts II | |
_KHII.png)
| Location | HP | Strength | Defense | EXP | ||
| The World That Never Was | 1000 | 45 | 26 | 0 | ||
| Physical | Fire | Blizzard | ||||
| ×1.0 | ×1.0 | ×1.0 | ||||
| Thunder | Dark | Neutral | ||||
| ×1.0 | ×1.0 | ×0.5 | ||||
| World(s) | ||||||
| The World That Never Was | ||||||
| Location | HP | Strength | Defense | EXP | ||
| The World That Never Was | 1000 | 45 | 26 | 0 | ||
| Physical | Fire | Blizzard | ||||
| ×1.0 | ×1.0 | ×1.0 | ||||
| Thunder | Dark | Neutral | ||||
| ×1.0 | ×1.0 | ×1.0 | ||||
| World(s) | ||||||
| The World That Never Was | ||||||
| Xemnas (Dragon Form) | ||
|---|---|---|
|
| ||
| Japanese | ゼムナス(ドラゴン) | |
| Translation | Xemnas (Dragon)
| |
| Type | Organization XIII | |
| Game | Kingdom Hearts II | |
_2nd_Fight_KHII.png)
| Location | HP | Strength | Defense | EXP | ||
| The World That Never Was First part |
1200 | 45 | 26 | 0 | ||
| The World That Never Was All other parts |
1500 | 45 | 26 | 0 | ||
| Physical | Fire | Blizzard | ||||
| ×1.0 | ×1.0 | ×1.0 | ||||
| Thunder | Dark | Neutral | ||||
| ×1.0 | ×1.0 | ×1.0 | ||||
| World(s) | ||||||
| The World That Never Was | ||||||
| Location | HP | Strength | Defense | EXP | ||
| The World That Never Was First part |
600 | 45 | 26 | 0 | ||
| The World That Never Was Second and third parts |
1200 | 45 | 26 | 0 | ||
| The World That Never Was Fourth and fifth parts |
1000 | 45 | 26 | 0 | ||
| Physical | Fire | Blizzard | ||||
| ×1.0 | ×1.0 | ×1.0 | ||||
| Thunder | Dark | Neutral | ||||
| ×1.0 | ×1.0 | ×1.0 | ||||
| World(s) | ||||||
| The World That Never Was | ||||||
| Bomb Bell B | ||
|---|---|---|
|
| ||
| Japanese | フローティングマインB | |
| Rōmaji | Furōtingu Main B | |
| Translation | Floating Mine B
| |
| Type | Gummi Nobody | |
| Game | Kingdom Hearts II | |
| Location | HP | Strength | Defense | EXP | ||
| The World That Never Was | 100 | 45 | 26 | 80 | ||
| Physical | Fire | Blizzard | ||||
| ×1.0 | ×1.0 | ×1.0 | ||||
| Thunder | Dark | Neutral | ||||
| ×1.0 | ×1.0 | ×1.0 | ||||
| World(s) | ||||||
| The World That Never Was | ||||||
| Location | HP | Strength | Defense | EXP | ||
| The World That Never Was | 50 | 45 | 26 | 60 | ||
| Physical | Fire | Blizzard | ||||
| ×1.0 | ×1.0 | ×1.0 | ||||
| Thunder | Dark | Neutral | ||||
| ×1.0 | ×1.0 | ×1.0 | ||||
| World(s) | ||||||
| The World That Never Was | ||||||
| Speeder B | ||
|---|---|---|
|
| ||
| Japanese | スピーダーB | |
| Rōmaji | Supīdā B
| |
| Type | Gummi Nobody | |
| Game | Kingdom Hearts II | |

| Location | HP | Strength | Defense | EXP | ||
| The World That Never Was | 100 | 45 | 26 | 80 | ||
| Physical | Fire | Blizzard | ||||
| ×1.0 | ×1.0 | ×1.0 | ||||
| Thunder | Dark | Neutral | ||||
| ×1.0 | ×1.0 | ×1.0 | ||||
| World(s) | ||||||
| The World That Never Was | ||||||
| Location | HP | Strength | Defense | EXP | ||
| The World That Never Was | 50 | 45 | 26 | 60 | ||
| Physical | Fire | Blizzard | ||||
| ×1.0 | ×1.0 | ×1.0 | ||||
| Thunder | Dark | Neutral | ||||
| ×1.0 | ×1.0 | ×1.0 | ||||
| World(s) | ||||||
| The World That Never Was | ||||||
| Spiked Roller B | ||
|---|---|---|
|
| ||
| Japanese | ミサイラーB | |
| Rōmaji | Misairā B | |
| Translation | Missiler B
| |
| Type | Gummi Nobody | |
| Game | Kingdom Hearts II | |

| Location | HP | Strength | Defense | EXP | ||
| The World That Never Was | 100 | 45 | 26 | 80 | ||
| Physical | Fire | Blizzard | ||||
| ×1.0 | ×1.0 | ×1.0 | ||||
| Thunder | Dark | Neutral | ||||
| ×1.0 | ×1.0 | ×1.0 | ||||
| World(s) | ||||||
| The World That Never Was | ||||||
| Location | HP | Strength | Defense | EXP | ||
| The World That Never Was | 50 | 45 | 26 | 60 | ||
| Physical | Fire | Blizzard | ||||
| ×1.0 | ×1.0 | ×1.0 | ||||
| Thunder | Dark | Neutral | ||||
| ×1.0 | ×1.0 | ×1.0 | ||||
| World(s) | ||||||
| The World That Never Was | ||||||
| Xemnas (Dragon Form) | ||
|---|---|---|
|
| ||
| Japanese | ゼムナス(ドラゴン) | |
| Translation | Xemnas (Dragon Form)
| |
| Type | Organization XIII | |
| Game | Kingdom Hearts II | |
_3rd_Fight_KHII.png)
| Xemnas (Armored Controller) | ||
|---|---|---|
|
| ||
| Japanese | ゼムナス(鎧) | |
| Rōmaji | Zemunasu (Yoroi) | |
| Translation | Xemnas (Armor)
| |
| Type | Organization XIII | |
| Game | Kingdom Hearts II | |
| Location | HP | Strength | Defense | EXP | ||
| The World That Never Was | 1000 | 45 | 26 | 0 | ||
| Physical | Fire | Blizzard | ||||
| ×1.0 | ×1.0 | ×1.0 | ||||
| Thunder | Dark | Neutral | ||||
| ×1.0 | ×1.0 | ×0.5 | ||||
| World(s) | ||||||
| The World That Never Was | ||||||
| Location | HP | Strength | Defense | EXP | ||
| The World That Never Was | 1000 | 45 | 26 | 0 | ||
| Physical | Fire | Blizzard | ||||
| ×1.0 | ×1.0 | ×1.0 | ||||
| Thunder | Dark | Neutral | ||||
| ×1.0 | ×1.0 | ×1.0 | ||||
| World(s) | ||||||
| The World That Never Was | ||||||
| Xemnas | |||||||
|---|---|---|---|---|---|---|---|
|
| |||||||
| Japanese | ゼムナス | ||||||
| Rōmaji | Zemunasu
| ||||||
| Type | Organization XIII | ||||||
| Games | Kingdom Hearts II Final Mix Kingdom Hearts Union χ | ||||||
| |||||||
_KHII.png)
_KHUX.png)
| Location | HP | Strength | Defense | EXP | ||
| Radiant Garden Garden of Assemblage |
3400 | 86 | 51 | 0 | ||
| Physical | Fire | Blizzard | ||||
| ×1.0 | ×0.5 | ×0.5 | ||||
| Thunder | Dark | Neutral | ||||
| ×0 | ×0.5 | ×1.0
| ||||
| Rewards | ||||||
| Power Boost | ||||||
| World(s) | ||||||
| Radiant Garden | ||||||
- "I can not feel—sorrow... No matter what misery befalls the worlds. No matter what you think, what you feel, or how you exist."
- —Xemnas to Sora and co.
Xemnas is the leader of Organization XIII, and is fought as a boss in Kingdom Hearts Final Mix and the final boss of Kingdom Hearts II and Sora's story in Kingdom Hearts 3D: Dream Drop Distance. In Kingdom Hearts Final Mix he challenges Sora at the Hollow Bastion, while in Kingdom Hearts II he fights Sora at both Memory's Contortion and within Kingdom Hearts itself. In Kingdom Hearts 3D: Dream Drop Distance, he battles Sora in The World That Never Was. In Kingdom Hearts III, he battles Sora, Riku, and Mickey alongside Ansem, Seeker of Darkness and Young Xehanort at the Keyblade Graveyard.
Design
Xemnas commands a gigantic and draconian battleship during several parts of his final battle with Sora and Riku. The dragon has a small main body, a long, segmented neck, and a round head with numerous tall, thin spikes lining it. Its mouth is somewhat beak-like and Xemnas, covered in armor, sits on a throne on the top of the head. The throne is adorned with large spikes and other additives that resemble the Nobody emblem, and large, seemingly organic, orange objects connect Xemnas to the battleship. The dragon's wings are thin, angular, and each is emblazoned with a black nobody symbol at the joint. Each wing also has several thin, black and white "feathers" with tips resembling the Nobody logo. Its thin arms end in three-fingered, segmented hands and each arm is lined by four blue diamond-shaped spikes of increasingly smaller size. In place of legs, the Dragon has two massive, conical engines with two smaller engines on either side of the main ones. It also has a long, thin tail with four conical objects connected to its tip. The dragon is predominantly colored in light shades of silver and metallic blue.
While commanding the dragon, Xemnas dons armor adorned with dozens of Nobody symbols. The shoulder pad on his left shoulder, helmet, crown, boots, knees, and breastplate all sport these designs. His crown and shoulder pad are gold, while the rest of the armor is colored in light shades of blue and silver. He has two silver belts on his waist and what seems to be white feathers on his right shoulder in place of armor. Several cords criss-cross in front of his torso, connecting to massive, oblong pieces of armor worn on each arm. Xemnas's faceplate is beak-like in structure and he wears clawed, metal gloves. He also wears black pants underneath the armor. Perhaps the most striking features of this armor are the oddly-shaped "sleeves" that are attached to each of Xemnas's arms. They are a mixture of red, orange, yellow, and white. He also wears a massive, similarly-colored cape that seems to connect him to the dragon. This armored form, referred to as the Armored Controller, bears a striking resemblance to No Heart.
In the final section of his battle with Sora and Riku, Xemnas's appearance is unchanged, save for his cloak. His once all-black cloak is now a white one covered in black designs, many of which resemble the Nobody logo.
The Armored Controller's name reflects the armor Xemnas wears and his command over the dragon.
Early concepts for the Xemnas battle included two gargantuan Nobodies in place of the dragon, formed from Dark City rather than the Castle That Never Was: King (キング Kingu), which had a vaguely humanoid upper body adorned in Nobody sigils and wore an immense crown, and Kentauros (ケンタロウス Kentarousu), which resembled a dilapidated version of the King attached to a quadrupedal lower body, with the crown becoming a spiked ruff.
Strategies
Kingdom Hearts Final Mix
At the start of the battle, immediately Lock-on to Xemnas, summon Tinker Bell, and prepare any variant of Aero available (preferably as a shortcut). This will minimize the damage Xemnas can do to Sora. He will immediately execute an energy-ball attack, which explodes into orb-like, damaging force fields. While it is advised that Sora has his most powerful abilities equipped, be careful at close range, as Xemnas will counter with a damaging shield technique or a powerful slashing combo. As Sora must also be wary of his MP, Elixirs and Megalixirs are strongly recommended.
After about three-quarters of Xemnas's pink HP Bar have been depleted, he will begin to teleport around the battlefield, ultimately increasing his speed. Escape his energy ball or slash/shield attack by keeping track of the dark cloud that surrounds him, it is possible to stun him with Gravity-based attacks before he reappears. He also gains a deadly ability in which he curses Sora and the party, draining their health and changing the Command Menu into a rapid roulette solely showing Shock and Release. Wait for Release to appear in the menu before selecting the command to end the curse. If Shock is chosen, Sora's health falls considerably. Tinker Bell can revive Sora to full health if he falls, but that means that once the curse is dispelled, Curaga is more essential. To avoid this attack, Dodge Roll at just the right moment when Xemnas teleports, or cast Curaga, as Leaf Bracer will shield Sora from getting cursed.
Once Xemnas hits his orange HP Bar, however, the battle difficulty increases even further. Xemnas will summon a ring of blue Ethereal Blades in the air before him, which fire at Sora when Xemnas gives the command. This technique can be avoided through the use of Dodge Roll. When his yellow bar is almost completely depleted, Xemnas shrouds the field in darkness and surrounds himself with energy. Long-range lasers will then fire from him in all directions. Remain close to Xemnas to avoid as much damage as possible, where he'll only hover in front of Sora and thus one only needs to merely watch for the direction of the lasers in order to properly avoid them. Another option of escape is to use Superglide. Once Xemnas uses his ultimate attack for the first time, his basic attacks become more powerful, and the Ethereal Blades he fires now glow red.
Xemnas also proves more difficult than Sephiroth due to attacking relentlessly, which in turn leaves very little chances to make him flinch from basic combos. Sora can try casting Gravity or using any other Gravity attribute attack (such as Zantetsuken) because if it hits while locked on to Xemnas, he will get stunned by a surge of overloading power causing him to cringe and shiver a bit in pain (Sora will also receive Tech Points). Xemnas can then be attacked, but be ready to use Dodge Roll to avoid his counterattack. The safe way to do this attacks him exactly three hits after Gravity hits him, then Dodge Roll and repeat Gravity. Also, cast the spell on him at the right time, as Xemnas might have a chance of shaking the spell off during an attack, even though Tech Points are gained, there is a chance he will retaliate hard.
Xemnas will only flinch to air combos, so keep that in mind when moving in to attack him, especially if stunned by any Gravity-based damage as aforementioned. Be sure to remove any Combo Plus abilities to access the combo finishers sooner before the battle, enabling Sora to attack with higher chances of not being interrupted. Prepare Curaga just in case Sora needs healing. With good timing, it is also possible to slide past or underneath the energy balls he fires with Sliding Dash. Should that connect, remember to combo from that to use a ground combo finisher if needed.
Xemnas's final phase tends to leave fewer openings to attack him head-on and to stun him, but there's often a free chance to make him flinch whenever he finishes using his strongest attack.
Kingdom Hearts II
First Battle
- Attacks
- Blade slice: Performs a slicing combo.
- Thunder guard: Creates a barrier that damages Sora if he touches it.
- Invitation to Nothingness: Sets a curse on Sora that continuously drains HP.
- Counter slice: Unleashes a quick slicing combo after guarding or teleporting.
- Slice barrage: Slices Sora multiple times in a long, desperation attack.
When the battle begins, Xemnas will ensnare Sora in a field of energy that will slowly drain his health, then teleport to the top of Memory Skyscraper. Sora must rush to the bottom of the building and use the Reaction Command "Facedown" to break the energy field and charge up after Xemnas. Xemnas will leap down to confront Sora as he nears the top. At this point, one of three Reaction Commands appears depending on how close Sora is to Xemnas. The first is "Clash", where they pass each other harmlessly. The second is "Breakthrough", where Sora attacks Xemnas with a single attack. At the last second, the command changes to "Finish", where Sora attacks Xemnas several times and slams him into the side of the skyscraper. It's recommended to hit ![]() at "Finish". Note that not hitting Xemnas will cause him to deal with damage to Sora.
at "Finish". Note that not hitting Xemnas will cause him to deal with damage to Sora.
After the sequence ends, Xemnas will begin his normal attack pattern, very akin to how he fights in Final Mix but more limited in terms of moveset (and thus is arguably more simple to combat as he is a boss in the main story). He will teleport in an orb of darkness frequently, emerging to attack Sora rapidly with his Ethereal Blades, spinning, flipping and kicking to attack from all sides. These attacks can be blocked with Guard, or more easily, Reflect. Xemnas will also project a barrier, blocking Sora's attacks and knocking him back. He can be stunned, so Sora can easily connect combos. However, Xemnas tends to teleport away afterward or if Sora attacks him too many times, he will teleport away in the middle of the combo when reaching his retaliation point.
Later in the fight, Xemnas will repeat the opening sequence involving Sora running up Memory Skyscraper. The Reaction Commands for the second time are the same as the first. As he gets weaker, Xemnas teleports more often and more quickly than before.
Final Battle
Energy Core
As soon as the battle starts, Xemnas begins to bombard Sora with buildings. Use the Reaction Command to avoid damage and then pass through the doorway into the next area. Run forward and use the "Skyscraper" command to reach Xemnas's massive Dragon Ship. Sora must now knock several Bomb Bell B Nobodies into the power generators of the ship and then use "Stunt Dodge" to dodge both the generator's laser attack and explosion upon destruction.
Sora then finds himself in the main core of the ship. Attack the core, dodging aerial attacks from the ship's "claws" and the lesser Nobodies that spawn once the core surrounds itself with a protective barrier. Only by destroying the Nobodies does the core become open to attack once again. Use the "Proceed" Reaction Command to enter the next phase of the battle.
Armored Controller
- First Incarnation
After destroying the main core of the Dragon Ship, Sora faces Xemnas in armor. Although he remains sitting on his throne, the Superior wields a massive sword, and can also channel the attacks of the Organization XIII members slain earlier in this game. Drive Forms can be used for only this portion of the battle and greatly increase the rate at which Xemnas's HP is depleted. Should Sora fall, King Mickey may appear and give him a second chance.
- Second Incarnation
After the fall of the massive Dragon Ship, it rejuvenates and teleports Sora and Riku to an alternate dimension. They fly to the head of the ship, where they find the stationary, armored Xemnas awaiting them yet again. He will attack with a long-range sword swipe as in the last battle, dealing a lot of damage on contact. After one bar of HP is depleted, Xemnas will slam his weapon against the floor, sending Sora and Riku flying, as well as dealing with very mild damage.
Xemnas will bombard Sora with lasers and buildings, so use the Reaction Commands to get back to the ship. Failure to do so will result in Xemnas blowing Sora away and dealing with minor damage. Once this is done, immediately and repetitively use Aerial Dodge (mash ![]() ) in order to dodge Xemnas's next tactic, which allows him to summon snowflake-shaped energy that fires lasers and is unavoidable. Should this not be done, Sora can attempt Aerial Dodge again or merely allow damage and then fall to the point where he can safely glide (
) in order to dodge Xemnas's next tactic, which allows him to summon snowflake-shaped energy that fires lasers and is unavoidable. Should this not be done, Sora can attempt Aerial Dodge again or merely allow damage and then fall to the point where he can safely glide (![]() ) back to the ship.
) back to the ship.
After Xemnas's second HP Bar is depleted, these lasers will continue to fire as Sora grapples with Xemnas. Be aware that he may summon a damaging shield, just as he did in his previous battles. Regardless of his Drive Form levels, Sora has full access to each Form's ability, allowing easier movement and dodging. Riku will also heal Sora with Cure Potion if his HP falls below critical.
Xemnas (Dragon Form)
_3rd_Fight_(Shielded)_KHII.png)
This fight pits Sora and Riku in a Gummi Ship-style battle against a massive Dragon Ship, which is piloted by Xemnas. Only three commands are available on the menu: Attack, Drain, and Shoot. Use Drain when enemy ships fire lasers at Sora and Riku, filling the Charge Gauge. If this gauge is filled, ![]() can be used to fire a powerful Reaction Command, "Mega-Laser". This attack will, if not completely, drain large portions of the ship's HP without fail. If Bomb Bells appear near Sora, he can press
can be used to fire a powerful Reaction Command, "Mega-Laser". This attack will, if not completely, drain large portions of the ship's HP without fail. If Bomb Bells appear near Sora, he can press ![]() to fire lasers to deal damage, but the Attack option offers higher accuracy. The shoot should only be used against enemies that are out of range. All enemies that bombard the ship via Shoot deal massive damage.
to fire lasers to deal damage, but the Attack option offers higher accuracy. The shoot should only be used against enemies that are out of range. All enemies that bombard the ship via Shoot deal massive damage.
Sora must first tackle the Dragon Ship's tail. Utilizing a combo of the commands mentioned above, this should hardly be a challenge. Xemnas may fire a large array of missiles and since Sora cannot heal in this battle, be sure to dodge by flying in circles to each corner of the screen.
After destroying the tail, Sora must defeat the "legs" of the ship. "Mega-Laser" will come in handy here and also fly in circles to dodge the snowflake-shaped lasers that are fired. After defeating both of these limbs, Sora can proceed to the wings.
Before the first wing can be destroyed, Xemnas will fire "snowflake lasers" as well as missiles. Both tactics can be dodged via flying to each screen corner. Once this is done, the command process repeats itself yet again. Defeat both wings in order to clear the battle and progress.
Final Form
_KHII.png)
- "If light and darkness are eternal, then surely we nothings must be the same... Eternal!"
- —Xemnas to Sora and Riku
Xemnas will first throw Sora and Riku into the air, leading to a series of aerial slash attacks and roundhouse kicks. It is possible, however, to avoid being thrown in the air if Sora has Reflega in the shortcut menu and uses it immediately after the battle begins. These tactics can be dodged by using the "Reversal" Reaction Command. To deal minor damage to Xemnas as he teleports around, then manually select the Trinity Limit ability. This approach would then lead to the "Block" Reaction Command. It is also possible for a cinematic to play where Xemnas knocks Sora's Keyblade away. At this time, activate the Reaction Command "Defend", where Riku tosses Sora's Keyblade back to him and they both force Xemnas away.
Eventually, Xemnas will allow Sora and Riku to the dropdown. He will then teleport around the battle area, shooting threads of dark energy that can be dodged via Reversal. When Xemnas reappears, he uses a clone in an attempt to trick Sora. Attacking the wrong Xemnas will result in the true Superior slashing with his Interdiction or dealing a devastating roundhouse kick.
As his HP depletes, Xemnas will shoot energy balls that explode to both block and cause damage. When it depletes even further, he begins to teleport rapidly, encircling Sora and Riku with lasers. He and his clone may then appear together or separately to shoot at Sora. These moves can be avoided via Reflega or Guard and if willing to be wasteful while possibly dealing with damage, a Limit. Once these tactics are completed, Xemnas will trap Sora, slowly draining his HP. The control of this force over Riku, who only can jump, cast Dark Aura, and attack. While Xemnas drains Sora, his clone will attack Riku with energy balls, slashes, and even the damaging shield tactic. The clone can be annoying, but Dark Aura will stun him just a little. Use this time to run to the real Xemnas and Sora, using Dark Aura every three steps until close to the true Xemnas. Jump to him and execute the Reaction Command in order to free Sora, stunning Xemnas. This leaves Xemnas open to major damage. However, the attack can be completely avoided: when Xemnas says, "Can you spare a heart?", cast Reflect or initiate a Limit just as Xemnas casts his curse on Sora.
Xemnas will then repeat the throwing technique used at the battle's start, as well as his normal attack pattern. Just before Xemnas's HP hits zero, he fills the battlefield with lasers, shrouding the area in darkness. At this point, repeatedly mash ![]() and
and ![]() in order to keep Sora and Riku alive. Failure to do so will spell certain death. An easy way to do this is to rotate your controller vertically, put your left thumb on
in order to keep Sora and Riku alive. Failure to do so will spell certain death. An easy way to do this is to rotate your controller vertically, put your left thumb on ![]() and right thumb on
and right thumb on ![]() . Once the area is cleared of lasers after 30 seconds, brief cinematics is shown, eventually reducing Xemnas's HP to 1. From there, simply perform a combo finisher, magic, or a Limit to finish Xemnas off.
. Once the area is cleared of lasers after 30 seconds, brief cinematics is shown, eventually reducing Xemnas's HP to 1. From there, simply perform a combo finisher, magic, or a Limit to finish Xemnas off.
Riku will heal Sora when his HP is low. Items still should be brought into battle, as it is best to be hit by Xemnas's drain attack with a full bar of HP. Ethers are also good for restoring much-needed MP. While Xemnas's final attack brings him to 1 HP, Sora can deplete his HP to 1 before the attack is executed, as well. Riku cannot die in this battle, because he is needed for the entire battle. The only time that Riku can die is when Xemnas starts to drain Sora's HP. If Riku is defeated before he reaches Sora, it is a Game Over.
In the HD 2.5 ReMIX version of the game, the "Reversal" Reaction Command can show up less frequently. The best way to avoid Xemnas's Invitation to Nothingness in this version is to activate Session, providing Sora and Riku invincibility during the attack. This problem was fixed in the HD 1.5 + 2.5 ReMIX version.
Data Rematch
The Data Rematch against Xemnas has two phases. The first is based upon Sora's one-on-one duel on Memory's Contortion, while the second is based upon the final phase of the final battle. Upon the completion of the first phase, Riku joins Sora's party, giving Sora a chance to change his equipment between battles. If Sora is defeated in the second phase, he will have to redo the first phase.
For the first phase, simply use the same strategy used against the real Xemnas. However, there are four differences. The first three are simple: Xemnas has more health, doesn't curse Sora at the start of the fight, and is left with 1 HP if Sora uses Finish during Facedown. The fourth is the addition of an enhanced Slice barrage attack when Xemnas gets close to half health, where the arena darkens and he follows Sora closely, thereby making it much more difficult to evade the attack.
For the second phase, use the same strategy used in the final battle against the real Xemnas. However, Xemnas's pattern is different. For instance, he now uses the Invitation to Nothingness multiple times. Sora should bring Elixirs and Hi-Potions to the fight for healing.
Kingdom Hearts 3D: Dream Drop Distance
Attacks
- Dual-wield Attack (二刀流攻撃 Nitōryū Kōgeki): Xemnas slices Sora with his Ethereal Blades.
- Flying Two Swords (飛翔ニ刀 Hishō Ni-gatana): Xemnas dashes towards Sora and slices him with his Ethereal Blades.
- Shot (ショット Shotto): Xemnas fires his Ethereal Blades as projectiles, usually after trapping Sora in a Spark Wall cage or after surrounding him in a circle of Ethereal Blades.
- Spark Wall (スパークウォール Supāku Wōru): Xemnas throws up a barrier to defend against Sora's attacks and will occasionally trap him in a cage composed of Spark Walls to fire Ethereal Blades at him.
- Building Throw (ビル投げ Biru nage): At the outset of the fight, and after taking significant damage, Xemnas teleport to the edge of the arena and hurl buildings at Sora.
At the start of the battle, Xemnas will hurl two buildings at Sora, then three more. Perform carefully-timed Slide Rolls to avoid them. If left alone during his normal phase, he will casually walk up to Sora like in prior games but will start to actively attack in response to Sora's offense.
Xemnas is incredibly swift and frequently travels around the battlefield either inside an impenetrable sphere of darkness or by teleporting from place to place, attempting to catch Sora from behind. Arguably he fights akin to prior versions, albeit with much more aggression. As soon as Xemnas reappears from the dark sphere, Lock-on to him and press ![]() to guard against the ensuing Ethereal Blade combo or roundhouse kick, leaving him open to Sora's Counter Rush. The Slide Roll/Sonic Impact/Double Impact/Sliding Sidewinder combo is also efficient at repelling Xemnas and causing him to flinch and getting knocked away, and powerful Unison Attacks like Decussation is useful as well. As with all bosses, if you can create a deck of alternating Balloon- and Cure-type spells, you can easily complete the battle simply by activating the commands one after the other.
to guard against the ensuing Ethereal Blade combo or roundhouse kick, leaving him open to Sora's Counter Rush. The Slide Roll/Sonic Impact/Double Impact/Sliding Sidewinder combo is also efficient at repelling Xemnas and causing him to flinch and getting knocked away, and powerful Unison Attacks like Decussation is useful as well. As with all bosses, if you can create a deck of alternating Balloon- and Cure-type spells, you can easily complete the battle simply by activating the commands one after the other.
Should Xemnas surround Sora with lasers, leap over them with High Jump and either use the Air Slide/Sonic Impact/Double Impact combo or avoid them by performing Superglide towards the opposite end of the battlefield. When Xemnas traps Sora in a cage of energy shields, simply High Jump over them and repeat the Air Slide/Sonic Impact/Double Impact combo to avoid the ensuing barrage of lasers; while risky, a Flowmotion attack at this point will halt Xemnas's attacks for a short period. He may try to defend himself with a single energy shield from time to time, but Sora merely needs to stay away from it to avoid taking damage or allow it to hit him so that he can perform Payback Raid, as the shield does almost no damage.
After half of his HP has been depleted, Xemnas resets the battlefield, requiring Sora to time Slide Rolls and dodge the incoming buildings: if Xemnas hurls one building, it will slide across the arena and can be dodged by leaping over it or by Air Sliding into it to trigger Flowmotion. If he hurls two, they will approach vertically but are be pretty easy to dodge. When he throws three, they will bounce towards Sora while horizontal. After all three sets of buildings have been thrown, Xemnas throws another building at Sora that knocks the battlefield and himself into a gliding phase where he cannot move but can still attack. Xemnas will throw another building at Sora, which Sora can use to trigger the Nightmare's End Reality Shift.
If Nightmare's End succeeds, the arena will shapeshift to include a long Flowmotion rail with a passive Xemnas at its end. Sora can unleash powerful commands during this time without fear of reprisal, and after a set time, Xemnas will rally and warp the battlefield back to its original state. Using Sliding Dive from the last rail will cause Xemnas to rally immediately. If Nightmare's End fails, Sora will be damaged and the battlefield will shift back to its original form, and the ferocity of Xemnas's attacks will remain normal.
If Sora succeeds at using Reality Shift, Xemnas increases the frequency and ferocity of his attacks once its phase is done. If Sora immediately attacks him with the Slide Roll/Sonic Impact/Double Impact combo, he will repeat the latter phase with the buildings. Resume the Guard and Counter Rush and Slide Roll/Sonic Impact/Double Impact/Sliding Sidewinder combos strategy, and use a powerful Link Attack—like Decussation—or Dual Link—like Unison Rush—to finish Xemnas off. It is advised to bring two Curaga commands into battle to ensure maximum healing potential and cancel out the wait for command reload time should Sora's HP need replenishing. Also bring Spirits that have Curaga and the Haste Support Magic to not have problems with the reload time. Use Flowmotion to Sora's advantage, and the battle should end with minimal difficulty. It is a necessity to enter this fight with a full Drop Gauge and even bring Drop-Me-Not's when at a lower level.
Kingdom Hearts III
Xemnas is fought alongside Ansem and Young Xehanort. It is recommended to take him out last since he is the fastest and most aggressive out of them making it difficult to land a combo. Xemnas will attack with his Ethereal Blades and hand-to-hand combat, employing a rapid slashing blade combo and swinging his Ethereal Blades in a helicopter-like manner before unleashing a burst of energy from his Ethereal Blades as well as spinning energy kicks, and can launch 4 energy balls and quickly move around while creating orbs that fire lasers. As his health decreases, Xemnas teleports more often to avoid attacks.
Each member will have a dark aura surrounding them meaning they'll only attack Sora each time they disappear and reappear with a specific order of attacks. For Xemnas, Young Xehanort will release missiles of ice followed by Ansem's cage of dark claws that will launch Sora into the air and Xemnas using his rolling attack. Jump to avoid the dark cage and block the icicles Xemnas's attack. Xemnas can release Ethereal lasers that can be blocked and right as he launched the energy orbs, Airstep to him right as they cannot explode upon contact to get a good combo. The end of his combos can be blocked and Sora can use Risk Dodge. When half of his health is down, his combos last longer and his finishing move will launch his victims into the air. During the cyclone sequence each member will use a specific order of attacks. If Xemnas is the only one left, he'll first fire several Ethereal lasers that surround Sora, but can be difficult to block, then he'll do a normal combo followed by his rolling attack. He is immune to thunder magic, so use any other offensive spell to attack from a distance. Keeping Riku and Mickey alive is wise as they can do double and triple damage when attacking together. When they try to combo your target, it would be wise to stop your combos to let them land their own. The Magic Carousel Attraction also appears as well.
Kingdom Hearts III Re Mind
In addition to fighting alongside Ansem and Young Xehanort as in the base game, Xemnas also briefly fights alongside Saïx for the second phase of his battle. Here, the player plays as Roxas, and has Lea and Xion as allies. Xemnas retains his attacks from the main fight, except the player can use the Thinking of You team attack.
When fought alongside Ansem and Young Xehanort, the fight is nearly identical except the Faith Volley and True End team attacks are available.
Data Rematch
Xemnas's data is not only much stronger and with more hp but has also acquired several new attacks, making him much more deadly. He retains his old Ethereal Blades slashing combo and helicopter attack as well as energy kick but has gained new melee attacks: he can perform a leaping kick with both legs, which can be enhanced with a burst of energy, and also a straight kick as well as also gaining more sword combos. Xemnas has also gained the ability to use his old barrier ability, which can be broken with a single attack but damages Sora if he is thrust into it, and Twilight Thorns that do not damage but cannot be blocked and will launch Sora into the air, allowing Xemnas to easily catch Sora off-guard.
After a certain amount of Xemnas's health has been depleted, he will surround the entire arena with darkness as Twilight Thorns begin to materialize out of nowhere and even suddenly, allowing Xemnas to force Sora into the air without Sora being able to react. Eventually, Xemnas will create thousands of Ethereal Blades and launch them as projectiles while also randomly attacking until the stage returns to normal, the red can be blocked, but the blue ones cannot so be sure to roll out of the way upon seeing one. Before the first barrage, Xemnas will use his quick three-hit combos before throwing Sora with his thorns. Block immediately when he teleports. After his first barrage, he will go with his slower two-hit kick combos before throwing Sora. Time your guards to block all his kicks.
After the second salvo, Xemnas will immediately teleport for an unblockable X-shaped slash. Dodge roll out of the way. Afterwards, Xemnas will use quick two-hit sword combos before throwing Sora, twice in succession, and follow with the unblockable x-shaped slash. The first barrage of ethereal blades are blockable, but the second barrage sends out blue ethereal blades after the first few red blades. The last barrage will shoot blue blades first and then shoot another few blue blades after a few following red blades. The last salvo will always leave Sora stunned afterward if he's not in a form or doesn't have Stun Protection and Xemnas will teleport in for the unblockable X-shaped slash, but Sora will recover before it comes. Dodge roll out of the way and get in a combo on Xemnas.
Videos
| Xemnas – Kingdom Hearts Final Mix | |
| Xemnas I-IV – Kingdom Hearts II Final Mix | Xemnas's Data Rematch – Kingdom Hearts II Final Mix |
| Xemnas – Kingdom Hearts Dream Drop Distance HD | |
| Xemnas – Kingdom Hearts III | Xemnas' Recreated Data – Kingdom Hearts III Re Mind |
Gallery
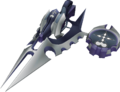
The Sidecar Glider used by Riku and Sora during the second fight against Xemnas's Dragon Form.

Notes and references
- ^ Shared with Ansem and Young Xehanort
| Kingdom Hearts Final Mix |
|---|
| Additional enemies |
| Bosses |
| Arch Behemoth - Destroyed Behemoth - Red Armor - Sneak Army - Unknown |
| Enemy Heartless |
| Black Ballade - Chimera - Gigas Shadow - Grand Ghost - Jet Balloon - Missile Diver - Neoshadow - Stealth Soldier - Pot Scorpion - Pink Agaricus - Sniperwild |
| Additional weapons |
| Diamond Dust - One-Winged Angel - Fantasista - Meteor Strike - Mighty Shield - Seven Elements |
| Additional music |
| Kingdom Hearts Final Mix - Additional Tracks - Kingdom Hearts Original Soundtrack Complete |
| Archives |
| Additional accessories - Additional abilities - Another side, another story... [deep dive] - Artwork - Enemy renders |
| Nobodies |
|---|
| Organization XIII |
| I. Xemnas | II. Xigbar | III. Xaldin | IV. Vexen | V. Lexaeus | VI. Zexion | VII. Saïx | VIII. Axel | IX. Demyx | X. Luxord | XI. Marluxia | XII. Larxene | XIII. Roxas |
| Enemy Nobodies |
| Sorcerer - Sniper - Dragoon - Berserker - Assassin - Dancer - Gambler - Reaper - Ninja - Samurai Dusk - Creeper - Specter - Twilight Thorn - Fake Vivi |
| Special Nobodies |
| Naminé - Absent Silhouettes - Organization XIII's Replica Data - Anti-Saïx - Data-Roxas - Data-Naminé |
- Organization XIII
- Original characters
- Kingdom Hearts Final Mix characters
- Kingdom Hearts bosses
- Kingdom Hearts II characters
- Kingdom Hearts 3D: Dream Drop Distance characters
- Kingdom Hearts III characters
- Kingdom Hearts II bosses
- Kingdom Hearts 3D: Dream Drop Distance bosses
- Kingdom Hearts III bosses
- Gummi Nobody
- Kingdom Hearts II enemies
- Kingdom Hearts II Final Mix characters
- Kingdom Hearts Union χ characters
- Optional bosses