Walkthrough:Kingdom Hearts/Traverse Town: Difference between revisions
mNo edit summary |
No edit summary |
||
| Line 9: | Line 9: | ||
|width="30%" style="text-align:center;"|<font color="white">'''Obtained''' | |width="30%" style="text-align:center;"|<font color="white">'''Obtained''' | ||
|-bgcolor="#45280e" | |-bgcolor="#45280e" | ||
|<font color="white">[[File:WPuppies.png|12px]]Dalmatians 1, 2, 3 | |||
|<font color="white">1 | |||
|<font color="white">Mystical House | |||
|<font color="white">[[File:WPuppies.png|12px]]Dalmatians 4, 5, 6 | |<font color="white">[[File:WPuppies.png|12px]]Dalmatians 4, 5, 6 | ||
|<font color="white">1 | |<font color="white">1 | ||
|<font color="white">Alleyway | |<font color="white">Alleyway | ||
|-bgcolor="#45280e" | |||
|<font color="white">[[File:WPuppies.png|12px]]Dalmatians 7, 8, 9</font> | |<font color="white">[[File:WPuppies.png|12px]]Dalmatians 7, 8, 9</font> | ||
|<font color="white">1 | |<font color="white">1 | ||
|<font color="white">Item Workshop | |<font color="white">Item Workshop | ||
|<font color="white">[[File:WPuppies.png|12px]]Dalmatians 10, 11, 12 | |<font color="white">[[File:WPuppies.png|12px]]Dalmatians 10, 11, 12 | ||
|<font color="white">1 | |<font color="white">1 | ||
|<font color="white">Secret Waterway | |<font color="white">Secret Waterway | ||
|-bgcolor="#45280e" | |||
|<font color="white">[[File:WItem.png|12px]]Earthshine | |<font color="white">[[File:WItem.png|12px]]Earthshine | ||
|<font color="white">1 | |<font color="white">1 | ||
|<font color="white">Secret Waterway (Leon) | |<font color="white">Secret Waterway (Leon) | ||
|<font color="white">[[File:WItem.png|12px]]Old Book | |<font color="white">[[File:WItem.png|12px]]Old Book | ||
|<font color="white">1 | |<font color="white">1 | ||
|<font color="white">Accessory Shop (Cid) | |<font color="white">Accessory Shop (Cid) | ||
|-bgcolor="#45280e" | |||
|<font color="white">[[File:WItem.png|12px]]Mythril Shard | |<font color="white">[[File:WItem.png|12px]]Mythril Shard | ||
|<font color="white">2 | |<font color="white">2 | ||
|<font color="white">Accessory Shop, 2nd District | |<font color="white">Accessory Shop, 2nd District | ||
|<font color="white">[[File:WItem.png|12px]]Postcard | |<font color="white">[[File:WItem.png|12px]]Postcard | ||
|<font color="white">10 | |<font color="white">10 | ||
|<font color="white">1st District, 2nd District, 3rd District, Item Shop<br>Item Workshop, Gizmo Shop, Geppetto's House | |<font color="white">1st District, 2nd District, 3rd District, Item Shop<br>Item Workshop, Gizmo Shop, Geppetto's House | ||
|-bgcolor="#45280e" | |||
|<font color="white">[[File:WItem.png|12px]]Pretty Stone | |||
|<font color="white">2 | |||
|<font color="white">Red Room, Alleyway | |||
|<font color="white">[[File:WItem.png|12px]]Defense Up | |<font color="white">[[File:WItem.png|12px]]Defense Up | ||
|<font color="white">1 | |<font color="white">1 | ||
|<font color="white">1st District | |<font color="white">1st District | ||
|-bgcolor="#45280e" | |-bgcolor="#45280e" | ||
|<font color="white">[[File: | |<font color="white">[[File:WPotion.png|12px]]Potion | ||
|<font color="white">2 | |<font color="white">2 | ||
|<font color="white"> | |<font color="white">Alleyway | ||
|<font color="white">[[File:WPotion.png|12px]]Mega-Potion | |<font color="white">[[File:WPotion.png|12px]]Mega-Potion | ||
|<font color="white">1 | |<font color="white">1 | ||
|<font color="white">2nd District | |<font color="white">2nd District | ||
|-bgcolor="#45280e" | |-bgcolor="#45280e" | ||
|<font color="white">[[File:WPotion.png|12px]]Elixir | |<font color="white">[[File:WPotion.png|12px]]Elixir | ||
|<font color="white">1 | |<font color="white">1 | ||
|<font color="white">Green Room | |<font color="white">Green Room | ||
|<font color="white">[[File:WPotion.png|12px]]Mega-Ether | |<font color="white">[[File:WPotion.png|12px]]Mega-Ether | ||
|<font color="white">1 | |<font color="white">1 | ||
|<font color="white">Magician's Study (Blue Trinity) | |<font color="white">Magician's Study (Blue Trinity) | ||
|-bgcolor="#45280e" | |||
|<font color="white">[[File:WPotion.png|12px]]Camping Set | |<font color="white">[[File:WPotion.png|12px]]Camping Set | ||
|<font color="white">1 | |<font color="white">1 | ||
|<font color="white">3rd District | |<font color="white">3rd District | ||
|<font color="white">[[File:WGummi.png|12px]]Warp-G | |<font color="white">[[File:WGummi.png|12px]]Warp-G | ||
|<font color="white">1 | |<font color="white">1 | ||
|<font color="white">Small House (Cid) | |<font color="white">Small House (Cid) | ||
|-bgcolor="#45280e" | |||
|<font color="white">[[File:WGummi.png|12px]]Navi-G | |<font color="white">[[File:WGummi.png|12px]]Navi-G | ||
|<font color="white">1 | |<font color="white">1 | ||
|<font color="white">Secret Waterway | |<font color="white">Secret Waterway | ||
|<font color="white">[[File:WGummi.png|12px]]Comet-G | |<font color="white">[[File:WGummi.png|12px]]Comet-G | ||
|<font color="white">1 | |<font color="white">1 | ||
|<font color="white">1st District (Cid) | |<font color="white">1st District (Cid) | ||
|-bgcolor="#45280e" | |||
|<font color="white">[[File:WWeapon.png|12px]]Wishing Star | |<font color="white">[[File:WWeapon.png|12px]]Wishing Star | ||
|<font color="white">1 | |<font color="white">1 | ||
|<font color="white">Geppetto's House | |<font color="white">Geppetto's House | ||
|<font color="white"> | |||
|<font color="white"> | |||
|<font color="white"> | |||
|} | |} | ||
===First Visit=== | ===First Visit=== | ||
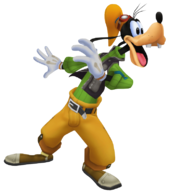
You are introduced to {{Wtext|Traverse Town|l}} after completing [[Walkthrough:Kingdom Hearts/Destiny Islands|Destiny Islands]]. During the initial cutscene, {{Wtext|Donald|c}}, {{Wtext|Goofy|c}} and {{Wtext|Pluto|c}} are shown walking into {{Wtext|Traverse Town|l}}, where they notice {{Wtext|Destiny Islands|l}}'s star going out in the night sky. They walk off to go find {{Wtext|Leon|c}}. {{Wtext|Pluto|c}} goes off and finds {{Wtext|Sora|c}}. {{Wtext|Sora|c}} notices he's in another World, he wonders about it and walks off to find {{Wtext|Pluto|c}}. And now you're back in control... | You are introduced to {{Wtext|Traverse Town|l}} after completing [[Walkthrough:Kingdom Hearts/Destiny Islands|Destiny Islands]]. During the initial cutscene, {{Wtext|Donald|c}}, {{Wtext|Goofy|c}} and {{Wtext|Pluto|c}} are shown walking into {{Wtext|Traverse Town|l}}, where they notice {{Wtext|Destiny Islands|l}}'s star going out in the night sky. They walk off to go find {{Wtext|Leon|c}}. {{Wtext|Pluto|c}} goes off and finds {{Wtext|Sora|c}}. {{Wtext|Sora|c}} notices he's in another World, he wonders about it and walks off to find {{Wtext|Pluto|c}}. And now you're back in control... | ||
Revision as of 19:25, 24 December 2011
First Visit
You are introduced to Traverse Town after completing Destiny Islands. During the initial cutscene, Donald, Goofy and Pluto are shown walking into Traverse Town, where they notice Destiny Islands's star going out in the night sky. They walk off to go find Leon. Pluto goes off and finds Sora. Sora notices he's in another World, he wonders about it and walks off to find Pluto. And now you're back in control...
First thing you'll want to do is go into the Accessory Shop and save, it is vital to save from now on. Once you're introduced to Cid, jump onto a cabinet near the door and open the Treasure Chest to get a Mythril Shard. It is of no use right now, but it will be useful later on in the game. Go back out and enter the 2nd District. You will witness a citizen losing their heart to a Soldier, an Emblem Heartless. Now you have to fight a group of Shadows, they're easy now considering you've leveled up a bit. As you can see, you now gain Munny, allowing you to purchase an abundance of items, armor and weapons. Walk over into the Gizmo Shop, and as you enter, Donald and Goofy are shown walking out of the Hotel wondering where Leon is. Next, go into the Alleyway through the door near the fountain underneath the Hotel. Yet again, Donald and Goofy will exit the Hotel again to call out to Leon. Go back to the 2nd District and enter the Hotel. Donald and Goofy will have just walked back into the 2nd District, again. Now go back to the 2nd District and walk into the Dalmatians's House, and Donald and Goofy will walk out of the Gizmo Shop. Now that we have made them walk around in circles, go back to the 1st District, you'll be surprised to find Heartless there as it is a haven for NPCs. Avoid the Heartless or battle them, then go to the Accessory Shop and talk to Cid, where he'll give you a small tidbit of advice. Leave after you are done talking to him.
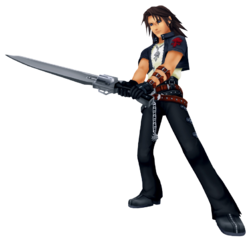
Now a cutscene begins where you are introduced to this "Leon". Now a small battle with Leon begins. Whether you win or lose, you still continue through the game.
| Leon | |||||
|---|---|---|---|---|---|
| HP | STR | DEF | MP R | EXP | |
| 120 | 8 | 8 | 10 | 30 | |
| Resistances | Weapon | Fire | Blizzard | Thunder | |
| x1.0 | x0.49 | x0.5 | x1.0 | ||
| Gravity | Stop | KO | Other | ||
| x0.04 | x0.3 | x0.5 | x0.5 | ||
| Rewards | N/A | ||||
| There is no penalty for losing except for the extra EXP. What you want to do is avoid all his attacks and attack when he's open. If he casts a fireball against you run around as it is homing so there is a chance it will go right by you. If you have Guard, use it to deflect the fireballs. Use Potions to heal. You should take down Leon in no time. | |||||
A few cutscenes then occur, the first one is short and shows Yuffie cheering Leon for finding the Keyblade. Second shows Donald and Goofy walking through the Alleyway, where Aerith appears to them, she seems to know the King too. The third shows Sora finally regaining consciousness and imagines Kairi talking to him, when it is really Yuffie. Now a long connected story between Sora, Leon, Yuffie and Donald, Goofy, Aerith. This explains the whole story behind Sora having the Keyblade. After you regain control of Sora, save. Next, talk to Leon and he'll tell you that the Keyblade can do multiple things beside being used as a weapon. You can use it to open Treasure Chests all around the world, like this one on the table. Open it and you'll get an Elixir. Now go back and talk to Leon, you're asked if you're ready and if you are, you are in for a challenge. Soldiers appear. You're now placed in the Alleyway, where you can defeat the Soldiers. However, it's best not to because you need to find the biggest Heartless, as per Leon's words.
Now, you can either rush your way to the 3rd District, or you can take your time and battle a number of Heartless to level up. We'd suggest the latter, so as to be ready and prepared for a significantly more difficult boss, at least for now. Once you're ready to go against the boss of this world, enter the 3rd District. While we suggest you wait until you get Scan, it will take an awfully long time to gain the ability, so fighting it with Scan might not be worth the extra time.
Now a cutscene plays, which is essentially the prelude to the boss battle. Donald and Goofy are on a balcony above Sora, there is an explosion above throwing Donald and Goofy to Sora. However once they find out that Sora wields the Keyblade, the area is sealed off. Now you have to defeat the numerous Soldiers to make the Guard Armor appear.
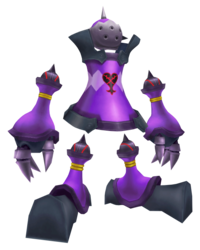
| Guard Armor | |||||
|---|---|---|---|---|---|
| HP | STR | DEF | MP R | EXP | |
| Torso: 700 HP Gauntlets: 84 HP Hammerlegs: 196 HP |
Torso: 8 Gauntlets: 11 Hammerlegs: 11 |
Torso: 8 Gauntlets: 10 Hammerlegs: 10 |
Torso: 12 Gauntlets: 13 Hammerlegs: 13 |
110 | |
| Resistances | Weapon | Fire | Blizzard | Thunder | |
| x1.0 | x0.49 | x0.5 | x1.0 | ||
| Gravity | Stop | KO | Other | ||
| x0.04 | x0 | x0.5 | x0.5 | ||
| Rewards | Brave Warrior | ||||
| First thing you want to do is get rid of its hands. They will only do harm if you leave them last because they are hard to dodge. While with the feet, you can easily jump once they're about to strike. To get rid of them, attack and then get out of the way once they take position to attack. If you get hit, use one of your Hi-Potions. Once they're gone, get rid of the feet as they are the next lethal thing besides the hands. They're easy to get rid of since button mashing will automatically reflect back their attacks. Again, once they're done, redirect all attack power towards the Torso, once it's defeated you are done. It should be easy considering you keep pressing Attack. | |||||
The Guard Armor finally loses control and its Heart disappears into the sky. You get Brave Warrior for your battle efforts. Next a cutscene plays, where Sora, Donald, and Goofy team up to find Riku, Kairi, and the King. The following cutscene shows Maleficent and her gang of Disney villains planning on how to get Sora closer to them and initially plan on using Riku. And finally, after the last cutscene of Traverse Town, you are given 100 Munny from the whole Final Fantasy gang. You also get Fire from Donald, and Goofy gives you the Dodge Roll ability, which is extremely handy. Go back to the Accessory Shop and save. Then when you're ready, go out and make your way to Wonderland. Unless you'd prefer Olympus Coliseum.
The Post Sidequest is also unlocked now, but you'll need to have obtained Thunder as well as complete Monstro to finish this.
Second Visit
Drop into the 1st District, go to the alleyway where Sora you started your journey and there should be a Red Trinity on the planks of wood blocking the passage, use it. It should lead to a closed-off area in the Alleyway with a chest, open it to get Dalmatians 4, 5 and 6. Go back to the 1st District and go into the 2nd District and head to the Alleyway through the door near the fountain. Head to the metal bars blocking off entry at the far right and use the Red Trinity there, it'll break the bars allowing you to get to the Secret Waterway. Talk to Leon and he'll tell you to talk to Cid for the strange gummi pieces and he'll give you Earthshine, we have no idea what it does yet. Go into the Dalmatian's House and go all the way to the first room, Pongo and Perdita will give you a number of gifts. If you have been following the walkthrough so far, you should have gotten Curaga-G and Firaga-G.
Head to the 1st District then into the Accessory Shop, talk to Cid and he'll offer to install those gummi pieces, now Navigational gummis, onto the ship, but in exchange you'll have to deliver the Old Book to the man in the 3rd District. The bell will ring, it probably indicates something but let's forget about it now. Head to the 3rd District, drop down to the open area where you fought the Guard Armor and turn left, there should be a red door with a flame on it, cast Fire on the door and a tune will play indicating something, basically you opened the door. Head in and you'll end up in the Mystical House. Jump across each moving stone to get to the island and then go through a hole in the wall. A cutscene will play, showing Kairi appearing out of nowhere, but it's just his imagination. Merlin will arrive and furnish the area and explain to you that he is here to train you in the arts of magic, and not just him but the Fairy Godmother will also appear to help you as well. Head to her once you're back in control to see what she can do for you; nothing yet it seems, she just tells you how worried she is about Cinderella. Talk to Merlin again, looks like the book is his. We recommend you do the book later on in the game as now you will only be offered a tutorial-like chapter since all the pages are torn, and now we're back to the Fairy Godmother, she will transform the Earthshine gem into Simba, a summon you can use in battle.
Head to the save point and save, and Merlin will suggest you go see Cid, remember when he told us he would be at the house in the 3rd District? Head there and... Heartless, but who's that? Riku. An argument occurs and Sora thinks they'll run into Kairi soon. But first, go to the large keyhole and examine it, it'll open the door between the 1st and 3rd Districts, now head to the house, climb the stairs and it's straight ahead. You'll find out that all these characters were from another world of their own that Maleficent had taken from them, along with Ansem's Report but then another segment where she is persuading Riku to join her side. Cid will give you a Warp-G to warp between worlds and the others suggest going to the bell above the Gizmo Shop. Head up there and use the Red Trinity, ring the bell three times and the Keyhole of this world will appear, jump down and get ready for a boss fight.
<tabber> Boss:Guard Armor=
| Guard Armor | |||||
|---|---|---|---|---|---|
| HP | STR | DEF | MP R | EXP | |
| Torso: 700 HP Gauntlets: 84 HP Hammerlegs: 196 HP |
Torso: 8 Gauntlets: 11 Hammerlegs: 11 |
Torso: 8 Gauntlets: 10 Hammerlegs: 10 |
Torso: 12 Gauntlets: 13 Hammerlegs: 13 |
110 | |
| Resistances | Weapon | Fire | Blizzard | Thunder | |
| x1.0 | x0.49 | x0.5 | x1.0 | ||
| Gravity | Stop | KO | Other | ||
| x0.04 | x0 | x0.5 | x0.5 | ||
| Rewards | N/A | ||||
| First thing you want to do is get rid of its hands. They will only do harm if you leave them last because they are hard to dodge. While with the feet, you can easily jump once they're about to strike. To get rid of them, attack and then get out of the way once they take position to attack. If you get hit, use one of your Hi-Potions. Once they're gone, get rid of the feet as they are the next lethal thing besides the hands. They're easy to get rid of since button mashing will automatically reflect back their attacks. Again, once they're done, redirect all attack power towards the Torso, once it's defeated you are done. It should be easy considering you keep pressing Attack. | |||||
|-| Boss:Opposite Armor=
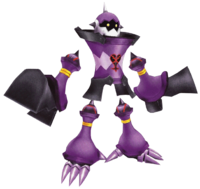
| Opposite Armor | |||||
|---|---|---|---|---|---|
| HP | STR | DEF | MP R | EXP | |
| Torso: 900 HP Gauntlets: 135 HP Hammerlegs: 270 HP |
Torso: 15 Gauntlets: 15 Hammerlegs: 15 |
Torso: 12 Gauntlets: 12 Hammerlegs: 12 |
Torso: 23 Gauntlets: 23 Hammerlegs: 23 |
390 | |
| Resistances | Weapon | Fire | Blizzard | Thunder | |
| x1.0 | x0.49 | x0.5 | x1.0 | ||
| Gravity | Stop | KO | Other | ||
| x0.04 | x0 | x0.5 | x0.5 | ||
| Rewards | Aero | ||||
| Now the first thing you want to do is take out the foot-hands, they hit hard and take a big chunk of HP off. After one is down collect all the HP balls. Dodge its kicks and shoves during this so as to not lose and HP. Retaliate by taking off its other hand. Then move onto the feet... hands, take both of them out and all that's left is the torso. The torso won't do any hard-hitting attacks but it will spin around which is easily cured by Cure. Keep attacking during this phase. | |||||
</tabber>
After defeating the bosses, Sora will then be able to seal the Keyhole for Traverse Town. You'll get another Navigational gummi, so speak to Cid about that, he'll also give you a free Comet-G. You'll also now be able to head towards Agrabah.
Third Visit
Fouth Visit
| Kingdom Hearts |
|---|
| Walkthrough |
| Dive to the Heart - Destiny Islands - Traverse Town - Wonderland - Olympus Coliseum - Deep Jungle - 100 Acre Wood - Agrabah - Monstro - Atlantica - Halloween Town - Neverland - Hollow Bastion - End of the World |
| Other |
| 99 Puppies - Trinity Marks - Gummi Missions - Trophies |
